How to build a Grout Formicarium in an aquarium
I had been asked to build a grout formicarium in a 5.5 gallon aquarium. Considering ants in my location need hibernation, the nest itself must be removable from the aquarium to fit in the fridge.
You will require:
an aquarium
2 pieces of glass (I used 3.5x5" picture frame glass)
oil based clay for building models
grout
sand
perlite
suran wrap/plastic wrap
olive oil
aquarium silicone
Take your two pieces of glass. If you need to cut them, then do so.
Form the tunnels on them.
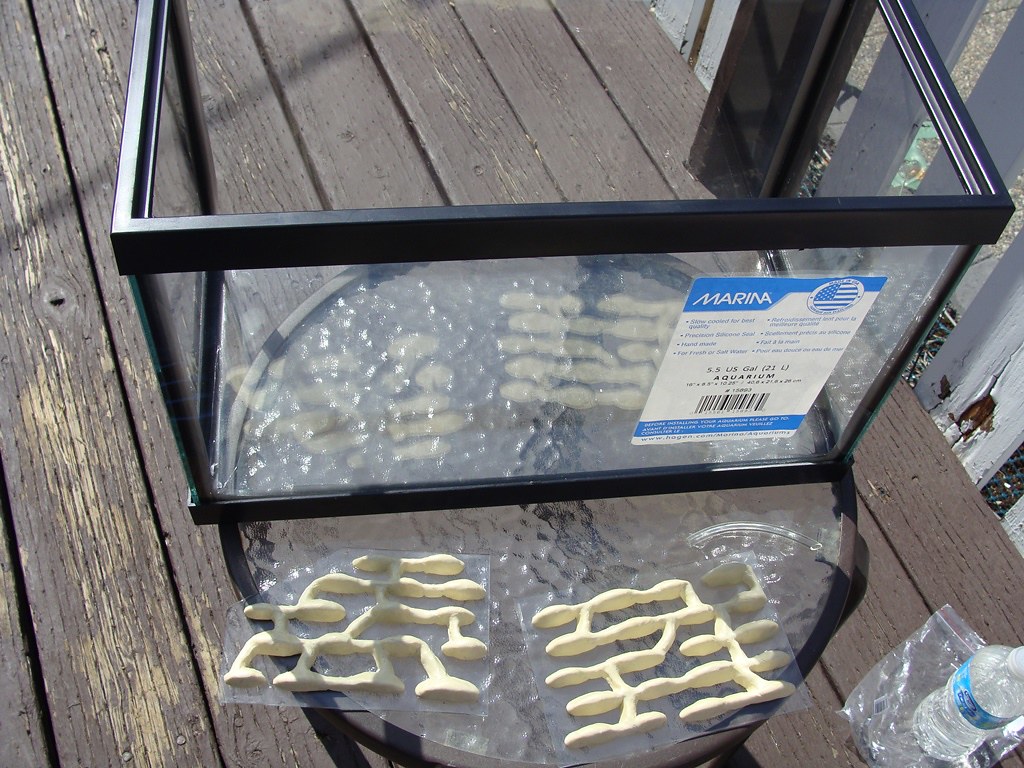
Somehow, tilt your aquarium so the corner faces down and the walls are just on a slight angle, not vertical. I placed my aquarium inside of a foot stool.
Use clay to tack them in place. I use a loop of clay to connect my two pieces together (I did not let it touch the aquarium or else the ants would be able to escape the nest if I removed it).
Also form a long piece of clay for the entrance/exit. You may need a toothpick/skewer to hold it straight.
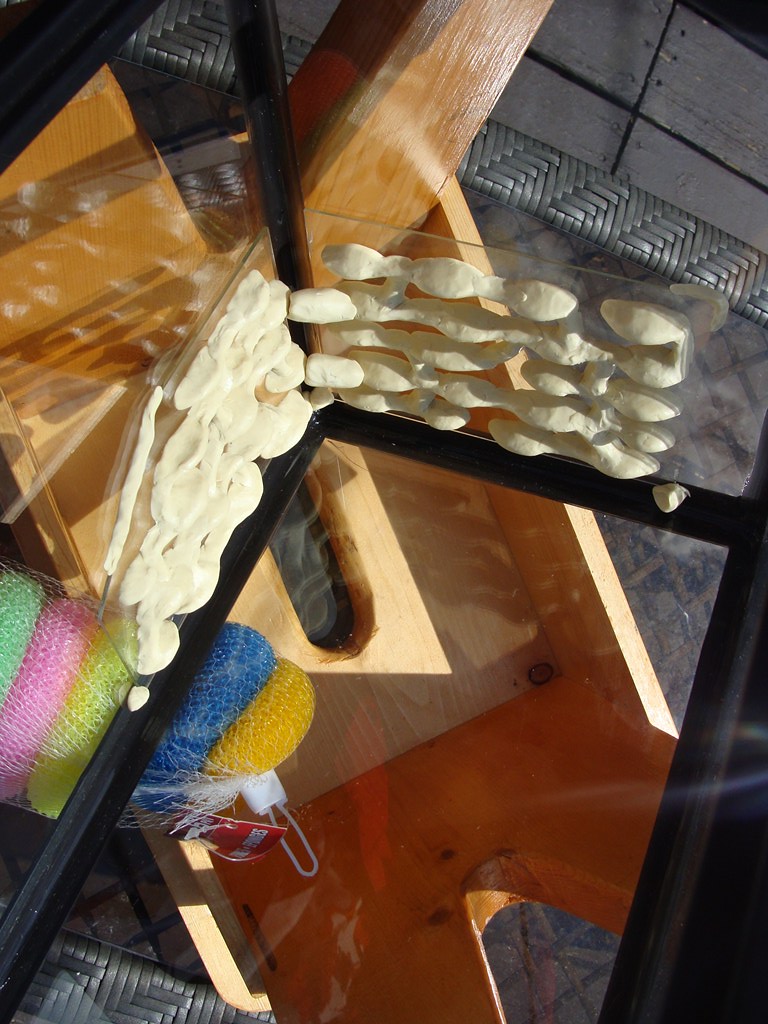
I used a cardboard lid from some chocolates to create a space between the nest and the 3rd wall. Without the space, I would not have been able to get the nest out of the aquarium to remove the clay. I covered the box with suran wrap and taped it tight. Any hollow box lid should work, hollow because you may need to smash it a bit to get it out in the end. (I didn't do it, but in the future I would add a layer of suran wrap to the floor as well to make it easier to remove).
I put an empty container in the middle to reduce the amount of grout I would need and also to reduce the weight. I tacked it down with a bit of clay. (I didn't do it, but in the future I would add a layer of suran wrap to the floor as well to make it easier to remove, before adding the container. Making the suran wrap as wrinkle free as possible).
Take the olive oil and a paint brush and paint olive oil all over the tunnels, the two walls, floor, and on the suran wrap on the box lid. Keep an eye on your glass, the clay blobs might start to slid. If they do, add more clay until they stay put.
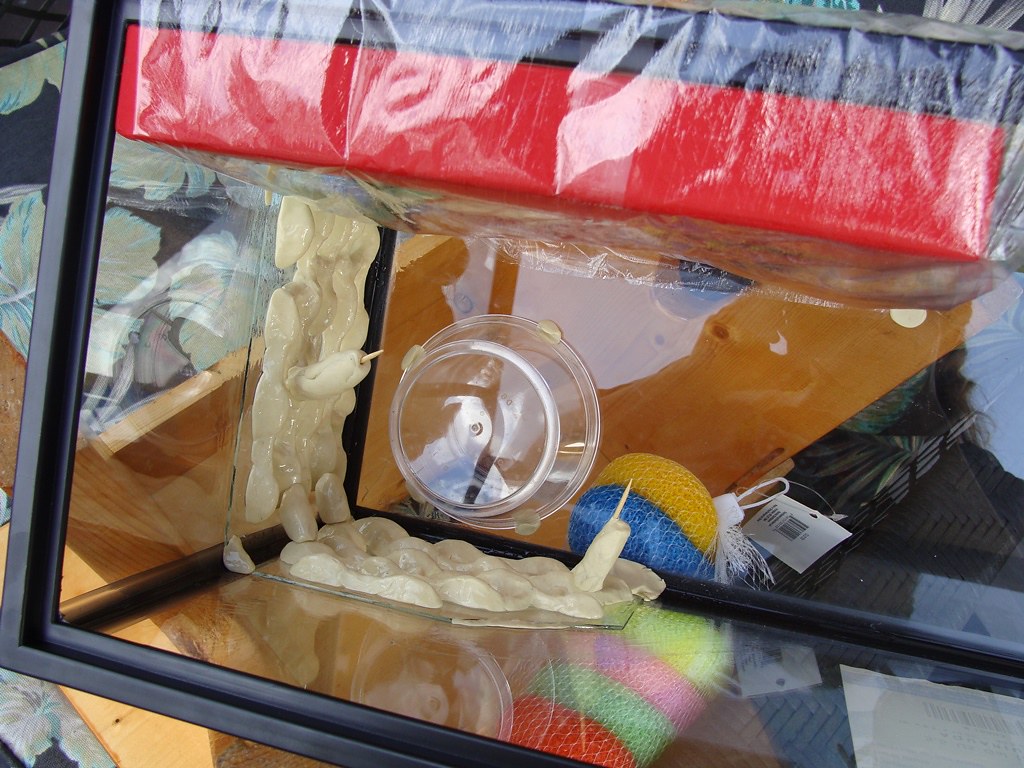
Mix your grout. Use 1/3 sand and only a bit of perlite for the first few layers. Make it fairly runny, like honey, so it gets into all the cracks and joints in the tunnels - try to cover all the tunnels. As you pour, use your skewer to knock any bubbles loose that get trapped between the tunnels. Later layers you can make thicker with more perlite to reduce weight.
Once you have at least 3cm over the tunnels/glass you can add sand or decorations to the nest mound. Let it dry - partway through the drying process, when the grout is cured enough to retain its shape, but still gives way under pressure, pull out the box lid and the suran wrap covering it. The grout should be wet enough to tap sand into. Let it finish drying. it will take 2-4 days for this much grout to dry enough to actually handle.
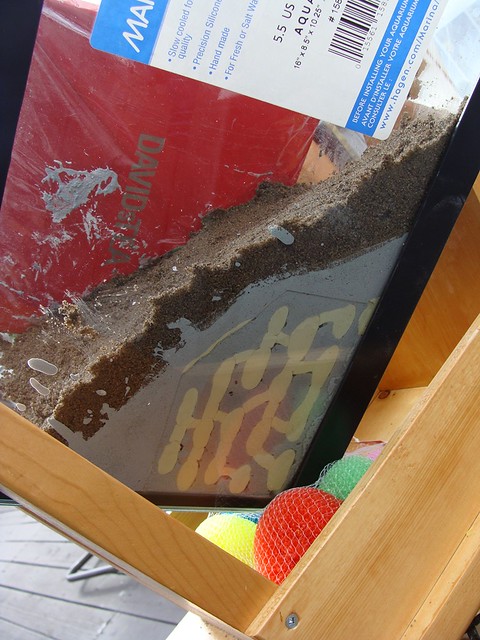
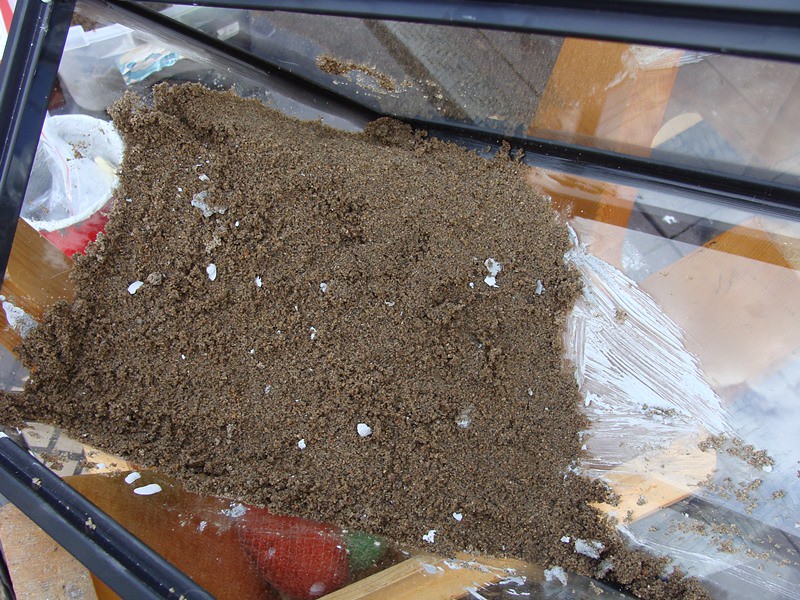
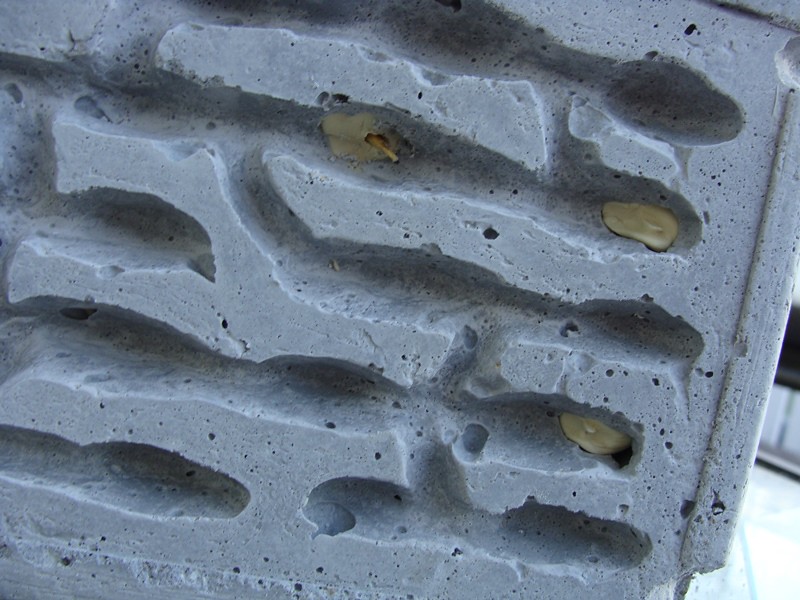
Once it has dried, now we have the fun part - getting it out. I used a razor and used a screwdriver to sink a screw into the surface. It took me 20 minutes of wiggling, pulling, and letting gravity pull it down.
Carefully pry off the glass (Go slowly! work on one corner at a time lifting millimeter by millimeter). Remove the clay tunnels and clean the glass. I use the razor to expand the edges where the glass sat by 2-3mm on all sides. Otherwise I find I have a hard time getting the glass back in.
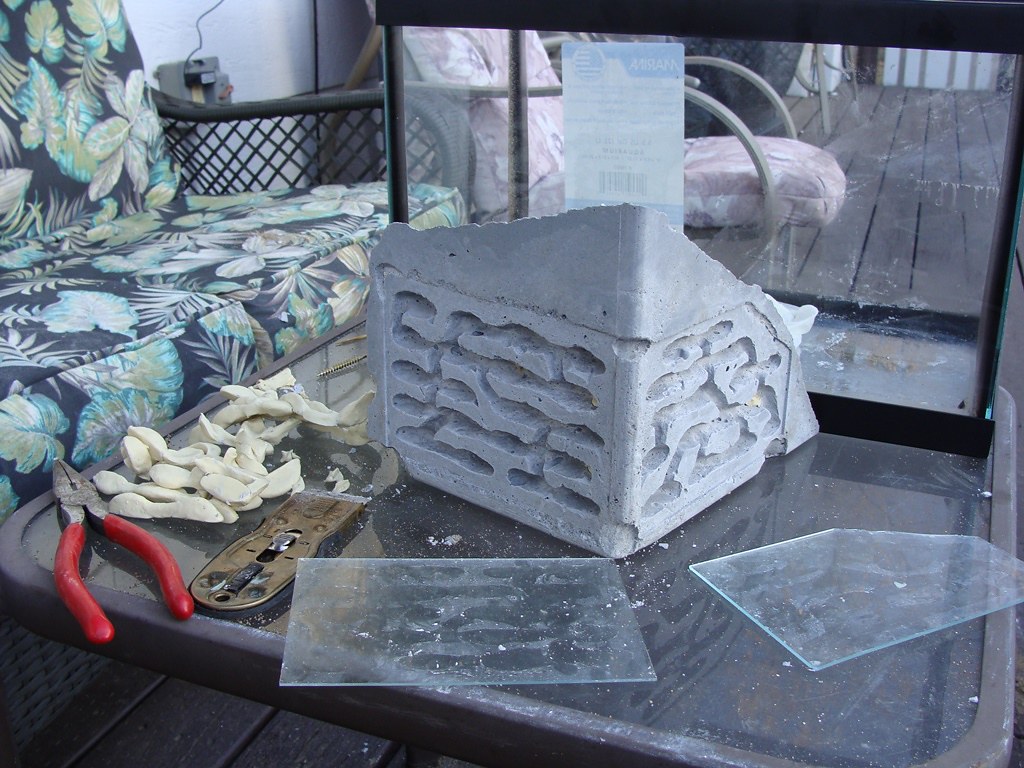
Remove the loops of clay and enlarge the entrances so you have a clear view of all of the nest.
Cover the mound in suran wrap - try to minimize the wrinkles. Tape it up well. Take the tank (the nest mound is not in it yet), you can silicone in any plants in the far side where the nest does not sit. Once it is dry, add a thin layer of very runny grout. Just enough to cover the floor. Don't use perlite on the floor, just grout (1/5 sand is optional). Make it very runny so it levels itself as it pours.
Now, carefully place the suran wrap covered nest mound in - exactly where you want it to sit so it makes its own indentation. Leave it there for now.
Add any rocks or other decorations. Cover in sand. Carefully tap sand into the joint where the nest mound and floor meet.
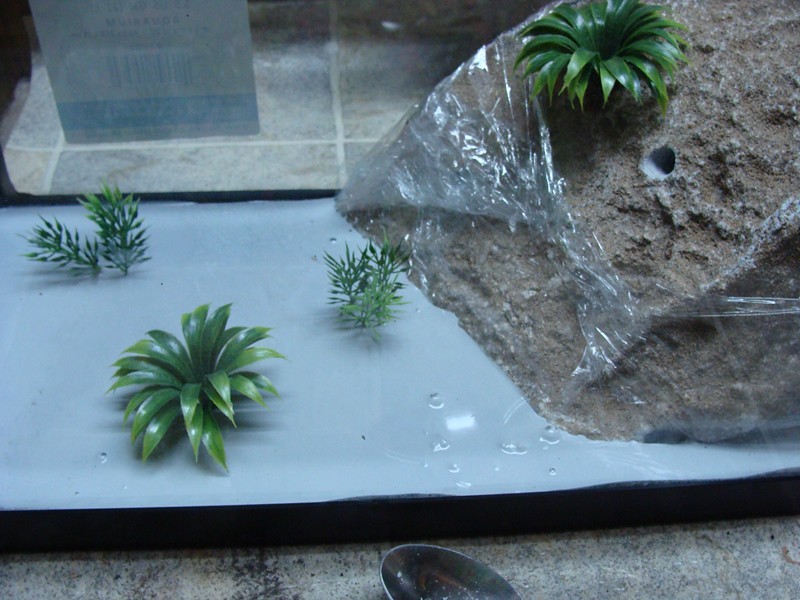
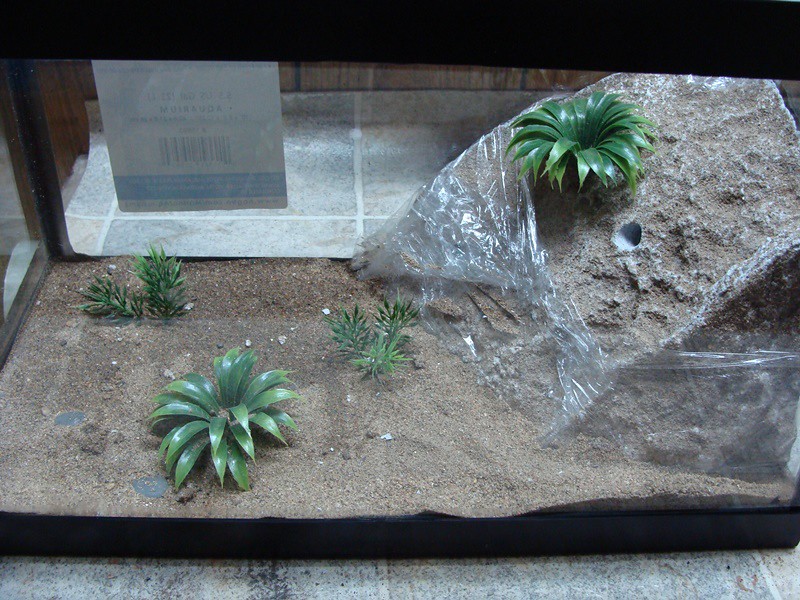
This may take 2-5 days to fully dry. Within 12 hours the thin floor grout will have cured enough to hold its shape, but easily release the nest mound. Cut the suran wrap so that it can stay behind if it is stuck - just trim it, don't move the mound yet. Carefully lift out the nest mound out of the tank and set it aside. If the suran wrap stays behind, let it. Now carefully peel out the suran wrap. The grout under the mound will be damp - let it dry fully. Don't cover it in sand or the ants may tunnel in it. If there is any grout on the sides of the aquarium - clean it with a damp paper towel.
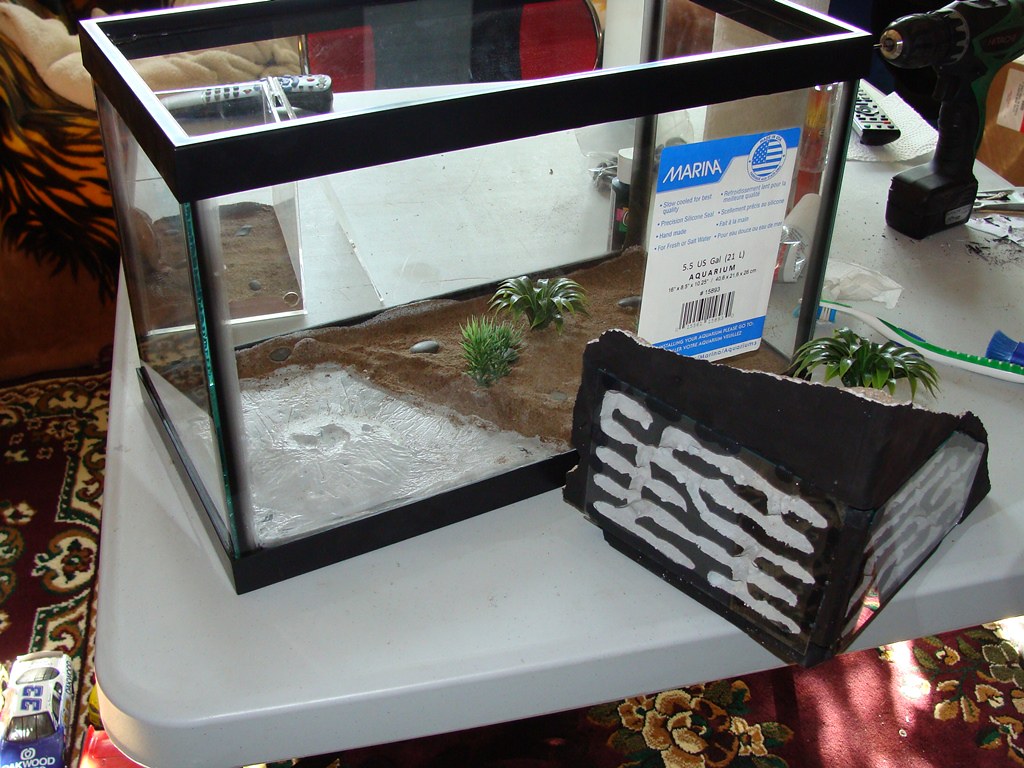
Now we can paint the nest if we want. Once painted, ensure the glass still fits nicely. (I did it backwards and painted it before - and I kept getting grey finger prints all over the paint....)
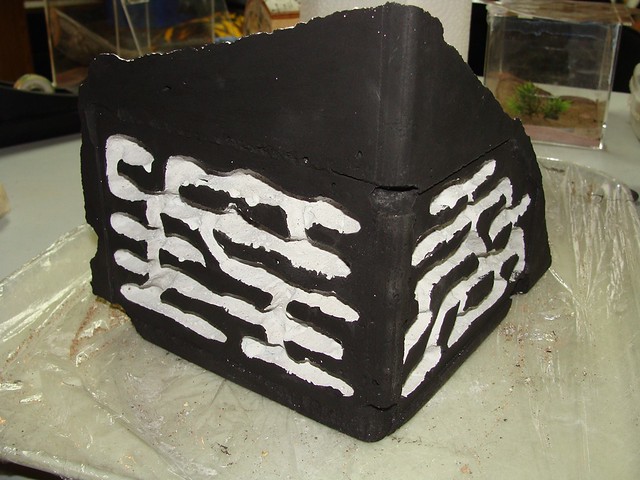
Before we silicone the glass in, lets add our watering tunnel. Take a large drill bit (I used a 7/16") and drill into the sand covered nest mound ensuring you will not hit the tunnels or entrances. Drill it as deep as you can. You can cover the tunnel with plain steel mesh, but I covered mine with a plant that had mesh between 2 pieces and some stone pieces siliconed on top - leaving the hole too small for the intended ants (Formica) to climb into. I siliconed the plant onto a small piece of 7/16" tubing which I siliconed into the tunnel I drilled.
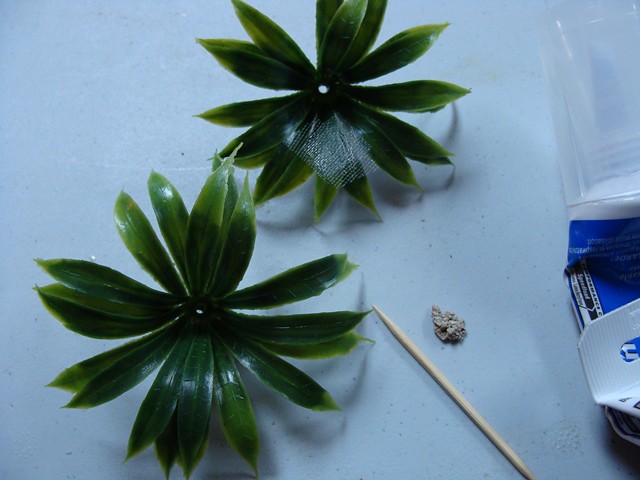 [/url]
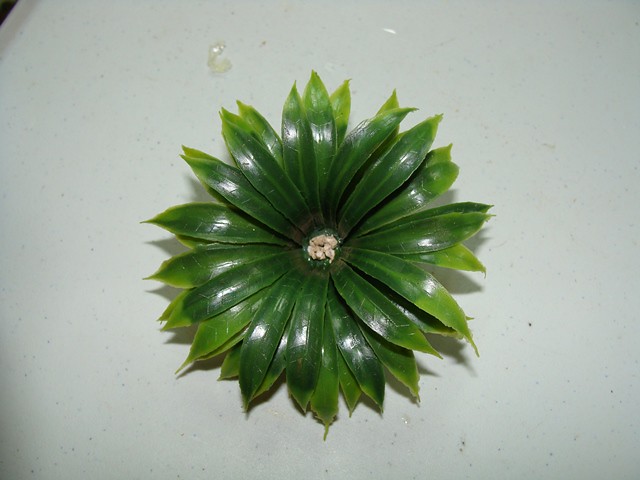
Now you can silicone your glass on - ensure it is clean!
Let everything dry another 24 hours and put the nest mound into the aquarium. It should sit snugly into its depression with no room for larger ants (Formica, Camponotus, etc) to get under or between the nest and floor/walls.
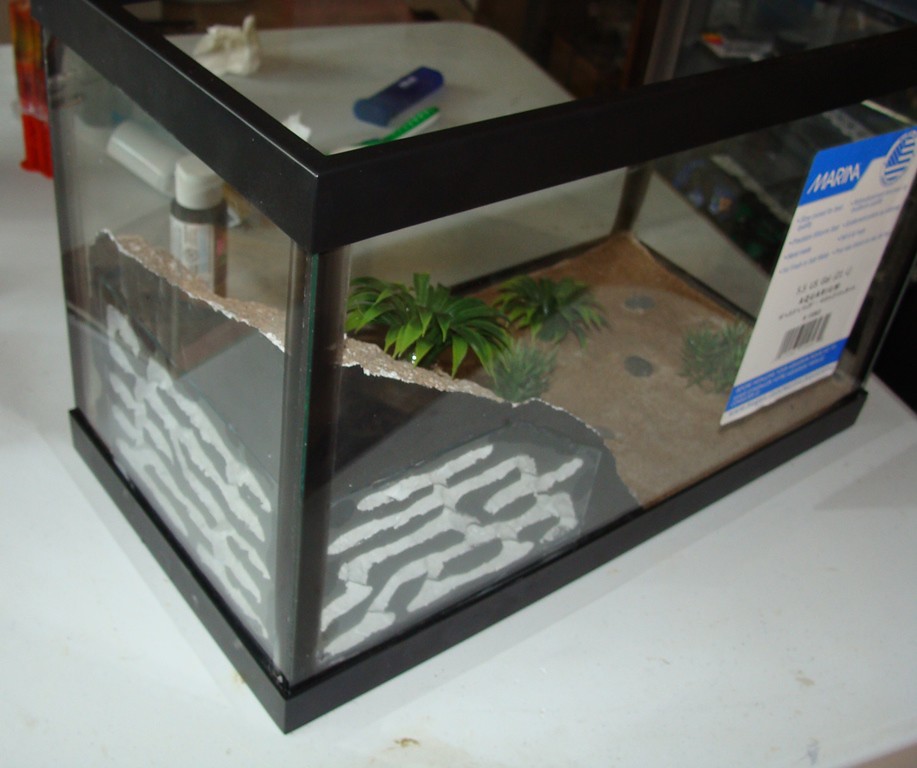
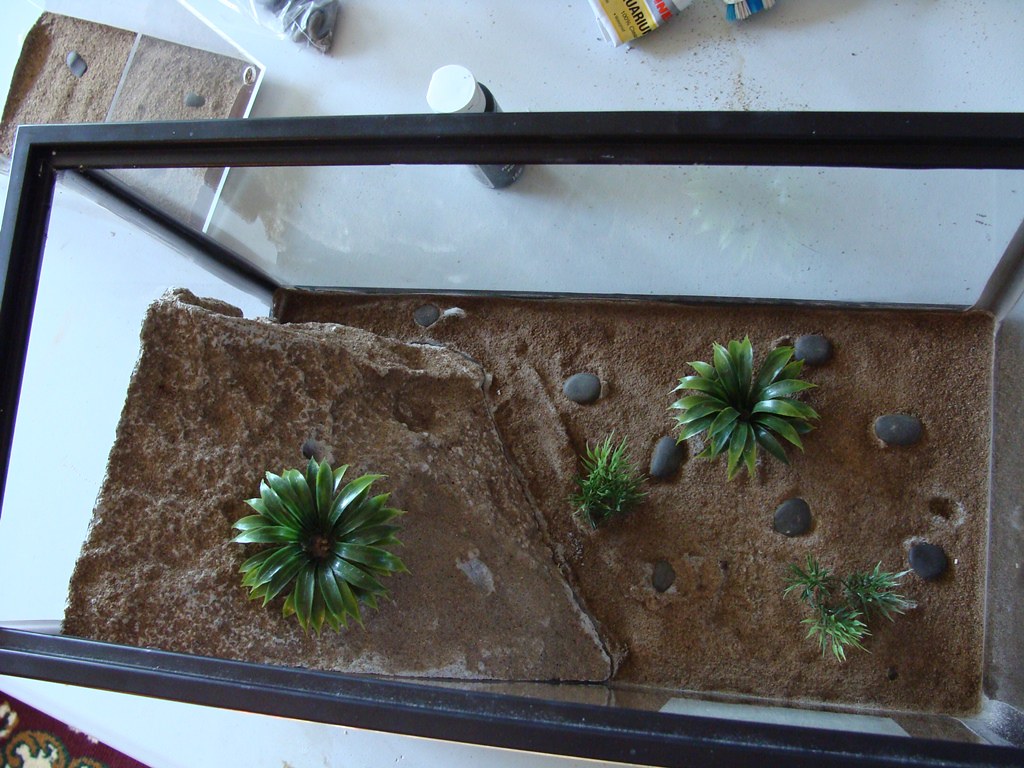
There you have it. A removable formicarium.
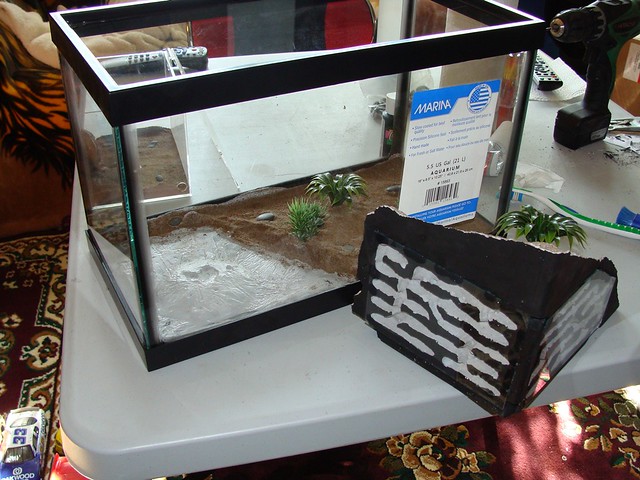
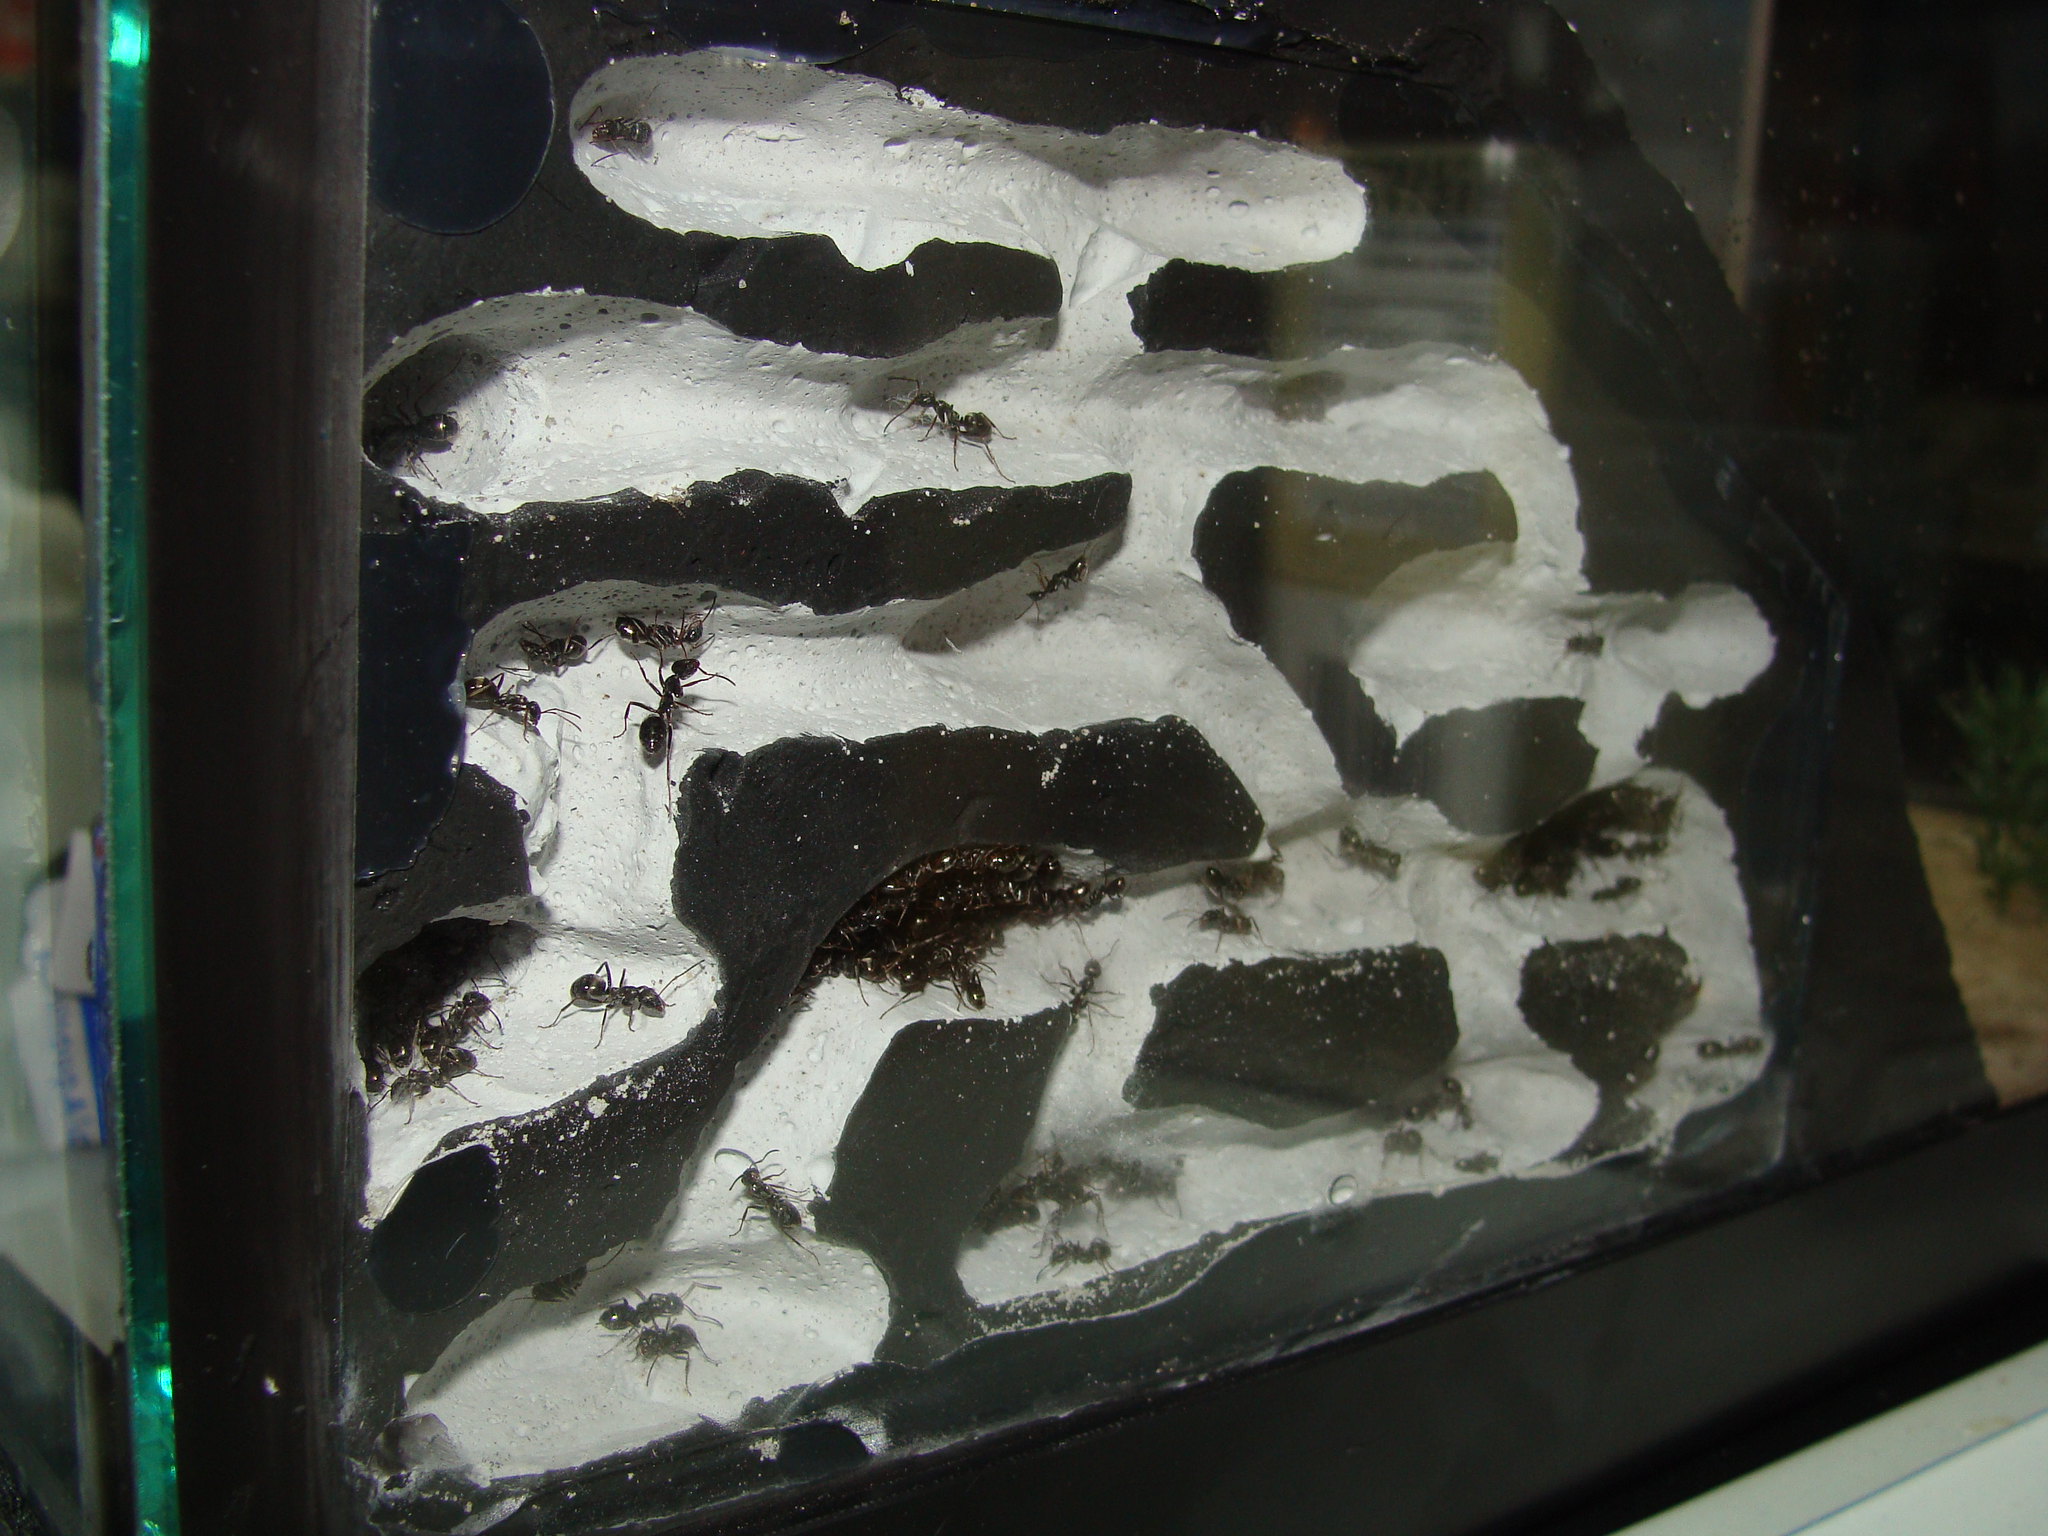
Edited by Crystals, December 28 2017 - 4:15 PM.
. Any container ideas? I'd like to use a glass cylinder between 1"-4" in diameter or so but can't think of where I can find something like that.


