Jump to content

  • Chat
  •  
  •  

Welcome to Formiculture.com!

This is a website for anyone interested in Myrmecology and all aspects of finding, keeping, and studying ants. The site and forum are free to use. Register now to gain access to all of our features. Once registered and logged in, you will be able to create topics, post replies to existing threads, give reputation points to your fellow members, get your own private messenger, post status updates, manage your profile and so much more. If you already have an account, login here - otherwise create an account for free today!

Photo

Photo journey of how to build a grout formicarium


  • Please log in to reply
65 replies to this topic

#1 Offline Crystals - Posted September 20 2013 - 7:31 PM

Crystals

    Advanced Member

  • Moderators
  • PipPipPip
  • 2,049 posts
  • LocationAthabasca, AB (Canada)

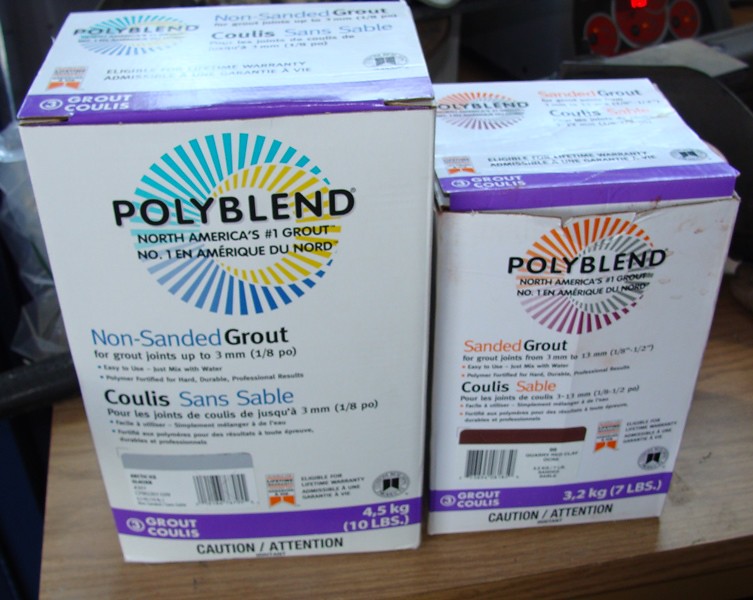
I figured I would share how I built grout formicariums as I made quite a number of mistakes when I first tried it.  All I have locally available is un-sanded grout and Plaster of Paris, and I found the Plaster of Paris to get moldy very quickly.  Later I found Sanded grout, and I will post my improvements/alterations after this thread.


Here is my photo journey on how I build a grout formicarium.


There are several ways to build a formicarium with un-sanded grout.  I will over three different ways.

Note: I used Craftsmart modeling clay that never dries out (from Michaels for $3).  Play dough and plasticine will NOT work, the grout will crack all the way through as it dries if you use them.


Container Mould Method:

Find a container with a flat bottom, ensure the bottom doesn't flex too easily.  Find, or cut, a piece of glass that will fit inside at least 1/2" away from the sides. Use modeling clay to build your tunnels and place the glass into the container. Using a paint brush, brush on virgin, or extra light olive oil. Mix 2 grout: 1 crushed perlite and add water until it is a ketchup consistency, then pour the grout mixture into the container.  Pour the grout into the container.  Let it dry for at least 12 hours.  Then take the grout out and remove the clay. Drill your tubing entrance and watering entrance. Silicone your glass down, turn it upside down or put some weight on the glass and let it dry for 48 hours.   I forgot to add the clay and just used a dremel to carve out my tunnels.

DSC04769_zps9447f89d.jpg


Picture Frame Method:  (My favorite method)

Find a nice picture frame with glass.  Dollar stores and garage sales are excellent places to start.  Use care when handling the glass, the edges are very sharp.


Make a frame around the outside of the glass.  I like to use cardboard or lego.  This will contain the liquid grout.  This will ensure that your formicarium is the exact same size as your glass and the picture frame.


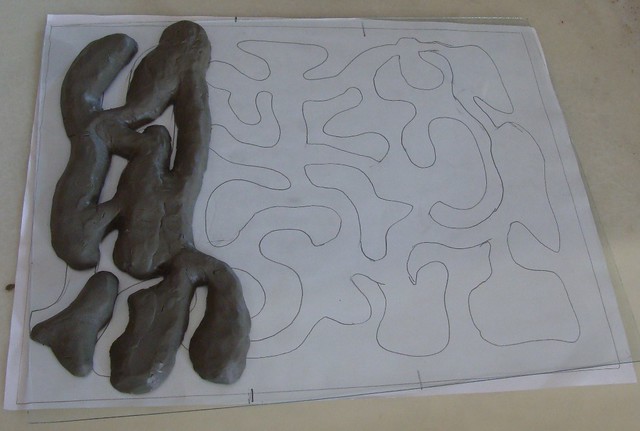
Clean your glass and get your rolling pin and clay carving tools out.  I use an exacto blade, rolling pin, toothpicks, tweezers, and a small piece of 1/4" tubing.

I like to have a pattern behind the glass to follow.  I use the tubing as a smoothing tool to get rid of those straight edges.

DSC04775_zps182de1ad.jpg

DSC04776_zpsc4112183.jpg


I like to have two watering systems as my location is very dry.  I use aquarium 1/4" tubing and a water channel in the pattern (the sun in this one). 

The tubing allows for slow absorption, while the water in the water channel creeps along the glass and slowly sinks into the grout.  The water channel is faster and allows the ants a quick drink if they drink from the grout/glass joint.  This allows for mor even moisture distribution.  You can silicone around the water tunnel to prevent water creeping.


Find a flat and sturdy tray or board.  I like to use an old serving tray.  This will allow you to move your drying formicarium if you need to.  It also minimizes the mess.


Brush on some virgin or mild olive oil.  Ensure you get the glass, clay, tubing, and the sides of the moulding frame.  Using clay, connect your watering system to the wall before oiling, or it won't stick.

DSC04783_zps2eaa056c.jpg


We are going to use several layers of grout.  Remember that grout will continue to thicken for about 10 minutes, so if it is a bit too watery, just stir for a few more minutes.

The first edging layer is straight grout.  Make the mixture about the consistency of thick pudding.  Place it around the edges of the frame, this will keep leakage to a minimum.

DSC04786_zps7064ef28.jpg


Using the thick grout along the edges, I had almost no leakage.  Or you can use small strips of clay on the outside.

DSC04793_zpsa4439c64.jpg


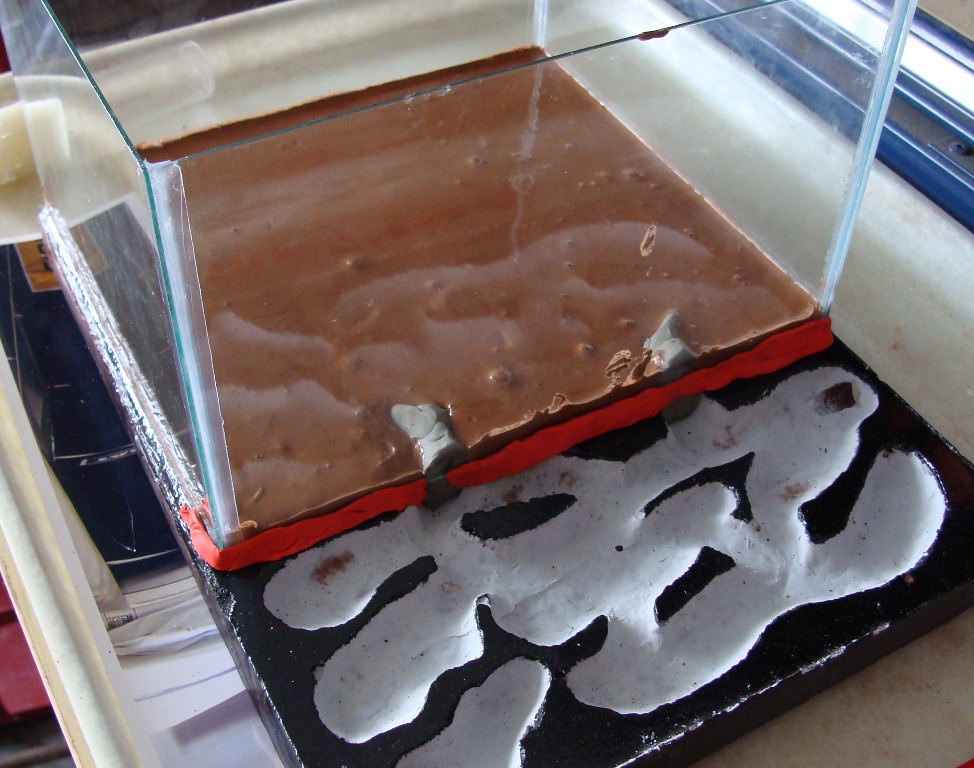
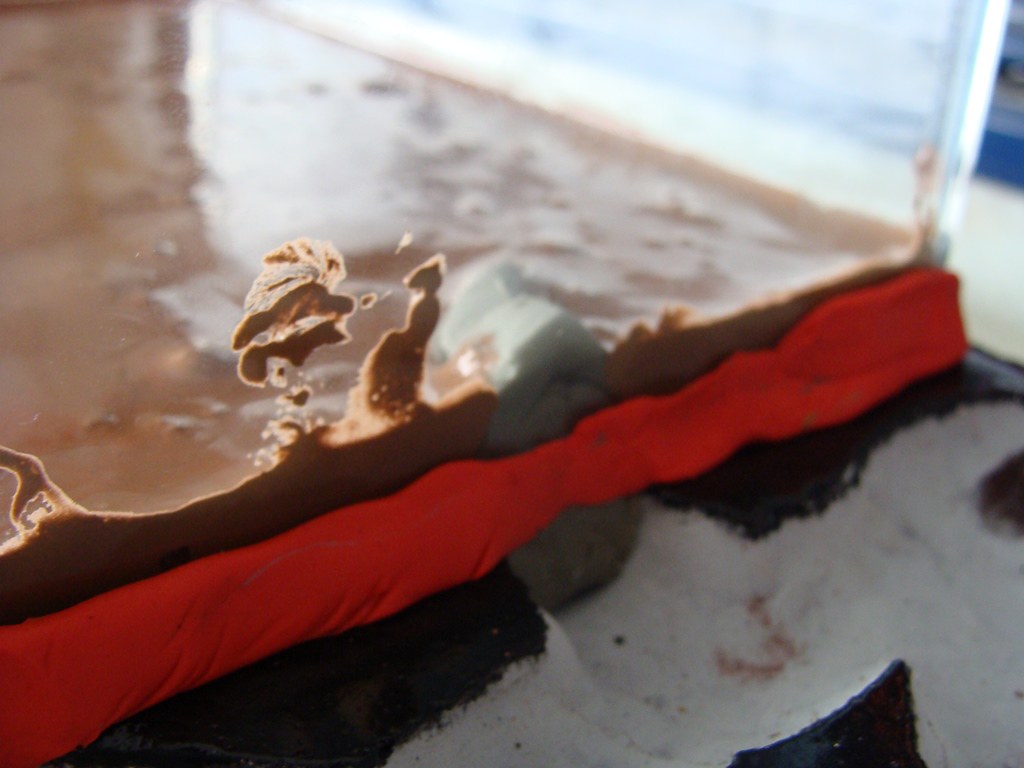
The next layer is also straight grout.  Only this time is is more watery so no air bubbles will get trapped along the edges of the tunnels.  This layer will cover the glass, but not the back of the clay tunnels.  It is the consistency of pancake syrup.  Use a small stick or BBQ skewer to help spread it out as you pour to avoid air bubbles being trapped.

DSC04787_zps1d5d6c2c.jpg


The middle layer is grout mixed half and half with crushed perlite.  I used a rolling pin with the perlite in a freezer bag to crush it.  This mixture must be thick, about the consistency of thick pudding.

Carefully lift up the water tubing and put this mixture under the tubing.  You don't want your tubing to appear in your tunnels.  I use a pinch of crushed perlite on the ends of the tubes to allow the water an easier escape from the tubing.  I also tend to place a tiny bit of aquarium filter media in the ends of the tubing to keep the grout out. You don't need much to keep the thick grout out.  Then continue spreading this mixture over the clay tunnels.  Don't use this mixture along the frame as it is quite porous and lets the water travel fairly easily.

DSC04788_zps6103e51d.jpg

DSC04789_zps705870fb.jpg

DSC04790_zpsd3f91d94.jpg


Keep in mind that straight grout and grout with perlite in it have noticeably different coloration once dry.  This is why I keep the perlite mixture away from the glass.


The last layer is straight grout (preferably sanded grout, as it is water proof). Make it fairly runny, about the consistency of melted ice cream.

Pour enough to level out the grout.  Then add a sheet of bug screen for added strength if you want.  Lightly tap it into the grout.  Then pour at least another 3/8" of grout on top of the mesh.  Try to level the grout.  I lightly shake the tray side to side, but any leveling tool will work.

DSC04791_zpsa9246445.jpg

DSC04792_zps2eb8faf2.jpg


Let this dry for at least 24 hours.  It depends on the temperature and humidity for how long it takes to cure enough to handle.


Test your grout, if it is firm then remove the side frame.  If it is cured enough you can turn it over.

DSC04805_zps03360d16.jpg


Carefully lift the glass.  Go slowly, lift one corner 2mm and then go to each of the other corners.  You will probably see the air appearing between the glass and grout.  Patience is key in this spot, you will likely have to go to each corner numerous times.  You don't want to break the glass.

Often the clay will stick to the glass as the back of the clay was oiled and prevented the grout from sticking.  In my case the clay stuck to the glass.  I like this pattern so much that I wrapped my clay in plastic wrap and put it away for future moulds. Good thing I bought so many frames of the same size, so I can steal the glass from a spare (also handy if you break some glass).

DSC04808_zps15d1441c.jpg


The watering system survived without incident.  The clay kept the grout out.  Next time I will be smarter and place the opening at the top of the formicarium as water runs downhill (lesson learnt).

DSC04812_zps4041ace9.jpg


The reality is that cardboard has some give, even if it is fitted around the piece of glass.  You will likely have to shave the excess off so it fits properly in its frame.  I always have to remove the metal tabs in the frames.  I also trim the edges for a clean look.  I prefer a razor blade from the dollar store, but anything flat and sturdy will work.  The wooden rulers work quite well.

DSC04806_zps04fd4dcc.jpg


I silicone a clear page protector sheet to the back of the formicarium to prevent water damage to the surface it will be resting on. 

Place the glass back on the front while doing this.  It may not seem like it, but the formicarium is still soft enough for gravity to affect its shape.  Keeping the glass on the front and the formicarium glass side down allows it to keep its shape while it continues to dry.

DSC04840_zps3d4a4bdf.jpg


Let the silicone dry for at least 24 hours.  This is more to allow the grout to continue curing than to let the silicone dry.

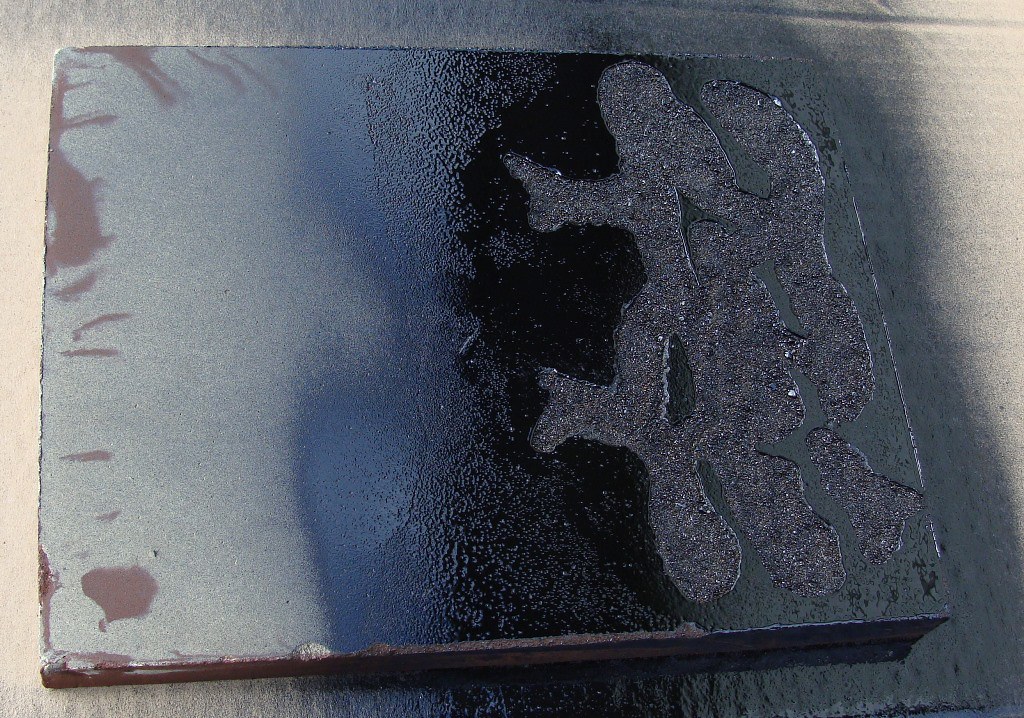
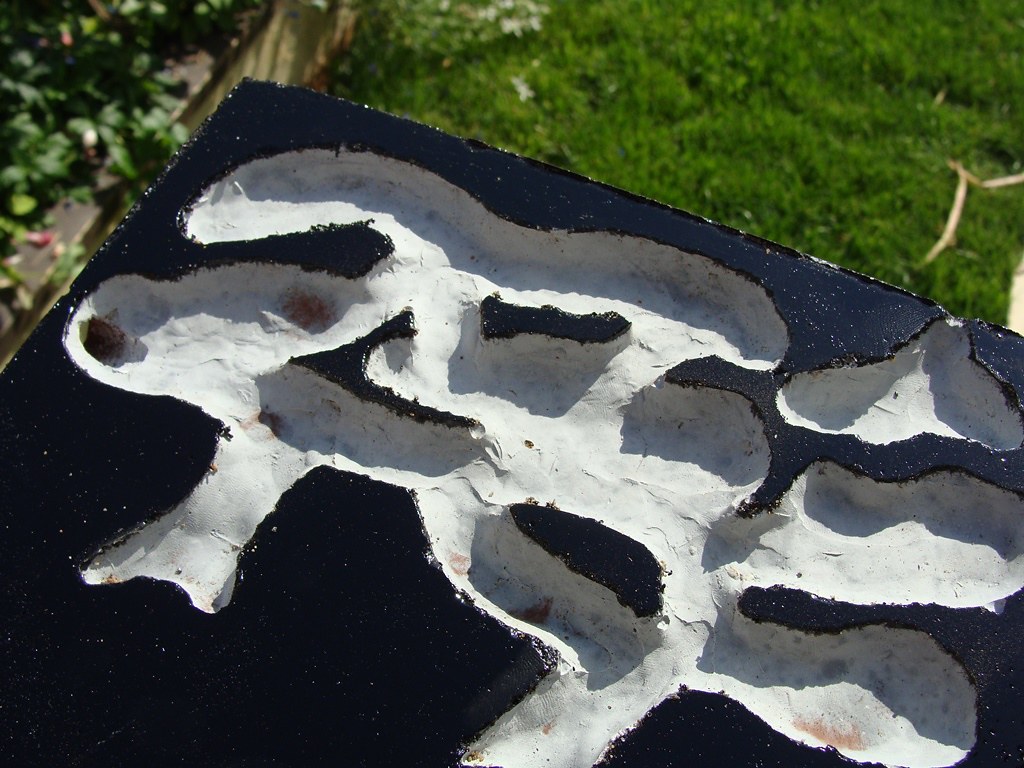
Then turn it over and remove the glass again.  If you wish, you can paint your formicarium. I originally used food coloring, but it eventually faded.  I have found that Krylon paint is water proof and works extremely well.

DSC04841_zps818c927a.jpg


Let it dry for another 12 hours after painting.


Drill any holes needed.  Entrances for tubing and a pin hole for water if you have a water channel.  Ensure that that frame will not impede anything, you may have to shave the frame down a bit.

Silicone your tubing in and let it dry for 12 hours.  I usually use a 4" piece of tubing leading from the formicarium and use a bigger piece of tubing as a connector for the foraging area tube.


Clean the glass thoroughly.  Carefully fit it into the formicarium.  Ensure there are no bits of grout under the glass to prevent a perfect fit.  If you press on two opposite corners there should be no teeter totter motion.  Also ensure the frame fits over the glass and grout.  If it doesn't you will have to shave the excess grout off or look at what is impeding progress.

Once you are fully satisfied that it is a good fit we can move on to siliconing.

Place a small bead of silicone along the edge of the grout.  I use a toothpick to spread the thick parts out.  A thick layer of silicone will make it hard to press the glass tight onto the grout and usualy results in gobs of silicone squishing out.

DSC04842_zps6ee3d518.jpg


Get your glass (ensure that it is clean!).  Carefully lay it onto the silicone and press down all along the edges.  Now lay it upside down on the floor and put a heavy weight on top of it.  Leave it for at least 12 hours.

DSC04845_zps6d7ad1dc.jpg


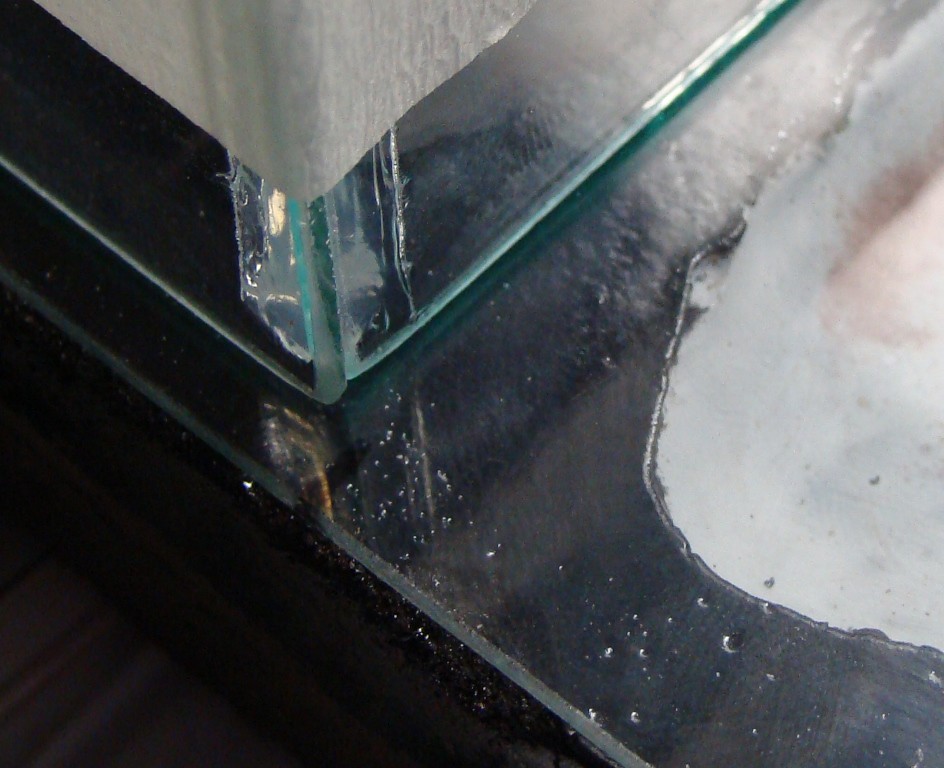
Use another small bead of silicone along the glass/grout joint.  I usually use a rubber glove, tiny plastic baggie, or a piece of plastic to spread the silicone along the edge and into the cracks and seams.  This is our secondary insurance that any ants we put in the formicarium stay in the formicarium.  It will also prevent the water from leaking out as the water creeps along the glass when watering.  Use paper towel to rub off any silicone that is on the surface pane of the glass.

DSC04849_zps42321ebb.jpg


Let it dry for 12 hours.


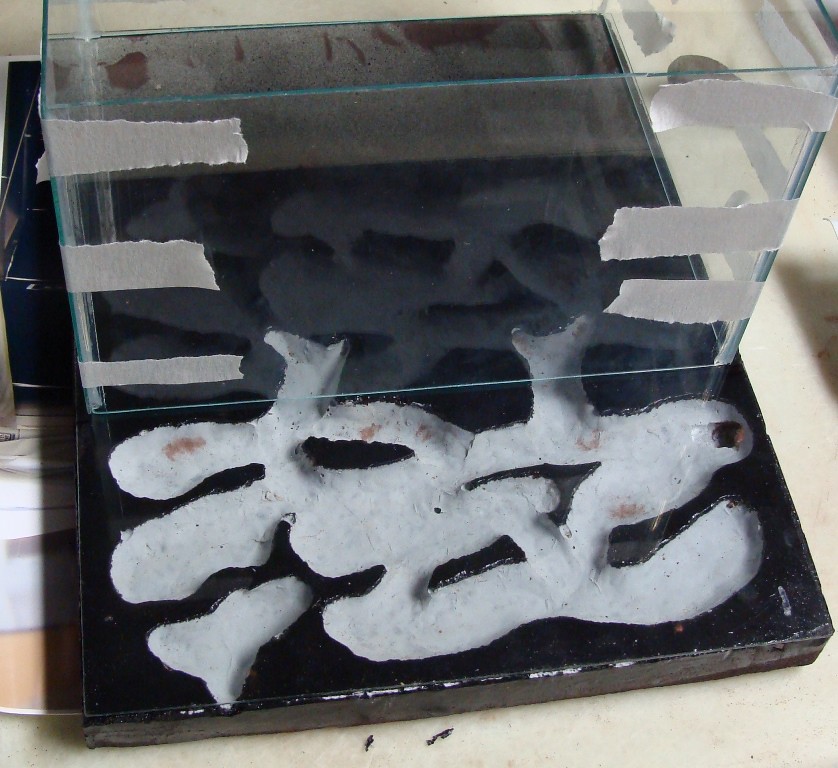
Place the frame on formicarium.  You can silicone it on if you want; or if you wish to swap frames in the future, don't bother.


DSC04857_zps2be48353.jpg

DSC04861_zps3f8f2b2b.jpg


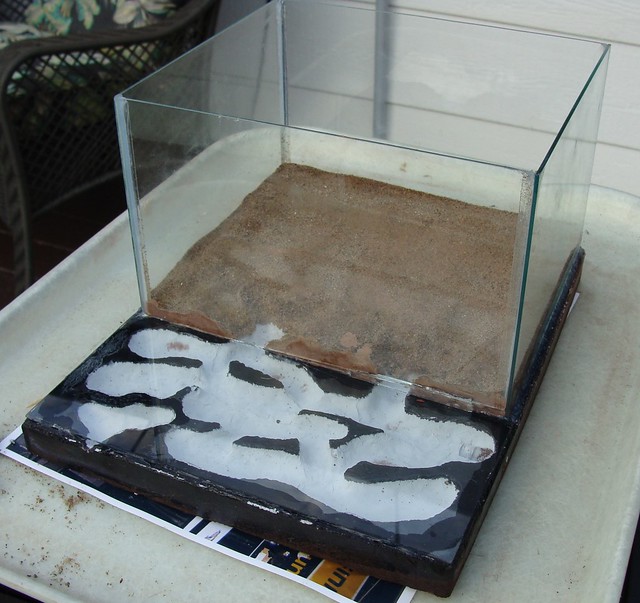
Container containing both nest and foraging area:

Find a container that is at least as tall as it is long.  I found mine at an oddball Giant Dollar Store.  This also works well in Betta fish containers and small aquariums.

Build a clay tunnel mould on one side (don't go more than 1/2 way up).  Add an entrance tunnel that will stick up the surface.

DSC04777_zps4d527ebd.jpg

DSC04778_zps48511829.jpg


Oil the container and the clay.  Mix the grout and add it.  The grout should be at least 1/2 grout and 1/2 crushed perlite.  The consistency doesn't really matter as the grout cannot escape the container.  Thin enough to avoid air bubbles, but thick enough that you won't have to wait forever for it to cure.  Melted ice cream to ketchup consistency works well.  Place the container on a 45 degree angle and pour the grout in.  Ensure your entrance tunnel remains upright.

DSC04795_zps00d922ff.jpg

DSC04794_zpsa7d37f8f.jpg


I added a second layer as it matched the sand I was planning on using.  The ants I had in mind were brown, so grey was my best tunnel choice.

I added sand on top, patted it in lightly and let it dry for 24 hours

DSC04798_zps356c470a.jpg


Carefully remove the mould and pull out the clay.  Put the mould back in.  If you want, you can silicone around the tunnel edges.

DSC04863_zpsed5b987e.jpg


Mix up more grout.  Thin enough that it levels itself easily, or at least levels with a shake of the container.  Pour it in.

DSC04817_zps6b80701f.jpg


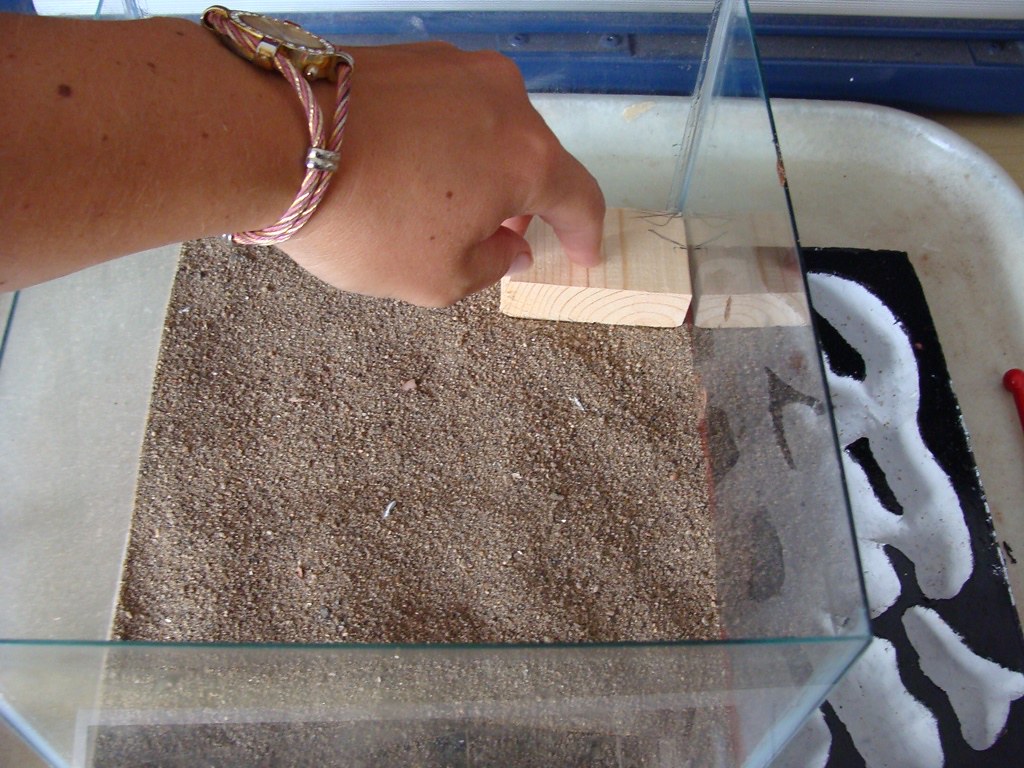
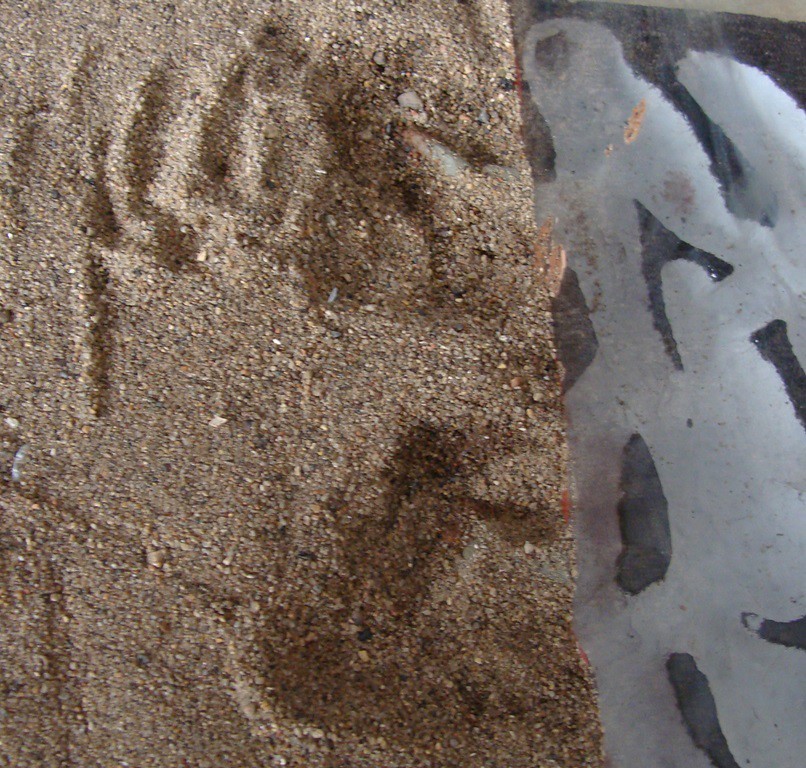
Add sand on top, and any decorations you wish to include.  Pat the sand down, remember any indentations you make here will result in valleys and hills once dry.


Let it dry for 48 hours and you are good to go.

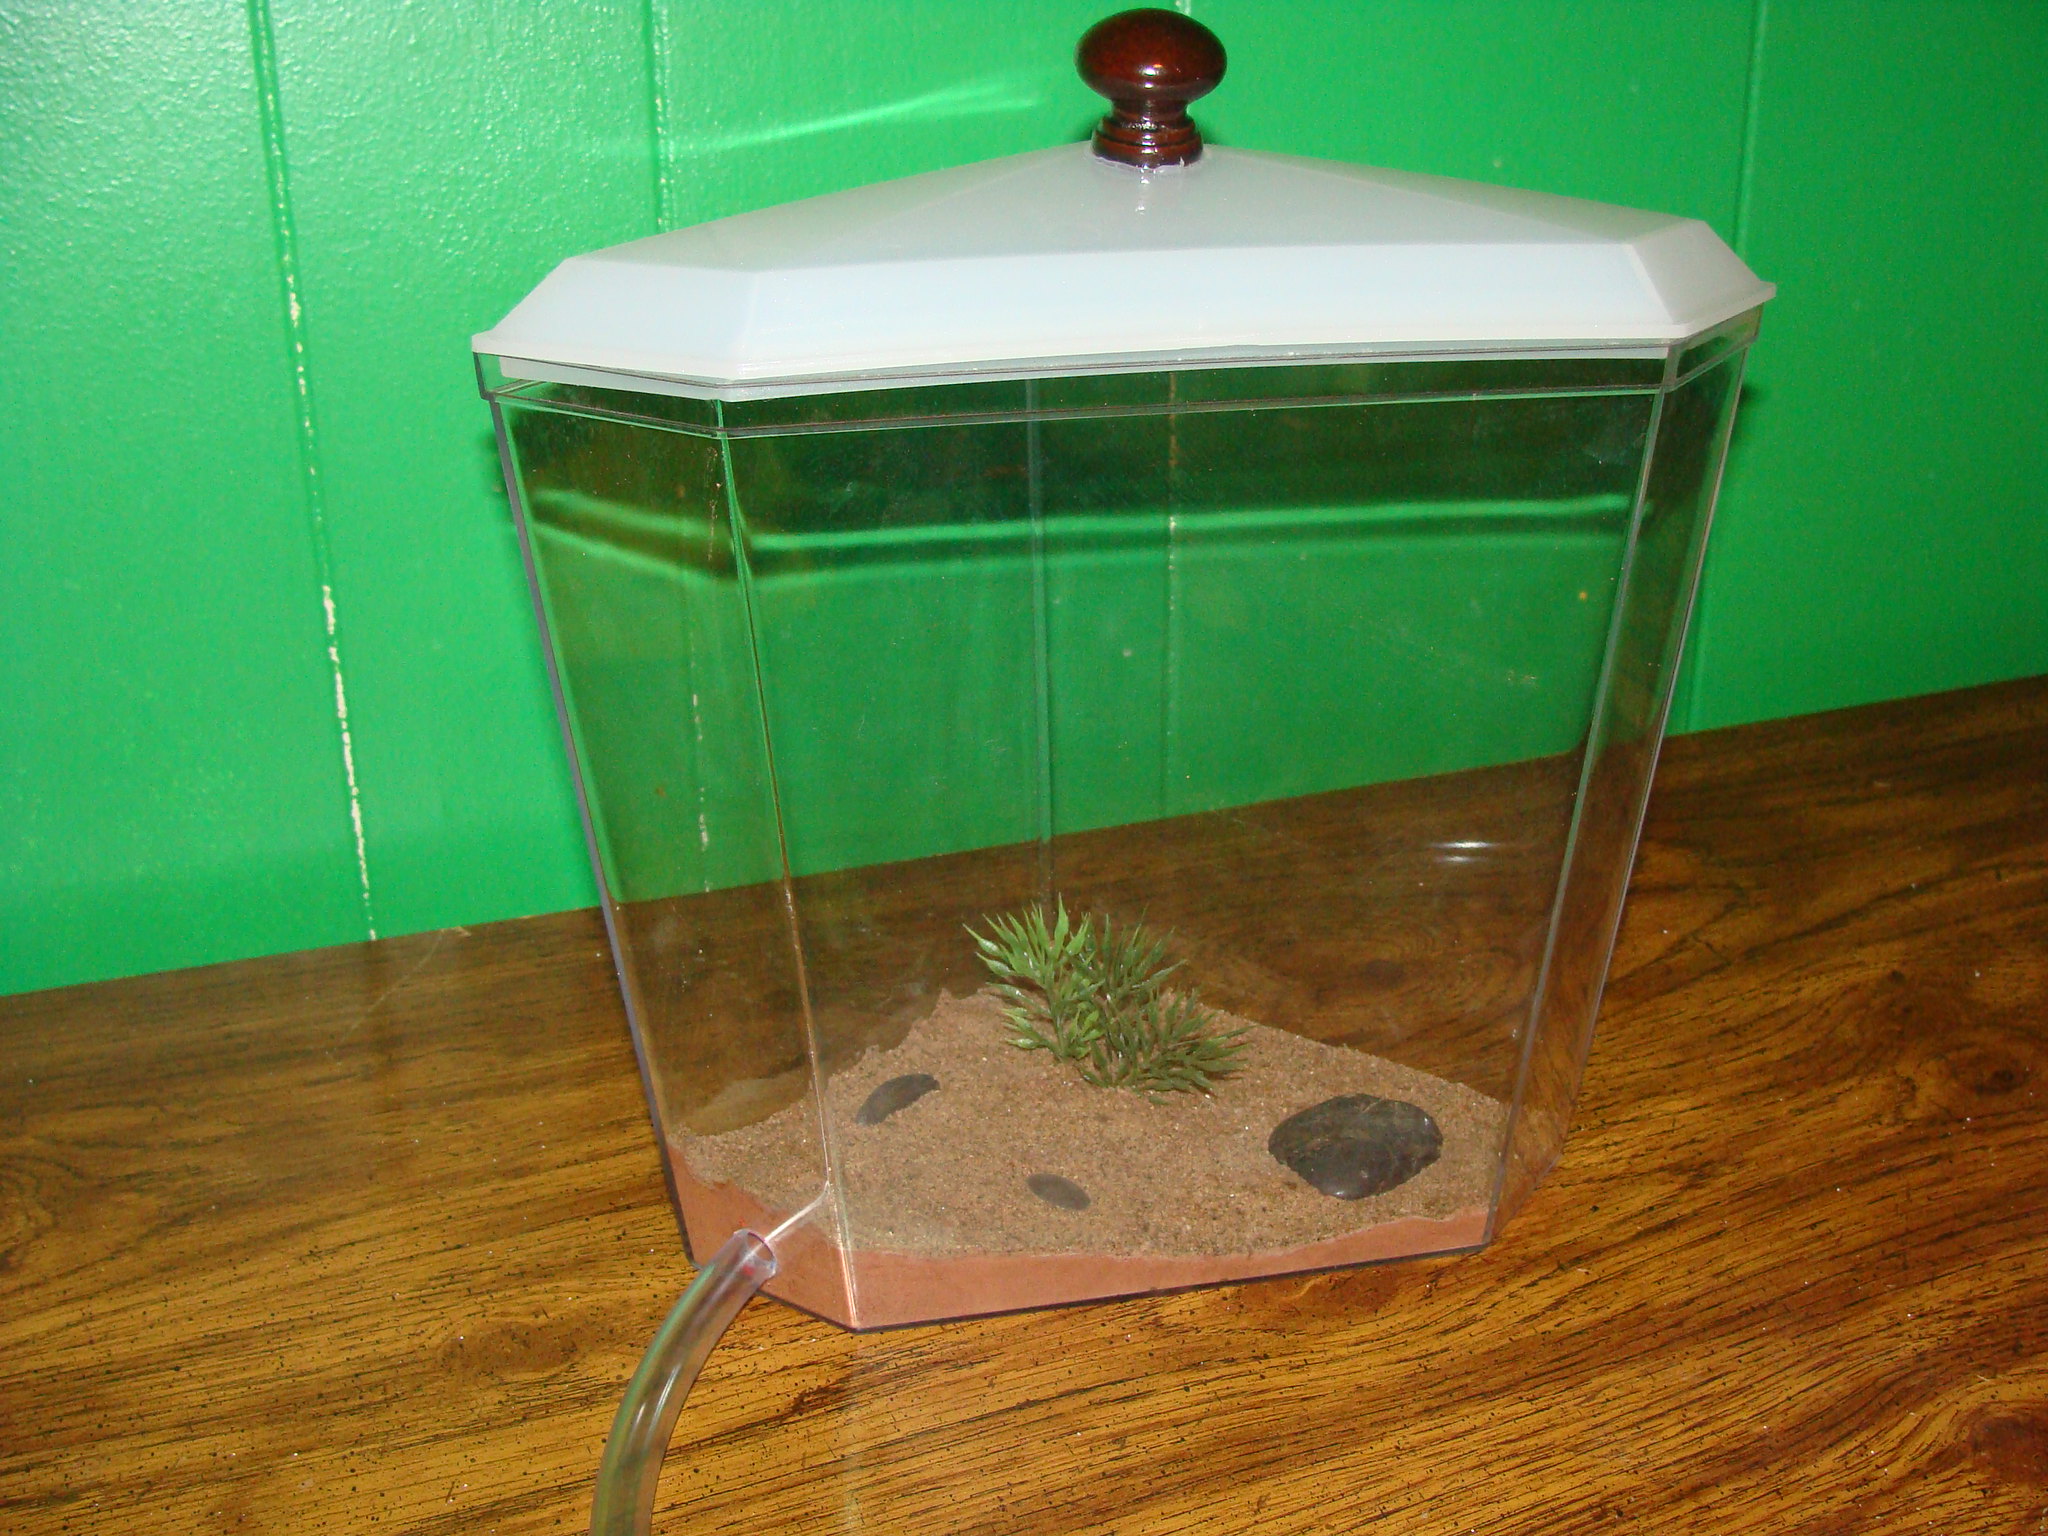
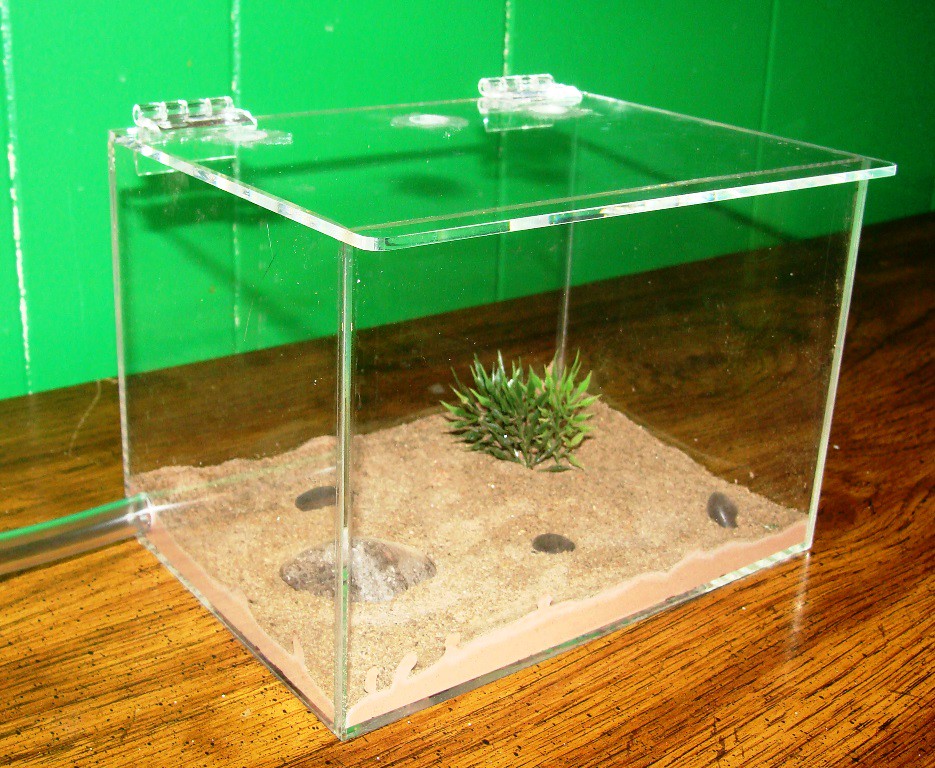
You can add a watering hole on top, but just by watering the foraging area the water will creep along the plastic to the nest.

This is good for small colonies just starting out.

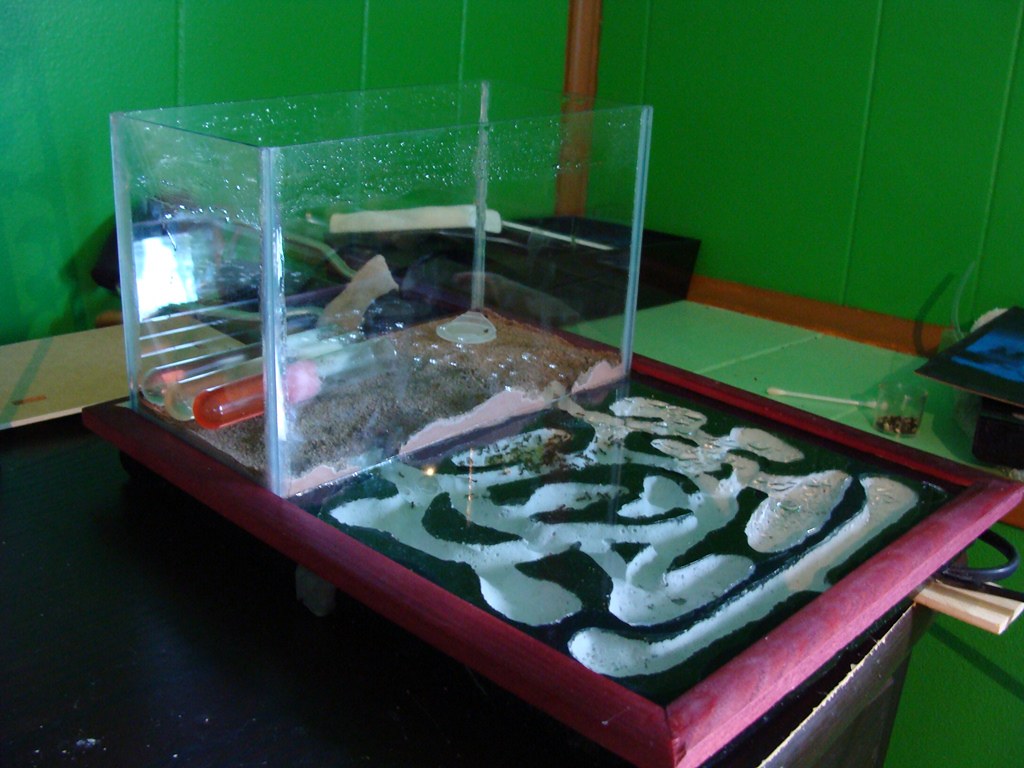
My Myrmica lived in my grout nests over 5 months before I gave them away:


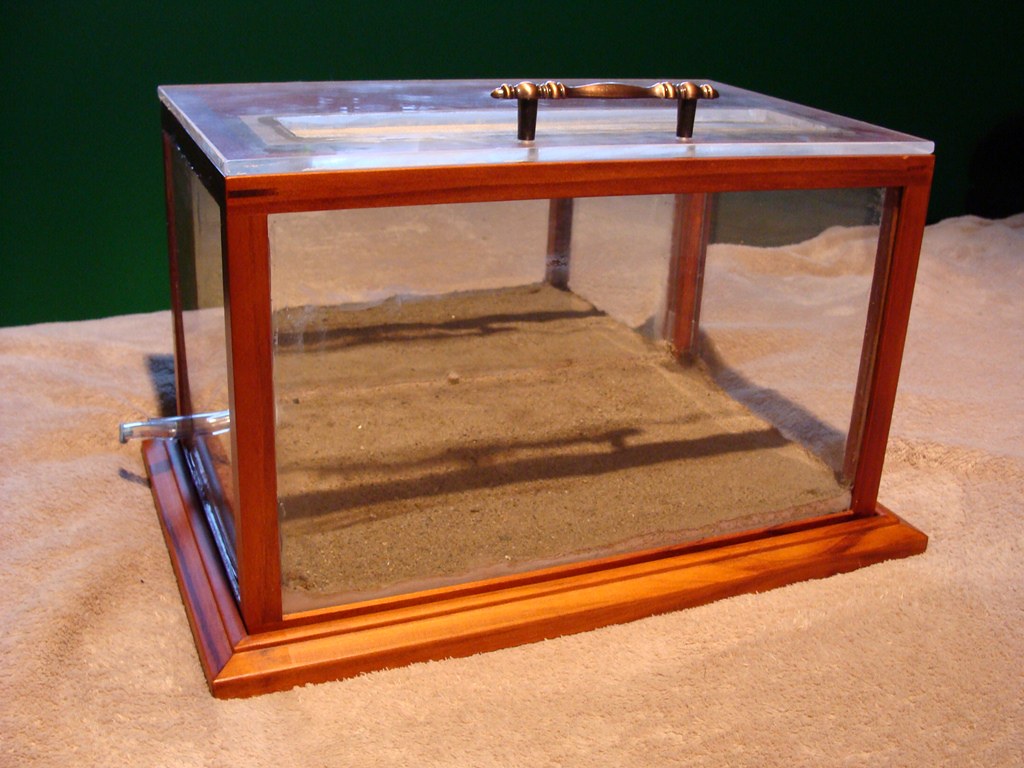
I find that football display cases and aquariums make excellent foraging areas that look nice enough that family members won't call it garbage or junk.


  • OldManTrashcan, CrazyLegs and nofuel11 like this

"Always do right. This will gratify some people, and astound the rest." -- Samuel Clemens


List of Handy Links   (pinned in the General section)

My Colonies


#2 Offline Crystals - Posted September 20 2013 - 7:34 PM

Crystals

    Advanced Member

  • Moderators
  • PipPipPip
  • 2,049 posts
  • LocationAthabasca, AB (Canada)

After I made this thread, I managed to get a hold of some sanded grout.  There is a world of difference between un-sanded grout and sanded grout.

Pure un-sanded grout doesn't like to absorb water, but it will over time.  Pure sanded grout absolutely refuses to absorb water.  Sanded grout is also much harder, my wood drilling bits wouldn't work.  I had to use drill bits meant for metal.
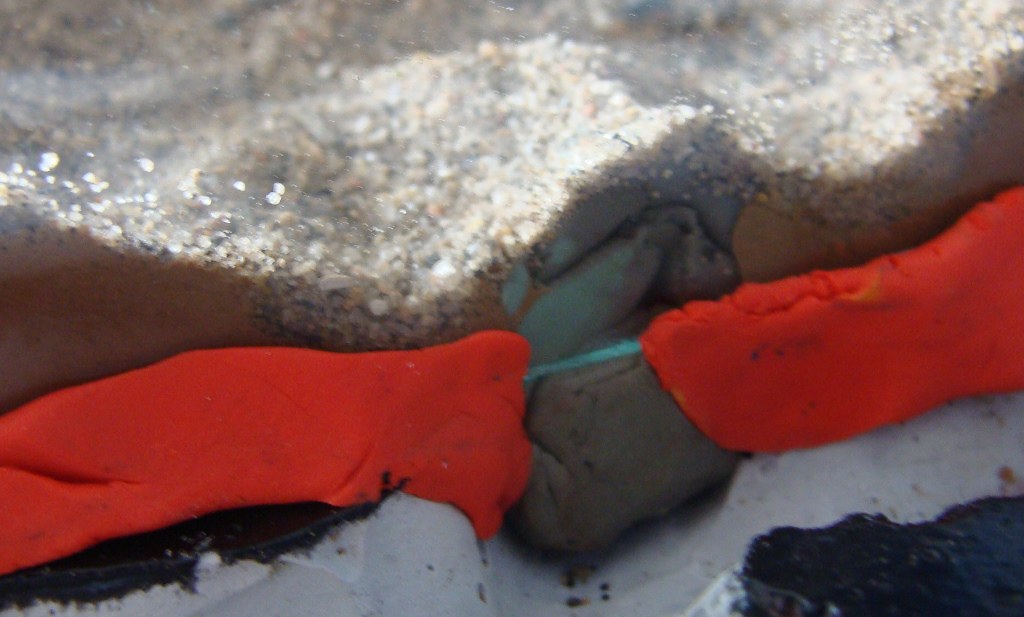
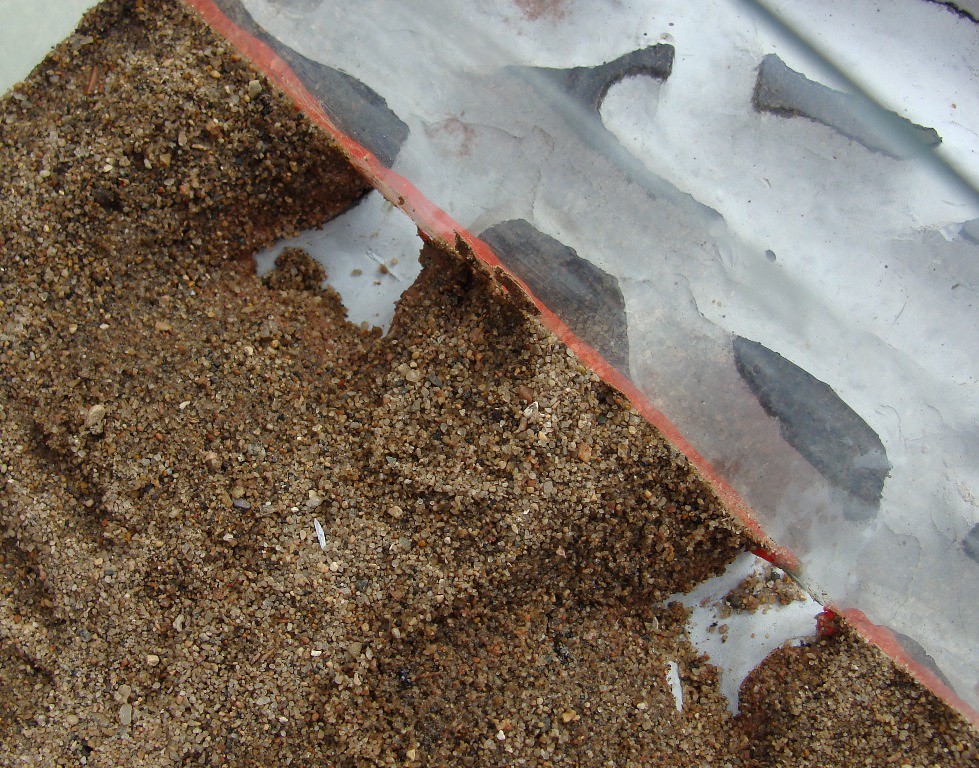
Sanded grout requires less water than un-sanded grout.


Now, I don't require so many layers of grout.  Sanded grout along the edges and at the back, un-sanded mixed with perlite agianst the glass and on the tunnels.
The sanded grout also prevents any sweating from heavy watering.  Also helps prevent the formicarium from drying out.


I often mix the grout in plastic cups with a stick.  I prefer to make several batches than to make one too large or the incorrect consistency.


"Always do right. This will gratify some people, and astound the rest." -- Samuel Clemens


List of Handy Links   (pinned in the General section)

My Colonies


#3 Offline Crystals - Posted September 20 2013 - 7:47 PM

Crystals

    Advanced Member

  • Moderators
  • PipPipPip
  • 2,049 posts
  • LocationAthabasca, AB (Canada)

Guide for Advanced hydration formicarium: http://www.formicult...nced-hydration/


Guide to create this type of formicarium:
38652517734_014b2666e0_b.jpg
35059239463_4e98f14e33_z.jpg

You will need:
1 Certificate photo frame with glass (this will be the base)
1 8x10 piece of glass
1 4x10 piece of glass (if you can't find a 4x10 picture frame, you can break an 8x10 in half to get two 4x10) (This creates the side width and can vary to suit your tastes - I created one with a 4x10 and another with a 6x8)
Sanded grout
Un-sanded grout (this will be your tunnel color)
Crushed perlite
Sand
Clay (oiled, never drying clay works best)
Fusion spray paint or a water proof paint
Aquarium silicone
Sand paper
Masking or painters tape
Glass cutter

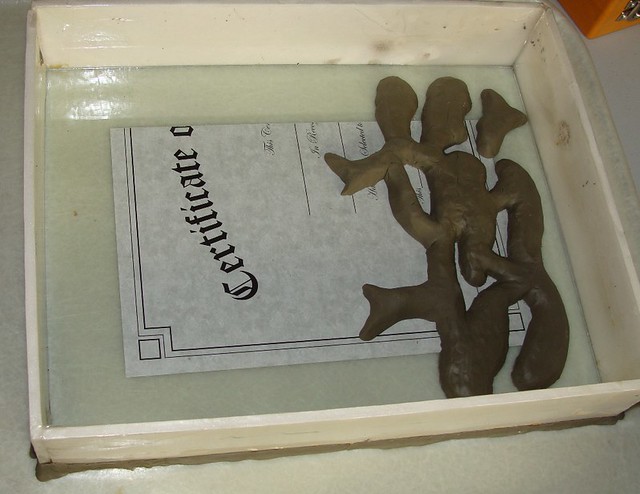
Make your pattern on the certificate glass. Keep at least 1/2" from the edges, with the water tunnel being the only exception. Remember to add a water tunnel. Ensure your exit tunnels end about 1" inside of the outworld (you can tell this distance by the "width" piece of glass - if you used a 4x10 - it will be 4").
35868551035_9ce404af18_z.jpg

Make a frame around it. You can use cardboard, lego, etc. I use a styrofoam frame, which I can reuse. I advise placing this on a hard moveable surface, such as my serving tray. Place small strips of clay around the outside base, this will contain any runaway grout. (The paper is under the glass to prevent scratches in case the glass slides a bit)
35480674370_9bd162b399_z.jpg

Put a light sheen of olive oil on your glass and clay pattern. A paintbrush or paper towel works well. Grab the un-sanded grout.
35059241003_1fddcb9e1d_b.jpg

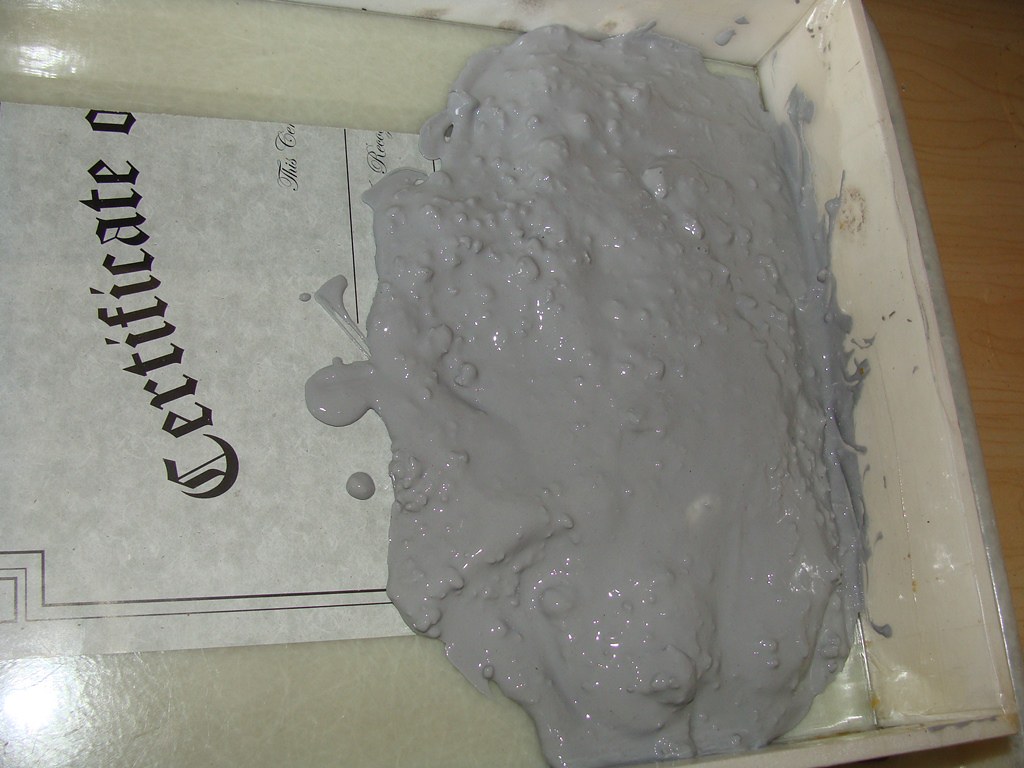
Mix some un-sanded grout, crushed perlite, and water together. 3:1 grout:perlite. Add enough water until it is a ketchup-like consistency. Spread it over the tunnels. I tend to mix stuff in plastic cups, I prefer to mix 2 or 3 batches rather than mixing too large of a batch. Use a stick or skewer to ensure you get grout into all of the holes, just swirl it around.
35480675310_52101d4278_b.jpg

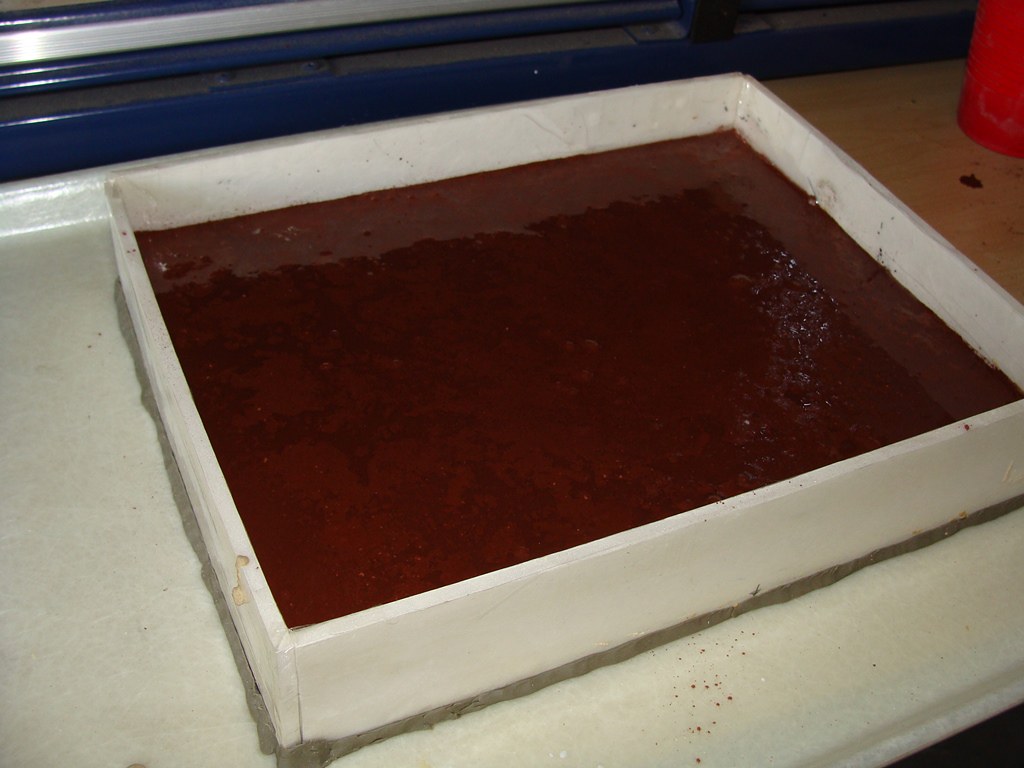
Grab the sanded grout. Mix the sanded grout and sand half and half and add enough water until it is a honey like consistency or a bit thicker. Fill up your form until it covers the un-sanded grout by 1/8". Level your grout. If it is thin enough lightly shaking the tray side to side should work, it not, find a level or piece of wood to smooth the surface. It is normal for 1-3mm of water to rise to the surface, just ignore it. If you choose, you can add some screen in this mix for added strength, I didn't bother.
35059242303_0af8b8a583_b.jpg

Put the form somewhere warm to dry for a day or so. It will depend on the humidity and temperature as to how fast it will dry. On a 30 Celcius day it can take as little as 8 hours for it to cure enough for me to remove the frame, if it is rainy and in my basement, it can take a good week to dry.

While we wait, lets build our Outworld!
Grab your 8x10 and your 4x10 (or whatever you chose as a width). Find your glass cutter and find a flat stable surface.
We are going to cut the 8x10 into two 5x8's, and the 4x10 into a 4x5.

For those of you who have never cut glass before, I will go over cutting glass. It is easier than it looks or sounds, usually.
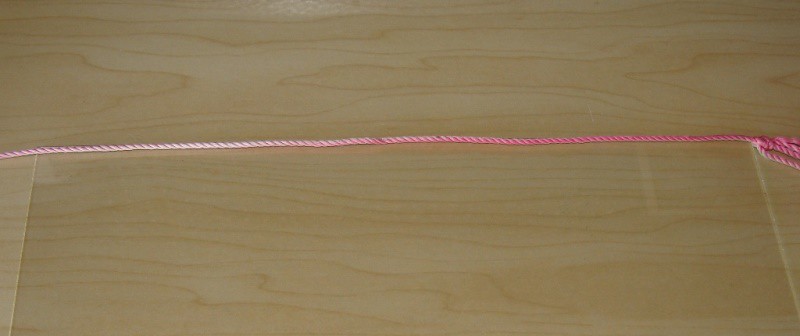
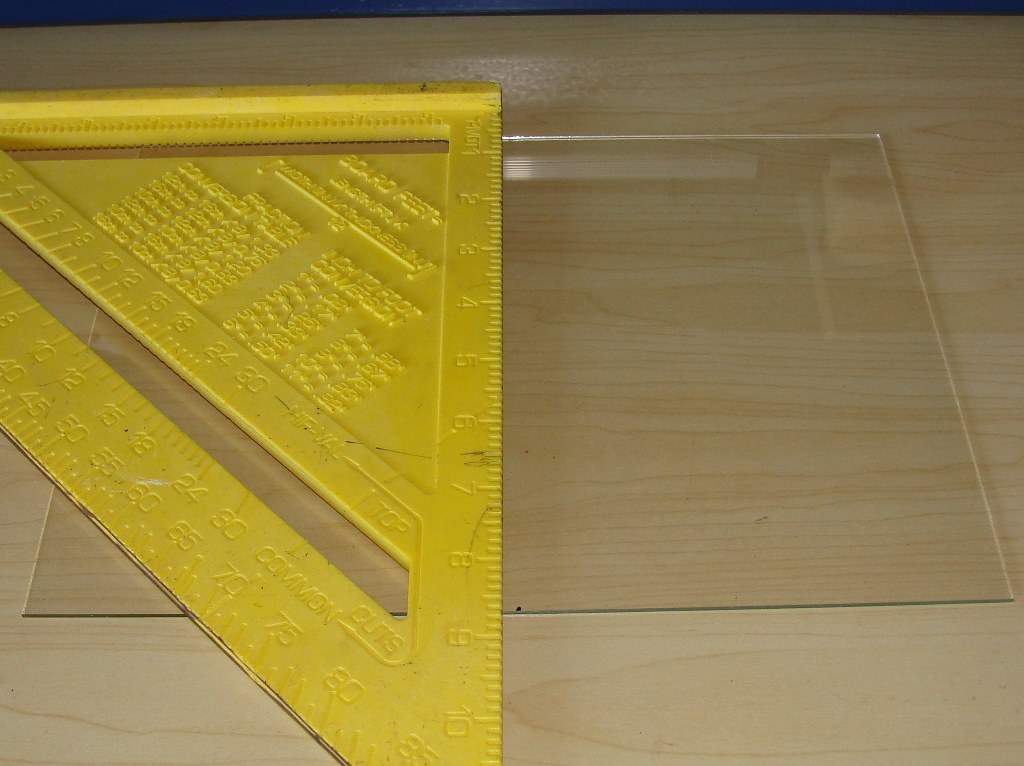
Take your 8x10, a piece of string, and a marker. On the 10" length find the mid-section, stretch the string from end to end, when folded in half, this is the middle. Or you could be smart and measure it - I was always too lazy to do the math. Use the felt leave a small line on the edge of the glass to mark the middle.
35480676040_0d92cfc9ab_b.jpg

Mark both sides and place a straight solid object on the glass. I used a right angle, but a ruler also works.
35059243113_5d8d416075_b.jpg

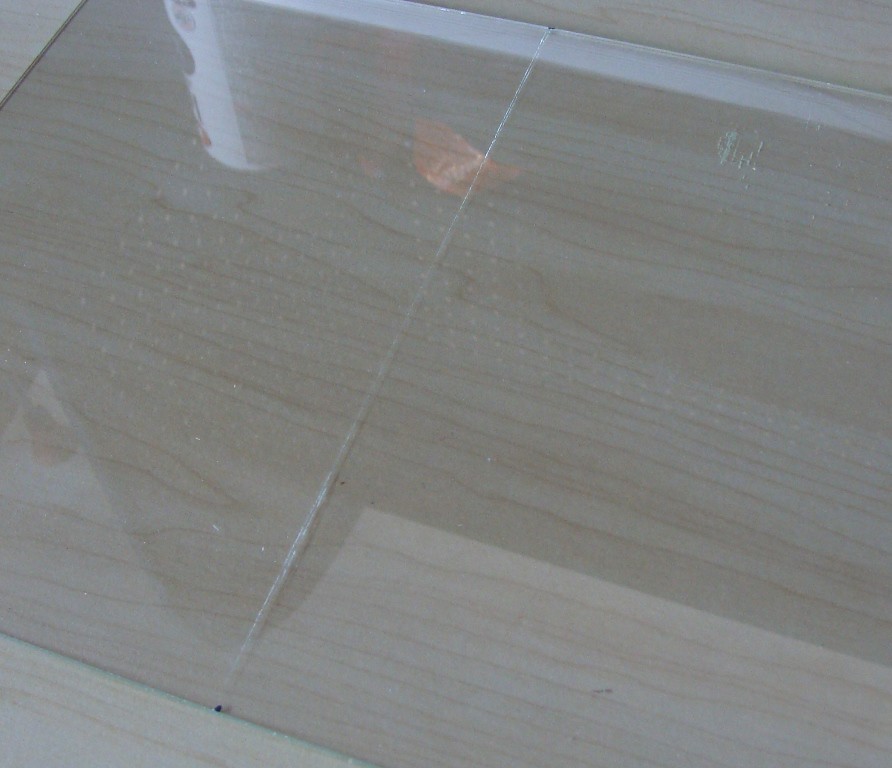
Cut the glass. Run the cutter over the glass, it will leave a white chipped line, ensure the line is straight and all the line pieces are connecting. Turn the glass over carefully and run the cutter over top of the exact same line - should break as you run your cutter along the original path. If your original path wasn't completely connected, it may deviate a bit, don't worry too much. Mine are never perfect.
35480677560_798bc1d6eb_b.jpg

Cut your 4x10 into two 4x5's.
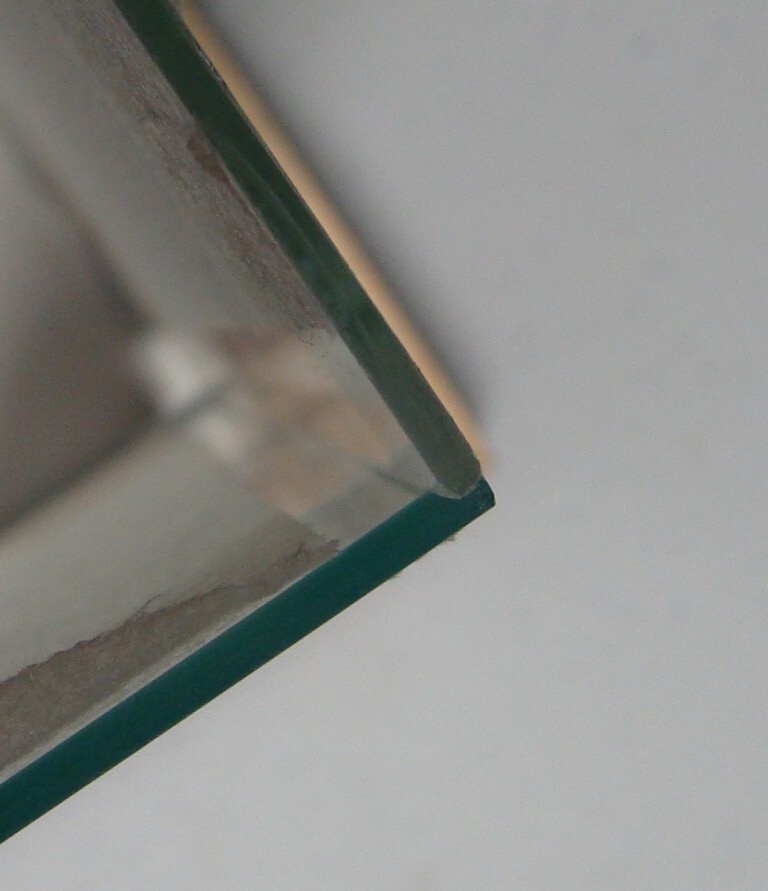
Grab some sand paper, the grit doesn't really matter, the finer it is the longer it will take. I used 50 grit. Sand all of the edges. Be careful, the glass edges are sharp. Sand them until you won't cut yourself on them by accident.
Once done sanding, take some masking or painters tape and take along the edges that will be siliconed. This will be the 5" lengths in our case.
35736882371_a8b4239101_b.jpg

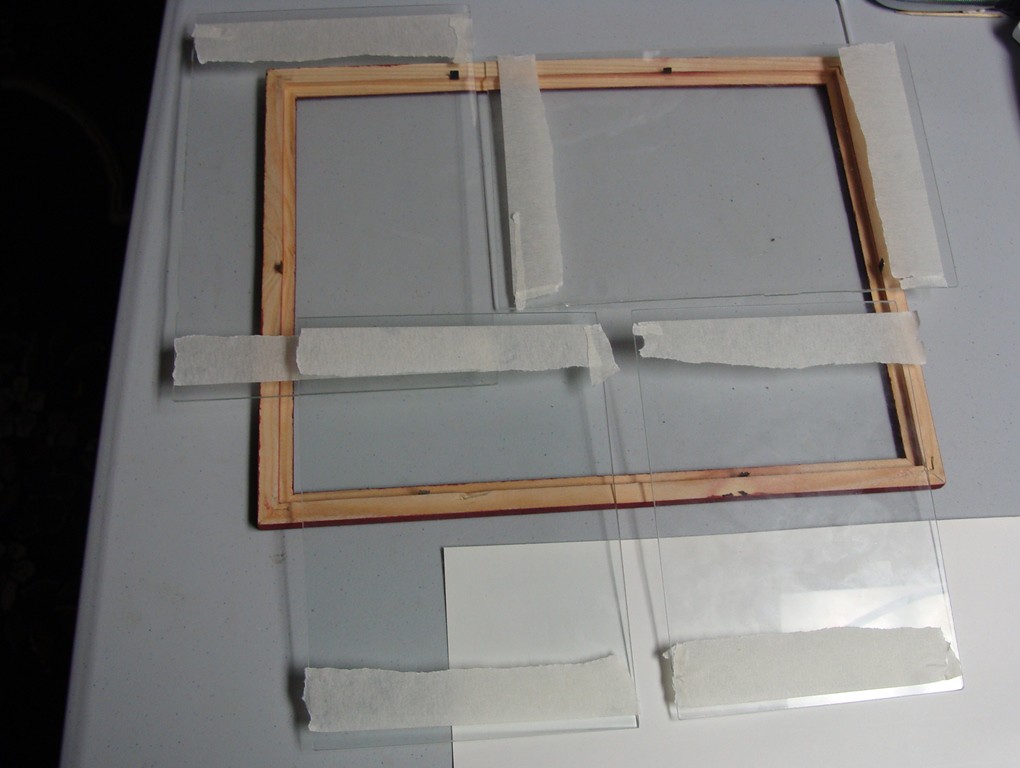
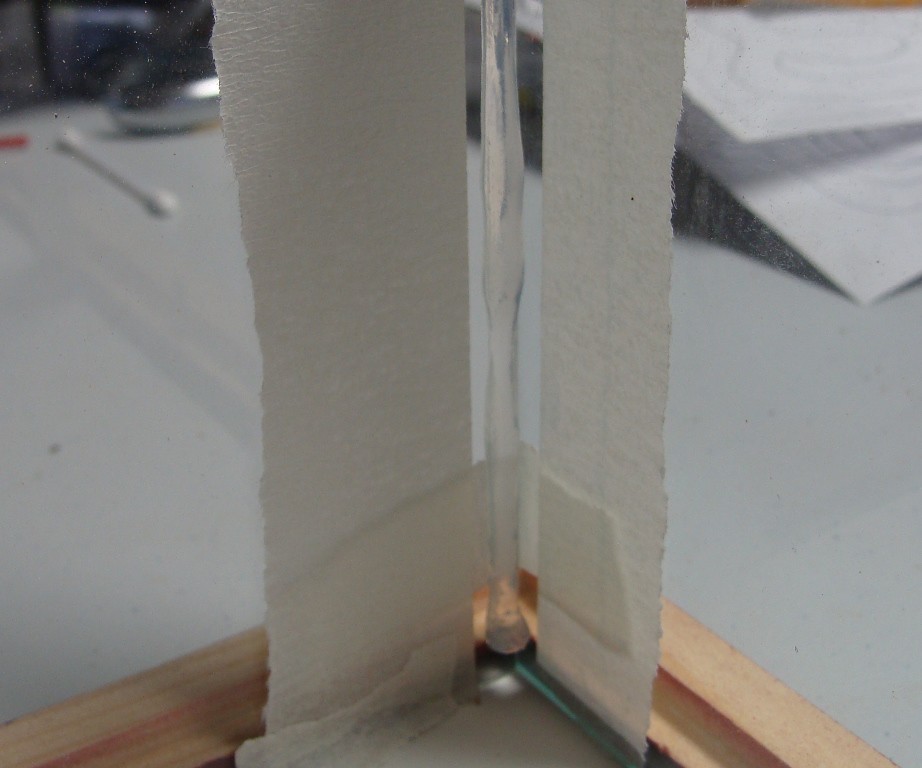
Find one of the empty frames and we will use it as a guide for our corners. Use some strips of tape and connect two of the pieces together. The side pieces must placed so that they will be on the "outside". Place the original "good" factory cut side down. Don't worry if there is a size difference of 1-8mm. This is fixable, bigger gaps may take more effort though.
35059244603_2e2cf89f69_b.jpg

35736883591_c6744a22eb_b.jpg

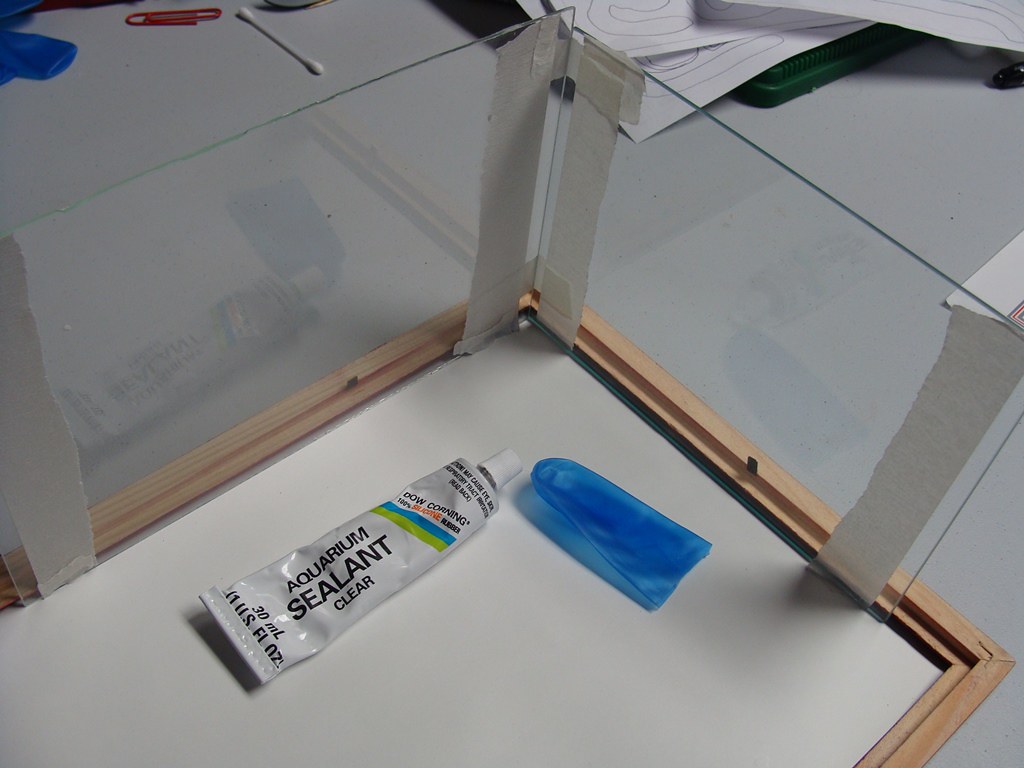
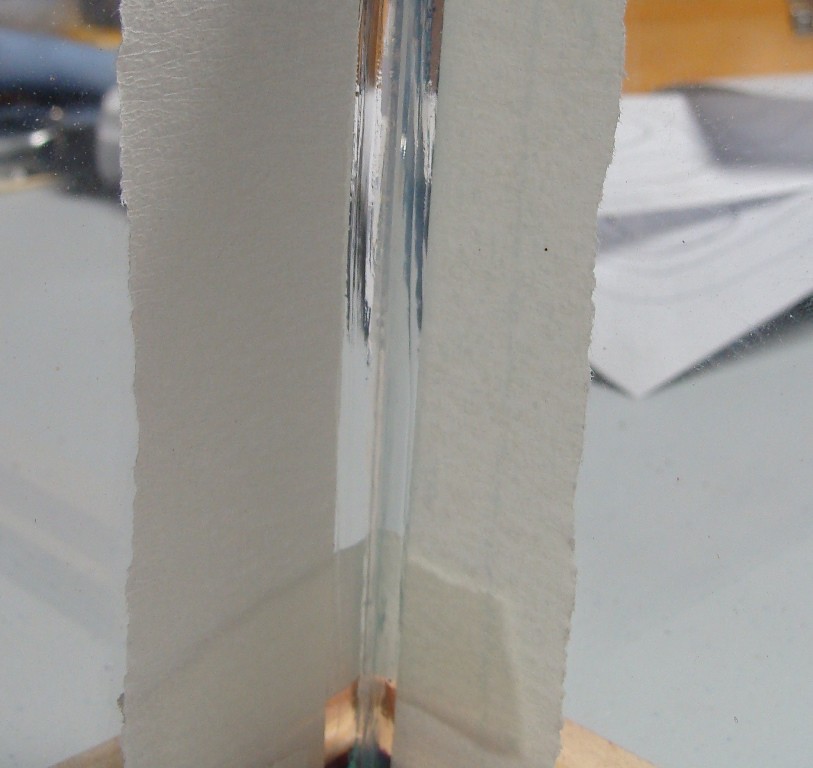
Place a light bead of silicone down the joint and spread it. I use a plastic glove finger, or a piece of plastic to spread the silicone.

35480679870_f0c20968ca_b.jpg

35736884951_02079b3635_b.jpg

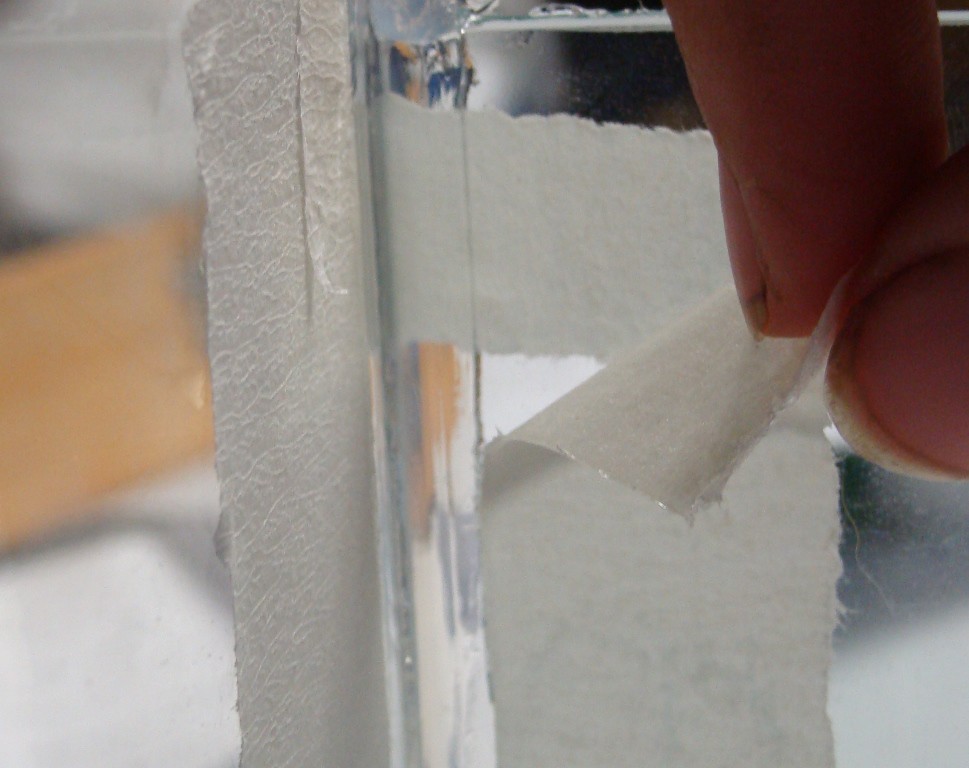
Now carefully remove the tape on the edges of the silicone. If we let it dry, it can damage our silicone later. Peel away from the silicone.
35059246283_75d8e3ebaf_b.jpg

35827874086_8e5ab0af7a_b.jpg

Let this one dry and do the other one. Remember to assemble them so that they will fit together in a rectangle later. it will take them a couple of hours to dry enough to handle.
Place the two piece together and silicone them. Use tape and one corner of the picture frame as a guide. Let it dry for a couple of hours.
35059247193_68f44095c0_b.jpg

Check if your grout is dry, it will not fully cure for at least a week so try to leave it facedown on the glass whenever you put it down as gravity can still affect it somewhat. I usually remove my clay as soon as the grout doesn't have any "give" when I push on it. We can work with it some while it is curing. Once it is fully cured it can be difficult to drill or to remove the glass for the first time. The clay that you used along the form might be dirty, but keep it for later, it will get even dirtier.

Mine happens to have three colors as I used the last bit of yellow sanded grout as I didn't want to waste it. Some of my red bled through as my grey was too thin. Doesn't bother me.
35736888701_e6818e1333_b.jpg
 

If you are using acrylic paints, go ahead and paint.  Try to avoid painting the tunnels, but feel free to paint everything that touches the glass and on the outside.  Honest, non-toxic acrylic paint is safe.  Scientists use it for marking individuals (http://turnstylenews..._tD5Nk-L-11.jpg).


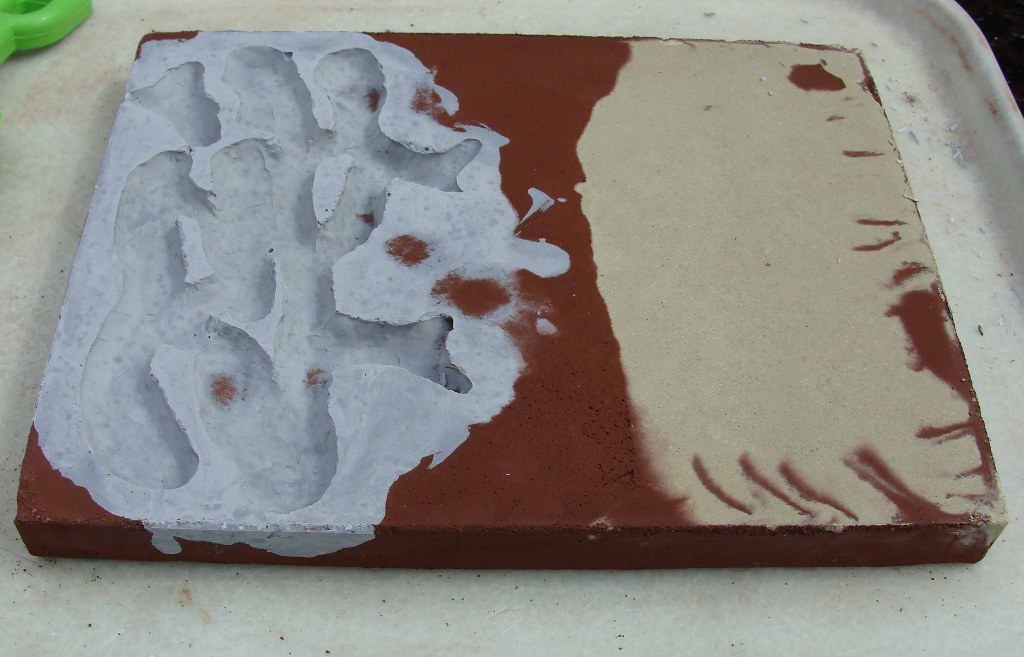
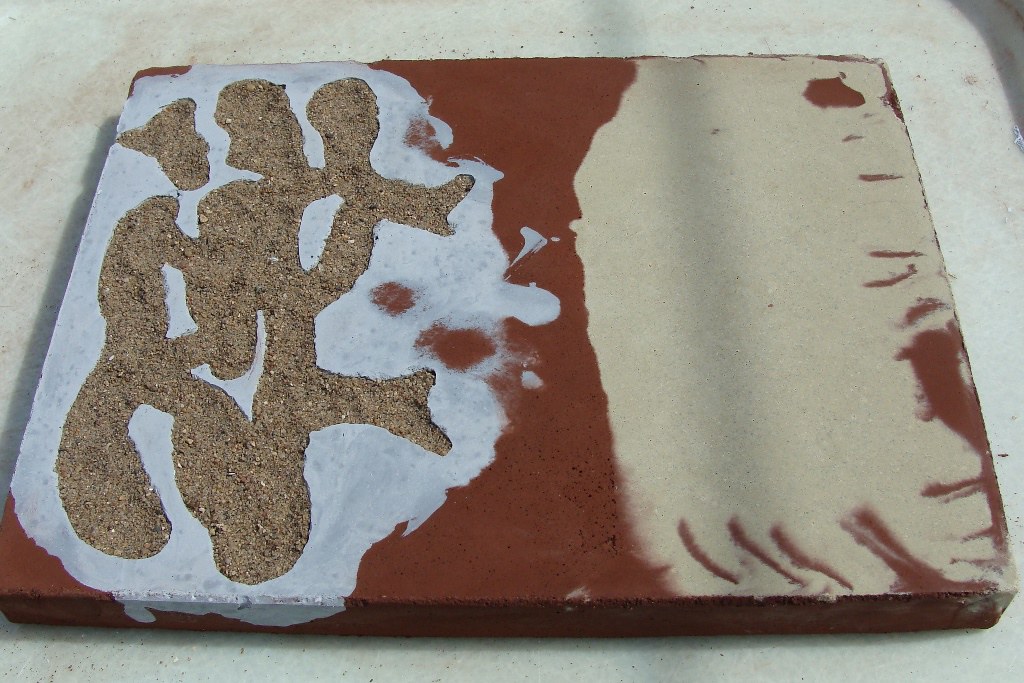
If you are using Krylon spray paint, get your sand (bone dry is best). fill all of your tunnels and carefully inspect every surface and remove every little nuisance grain of sand from the surface. If you don't remove it here, it can prevent a good fit of your glass.
35029035624_03430dd71b_b.jpg

Get your spray paint. Fusion for plastics is best, but any waterproof paint should do. If you don't use a spray paint, you can skip the sand and paint it with a brush. For the first coat, you must have your can at least 18" away from the formicarium or it can blow the sand into your paint. After the sand is "anchored" down by the paint you can bring your can in closer. Give it several coats, letting it dry in between. You only need to spray the tunnel half, the outworld will have a different covering.
35827876226_64d9d7fc43_b.jpg

Let the paint dry until it isn't tacky. Depending on how cured your grout it can take 10 min to 3 hours. The painted sand will easily crumble when touched. Remove the sand.
35736892321_e50671c10a_b.jpg

If you want, you can spray the back and sides for additional water proofing. Ensure you cover your tunnel section with cardboard or something as spray paint gets into the weirdest places.

Drill your entrance holes. Drill a hole in the top of your grout so you can water your water tunnel with a syringe or eyedropper, if it is still soft enough, even an exacto blade will work. While it is curing a wood bit will easily work, once fully cured you will need a bit meant for metal to handle the sanded grout.

Place the certificate glass on your formicarium and place your outworld on top. Use a felt to mark where your outworld ends on both edges. Place the glass aside for now.
35827877896_ca4e6ca229_b.jpg

35029038524_b7b8c9a1b4_b.jpg

Take your outworld and turn it upside down so all of the "good" edges are facing up. Yes, the bottom edges will be uneven, we will fix this the easy way. Try to have the more even bottom edge facing the tunnels (or one with the smallest gap).
Silicone THREE SIDES of the outworld. Do NOT silicone the side that faces your tunnels, or your glass will not sit snugly against it later. Let it dry completely.
35736894351_16b29ce10c_b.jpg

I have a pretty good gap here - it is 8mm. I will fix it later.
35827880056_8d72dd7af8_b.jpg

Take clay and fill the entrance holes and place a thin strip along the glass that wasn't siliconed. This is perfect time to use dirty clay.
35059250343_9e3048cb76_b.jpg

35827881796_dbd4bb13b0_b.jpg

Find some grout, doesn't matter which kind. Mix it to a syrup consistency and pour in enough to cover the floor and cover any gaps. I had a large gap, so my layer was a bit deeper.  I like to mix half grout and half sand.
35059250833_a68a4631fa_b.jpg

35029041824_3e7a4145bd_b.jpg

Get some sand (or not if you don't like sand). Cover the grout and pat it in lightly. Push the grout and sand down by your entrance clay, this will create a "ramp" or hill effect. Ensure you will be around after an hour or so for at least 10 min.
35480667970_8dc70b7b11_b.jpg

35059234293_0432811ff5_b.jpg

35480668440_b8bed67c30_b.jpg


Once the grout hardens enough that it doesn't run, usually an hour or so later, remove the clay and tamp down your ramp some more if you want. I find it hides the painted edges of the entrance.
35059235593_5e4f953397_b.jpg

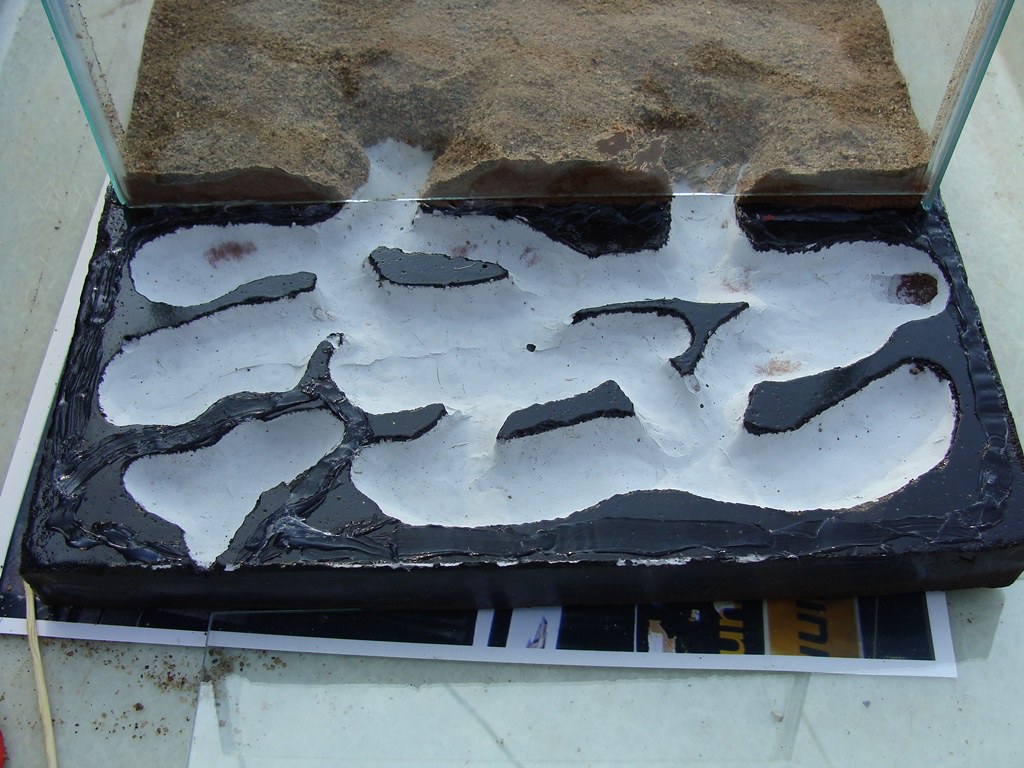
Let the grout dry fully. In the mean time, remember that certificate glass we marked? Lets go cut it along that line you made. One piece will cover your tunnels, and the other just happens to be a perfect fit for a lid! Imagine that. Cut the pieces and sand down the edges.

Once your grout is dry, scrape the excess sand loose and dump it out. Use your fingers or a Popsicle stick.
Clean your glass that will cover your tunnels thoroughly. If some paint on your grout chipped away touch it up with acrylic paint or even a permanent felt marker (let it dry).

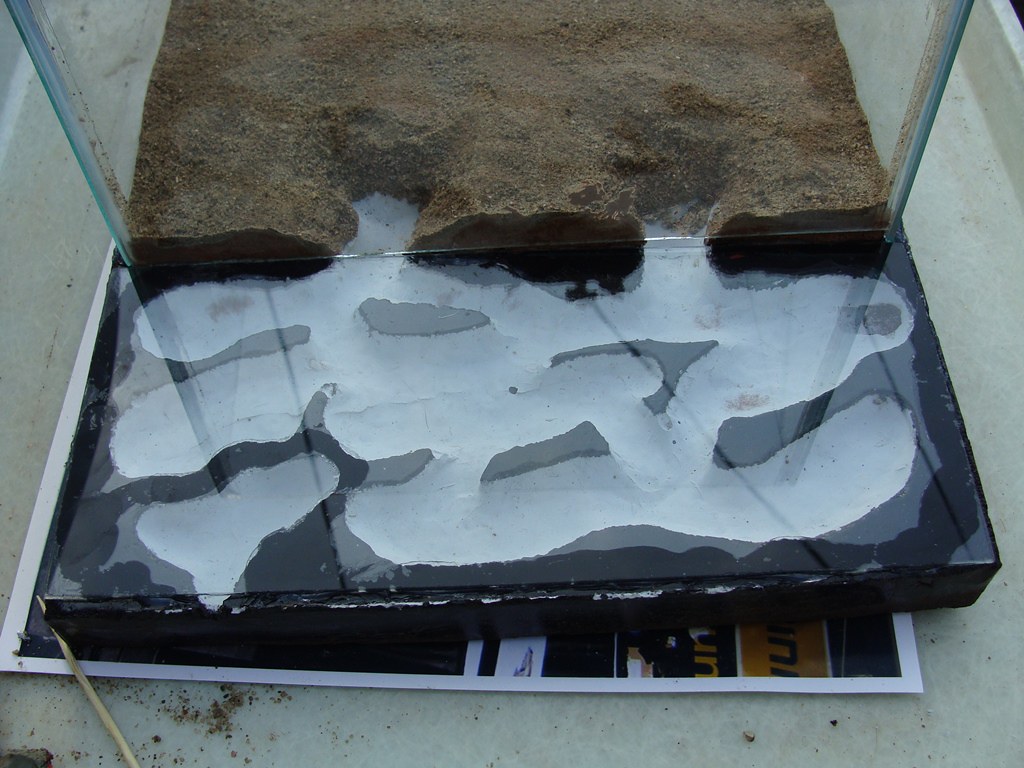
Fit your glass over the tunnels, ensure there is no rocking or sand in the way of a tight fit. Place the "good" straight edge along the outworld.

Run a silicone bead along the edges of the formicarium AND around your water tunnel.
35059237603_720afcf5b7_b.jpg

Double check if your glass is clean. Place it on the tunnels, ensure the "good" edge is tight against your outworld.
35480671660_f2a29f38ea_b.jpg


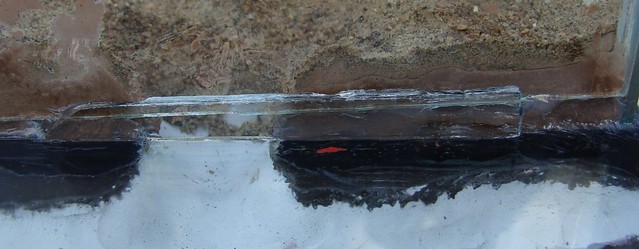
Remember my large gap? Well it is too big for my glass to cover, I cut a small strip of glass to cover the hole. If I had been planning on placing any other species in there other than carpenter ants, I could have used plastic from a page cover or just silicone.
35827869556_7782a1d09a_z.jpg


If there are tiny gaps along the joint, silicone it lightly. If not, you can skip this part.
Let this dry for at least 48 hours before watering it or introducing ants. A week is ideal.

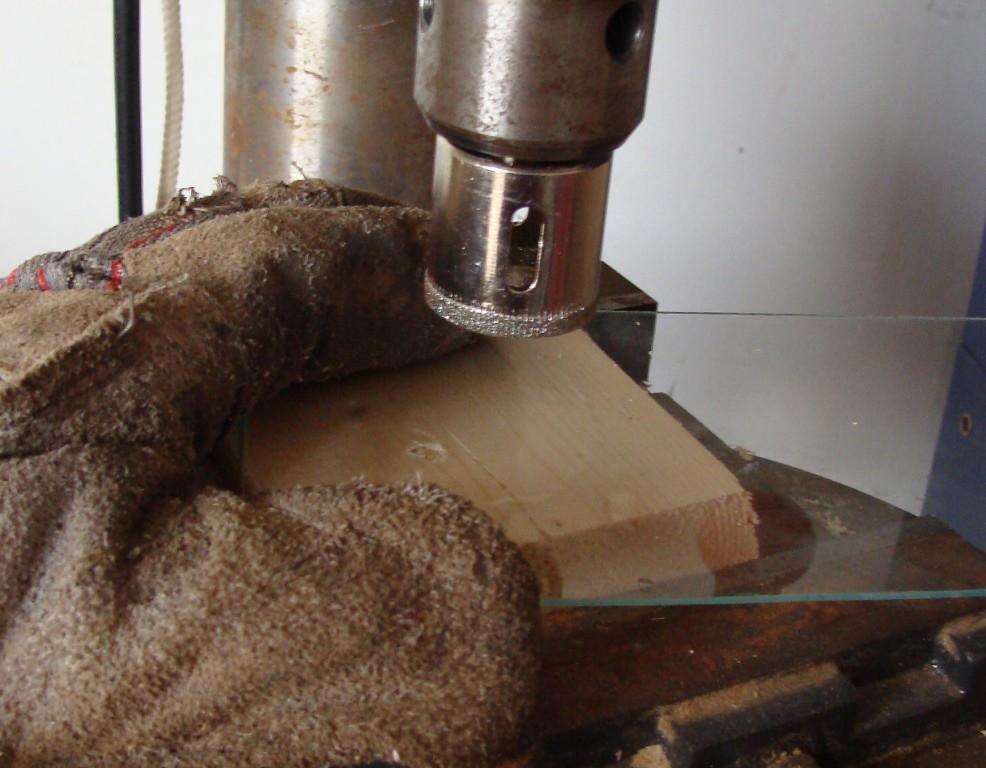
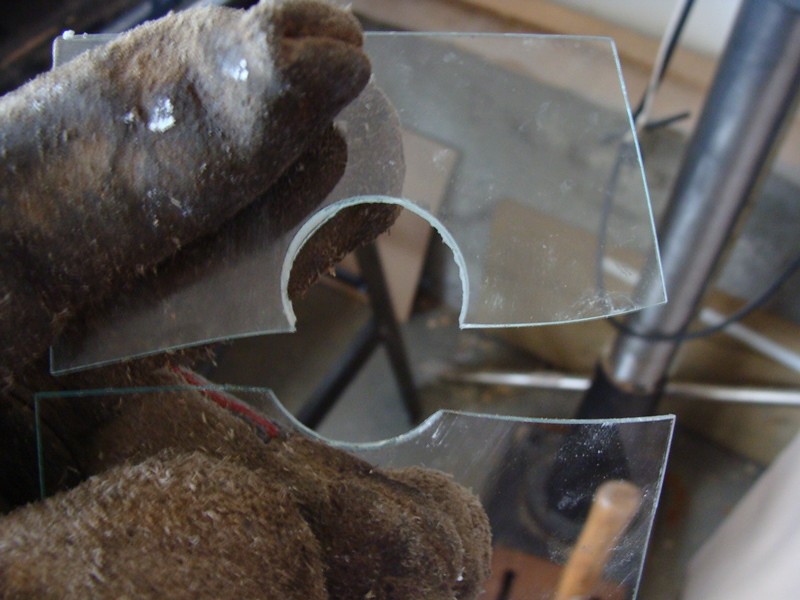
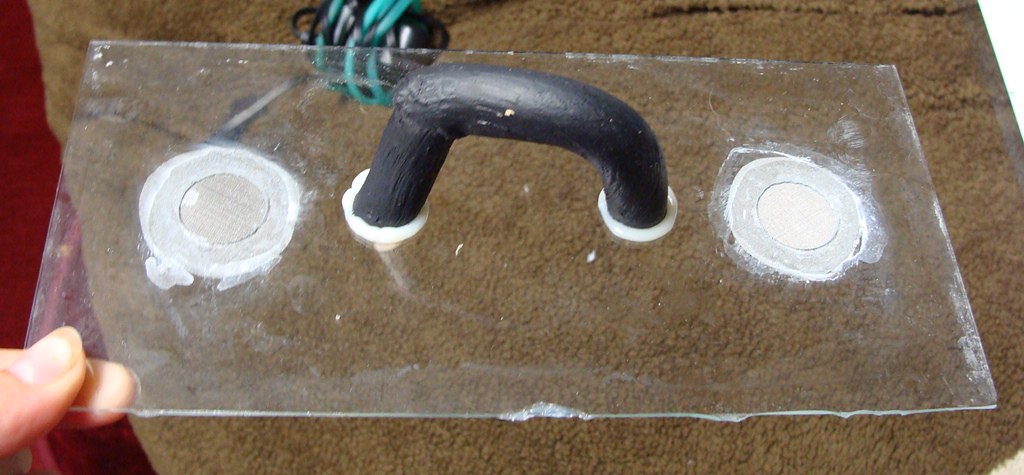
Now for your lid. IF you have a drill press and diamond tipped bit, feel free to try drill ventilation holes. Try on spare glass first. I used a 2cm and a 3cm drill bit with success.
If you don't have a drill press, check what your local glass shop would charge to drill 1-2 holes in glass.
Use gloves, water on your bit, and go slowly. Let your drill do the work. Go too fast or press a bit too hard and this thin glass breaks easily. I pressed a bit too hard near the end. I can fix my break with 2" clear tape.
35827868226_a72d18f7c1_b.jpg

35059236643_71bb660d36_b.jpg

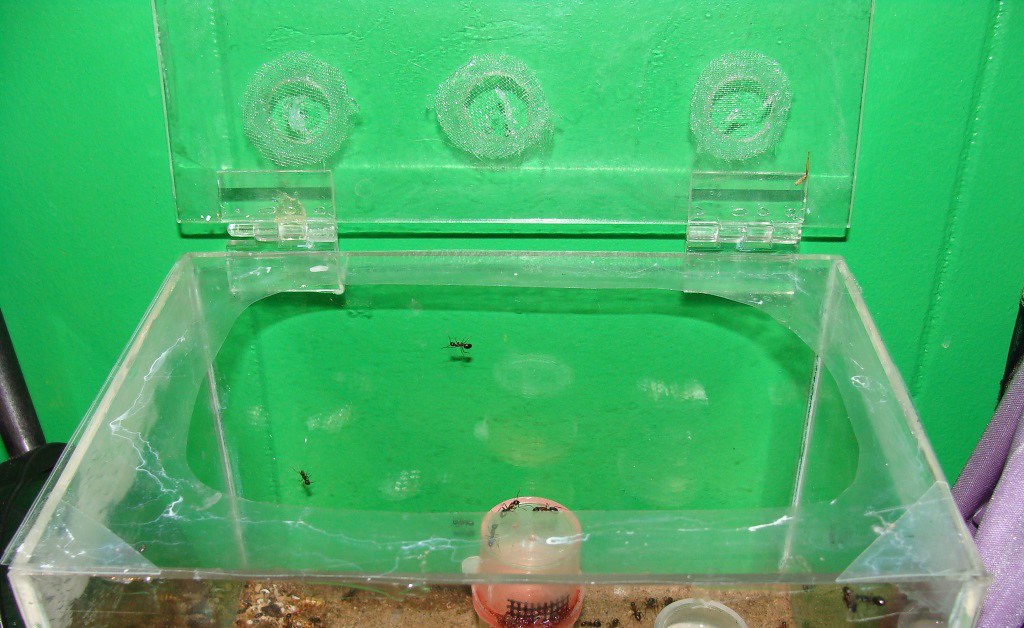
Find a handle. Anything from a drawer handle to a piece of wood (mine was a root piece). Silicone or epoxy it to the glass. Cut and silicone/epoxy some metal mesh over the holes and you are good to go. Allow it to dry for 48 hours before placing it on the formicarium - the fumes are really potent.
35827868736_daf8324c78_b.jpg

We are done!
35059239463_4e98f14e33_z.jpg


Edited by Crystals, December 28 2017 - 5:33 PM.

  • Jonathan21700, Herdo, Lazarus and 1 other like this

"Always do right. This will gratify some people, and astound the rest." -- Samuel Clemens


List of Handy Links   (pinned in the General section)

My Colonies


#4 Offline dspdrew - Posted September 20 2013 - 11:50 PM

dspdrew
  • LocationSanta Ana, CA

Very nice! Thanks for sharing all that. :D


#5 Offline Crystals - Posted September 30 2013 - 4:00 PM

Crystals

    Advanced Member

  • Moderators
  • PipPipPip
  • 2,049 posts
  • LocationAthabasca, AB (Canada)

I have added a guide on How to build a Grout Formicarium in an Aquarium on page 3 of this thread.

http://www.formicult...carium/?p=17667


Additional Escape Prevention:


I made an addition to the outworld on my Formicarium.  I added a lip cut out of a stiff page protector and coated it with fluon.  The ants cannot climb upside down on fluon, which was essential with my escape artist Lasius.

35048139644_5a6e139dd3_b.jpg


Edited by Crystals, December 28 2017 - 4:20 PM.

"Always do right. This will gratify some people, and astound the rest." -- Samuel Clemens


List of Handy Links   (pinned in the General section)

My Colonies


#6 Offline Crystals - Posted September 30 2013 - 4:18 PM

Crystals

    Advanced Member

  • Moderators
  • PipPipPip
  • 2,049 posts
  • LocationAthabasca, AB (Canada)

How To Build An Outworld:


Here is a really detailed tutorial: http://www.formicult...-foraging-area/


Find a container.  Almost any size will do, ensure you can get your hand in without brushing against the escape prevention on the edge (fluon, talc, oil, etc).

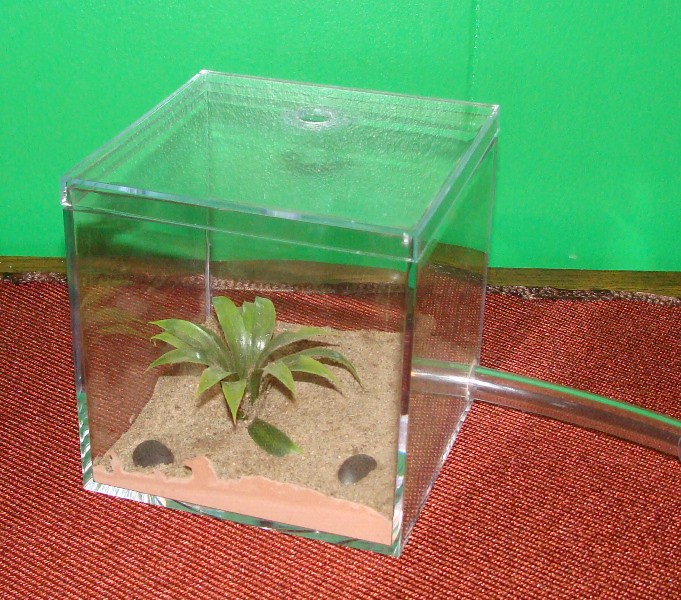
I like to use clear food storage containers and fish tanks (small plastic betta fish tanks work well).  Display cases also work very well (watch for tempered glass, you may have to replace it with regular glass or acrylic).


Drill ventilation holes and cover them with steel mesh. (Mesh from a dollar store frying pan often works well).


Get some grout (sanded or unsanded both work).  Mix some sand in, 3 grout:1 sand.  The sand adds strength, although you can skip the sand if you want.

Add enough water until it is the consistency of ketchup or a bit thinner.


Pour enough grout in to cover the bottom by at least 1 cm.  I like to add 2-3cm so it isn't so easy to knock over later.  Level it (lightly shaking side to side, or leveling with a stick works well)


Add any decorations.  Rocks, sticks, plastic plants, a lego town, whatever your heart desires.  Add the sand last (the sand will also help hold your decorations upright if they want to fall over).  Lightly pat the sand down if you can, it will stick better.  Any indentations you make will give you hills and valleys.  (I like to push some sand down at an angle towards the wall in one place to create a nice tunnel entrance later, one finger is sufficient to do this).


Let it dry.  It may take 1-5 days depending on heat and humidity.


Pour out the excess sand.


Drill a hole for your tubing.  You can place it level with the substrate, or sink it into the grout coming "up" like in a natural setting.


Silicone your tubing in and let it dry for 48 hours.


You are done!


35887914965_2669420df8_b.jpg

35887912035_d5451e4546_k.jpg

35718646552_afb98726b5_b.jpg

35048124254_75a08b660d_b.jpg


Edited by Crystals, December 28 2017 - 4:25 PM.

  • Enderz and CrazyLegs like this

"Always do right. This will gratify some people, and astound the rest." -- Samuel Clemens


List of Handy Links   (pinned in the General section)

My Colonies


#7 Offline wook - Posted September 30 2013 - 4:25 PM

wook

    Advanced Member

  • Members
  • PipPipPip
  • 126 posts
  • LocationSarajevo, Bosnia and Herzegovina
I should rent you to make me formicarium!
What do you think about heating?

...:::]|wook|[:::...


#8 Offline dspdrew - Posted September 30 2013 - 5:21 PM

dspdrew
  • LocationSanta Ana, CA

Where'd you get that cool looking aquarium or whatever it is in the last picture?


#9 Offline Crystals - Posted September 30 2013 - 5:43 PM

Crystals

    Advanced Member

  • Moderators
  • PipPipPip
  • 2,049 posts
  • LocationAthabasca, AB (Canada)

It is a football display case from Michaels. 

It had tempered glass, which of course shattered when we tried to drill it.  We replaced the piece with acrylic and siliconed it in.  I had the lid ordered from the glass company, I siliconed the mesh on and attached a dresser drawer handle.  I can't believe how easily acrylic scratches...  Next time I am using glass and just drilling several round holes for ventilation.


My family is more accepting of "odd" pets when they are in a fancy enclosure.


"Always do right. This will gratify some people, and astound the rest." -- Samuel Clemens


List of Handy Links   (pinned in the General section)

My Colonies


#10 Offline dspdrew - Posted September 30 2013 - 6:38 PM

dspdrew
  • LocationSanta Ana, CA

Ohh, so that's the football display case you were talking about. The display cases I was thinking about are a lot different. They're basically 100% acrylic and just made very nice so all seems look perfect.


#11 Offline Crystals - Posted October 16 2013 - 11:29 AM

Crystals

    Advanced Member

  • Moderators
  • PipPipPip
  • 2,049 posts
  • LocationAthabasca, AB (Canada)

I finally made my first video - on how make grout formicariums of course.  :D    There are 3 parts to this video.

Part One:


Part Two:


Part Three:


  • CrazyLegs and littlebandicoot like this

"Always do right. This will gratify some people, and astound the rest." -- Samuel Clemens


List of Handy Links   (pinned in the General section)

My Colonies


#12 Offline Mercutia - Posted October 18 2013 - 10:56 AM

Mercutia

    Advanced Member

  • Members
  • PipPipPip
  • 621 posts
  • LocationToronto, Canada

This is great Crystals. I like how thorough you are in explaining everything and why it's necessary. Will definitely be looking into trying this in the future.


#13 Offline Myrmecologeek - Posted October 23 2013 - 10:17 PM

Myrmecologeek

    Advanced Member

  • Members
  • PipPipPip
  • 38 posts
  • LocationPhilippines

Great help! :) I'd vote for this to be pinned actually.


Edited by Myrmecologeek, October 23 2013 - 10:17 PM.

  • AntTeen804 likes this

#14 Offline Crystals - Posted November 18 2013 - 2:10 PM

Crystals

    Advanced Member

  • Moderators
  • PipPipPip
  • 2,049 posts
  • LocationAthabasca, AB (Canada)

If you are going to store formicariums made from solid grout, ensure you dampen them occasionally as the grout may crack if it dries out completely.


I add a syringe-full of water to mine every month.  I make quite a few at a time, so I wrap them in scraps of cloth or towels and put them in cardboard boxes.


I think I may have to try making a formicarium out of firebrick one day.


"Always do right. This will gratify some people, and astound the rest." -- Samuel Clemens


List of Handy Links   (pinned in the General section)

My Colonies


#15 Offline Crystals - Posted November 26 2013 - 8:11 AM

Crystals

    Advanced Member

  • Moderators
  • PipPipPip
  • 2,049 posts
  • LocationAthabasca, AB (Canada)

I have made a short video on how to make an outworld for your ants using a plastic container and grout.

You don't really need any substrate, but I like the make it look a bit fancier.


  • littlebandicoot likes this

"Always do right. This will gratify some people, and astound the rest." -- Samuel Clemens


List of Handy Links   (pinned in the General section)

My Colonies


#16 Offline dspdrew - Posted November 26 2013 - 8:25 AM

dspdrew
  • LocationSanta Ana, CA

Nice. I gotta admit, that drilling part was funny. :snicker:


You should get a stepper bit, they make drilling into soft materials like plastic REALLY easy. Without using a drill press, regular dill bits dig in too quickly and can sometimes crack or completely destroy the container.

titanium-metric-self-starting-495.jpg


  • noebl1 and antsriondel like this

#17 Offline Crystals - Posted November 26 2013 - 9:36 AM

Crystals

    Advanced Member

  • Moderators
  • PipPipPip
  • 2,049 posts
  • LocationAthabasca, AB (Canada)

I couldn't believe how much trouble it gave me.   :rolleyes:   

I had just finished drilling 15 others with no issues, but then I sharpened the bit so it was probably too sharp.

I may have to look at a stepper bit, but they are so hard to sharpen that I may just stick with my drill and go more slowly - or else use my drill press.


"Always do right. This will gratify some people, and astound the rest." -- Samuel Clemens


List of Handy Links   (pinned in the General section)

My Colonies


#18 Offline shadowblue898 - Posted February 21 2014 - 12:36 AM

shadowblue898

    Newbie

  • Members
  • Pip
  • 2 posts

It is a football display case from Michaels. 
It had tempered glass, which of course shattered when we tried to drill it.  We replaced the piece with acrylic and siliconed it in.  I had the lid ordered from the glass company, I siliconed the mesh on and attached a dresser drawer handle.  I can't believe how easily acrylic scratches...  Next time I am using glass and just drilling several round holes for ventilation.
 
My family is more accepting of "odd" pets when they are in a fancy enclosure.

If you are going to store formicariums made from solid grout, ensure you dampen them occasionally as the grout may crack if it dries out completely.
 
I add a syringe-full of water to mine every month.  I make quite a few at a time, so I wrap them in scraps of cloth or towels and put them in cardboard boxes.


I think I may have to try making a formicarium out of firebrick one day.


I tried the firebrick after watching your video I think the brick is to dense I couldn't do anything to it

#19 Offline shadowblue898 - Posted February 21 2014 - 12:37 AM

shadowblue898

    Newbie

  • Members
  • Pip
  • 2 posts
Maybe I got the wrong kind

#20 Offline Crystals - Posted February 21 2014 - 7:01 AM

Crystals

    Advanced Member

  • Moderators
  • PipPipPip
  • 2,049 posts
  • LocationAthabasca, AB (Canada)

Was it actually firebrick?  A fired ceramic?  Not a cement brick?

They are usually inside by the firelogs.   They must be made from clay/ceramic.  You will notice that they are much lighter than common cement bricks.

Sometimes called a refractory brick.


They are very porous and I can even use pliers to crush pieces that are 1cm wide.  If you can't cut through it, either you aren't using an engraving/carving bit or you have a cement brick.


These are the engraving/carving bits I use: http://ecx.images-amazon.com/images/I/416JK7%2BvjJL.jpg

They should have the carving edges to them.  Many dremel bits are made from soft fired ceramic, which won't do any damage to a hard fired ceramic. 


This site shows some firebricks: http://homehardware....N?Ntt=firebrick

They come in 5 common sizes:   

8" x 4" x 1.25"

9" x 4.5" x 1.25"  (I use this one, also called a firebrick "split")

9" x 4.5" x 2.5"

9" x 4.5" x 3"

9" x 4.5" x 4"


I got mine from Canadian Tire, but most fireplace or wood stove suppliers will carry them.


I should probably make a photo-how-to on firebrick to go with my videos, so people have a place to post questions.

I will put it on my To-Do list.


"Always do right. This will gratify some people, and astound the rest." -- Samuel Clemens


List of Handy Links   (pinned in the General section)

My Colonies


2 user(s) are reading this topic

0 members, 2 guests, 0 anonymous users