- Formiculture.com
- Forums
- Gallery
- Members
- Member Map
- Chat

190 replies to this topic
#41
 Offline
-
Posted February 4 2015 - 1:27 AM
I posted another little Hydrostone/cement experiment I did over on my Formicarium #5 thread, since it was more relevant to that design. It seems no matter what mixture of Hydrostone and cement used, it still "sweats" and dissolves. There were also some other strange problems. So basically, it looks like cement really might just be the best material for all of this in my opinion. You can see that post here (https://www.formicul...1-2015/?p=11607).
#42
 Offline
-
Posted February 4 2015 - 6:07 PM
I think you are way too impatient and need to let it cure for a week or more
#43
 Offline
-
Posted February 4 2015 - 7:09 PM
What exactly are you referring to?
#44
 Offline
-
Posted February 4 2015 - 8:25 PM
What exactly are you referring to?
You said no matter what you do it still sweats and dissolves. I've never seen hard cement dissolve.
#45
 Offline
-
Posted February 5 2015 - 12:12 AM
Oh yeah, it's the Hydrostone. If you mix Hydrostone in with it, you will see it.
#46
 Offline
-
Posted February 5 2015 - 11:03 AM
The extremely low pH of cement would probably have harmful effects on resident colonies. I have read about many "mass die-offs" as a result of using cement formicaria. If you do decide to try this, I would let the mix cure for at least a couple of months beforehand.
Edited by Myrmicinae, February 5 2015 - 11:04 AM.
#47
 Offline
-
Posted February 5 2015 - 1:21 PM
The extremely low pH of cement would probably have harmful effects on resident colonies.
Cement has an extremely high pH when uncured, and slightly high when cured. At no point does cement have a low pH. Either way, extremely high or low pH can be harmful, so yes, it is a good idea to make sure the cement is cured before using it.
I have read about many "mass die-offs" as a result of using cement formicaria.
What exactly was their evidence that the cement actually caused the deaths? Can you tell me where I can read some of this? It seems if cement was toxic enough to cause "mass die-offs" then the Argentine ant problem would have been over years ago. I do notice in this hobby people frequently jump to conclusions. Correlation does not imply causation.
#48
 Offline
-
Posted February 5 2015 - 3:21 PM
After doing more research on portland cement, I found that Ytong is hardly different than regular concrete and just like it, consists of portland cement as the basic ingredient. The only difference is how it is formed.
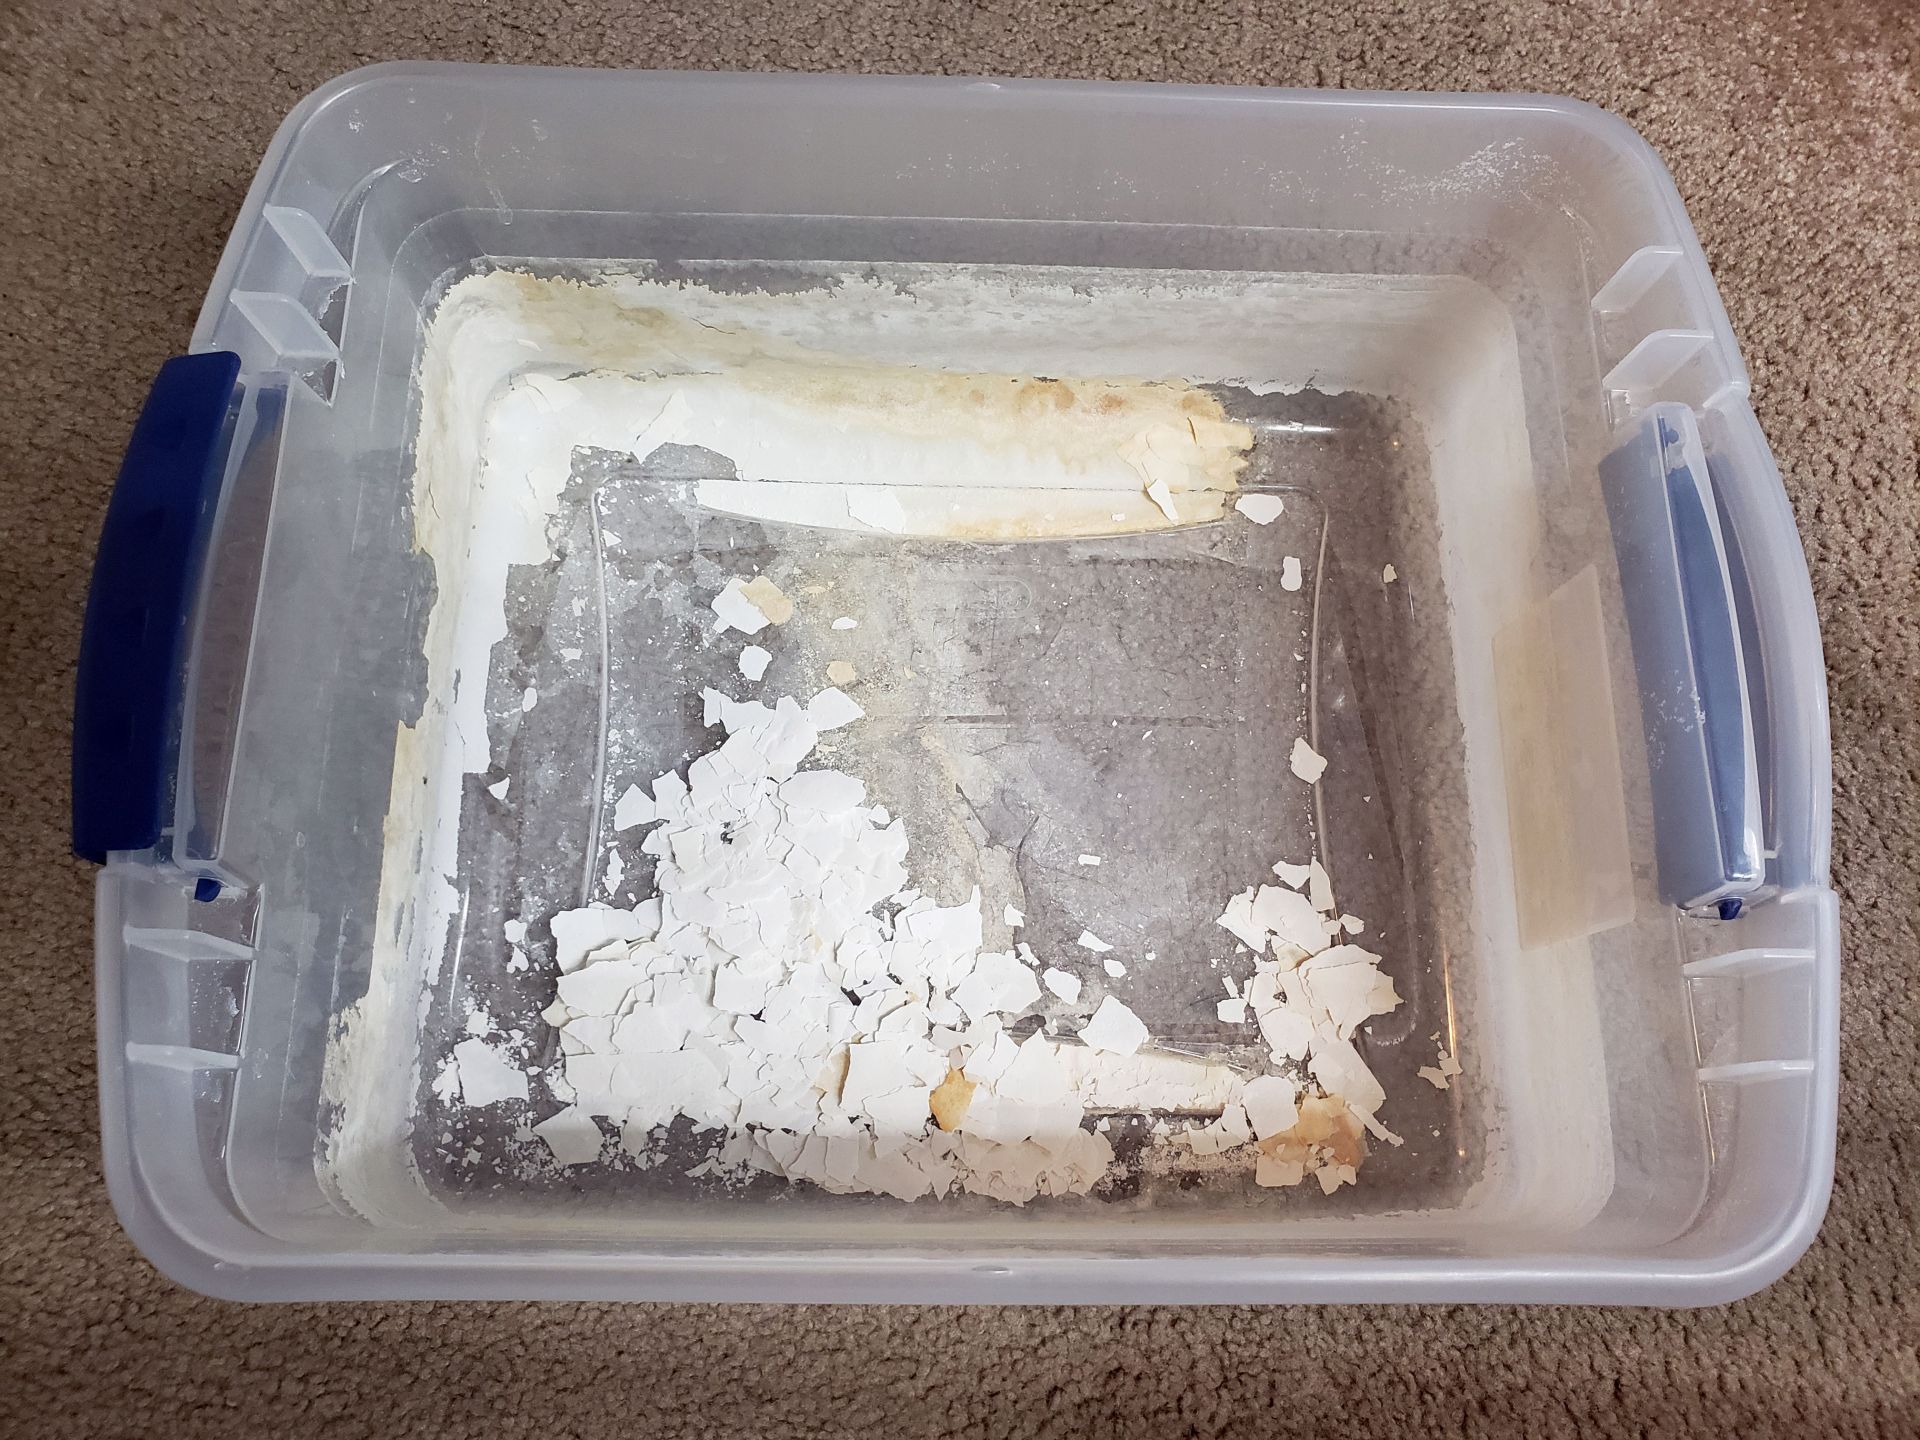
Edit: I had a very large item made out of Hydrostone soaking in water for a very long time, and look at the coating that solidified on the bin. It's very obvious by now that the gypsum cement is dissolving in the water.
Edited by dspdrew, November 22 2023 - 8:04 PM.
dspdrew
#49
 Offline
-
Posted February 5 2015 - 4:18 PM
The extremely low pH of cement would probably have harmful effects on resident colonies.
Cement has an extremely high pH when uncured, and slightly high when cured. At no point does cement have a low pH. Either way, extremely high or low pH can be harmful, so yes, it is a good idea to make sure the cement is cured before using it.
I have read about many "mass die-offs" as a result of using cement formicaria.
What exactly was their evidence that the cement actually caused the deaths? Can you tell me where I can read some of this? It seems if cement was toxic enough to cause "mass die-offs" then the Argentine ant problem would have been over years ago. I do notice in this hobby people frequently jump to conclusions. Correlation does not imply causation.
Sorry about that. I meant "high pH."
Mack (Tar Heel Ants) mentioned in an earlier thread that none of his colonies ever survived when placed in portland cement formicaria. That said, as I recall, he only allowed the nests to cure for a couple of weeks. I have heard similar stories from others on the Yuku forums. Curing time is probably an important factor here, as alkalinity of cement declines quickly with age. This aspect is taken into consideration during the construction of "fake rock" ornaments for aquaria. They are always allowed to cure (often in circulating water) for a few months to decrease pH to acceptable levels.
Note: Chemistry happens to be the field of science that makes the least sense to me, so please take all I have said "with a grain of salt."
Edited by Myrmicinae, February 5 2015 - 4:29 PM.
- Miles likes this
#50
 Offline
-
Posted February 25 2015 - 8:28 AM
Okay, so almost a month has gone by since I started testing out the new fungus container with the cement floor, and it's not working so great. Nothing seems to have harmed the ants at all, but there's just not enough moisture.
For the first week the ants continued to add substrate to the fungus, but then stopped and didn't do anything more to it. I noticed they never seemed to do much standing on the fungus garden itself like all the other colonies, but instead would just stand next to it all the time. Finally after about two weeks had gone by, it looked like it was starting to dry out a bit, and then yesterday it finally started to die. When I put a couple drops of water in there, the ants immediately started drinking it as if they were dying of thirst. I think it's pretty obvious the container is just way too dry.
Even though cement changes color, making it clear that it's absorbing water, it seems to be such a small amount, that it still feels dry to the touch. I think even though the humidity at first was about the same as it was using any of the other materials, the humidity right on the surface was probably much lower in comparison to the others because the cement is so dry. Also, I don't know if this is true, but it seems like as the cement continues to cure, it gets less and less permeable. Once I get the colony moved to the next container to be tested, I'll check the humidity of this cement container again and see if it has changed at all since it's original reading.
The only option this leaves me with is the ceramic tile again. Instead of pouring cement around the edges of the tiles, this time I used resin. I did try some resin once the first time, but the gaps on the edges were so thin, it was almost impossible to pour the resin in there without getting it all over the tile and the sides of the container. One major problem is when the stream of resin gets very thin, static electricity makes it fly over onto the side of the container. I tried squirting it out of a little pipette, which worked better but still wasn't good enough. This time I left a larger gap between the tile and the sides of the container, and with the help of the pipette again, I was able to squirt the resin into it without making any mess at all.
Over all, this doesn't look too bad, and I'm pretty sure it's going to function fine, since these tiles absorb water almost as well as Hydrostone. One thing I don't like is the pinkish color of these particular tiles. I have another tile I got from Amazon that was more of a pure white, but unfortunately those are a bit more expensive.
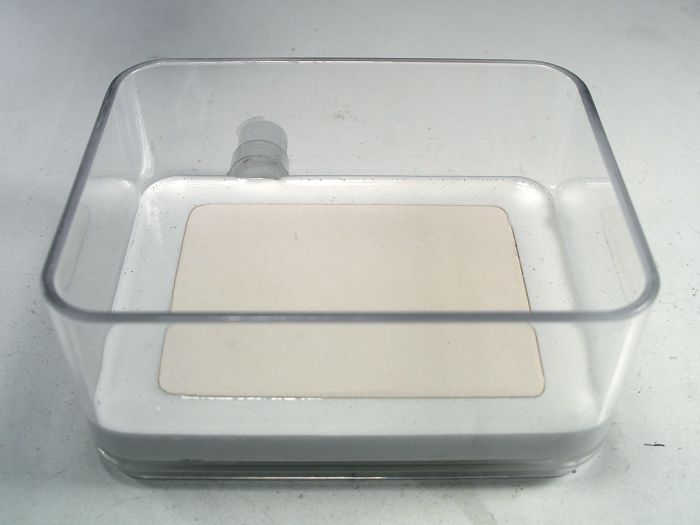
Here you can see the water absorbing into the tile. This happens within seconds with these tiles, a lot like Hydrostone.
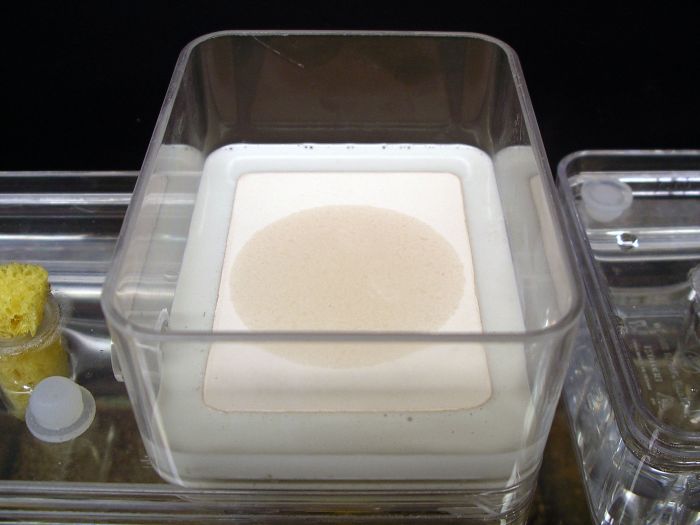
I'll be moving the colony into this later today, if I think the resin has cured enough.
As for the water tanks, I decided I am going to start designing them all with three ports instead of one. This way the same tank can be used for the larger versions of these I plan on designing next. This would also allow you to setup two nests and have them connected together if you wanted to move a colony between them or something. I can also use the same water tanks for other things that need hydration, like my springtail cultures for instance. I'll just use some plugs to cover any ports that aren't being used.
Making these with three water ports means the screw-top mouth will have to go (since it would obviously interfere with any container I would try to set over the center port. Instead I'm just going to use a smaller hole for the mouth with a very low profile rubber plug. This hole will be in the corner too, making them much easier to empty them.
I found the perfect little plug, and ordered what I thought would be a hand-full of them, only to find out I paid $4.50 for a single tiny 8 mm plug.
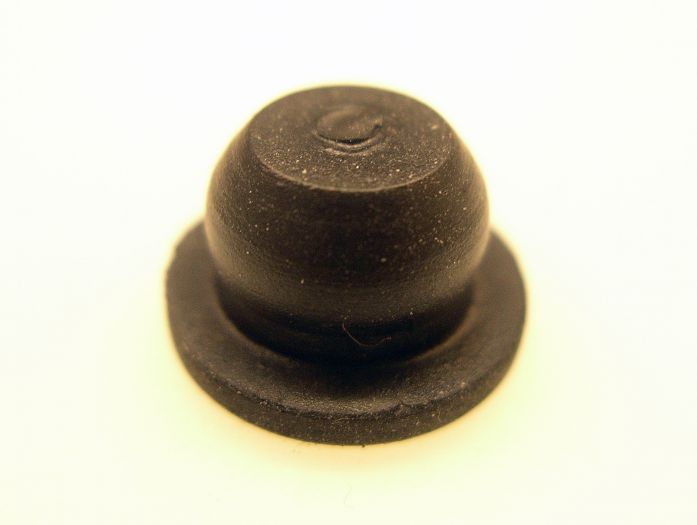
I was pretty pissed, but that just gave me an even better idea. Since these plugs were black, and I would have preferred something more translucent to match the tank better, I just made a mold from the one I got, and then poured a whole bunch of them myself using translucent silicone.
I started with a resin mold of one.
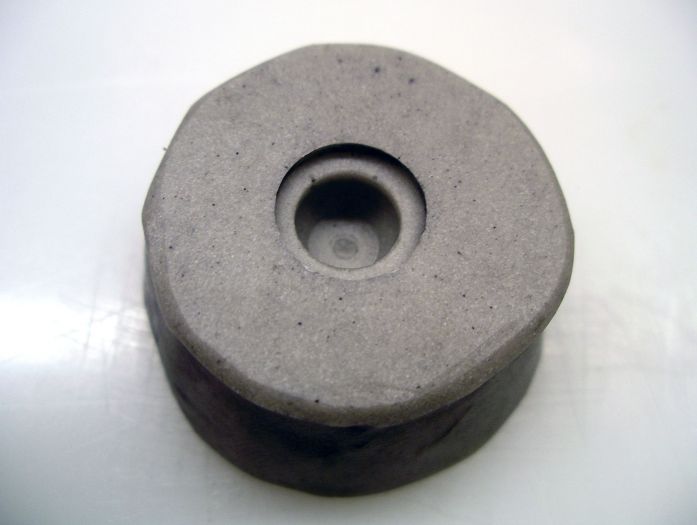
Then once I had four made, I lined them up inside a small square plastic container and made a silicone mold from all of them.
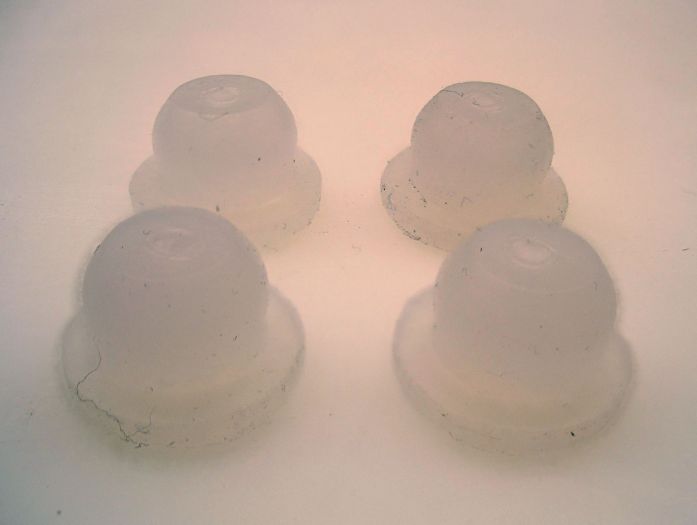
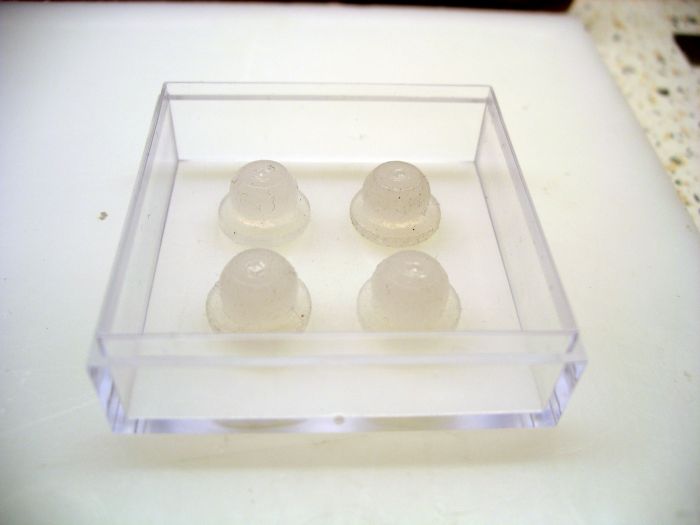
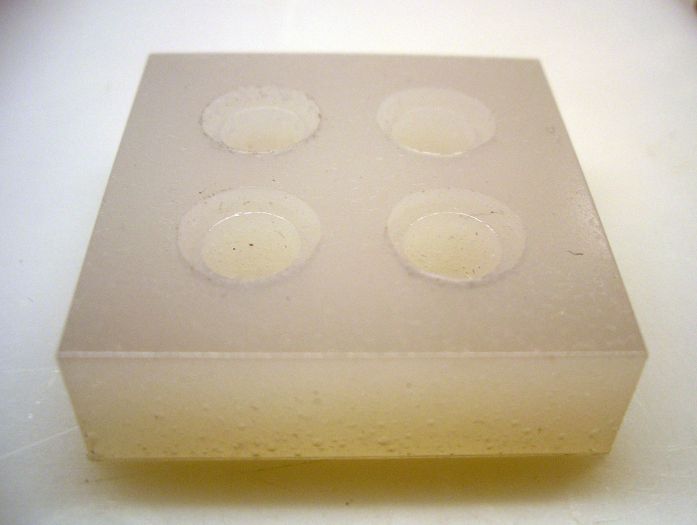
These plugs are working great, and cost me hardly anything. Now I just have to create the plug for the water ports, and the tanks will be complete.
For the first week the ants continued to add substrate to the fungus, but then stopped and didn't do anything more to it. I noticed they never seemed to do much standing on the fungus garden itself like all the other colonies, but instead would just stand next to it all the time. Finally after about two weeks had gone by, it looked like it was starting to dry out a bit, and then yesterday it finally started to die. When I put a couple drops of water in there, the ants immediately started drinking it as if they were dying of thirst. I think it's pretty obvious the container is just way too dry.
Even though cement changes color, making it clear that it's absorbing water, it seems to be such a small amount, that it still feels dry to the touch. I think even though the humidity at first was about the same as it was using any of the other materials, the humidity right on the surface was probably much lower in comparison to the others because the cement is so dry. Also, I don't know if this is true, but it seems like as the cement continues to cure, it gets less and less permeable. Once I get the colony moved to the next container to be tested, I'll check the humidity of this cement container again and see if it has changed at all since it's original reading.
The only option this leaves me with is the ceramic tile again. Instead of pouring cement around the edges of the tiles, this time I used resin. I did try some resin once the first time, but the gaps on the edges were so thin, it was almost impossible to pour the resin in there without getting it all over the tile and the sides of the container. One major problem is when the stream of resin gets very thin, static electricity makes it fly over onto the side of the container. I tried squirting it out of a little pipette, which worked better but still wasn't good enough. This time I left a larger gap between the tile and the sides of the container, and with the help of the pipette again, I was able to squirt the resin into it without making any mess at all.
Over all, this doesn't look too bad, and I'm pretty sure it's going to function fine, since these tiles absorb water almost as well as Hydrostone. One thing I don't like is the pinkish color of these particular tiles. I have another tile I got from Amazon that was more of a pure white, but unfortunately those are a bit more expensive.

Here you can see the water absorbing into the tile. This happens within seconds with these tiles, a lot like Hydrostone.

I'll be moving the colony into this later today, if I think the resin has cured enough.
As for the water tanks, I decided I am going to start designing them all with three ports instead of one. This way the same tank can be used for the larger versions of these I plan on designing next. This would also allow you to setup two nests and have them connected together if you wanted to move a colony between them or something. I can also use the same water tanks for other things that need hydration, like my springtail cultures for instance. I'll just use some plugs to cover any ports that aren't being used.
Making these with three water ports means the screw-top mouth will have to go (since it would obviously interfere with any container I would try to set over the center port. Instead I'm just going to use a smaller hole for the mouth with a very low profile rubber plug. This hole will be in the corner too, making them much easier to empty them.
I found the perfect little plug, and ordered what I thought would be a hand-full of them, only to find out I paid $4.50 for a single tiny 8 mm plug.

I was pretty pissed, but that just gave me an even better idea. Since these plugs were black, and I would have preferred something more translucent to match the tank better, I just made a mold from the one I got, and then poured a whole bunch of them myself using translucent silicone.
I started with a resin mold of one.

Then once I had four made, I lined them up inside a small square plastic container and made a silicone mold from all of them.


These plugs are working great, and cost me hardly anything. Now I just have to create the plug for the water ports, and the tanks will be complete.
#51
 Offline
-
Posted February 25 2015 - 7:26 PM
So I checked the humidity in the container with cement, and it's not going above 75 percent. This is probably just not enough humidity, and the reason the fungus and brood died.
#52
 Offline
-
Posted February 25 2015 - 8:00 PM
Just an idea, what would happen to the concrete if some perlite was added?
#53
 Offline
-
Posted February 25 2015 - 8:21 PM
It would never be able to be poured an eighth of an inch thick. Also, I don't think perlite absorbs water, and even if it did, being surrounded by cement, would stop any movement of water through the material.
#54
 Offline
-
Posted February 25 2015 - 9:17 PM
That looks really good, the resin turned out nice. I'm anxious to hear the humidity report on this soon.
#55
 Offline
-
Posted February 26 2015 - 5:20 AM
Then why does it work with grout?
#56
 Offline
-
Posted February 26 2015 - 5:32 AM
Grout is probably more permeable in the first place. Also, I'm not sure if the grout you are talking about was an eighth of an inch thick. to get a layer that thin, the perlite would need to be crushed, and the smaller the particles, the weaker it makes the cement/grout. I actually tried powdered perlite mixed with cement once, and it was about as hard as dried mud.
#57
 Offline
-
Posted March 1 2015 - 12:53 AM
So far the new tile/resin design is working great. I moved the test colony into it, and at first one of the only two workers died, but I don't think it was related to the nest. I gave them a new chunk of fungus and two pupae from one of the other colonies.
Even though these seem to be the solution, I still don't like the way they look, and I don't like the idea of a non-permeable area around the edges, so I decided to just try using a tile, but pouring Hydrostone around it, and over the top about 1/8 inch deep, similar to the original design. This should distribute the erosion to a larger surface area, and if it eventually does break through, it will only be a hole 1/8 inches deep to the surface of the tile. This of course wouldn't be any risk to the ants, only a risk to the nice look of the nest. I made two nests like this, and poured Hydrostone over one of the tile/resin versions, essentially making it into one too. While I was at it, I also made one nest that has nothing more than a piece of ultra fine nylon mesh covering the port, with a 2 mm thick white PVA sponge laying in the bottom of the container. I want to see if the ants ever try to chew into the sponge floor.
I moved all of my colonies into these new nests. They all seem to be doing just fine after the move, except the ones in the container with the sponge in the bottom. Just like what happened at first with my other formicarium, the ants don't seem to like the PVA sponge, and won't get near it. This means all the ants that were on the fungus at the time of the move are still crawling around on the fungus and don't seem to want to step off it. The ants that were in the tube or the foraging container won't enter the fungus container. They go right up to it, but stop there. They've even started piling up substrate right at the entrance to the container. I'm going to keep close watch on this colony, and if they don't start to get used to the sponge (I assume it's something they are smelling) soon enough, I'll take them out and put them in one like the others before their fungus garden is at risk.
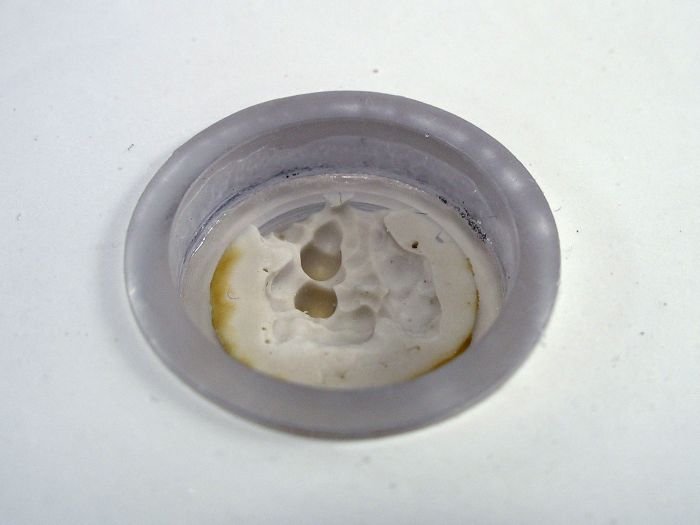
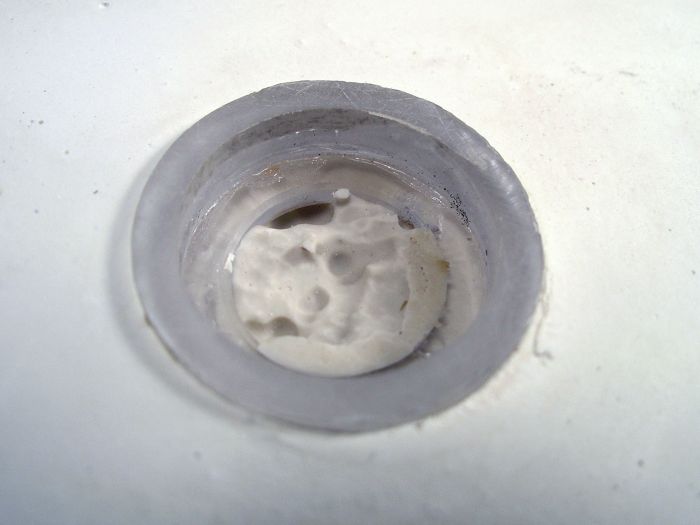
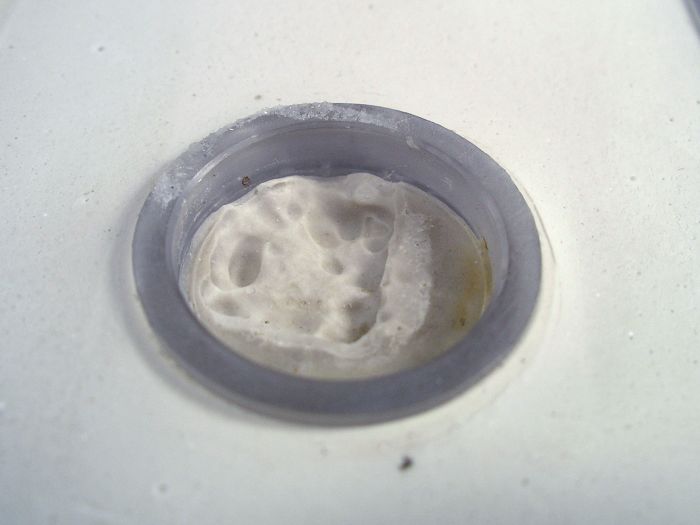
While I was making these changes to the nests, I got a few pictures of the ports on the bottoms. You can see how much of the Hydrostone has dissolved in just a few months.
#58
 Offline
-
Posted March 1 2015 - 11:41 AM
That is so trippy how that is happening. Who knew that would be such a big pain in the butt.
#59
 Offline
-
Posted March 1 2015 - 3:07 PM
Yeah, for real. I never had any idea it would be this much of a pain. I thought this all seemed like it would be pretty cut and dry.
#60
 Offline
-
Posted March 1 2015 - 6:23 PM
Okay this is pretty funny. I think I'm going to scrap the PVA sponge idea. PVA sponges work great in formicariums, but I don't think they are the best thing to have ants walking around on. Apparently they really don't like them. I don't know what it is, but if you've ever seen a dog walk around after having someone stuck boots on its feet, you pretty much know what it looks like to see ants walking on a PVA sponge. At least Acromyrmex versicolor.
- ryanp347 likes this
Also tagged with one or more of these keywords: formicarium, container, out world, enclosure, how-to, diy, design, nest, dspdrew, tutorial
 |
Ant Keeping →
General Ant Keeping →
Will this nest be enough for my dorymyrmex?Started by rainout , Jan 21 2026 |
|

|
|
 |
Ant Keeping →
General Ant Keeping →
bmb1bee's Fossil FormicariaStarted by bmb1bee , Jan 9 2026 |
|
|
|
Market Place →
General Market Place →
FormiFactory's Nest ShopStarted by FormiFactory , Dec 8 2025 |
|

|
||
Off-Topic →
General Off-Topic →
3D printing Corner!Started by OwlThatLikesAnts , Nov 10 2025 |
|
|
||
Market Place →
General Market Place →
Possible THA Formicarium for sale in ArizonaStarted by sacs4010 , Aug 20 2025 |
|

|
1 user(s) are reading this topic
0 members, 1 guests, 0 anonymous users


