Jump to content

  • Chat
  •  
  •  

Welcome to Formiculture.com!

This is a website for anyone interested in Myrmecology and all aspects of finding, keeping, and studying ants. The site and forum are free to use. Register now to gain access to all of our features. Once registered and logged in, you will be able to create topics, post replies to existing threads, give reputation points to your fellow members, get your own private messenger, post status updates, manage your profile and so much more. If you already have an account, login here - otherwise create an account for free today!

Photo

I tried making a formicarium.


  • Please log in to reply
10 replies to this topic

#1 Offline FSTP - Posted November 12 2016 - 7:27 PM

FSTP

    Advanced Member

  • Members
  • PipPipPip
  • 1,032 posts
  • Location36.7378° N, 119.7871° W

Well I tried making a formicarium. It didn't come out as good as I would have liked but it was only my first try. I have no use for one yet, but I suppose its good to start building some to get an idea how its done before I actually need one.


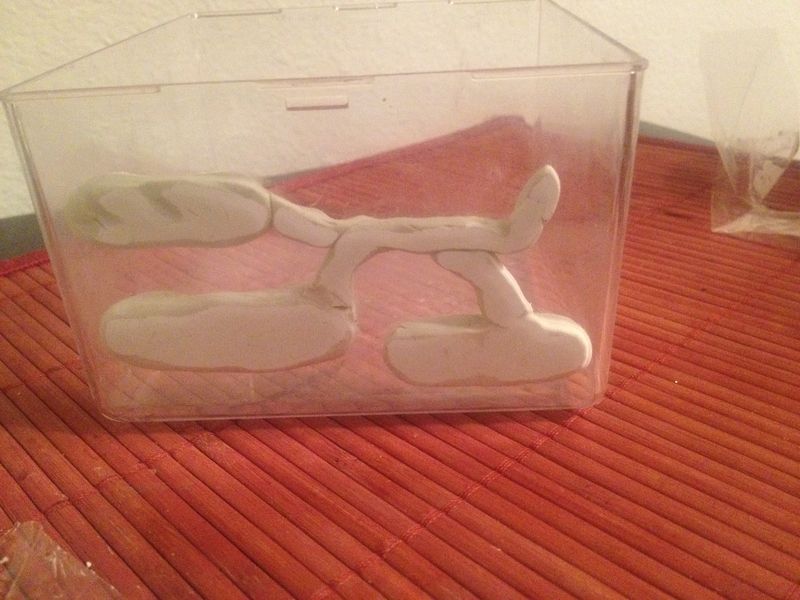
I used hydrostone and molding clay to make the molds, inside a small plastic container with a nice tight fitting lid.


Here is a picture of some of the chambers. Its all dirty because I was working with it.


buildform_zps3buayvsg.jpg


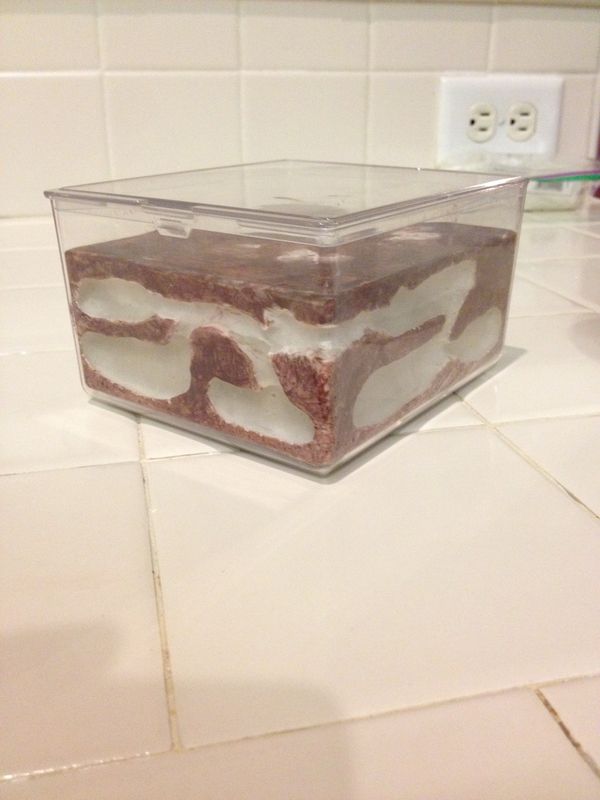
Then here it is finished. I painted it with non-toxic paint per Crystals how-to. Aside from the chambers you can see, there are three small chambers that are accessible with a syringe and needle to fill with water for hydration.


form2_zpsdbbqhhjn.jpg


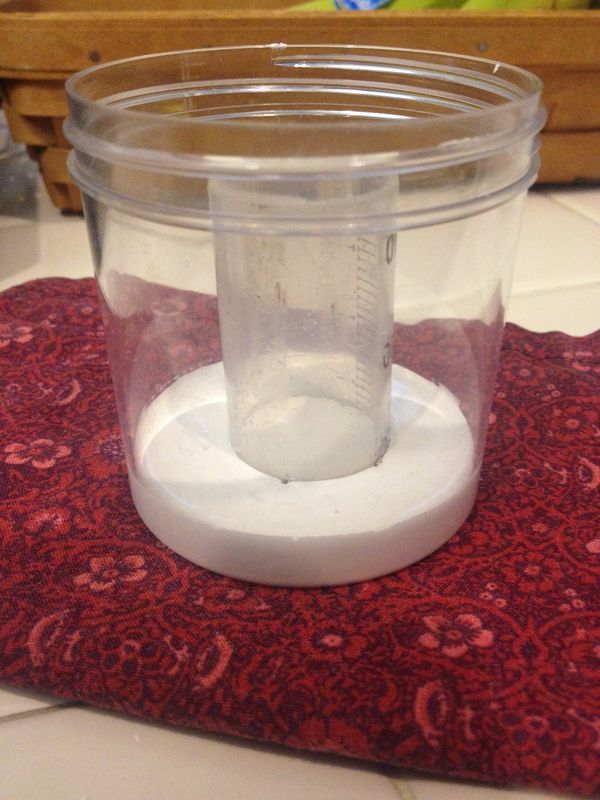
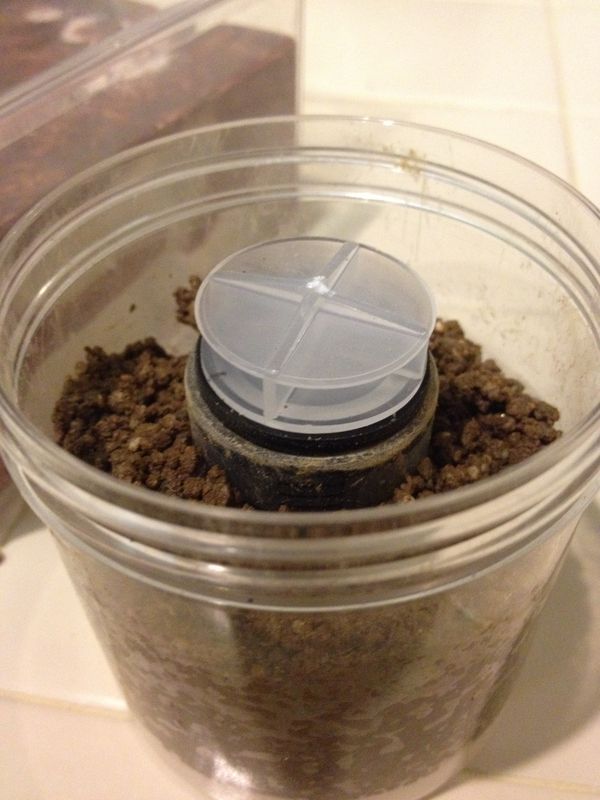
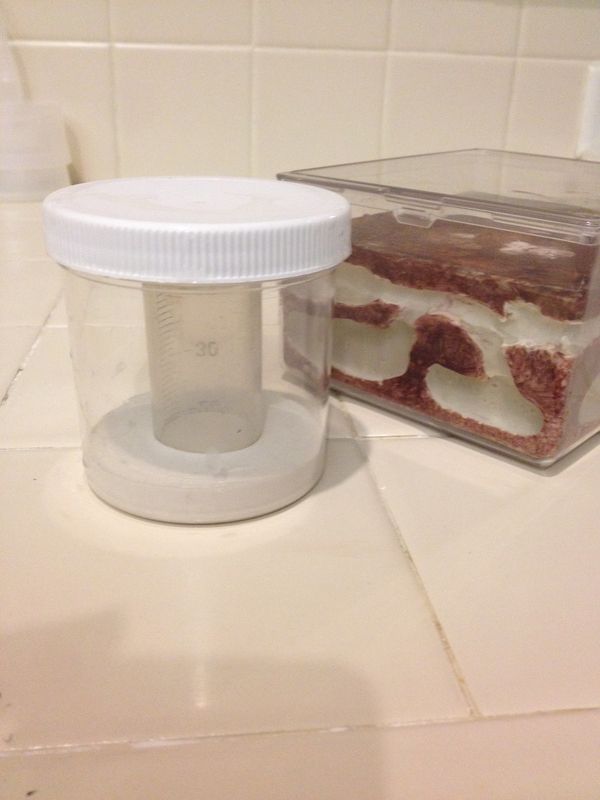
I also made a small Soil Founding formicarium. It has hydrostone on the bottom with a tube in the center for water I cut from a 60ml syringe. 


dirtform_zpswvm2f7bx.jpg


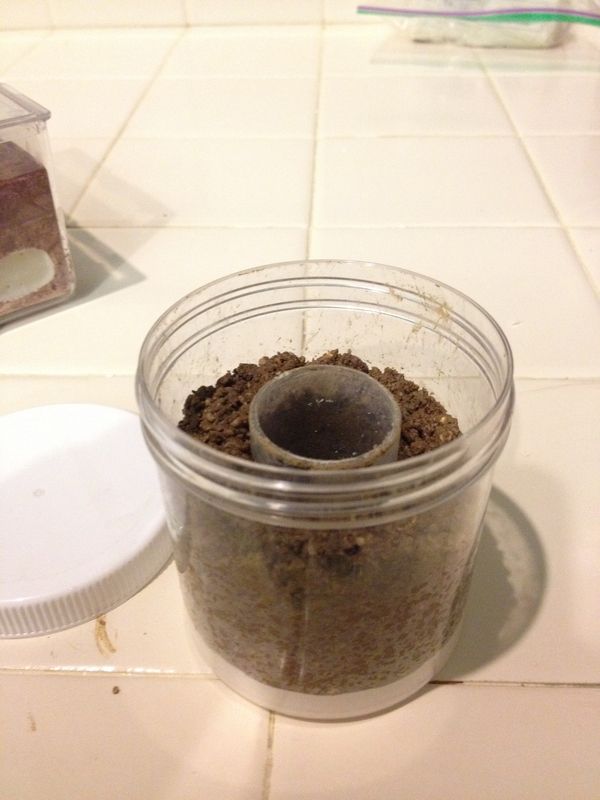
here it is with soil I used Drews recipe and method for the soil.


dirtform2_zpsbcueheqe.jpg


here is the water resivoir with a stopper I made out of a syringe plunger.


dirtform3_zps9giaprbs.jpg


Both of them together


forms1_zpsvwyqbj6l.jpg


Would love to here you guys criticisms.


Thanks,

Jess


  • ctantkeeper likes this

#2 Offline Loops117 - Posted November 12 2016 - 8:57 PM

Loops117

    Advanced Member

  • Members
  • PipPipPip
  • 802 posts
  • LocationSouth Lyon, Michigan

I think you did an awesome job.


#3 Offline T.C. - Posted November 12 2016 - 9:02 PM

T.C.

    Advanced Member

  • Members
  • PipPipPip
  • 3,099 posts

I think it looks fine! What kind of paint are you using on that?


  • ctantkeeper likes this

#4 Offline ctantkeeper - Posted November 12 2016 - 10:10 PM

ctantkeeper

    Advanced Member

  • Members
  • PipPipPip
  • 704 posts
  • LocationCT

awesome job!!!


#5 Offline fortysixandtwo - Posted November 13 2016 - 1:46 AM

fortysixandtwo

    Advanced Member

  • Members
  • PipPipPip
  • 98 posts
  • LocationNor Cal

Looks great to me. Nice work.


#6 Offline FSTP - Posted November 14 2016 - 11:24 AM

FSTP

    Advanced Member

  • Members
  • PipPipPip
  • 1,032 posts
  • Location36.7378° N, 119.7871° W

Thanks guys! there's some things I want to try differently with the next one. I'd like better defined chambers, so I have a few ideas I'm going to try on the next one.


#7 Offline T.C. - Posted November 14 2016 - 11:37 AM

T.C.

    Advanced Member

  • Members
  • PipPipPip
  • 3,099 posts

Thanks guys! there's some things I want to try differently with the next one. I'd like better defined chambers, so I have a few ideas I'm going to try on the next one.

What paint is that? I want to get some!


#8 Offline Crystals - Posted November 14 2016 - 11:57 AM

Crystals

    Advanced Member

  • Moderators
  • PipPipPip
  • 2,049 posts
  • LocationAthabasca, AB (Canada)

Looks good.


  • ctantkeeper likes this

"Always do right. This will gratify some people, and astound the rest." -- Samuel Clemens


List of Handy Links   (pinned in the General section)

My Colonies


#9 Offline Kevin - Posted November 14 2016 - 12:37 PM

Kevin

    Advanced Member

  • Members
  • PipPipPip
  • 833 posts
  • LocationSouth Jersey

One tip I have for you next time, carve your tunnels deeper if possible. I like to make them as deep as possible, then carve up and down in the back to make a little ridge. It's good for extra room and provides a dark area that you can still see into. Otherwise, it looks great!

Here's a diagram of what I mean. The arrows show your line of vision and how they can see into the dark areas, and the transparent grey is where it is darker from shadows.

http://imgur.com/a/y6nAy


Edited by Kevin, November 14 2016 - 12:40 PM.

Hit "Like This" if it helped.


#10 Offline FSTP - Posted November 14 2016 - 3:43 PM

FSTP

    Advanced Member

  • Members
  • PipPipPip
  • 1,032 posts
  • Location36.7378° N, 119.7871° W

Thanks everyone!


One tip I have for you next time, carve your tunnels deeper if possible. I like to make them as deep as possible, then carve up and down in the back to make a little ridge. It's good for extra room and provides a dark area that you can still see into. Otherwise, it looks great!

Here's a diagram of what I mean. The arrows show your line of vision and how they can see into the dark areas, and the transparent grey is where it is darker from shadows.

http://imgur.com/a/y6nAy


Its funny you say that. This is exactly what I was referring to in post #8 when I said there was some things I'd like to change in the chamber design in my next one.


Thanks guys! there's some things I want to try differently with the next one. I'd like better defined chambers, so I have a few ideas I'm going to try on the next one.

What paint is that? I want to get some!


It was an non toxic Acylic paint of various brands I got on sale at the local Crafting store.. There was some technique and several colors (black, brown, terra-cotta, beige) involved to get it to look that way. Though I think I could have done a much better job, as I do have experience with this type of painting, but it was kind of just an experiment mostly to see how the mold would come out. What I did was I diluted the paints with a bit of water. Then with a sponge brush randomly blotted down a base of black and let it slightly dry for about a minute. Then did the same thing with the brown. Then the terra-cotta, then finally the beige. Basically going from darkest to lightest getting lighter with each coat.  The idea is to create a random gradient of  similar colors, much like natural rock and dirt. 


Hope that Helps,

Jess


#11 Offline T.C. - Posted November 14 2016 - 8:39 PM

T.C.

    Advanced Member

  • Members
  • PipPipPip
  • 3,099 posts

Thanks everyone!


One tip I have for you next time, carve your tunnels deeper if possible. I like to make them as deep as possible, then carve up and down in the back to make a little ridge. It's good for extra room and provides a dark area that you can still see into. Otherwise, it looks great!

Here's a diagram of what I mean. The arrows show your line of vision and how they can see into the dark areas, and the transparent grey is where it is darker from shadows.

http://imgur.com/a/y6nAy


Its funny you say that. This is exactly what I was referring to in post #8 when I said there was some things I'd like to change in the chamber design in my next one.


Thanks guys! there's some things I want to try differently with the next one. I'd like better defined chambers, so I have a few ideas I'm going to try on the next one.

What paint is that? I want to get some!


It was an non toxic Acylic paint of various brands I got on sale at the local Crafting store.. There was some technique and several colors (black, brown, terra-cotta, beige) involved to get it to look that way. Though I think I could have done a much better job, as I do have experience with this type of painting, but it was kind of just an experiment mostly to see how the mold would come out. What I did was I diluted the paints with a bit of water. Then with a sponge brush randomly blotted down a base of black and let it slightly dry for about a minute. Then did the same thing with the brown. Then the terra-cotta, then finally the beige. Basically going from darkest to lightest getting lighter with each coat.  The idea is to create a random gradient of  similar colors, much like natural rock and dirt. 


Hope that Helps,

Jess

Ok, Thanks :)


1 user(s) are reading this topic

0 members, 1 guests, 0 anonymous users