Jump to content

  • Chat
  •  
  •  

Welcome to Formiculture.com!

This is a website for anyone interested in Myrmecology and all aspects of finding, keeping, and studying ants. The site and forum are free to use. Register now to gain access to all of our features. Once registered and logged in, you will be able to create topics, post replies to existing threads, give reputation points to your fellow members, get your own private messenger, post status updates, manage your profile and so much more. If you already have an account, login here - otherwise create an account for free today!

Photo

Dspdrew's Black Light Trap Research and Design

black light dspdrew trap

  • Please log in to reply
52 replies to this topic

#1 Offline dspdrew - Posted March 27 2014 - 10:07 AM

dspdrew
  • LocationSanta Ana, CA

Black light traps can be a very handy tool in catching queens. I started using one last season, and caught quite a few queens that way. I was just hanging a white sheet on the cab of my truck with a black light laying in the bed shining up on it, but setting this up over and over at every different place I went to was starting to get very old. I decided I needed a nicely built trap that I could quickly and easily set up with little work. Bioquip.com has some nice ones, but their products are rather expensive. Like I do with most things, I decided to just build my own. I figured if I'm making my own, I might as well design one way better than the ones I can buy for the same price. After I finish this, I plan to come up with a very low-priced design next, since I need one or two like that also.

This is a picture of one of the Bioquip traps that I'll be basing my idea on.

2851T-001-12W%20AC%20Universal%20Light%2
 
This link (http://books.google....epage&q&f=false) has a lot of useful information on black light traps. It was a study on black light traps and their effectiveness in capturing a certain type of beetle, but I'm sure most of the information is relevant to any insects caught with these.
 
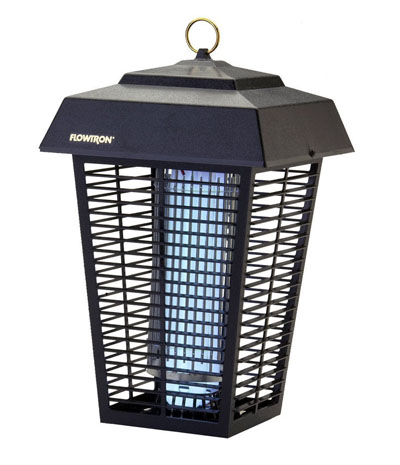
I just bought a bug zapper to start with, because these are obviously already designed to attract and kill the very bugs I want to collect. It already contains the ballasts, UV light bulbs, and the sockets that the bulbs plug into. I went with the Flowtron BK-80D, because it contains two 40 watt bulbs and two 40 watt ballasts. You can find this on Amazon for about 60 dollars. (http://www.amazon.co...flowtron bk-80d). This will give me 80 watts of light, compared to the 12 to 22 watts of lighting you would get from one of Bioquips traps; that means way more light, which means way more insect attraction. I would like this to be portable also, so I decided to tear apart a small desktop UPS and incorporate that into my trap too.
 
I just started this project, and will post everything on this thread as I go.


  • AntsTexas and AntsMissouri like this

#2 Offline dspdrew - Posted March 28 2014 - 5:25 AM

dspdrew
  • LocationSanta Ana, CA
This is the Flowtron BK-80D before taking it apart.
 
gallery_2_137_28940.jpg
 
 
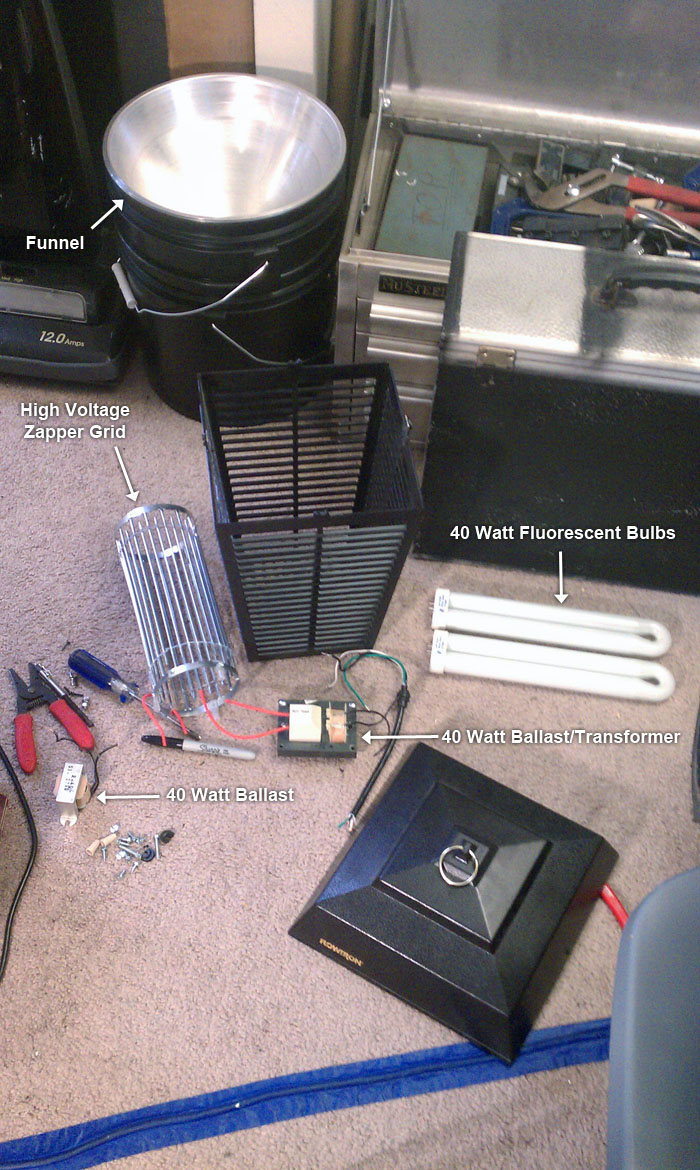
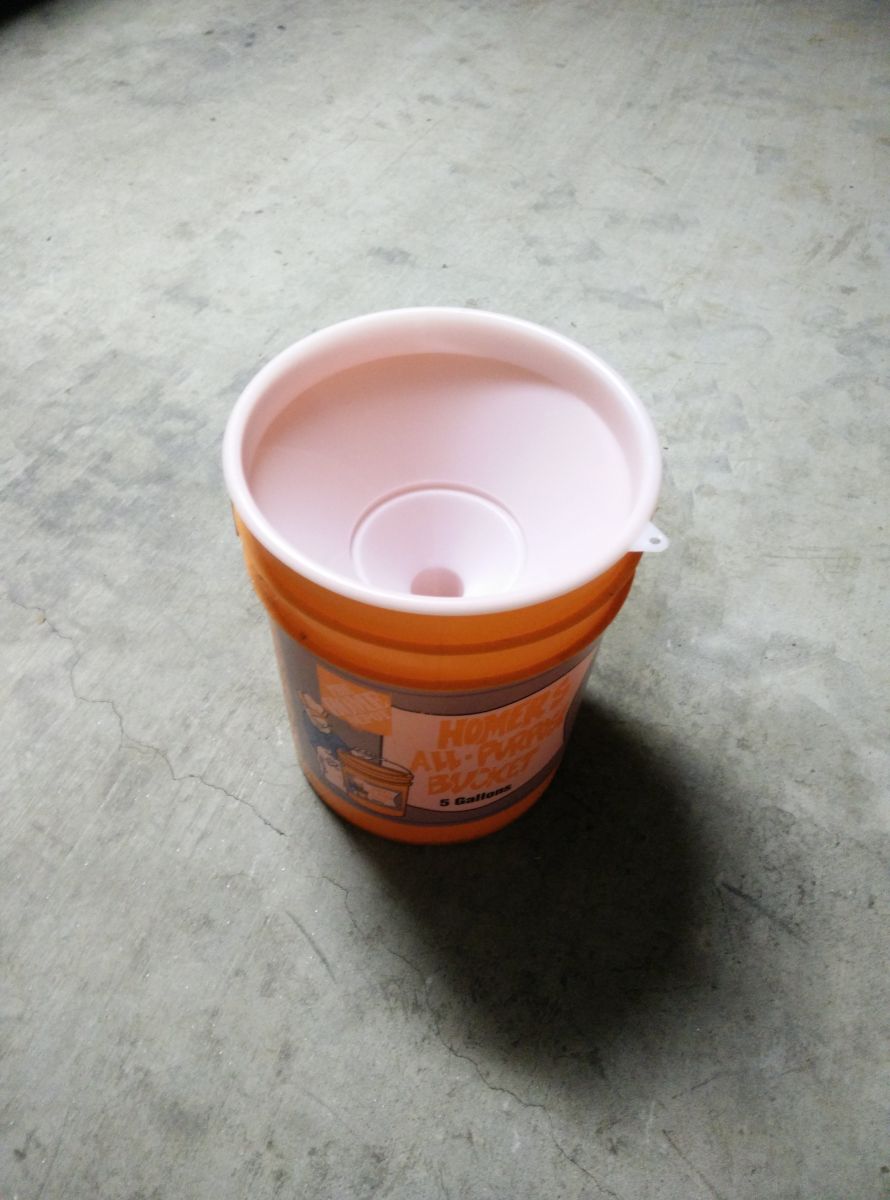
Here it is all disassembled. You can also see the two black buckets I purchased from Home Depot, and the funnel designed to fit inside them perfectly that I got from Bioquip. Even though the price was kind of high (27 dollars), I bought the funnel from them anyway, because that's the one part that only they make, and that I would not be able to fabricate myself.
 
gallery_2_137_37622.jpg
 
 
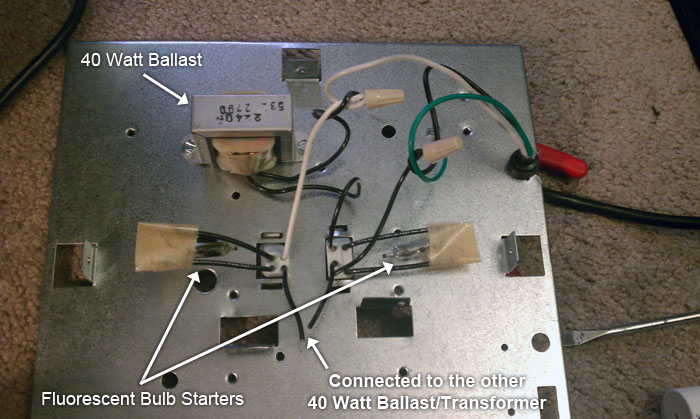
This is the top assembly that contains the 40 watt ballast, and the 40 watt ballast/high voltage transformer, and two fluorescent bulb starters. In this picture I already removed the ballast/transformer combo.
 
gallery_2_137_97956.jpg
  • CrazyLegs likes this

#3 Offline dspdrew - Posted March 28 2014 - 8:09 PM

dspdrew
  • LocationSanta Ana, CA
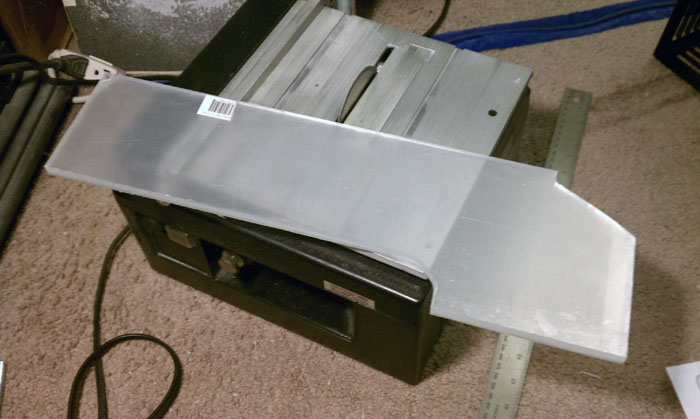
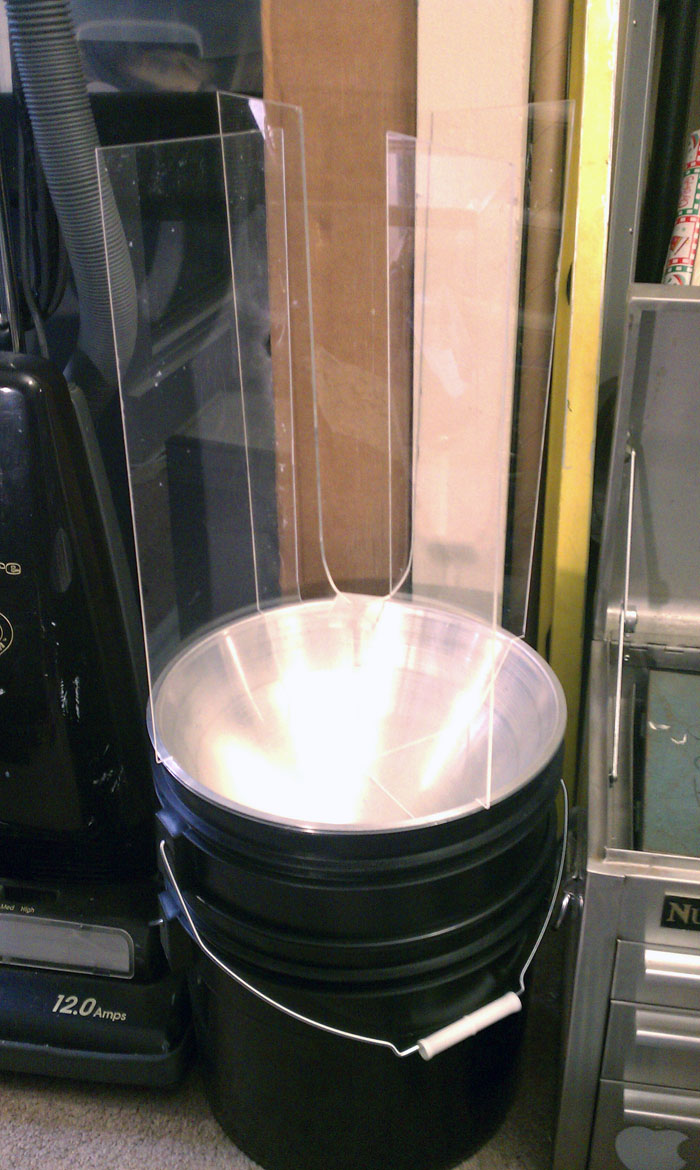
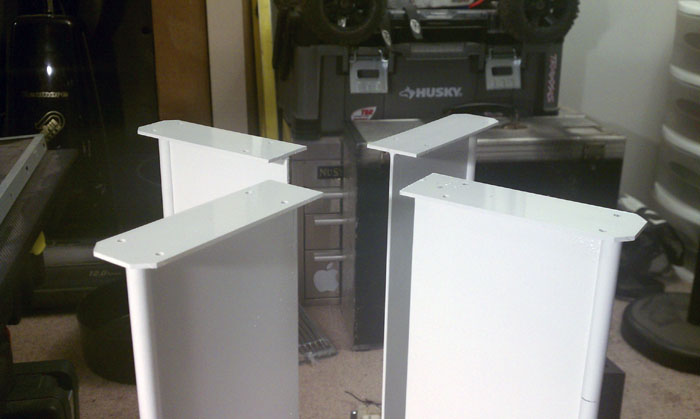
The acrylic baffling is all cut out and fit together now.
 
gallery_2_137_71531.jpg
 
gallery_2_137_176732.jpg

#4 Offline dspdrew - Posted March 30 2014 - 1:32 PM

dspdrew
  • LocationSanta Ana, CA
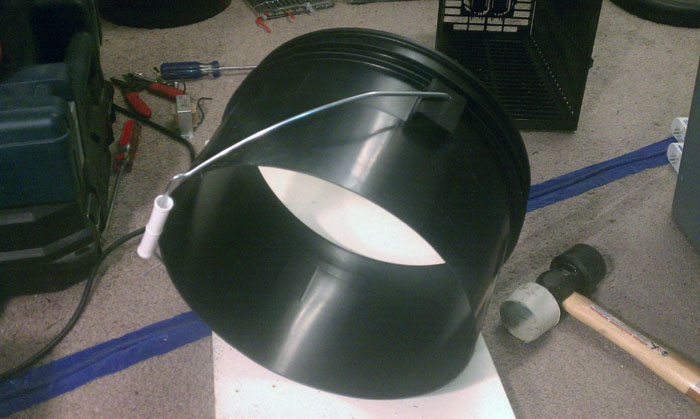
I cut the bottom off one of the buckets so it can be used for he top half of the trap.
 
gallery_2_137_51342.jpg
 
 
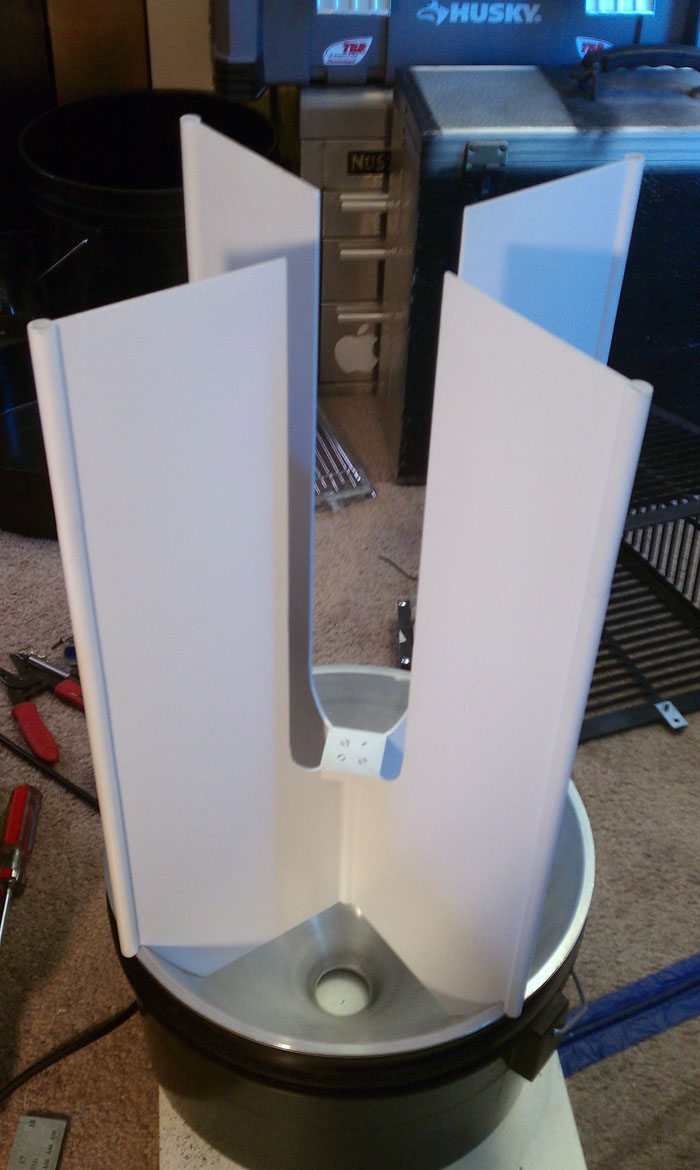
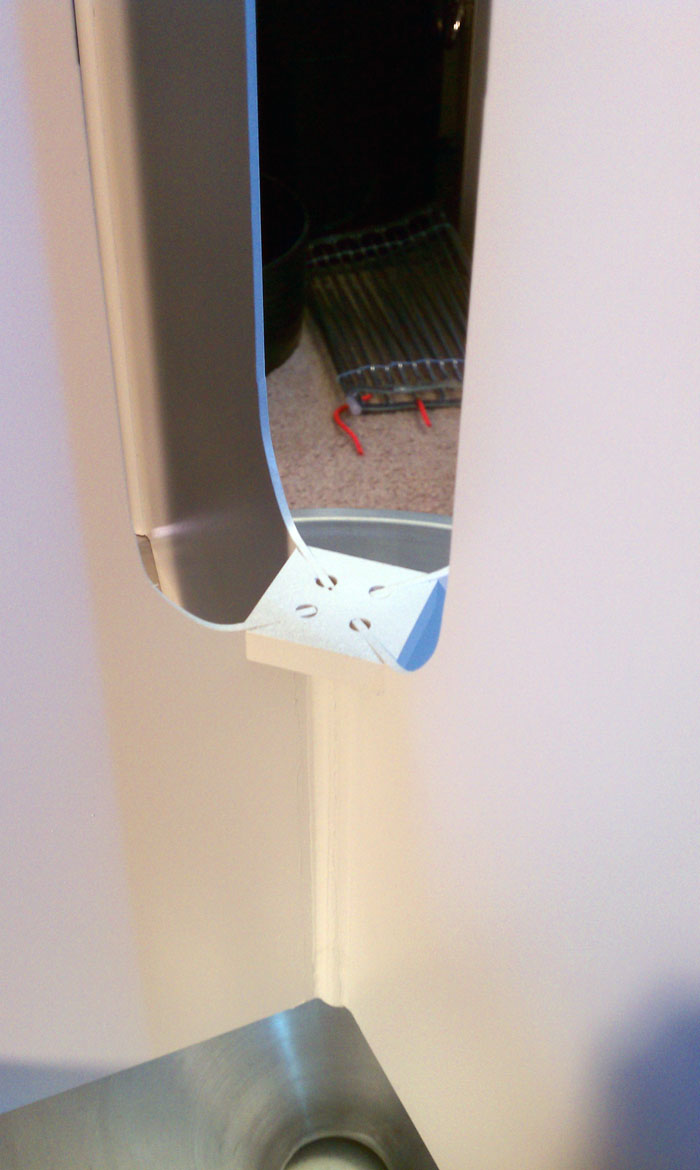
Baffling all reenforced, welded together, and painted.
 
gallery_2_137_89084.jpg
 
gallery_2_137_53535.jpg

#5 Offline jimbodw07 - Posted March 30 2014 - 10:40 PM

jimbodw07

    Advanced Member

  • Members
  • PipPipPip
  • 66 posts
  • LocationHigh Desert, CA

Huh very cool design. I will be watching this. :D


There are two kinds of sufferers in this world:
Those who suffer from a lack of life...and those who suffer 
from an overabundance of life.
-Waking Life

#6 Offline dspdrew - Posted March 30 2014 - 11:47 PM

dspdrew
  • LocationSanta Ana, CA
I guess the baffling wasn't completely finished yet, because it needed the mounts to attach it to the upper assembly. I spent like three hours making them, and then realized they just weren't going to work, so I then had to try to revert everything back to how it was in the beginning, which of course did not leave it in the best of condition. After about four hours of wasted time, and some added imperfections, I then almost had exactly what I had when I started today.
 
My next mounting idea turned out much better.
 
gallery_2_137_30843.jpg
 
 
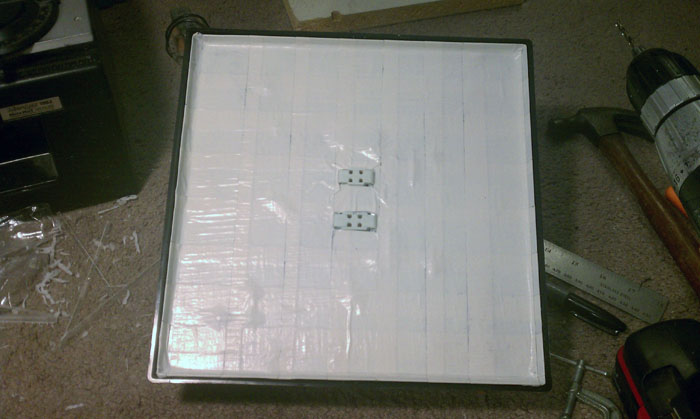
I duct-taped the underside of the upper assembly to seal up all the holes.
 
gallery_2_137_84.jpg
 
 
Now I just have to get the baffling mounted onto the upper assembly.

#7 Offline dspdrew - Posted April 4 2014 - 5:40 AM

dspdrew
  • LocationSanta Ana, CA

Okay, so this nice acrylic baffling piece I spent so much time on is now in the trash can. I completely destroyed it in an unfortunate chain of events. Some of its design was actually just a bunch of fixes to mistakes I made along the way. I'm going to remake it the way I would have liked to from the start--much better obviously. First of all, I'm going to use thicker acrylic to eliminate the need for the tubing down the edge of each fin, as well as the square piece that each fin had to be fit into. This new one should be a lot smoother and simpler. Secondly, I'm going to use white acrylic so it won't need to be painted, which is pretty much what caused its death in the first place.


#8 Offline Foogoo - Posted December 31 2014 - 11:00 AM

Foogoo

    Advanced Member

  • Members
  • PipPipPip
  • 1,161 posts
  • LocationLos Angeles, CA

I'm saving all the detailed reading for tonight, but in the meantime, this looks promising:

http://www.ncbi.nlm....les/PMC2603179/


I noticed a design online where they punched a hole in a rubbermaid. That might be a good idea, but I have spare buckets so I want to use those up. Some ideas I have for the funnel instead of buying one include dog surgery collar, large mixing bowl or cut up a length of duct.


My plan right now is to try constructing a LED trap, which should help with portability.


Camponotus vicinus, Crematogaster 1, Crematogaster 2, Formica francoeuri, *, *, Myrmecocystus testaceus, Novomessor cockerelli, Pheidole hyatti, Pogonomyrmex californicus, Pogonomyrmex rugosus, Solenopsis invicta


#9 Offline Mercutia - Posted December 31 2014 - 11:02 AM

Mercutia

    Advanced Member

  • Members
  • PipPipPip
  • 621 posts
  • LocationToronto, Canada

That's a hugeeeee trap. And I bet you're gonna catch some weird things with it, not just ant queens.


#10 Offline Foogoo - Posted December 31 2014 - 11:23 AM

Foogoo

    Advanced Member

  • Members
  • PipPipPip
  • 1,161 posts
  • LocationLos Angeles, CA

More the merrier! It appears the CDC design trap has a fan above the light to convince the insects to enter the funnel. That should be pretty easy to implement with a small battery powered fan.


Camponotus vicinus, Crematogaster 1, Crematogaster 2, Formica francoeuri, *, *, Myrmecocystus testaceus, Novomessor cockerelli, Pheidole hyatti, Pogonomyrmex californicus, Pogonomyrmex rugosus, Solenopsis invicta


#11 Offline dspdrew - Posted December 31 2014 - 11:44 AM

dspdrew
  • LocationSanta Ana, CA

I'm saving all the detailed reading for tonight, but in the meantime, this looks promising:

http://www.ncbi.nlm....les/PMC2603179/


I noticed a design online where they punched a hole in a rubbermaid. That might be a good idea, but I have spare buckets so I want to use those up. Some ideas I have for the funnel instead of buying one include dog surgery collar, large mixing bowl or cut up a length of duct.


My plan right now is to try constructing a LED trap, which should help with portability.

I'll have to check that article out. Funny, I had that same idea about the dog surgery collar. I just like this funnel because it fits perfectly and has a nice lip that lets it sit on the rim of the bucket.


#12 Offline Foogoo - Posted January 14 2015 - 7:40 PM

Foogoo

    Advanced Member

  • Members
  • PipPipPip
  • 1,161 posts
  • LocationLos Angeles, CA

I've got a UV LED strip on the way which should be much easier to configure. I'm thinking about how I want to set the bucket up though. I'm debating whether to use a funnel or not. Without one would allow you to inspect what arrives and get the moths and hamsters out. But with a funnel, you can set it and forget it, though you'll have to sift through inches of random creatures later on. Any suggestions?


Camponotus vicinus, Crematogaster 1, Crematogaster 2, Formica francoeuri, *, *, Myrmecocystus testaceus, Novomessor cockerelli, Pheidole hyatti, Pogonomyrmex californicus, Pogonomyrmex rugosus, Solenopsis invicta


#13 Offline dspdrew - Posted January 14 2015 - 9:47 PM

dspdrew
  • LocationSanta Ana, CA

Yeah, up until now I've been using just a white sheet, where I can sit in the bed of my truck picking anything I want off of it. I figure with one of these bucket/funnel traps, I can maybe just sort through all the goodies later and see what I came up on... so long as they don't all kill each other. I'll likely design something specifically for the bed of my truck, and use the portable bucket trap to carry out to another location near by and leave for a while. I see it as more as an unattended trap, like something you might leave out over night and check in the morning.


#14 Offline Foogoo - Posted January 26 2015 - 12:18 PM

Foogoo

    Advanced Member

  • Members
  • PipPipPip
  • 1,161 posts
  • LocationLos Angeles, CA

Any sources for the acrylic other than HD? Any tips on cutting it without a router or bandsaw? And where did you get that middle connector? I have an idea for building a cheap UV trap, which I'll share if it works out.


Camponotus vicinus, Crematogaster 1, Crematogaster 2, Formica francoeuri, *, *, Myrmecocystus testaceus, Novomessor cockerelli, Pheidole hyatti, Pogonomyrmex californicus, Pogonomyrmex rugosus, Solenopsis invicta


#15 Offline dspdrew - Posted January 26 2015 - 1:41 PM

dspdrew
  • LocationSanta Ana, CA

I get my plastic from http://paragonplastics.us/. They're located in Santa Ana, CA. As for cutting it, if you're cutting a straight line, all you need to do is score it and snap it in half, but if you have curves, then you will need some kind of power tool or a laser cutter. You can cut plastic with a router and a plastic cutting bit. I have some bits, but no router because they're just way too loud to use in an apartment. What middle piece are you talking about?


#16 Offline Foogoo - Posted January 26 2015 - 1:45 PM

Foogoo

    Advanced Member

  • Members
  • PipPipPip
  • 1,161 posts
  • LocationLos Angeles, CA
The square piece in your March 30 post

Camponotus vicinus, Crematogaster 1, Crematogaster 2, Formica francoeuri, *, *, Myrmecocystus testaceus, Novomessor cockerelli, Pheidole hyatti, Pogonomyrmex californicus, Pogonomyrmex rugosus, Solenopsis invicta


#17 Offline dspdrew - Posted January 26 2015 - 2:04 PM

dspdrew
  • LocationSanta Ana, CA
That's the top part of this bug zapper. I got it so that I would already have the socket for the bulbs.
 
gallery_2_137_28940.jpg
 
Edit: Actuallly, I made a couple posts that day. Are you talking about this center piece?
 
gallery_2_137_53535.jpg

Edited by dspdrew, June 20 2020 - 11:16 PM.


#18 Offline Foogoo - Posted January 31 2015 - 11:24 PM

Foogoo

    Advanced Member

  • Members
  • PipPipPip
  • 1,161 posts
  • LocationLos Angeles, CA

That's the top part of this bug zapper. I got it so that I would already have the socket for the bulbs.


Edit: Actuallly, I made a couple posts that day. Are you talking about this center piece?

Yeah that's what I was referring to.


I ordered a "12 inch homebrew funnel" and it's a perfect fit. Next I'm going to try and make the acrylic. Is Fluon effective on plastic? I'm thinking coating the funnel and acrylic with Fluon or silicone may help encourage ants and whatever else to go into the bucket.


IMG 20150131 185931

Camponotus vicinus, Crematogaster 1, Crematogaster 2, Formica francoeuri, *, *, Myrmecocystus testaceus, Novomessor cockerelli, Pheidole hyatti, Pogonomyrmex californicus, Pogonomyrmex rugosus, Solenopsis invicta


#19 Offline dspdrew - Posted January 31 2015 - 11:29 PM

dspdrew
  • LocationSanta Ana, CA

That's awesome. That funnel should work just fine. Fluon will work great on that thing. Too bad they had to put that one little ridge in it. How much did you pay for that?


#20 Offline Foogoo - Posted January 31 2015 - 11:36 PM

Foogoo

    Advanced Member

  • Members
  • PipPipPip
  • 1,161 posts
  • LocationLos Angeles, CA

That's awesome. That funnel should work just fine. Fluon will work great on that thing. Too bad they had to put that one little ridge in it. How much did you pay for that?


Ditto. The ridge is for a strainer. I don't think it will be an issue, but if it is, I was thinking it can be easily filled with something like caulk or epoxy. It's $10 but came out to almost $20 after shipping. Got it from morebeer.com, though there's plenty similar ones on ebay and other homebrew sites.


Regarding the acrylic, I'm hoping the width of a rotary saw will be enough for them to fit together, I'll just have to make sure I cut it straight :o . Cutting notches at the bottom would probably be best for it to sit on top of the bucket/funnel, but I'll probably have to find a bandsaw or dremel. Any suggestions on acrylic thickness to use?


Camponotus vicinus, Crematogaster 1, Crematogaster 2, Formica francoeuri, *, *, Myrmecocystus testaceus, Novomessor cockerelli, Pheidole hyatti, Pogonomyrmex californicus, Pogonomyrmex rugosus, Solenopsis invicta


Also tagged with one or more of these keywords: black light, dspdrew, trap

1 user(s) are reading this topic

0 members, 1 guests, 0 anonymous users