I got you on this one.
Up front know that:
1: plenty of keepers use heat pads, i've not used them myself but have had good results with the cable (15 watt lowest power one made). Heat pad users have to cope with the shape of the pad for heat application, while the cable can get applied in as much or as little as is needed in a spot. Though at 6' of heated cable length you will need to figure out what to do with the unused cable length.
2: most keepers i've read do not use a thermostat, and just take temp readings manually and adjust heat levels as needed during the year. I use a thermostat to automate that work, i'm kind of lazy like that and think the $40 i spent is well worth it. Also my house has no climate control really, so i needed a way to better regulate their temperatures than my place can offer. If your place has good climate control a thermostat is not something you likely need, but i recommend one to all as it's made keeping lower effort and less stress on me.
For cable use here are the main use tips to know:
1: The cable will be fairly long and have a mark on it where the heating part starts. There's a few feet of cable that won't get hot starting on the plug end.
It is part of the safety instructions with the cable to not allow the cable to overlap and touch itself. In any place the cable touches itself it will get extra hot and is considered a fire hazard. So however you deal with the excess part of the heated cable, do not coil it up onto itself to tuck it out of the way.
2: Surface area contact is key. The more direct contact the cable makes with the nest, the more of the heat will get into the nest. This is part of why i use tape, to ensure good surface contact between the cable and the nest.
3: I recommend using painter's tape to hold the cable in place where you want heat applied. It will hold well while not leaving behind a lot of sticky goo later. Which plenty of other tape types will do given the heating it will be subject to.
4: Keep the heat as far from any water sources as possible. If the heating is applied too close to the water towers in a nest it can cause the water to evaporate too fast and reach a point of saturation where the humidity in the nest is >100% and water will be begin to condensate on all surfaces.
5: use a bit of heat cable just draped on or loosely touching the nest glass, to remove and prevent any condensation fro forming on the glass. Once you got the heat cable in place, even a well placed one is likely to see some areas of the glass will gather condensation. All we need to do is let a little bit of the cable's heat go to the glass in that area. It will dry it up and prevent any more from forming.
6: These cables have a specific bendy direction in them already. You will need to work out what way the cable wants to bend and work with it, not against it. Doing this you can use the tension in it to keep it in place(examples below)
And now the images for examples to see:
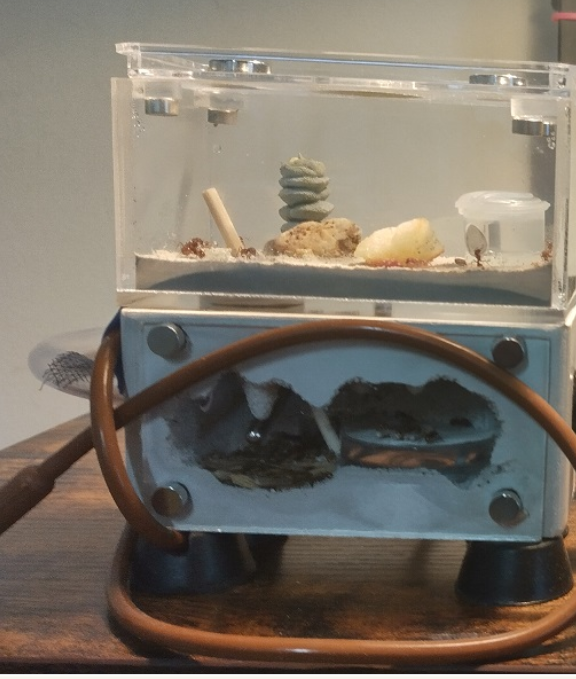
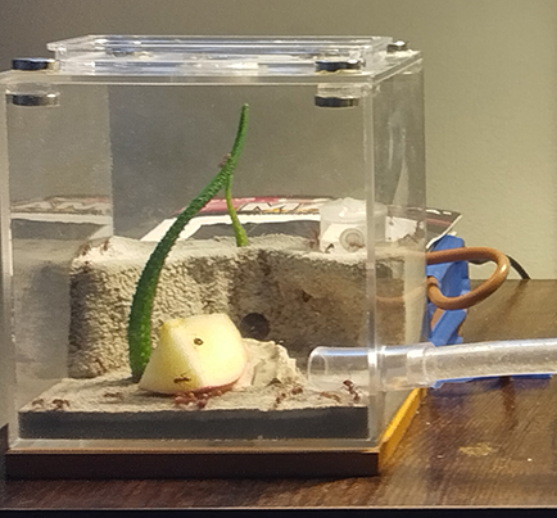
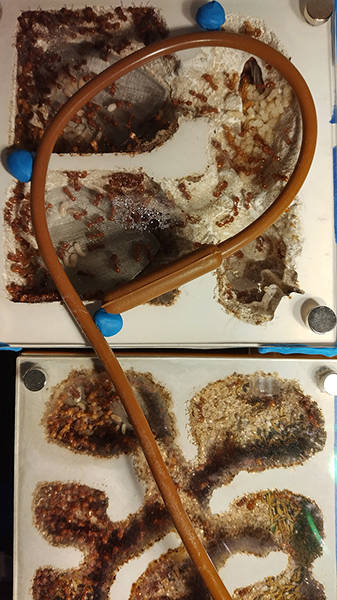
In a mini hearth, i applied the main heat to the far said wall awawy from the water tower. Then ran just a tiny bit across the top as you see. It's is only held in place the tension of itself and touches just the magnets, no actual glass contact there, but a .5-.25mm or so gap.
Tape holds it in a loop on the left side(plenty of surface area contact), and the little bit arcs over the glass to prevent condensation.
later in a fallen fortress i again taped the cable to the wall opposite the water tower, and made a full U turn "loop" going down the bottom and top edge of the wall. Then up across the glass to prevent condensation from forming. You can see the cable lump under the blue tape there along the bottom and top edge.
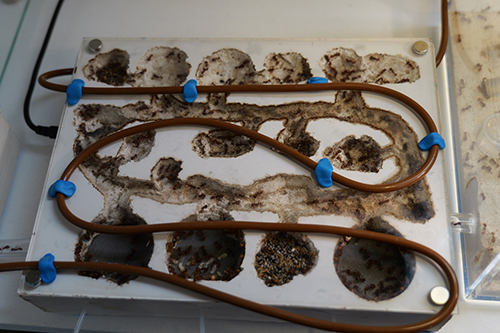
Eventually this is the largest nest in use and as you see it took a fair bit of cable to keep the condensation off the glass. The cable applies heat mainly to that wall on the top of the image where we can't see it. The blutak you see is used in two different ways to keep the cable in place(and why i don't use tape on the glass).
In some places you can see the blutak goes over the cable to hold it down. It still come sup a bit, but again we don't need a lot of glass contact, it just needs a tiny bit of heat to prevent condensation. But the ones here the cable is not covered, the bendy direction of the cable, gives it tension. And it is pressing itself firmly into the sides of the bluetak "stops" keeping itself in place. This is harder to describe than feel. When you have a cable in hand you'll be able to very quickly figure out how it wants to bend in certain directions, and that can create tension to hold itself in place with.
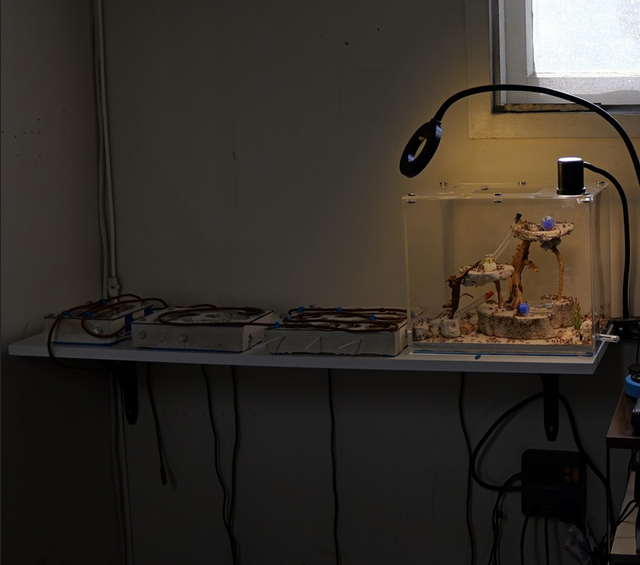
Here is the current whole setup. The shelf on the wall has a 1/2" gap at the back to allow the cables to loop around it and hang loose as it were.
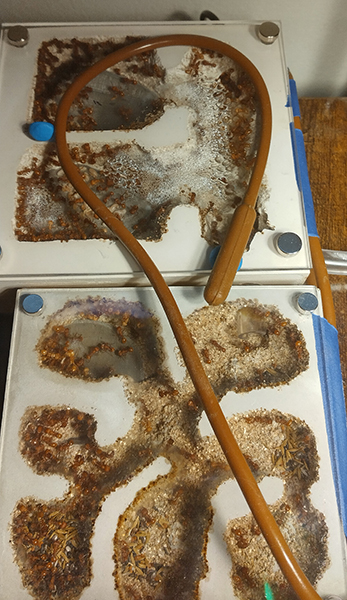
This is how i dealt with the feet of excess cable by making large U "loops" rather than trying to scrunch it all up smaller where it would be more likely to touch itself and get extra hot at such intersections.
This is a nest where i have cable taped on one side, away from water towers and a bit of cable over the top to keep the glass warm.
that cable going over the top is not even touching the glass except at the very edges, like just on the actual edge. the blutak makes it have to be closer to the glass than it would have been, but again it didn't need a lot of direct contact to prevent the condensation. And being only barely held in place it is easy to move out of the way for photos if i want.

here is an example of condensation and clear up:
this was shortly after hooking up a new nest, but not having gotten all the cable hooked up. A lot of condensation has collected.
the blutak is a tension hold there, the cable wants to be a few inches more to the left, the blutak is a stop that just keeps it where i want it.
And here this is several hours later. It eventually has no condensation by the following day.
And there you go, everything i know about heat cable use from my own xp.
Get good surface area contact where you need heat applied.
Get just a little heat on the glass where ever condensation tries to form.
Learn to work with the bendy direction of the cable. Don't try and force it to bend in ways it does not want to, that'll just give you a headache.
And i find this is a well worth while expense of $40 USD for a thermostat. The one i use has two probes and two power controls. More than a small colony needs but it allowed me to grow into it. Now i run two different nest sections at two different temperatures. Simulating the nest going deeper underground where temps are cooler and more year round stable. So the big nest is the "top" with temps going into the mid-high 80s. While the "deepest" nest is kept 71/72f kind of like it would be about 6+ feet underground.
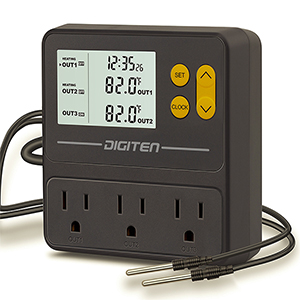
https://www.digiten....om-fermentation