Jump to content

  • Chat
  •  
  •  

Welcome to Formiculture.com!

This is a website for anyone interested in Myrmecology and all aspects of finding, keeping, and studying ants. The site and forum are free to use. Register now to gain access to all of our features. Once registered and logged in, you will be able to create topics, post replies to existing threads, give reputation points to your fellow members, get your own private messenger, post status updates, manage your profile and so much more. If you already have an account, login here - otherwise create an account for free today!

Photo

RPT's Journal

camponotus tetramorium brevicornis neoniger depilis crematogaster

61 replies to this topic

#41 Offline OwlThatLikesAnts - Posted October 21 2024 - 5:29 AM

OwlThatLikesAnts

    Advanced Member

  • Members
  • PipPipPip
  • 269 posts


Hello OwlThatLikesAnts;


I purchased both a 25-50 worker and a 50-100 worker Crematogaster colonies from Canada Ant Colony.   As far as shipping time goes, at checkout you can choose different options with different shipping times.    I usually choose "Expedited Parcel Delivery" that assures delivery within five to seven business days for delivery.   In my experience, it usually takes seven business days for me to receive a package from them (it's a two-hour drive from my place) I have no idea how long it would take to get where you are in British Columbia.    You asked in a different post about the heat pack, I've bought them before when I ordered queens and they arrived in good condition despite the weather being below freezing, it's cheap insurance.    You can email Teddy at Canada Ant Colony for specific details about your situation and purchase.   


I've never purchased anything other than ants from Canada Ant Colony.    As AntsGodzilla said, I expect they would ship the entire order in one package, on the order form is an area where you can send them a note about your purchase; you can request that they ship everything together there.   Good Luck

RPT

Ok thanks Rpt, for the information (I am actually in Montreal, Quebec) and it takes a 5 hour drive to get to where I am


  • rptraut likes this

Currently keeping:


1x Formica subsericea, 20+ workers

1x Crematogaster cerasi 2 workers with brood (still growing)


*As you watch your ants march, remember that every thing begins with a small step and continued by diligence and shared dreams*

-A.T (Me)


#42 Offline rptraut - Posted October 26 2024 - 2:14 AM

rptraut

    Advanced Member

  • Members
  • PipPipPip
  • 528 posts
  • LocationOntario, Canada

Update 26OC24


Crematogaster DIY Formicarium Build


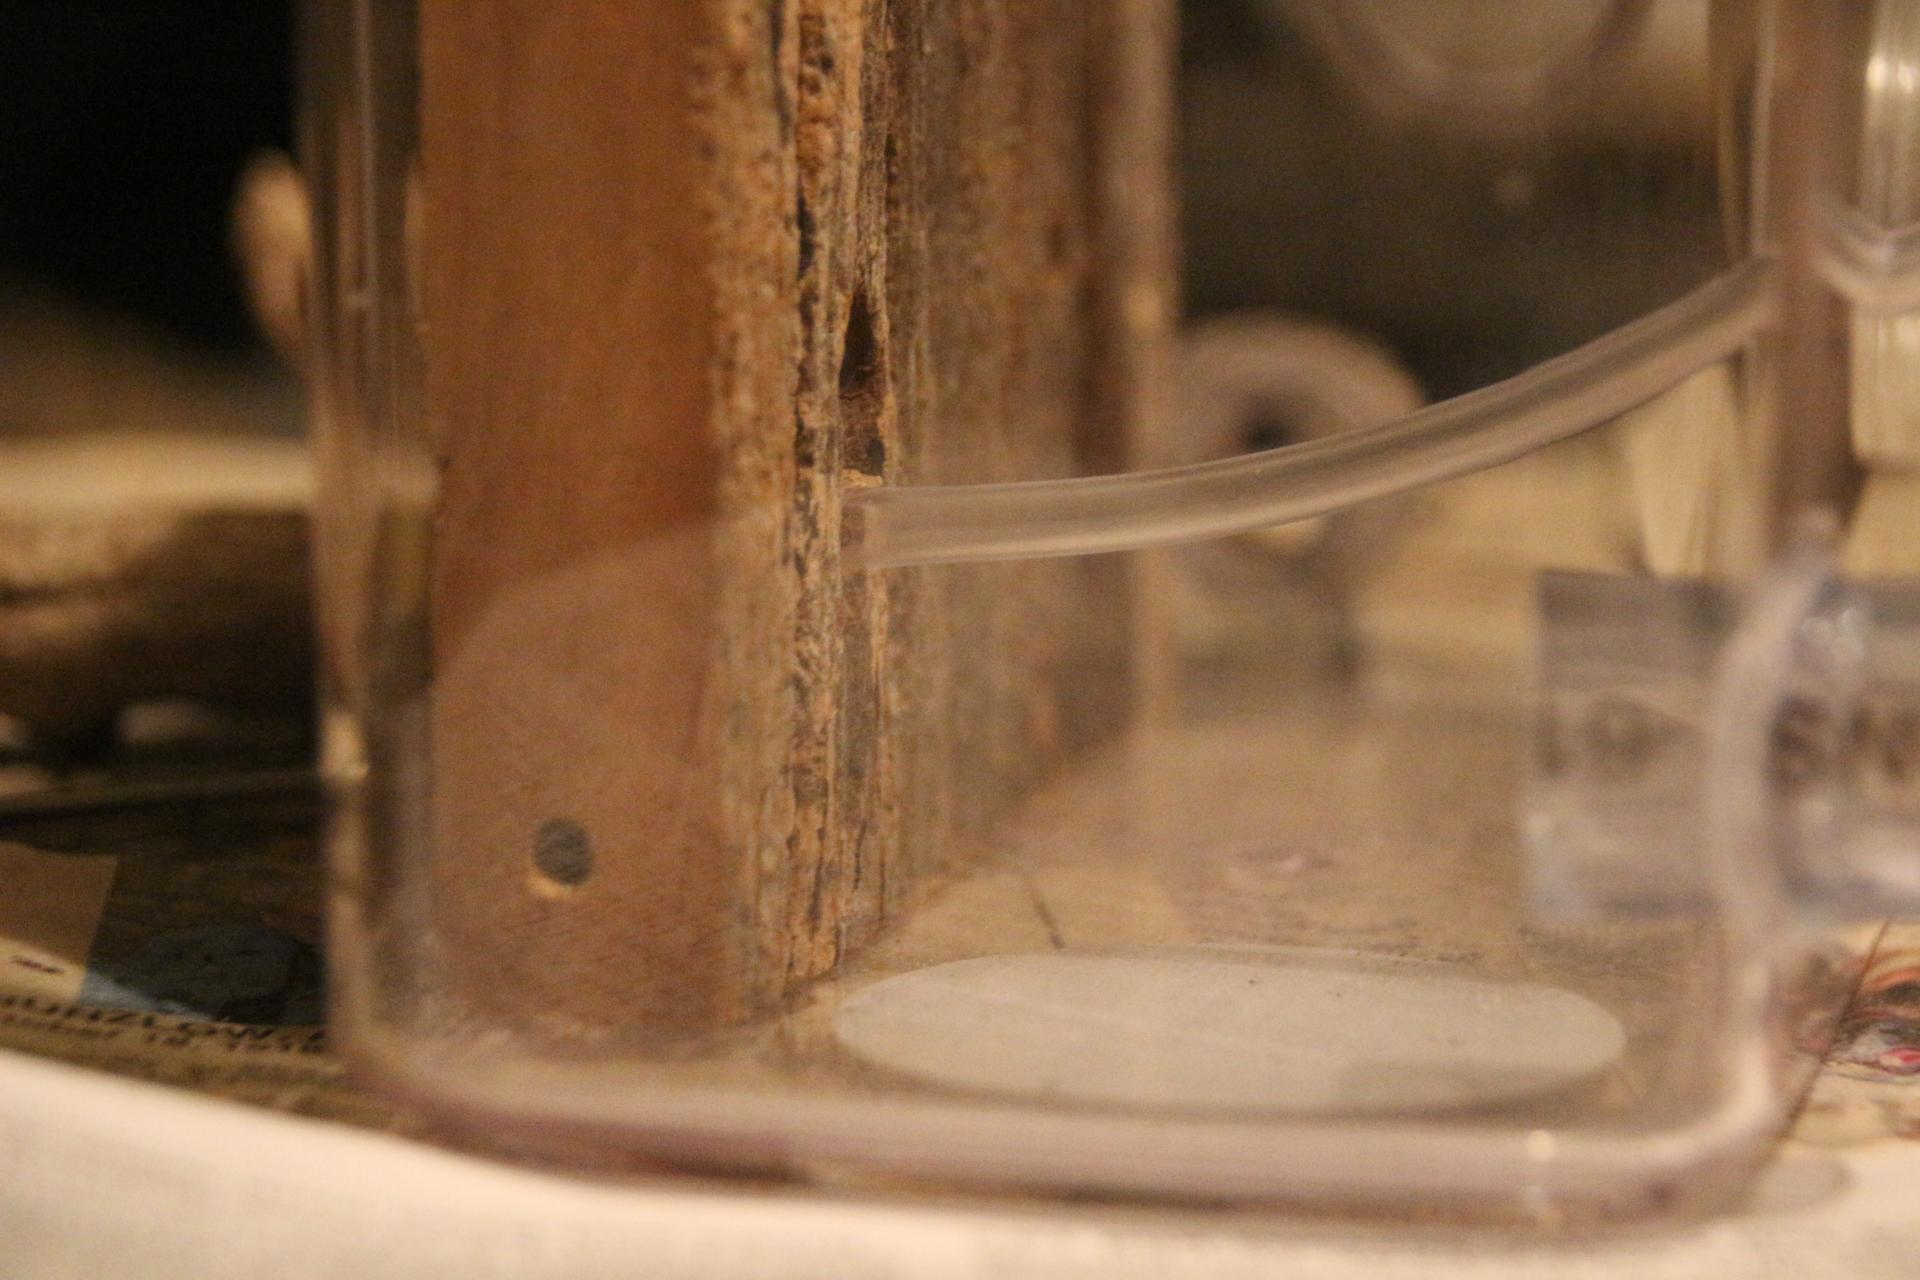
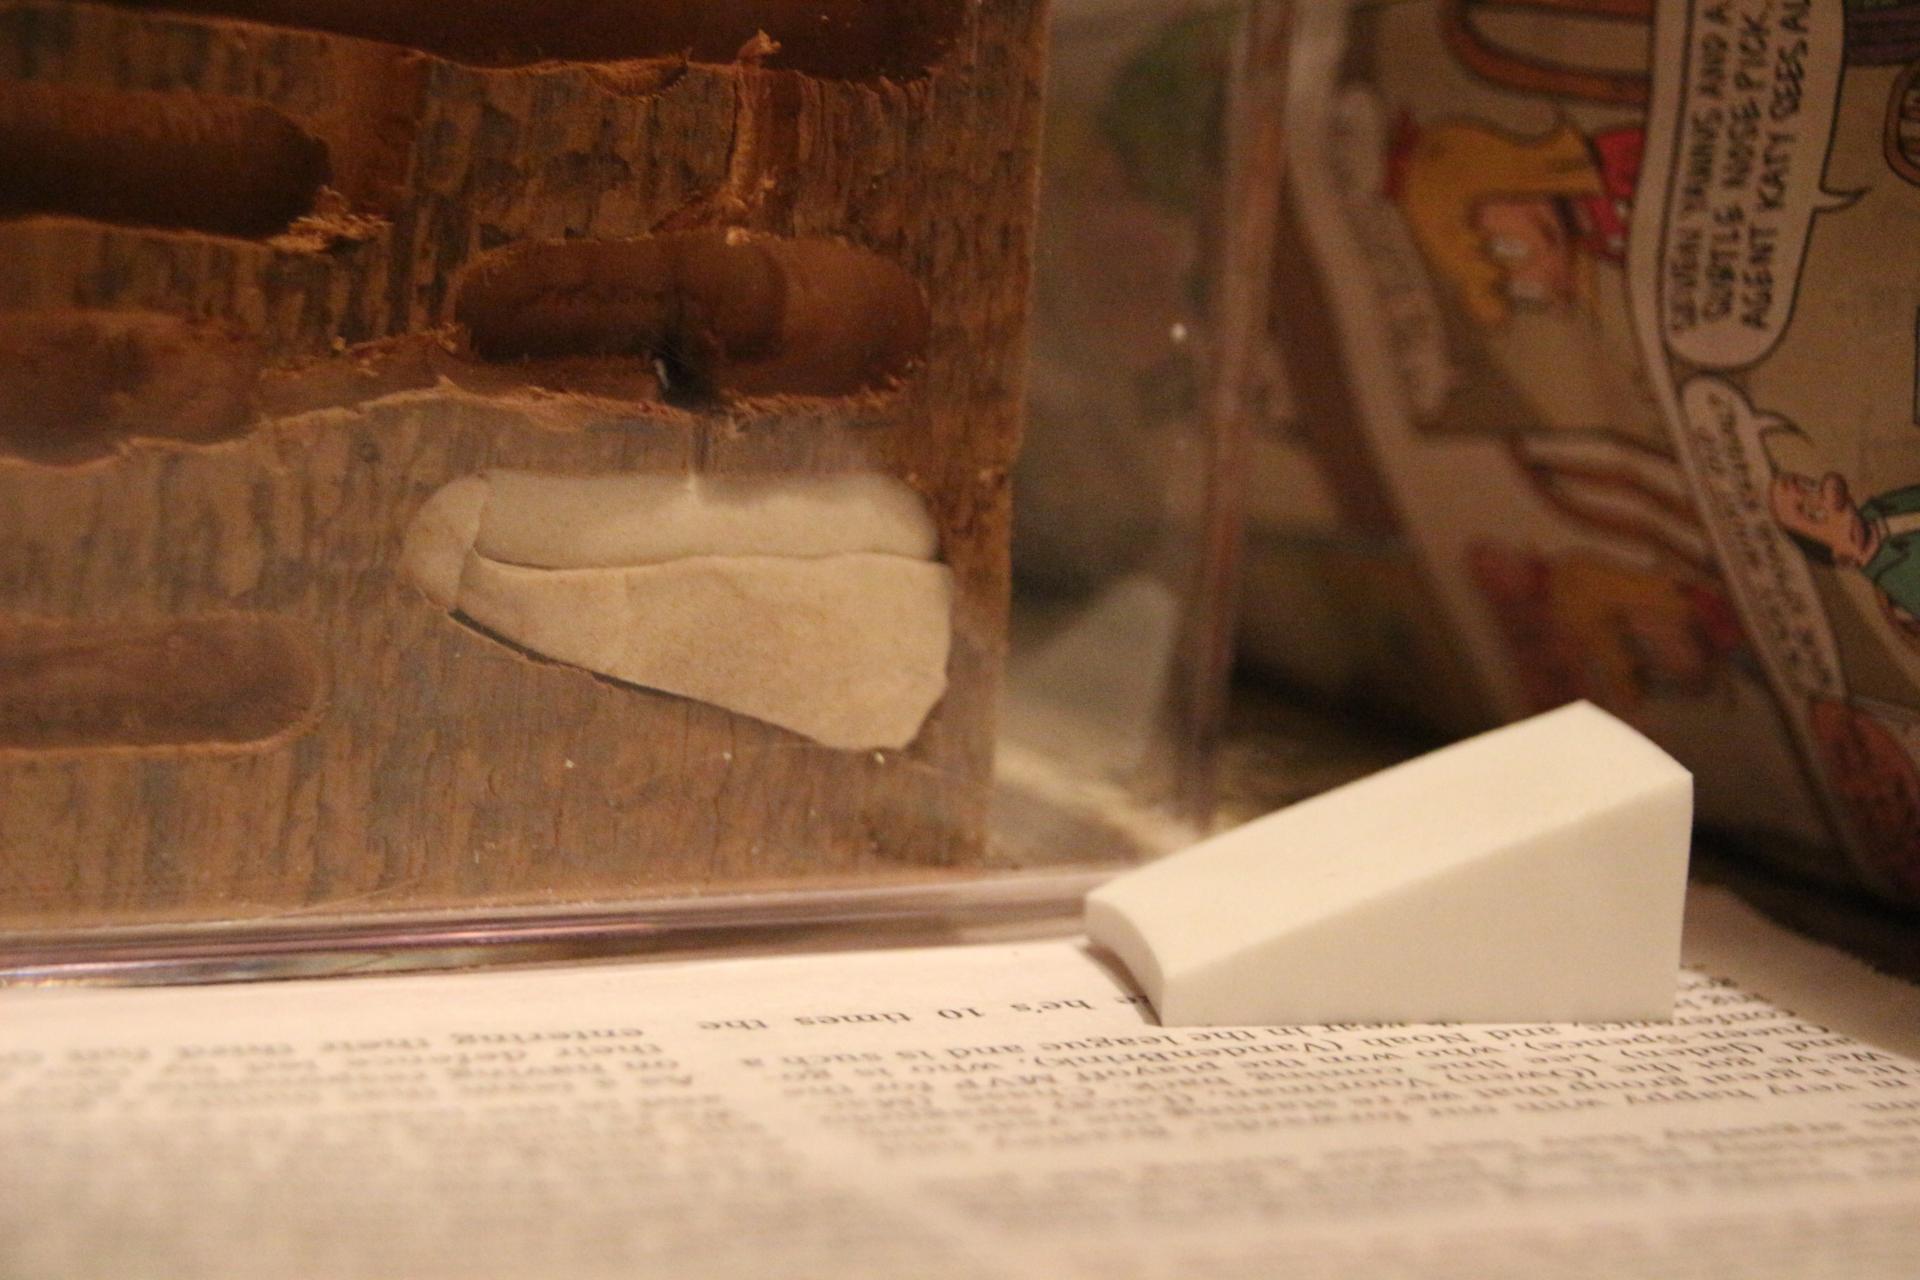
We're getting close to the time when we'll assemble all the components for this diy formicarium.   Let me first explain how the hydration system is intended to work.   


IMG_8253.JPG


The fill tube is mounted through the front and ends in a pocket in the middle of the sponge.  The hole in the side drains excess water into the oasis area.


IMG_8252.JPG


The sponge itself is a cosmetic sponge, intended to be used to remove makeup, I think.   I've often promoted the use of sponge for hydration, to increase humidity in the nest, as well as for drinking water.   To be most effective, any sponge needs to be wetted before its first use.    This can be as simple as soaking the sponge in water and wringing it out which ensures that the sponge will absorb liquids effectively afterwards.    I'll have to do this before final assembly.   In this formicarium the sponge will wet the corner of the board; there's a hole in the side where overflow will drain into the oasis that'll be in the corner.    The oasis is basically the low area of the grout base, where any liquid will flow and is maintained as a wet area for humidity and variety in the outworld.    There's a small hole from the chamber above, where ants can access the sponge for drinking water.    I'm sure they'll widen this out if it's important to them.   I haven't been keeping Crematogaster ants for very long, but my initial feeling is that they're able to thrive with a fairly dry nest compared to other ants like Lasius.   


IMG_8255.JPG


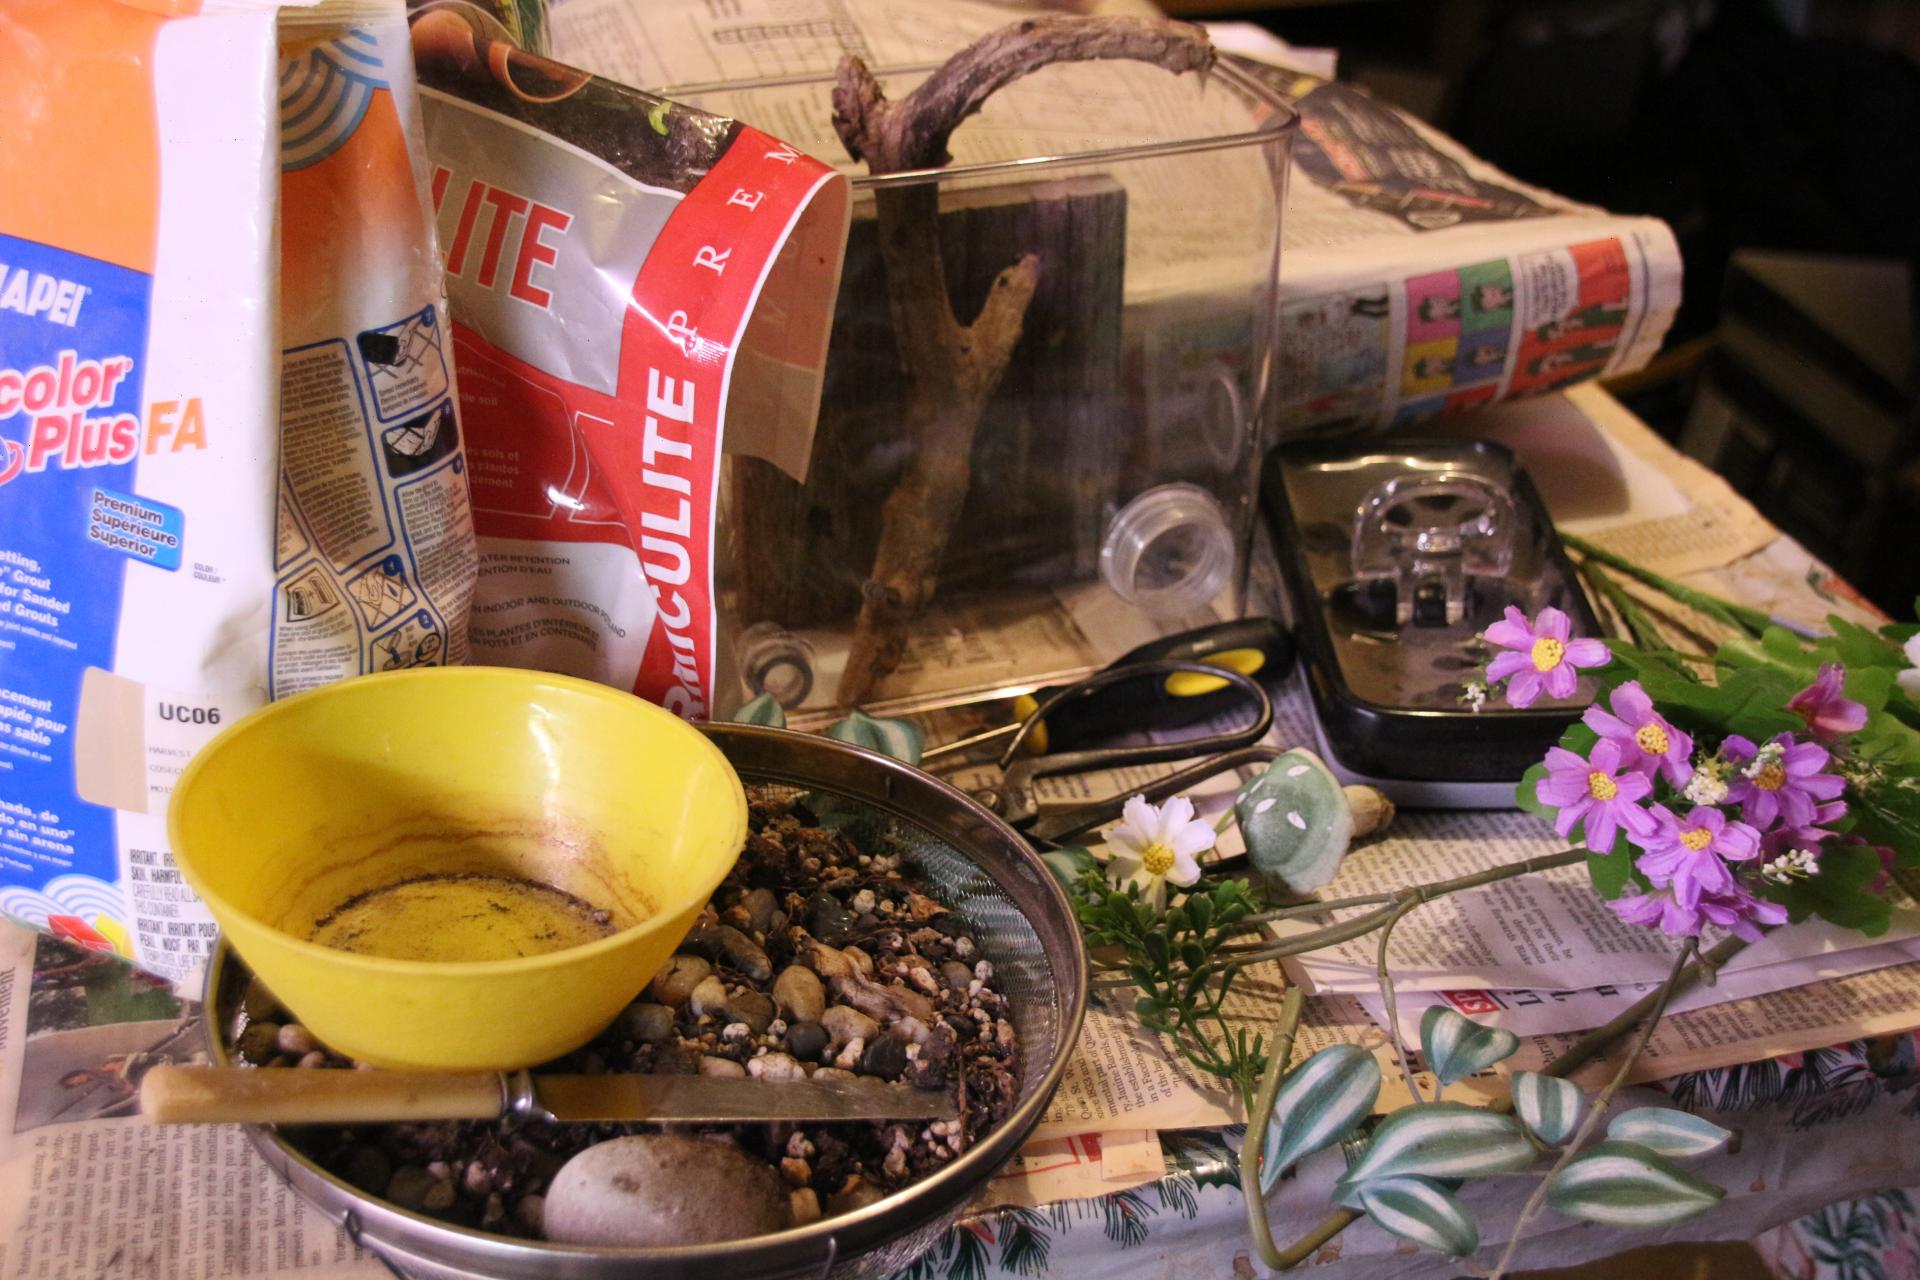
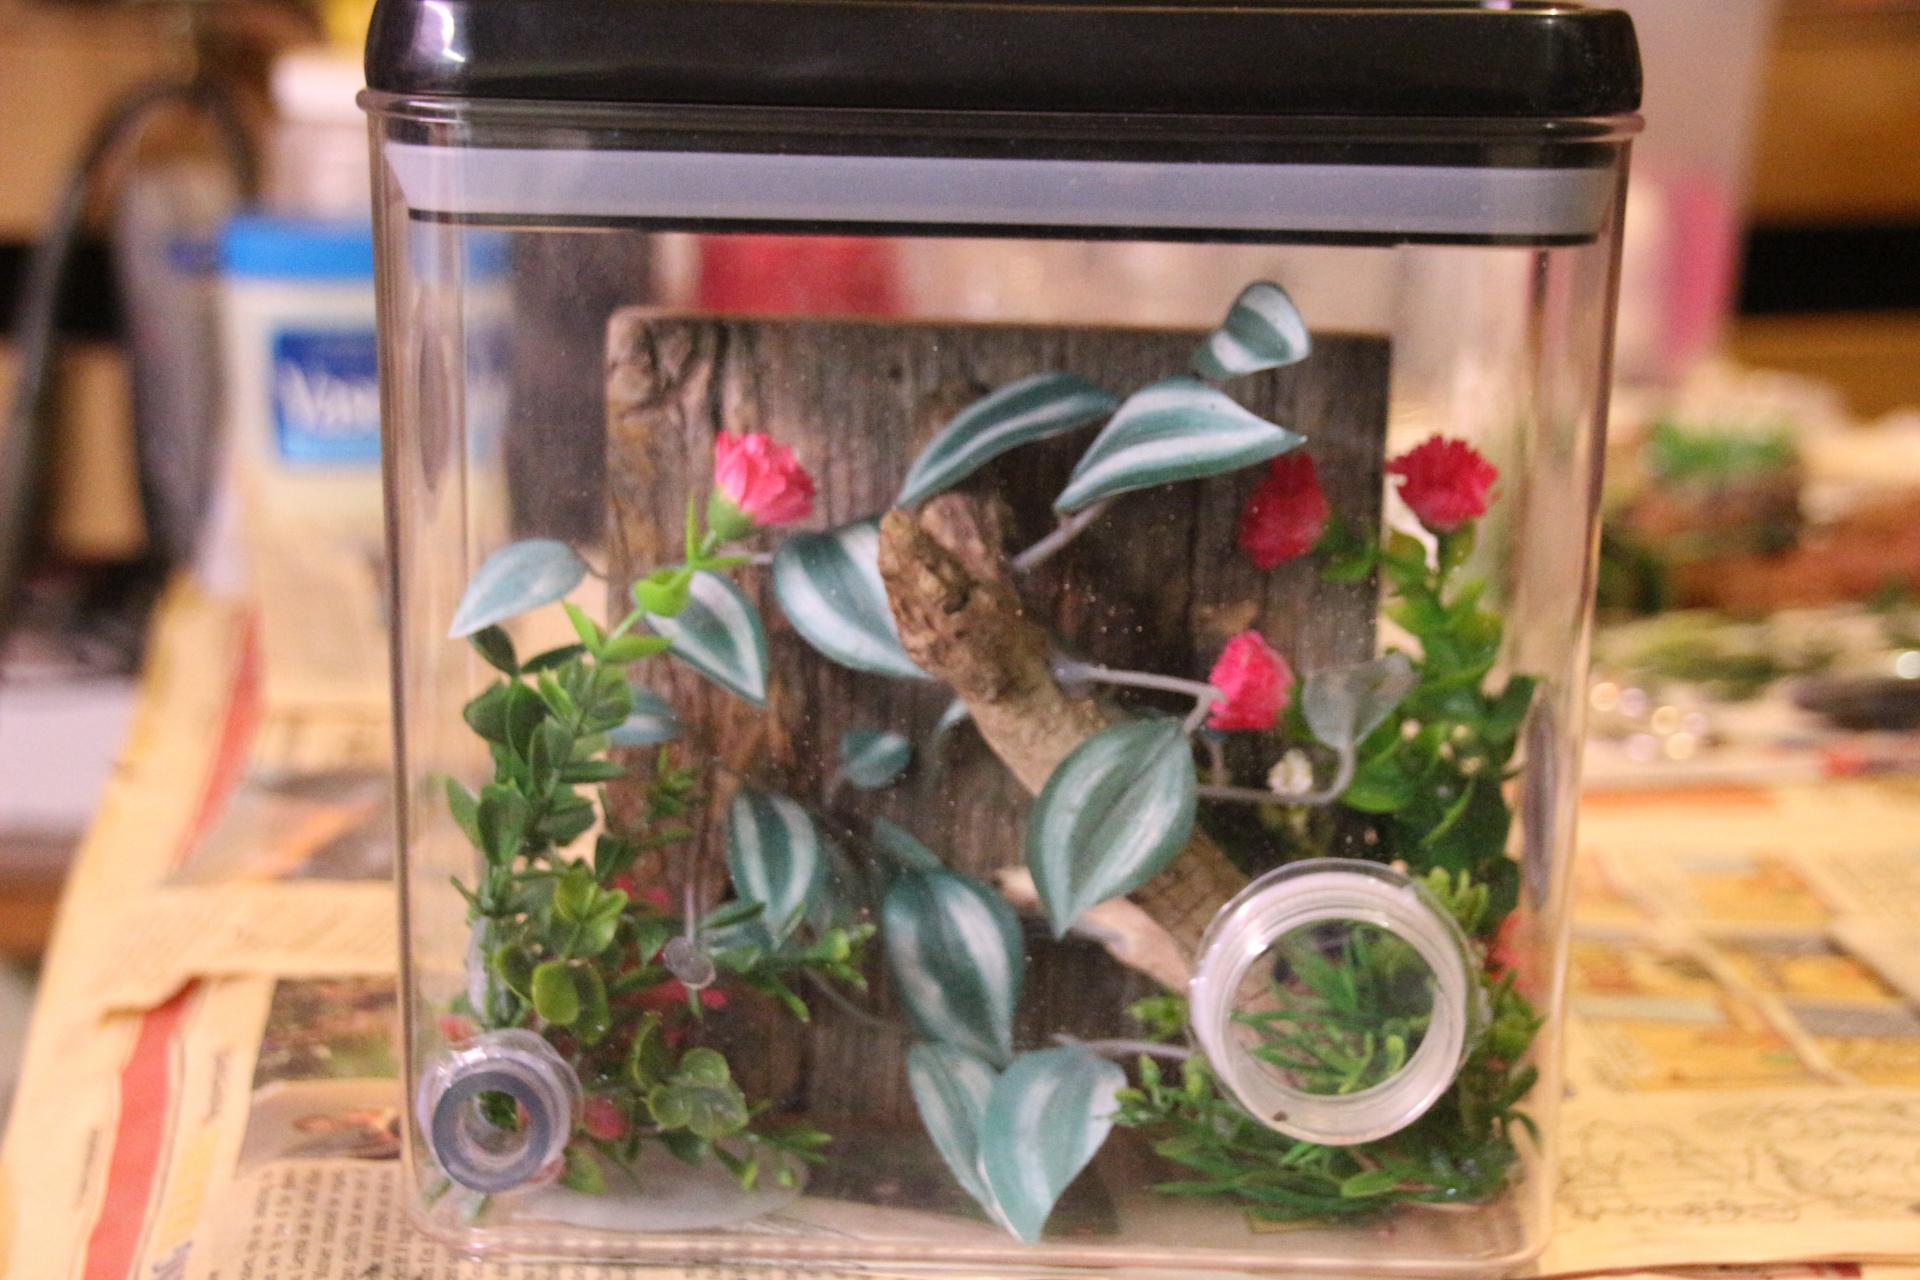
I've began to prepare for the assembly of this formicarium by gathering all the materials I think I'll need; I'm still looking for my spoon.    There are some things I know I'll incorporate into this build.   The branch inside the container will be positioned to give the ants something to climb to the various openings into the nest.   I'll probably attach some leaves and branches to it for added variety.   There'll be an oasis in the left corner that will basically be the low area of the grout base when I pour it.    I'll also position a rock across from the feeding port to place their food tray on.   This might also just be a high area of grout, or a fossil; I'll have to see how it looks.   I'll use small stones, plastic plants and flowers to decorate the corners and try to design a natural looking outworld.   Moss in the oasis will also add to this effect.   


For the base I'll use a mixture of tile grout (light coloured for these ants), vermiculite and water.    I mix enough grout powder into water to make a slurry that's the consistency of pancake batter.   Then I add enough vermiculite to make it the consistency of day-old oatmeal, or at least thick enough that it'll stay where I put it and not flow.    Tapping the container will settle it well enough.    I want to be able to stick things like plastic plants in it and they'll stay there, so waiting a little while for the grout to harden up sometimes helps with this.   I put vermiculite in the grout as it improves the moisture transmission and moisture holding ability of the grout.    Some ants can also chew away the grout/vermiculite easier as vermiculite is very soft.    In other formicaria where I've made chambers in the grout/vermiculite, the ants are able to enlarge chambers as the colony grows in size.   


Every build is different, but one thing I know for sure.    A grout/vermiculite mix doesn't stay workable forever.   I mix it to a fairly thick, dry consistency so it'll stay where I put it, but that means I have to work fairly quickly, and it really helps to have my supplies gathered together beforehand.    The whole thing has to be assembled in an evening and major changes are difficult once the grout hardens.  It helps to have a good idea of what you want your finished project to look like, what you have to do to assemble it, and what you'll need, before you start the assembly process. 


This is a work in progress, I welcome your suggestions before it all goes together.   

RPT


  • Karma, RushmoreAnts, Ants_Dakota and 2 others like this
My father always said I had ants in my pants.

#43 Offline rptraut - Posted November 3 2024 - 1:27 AM

rptraut

    Advanced Member

  • Members
  • PipPipPip
  • 528 posts
  • LocationOntario, Canada

Update 03NO24


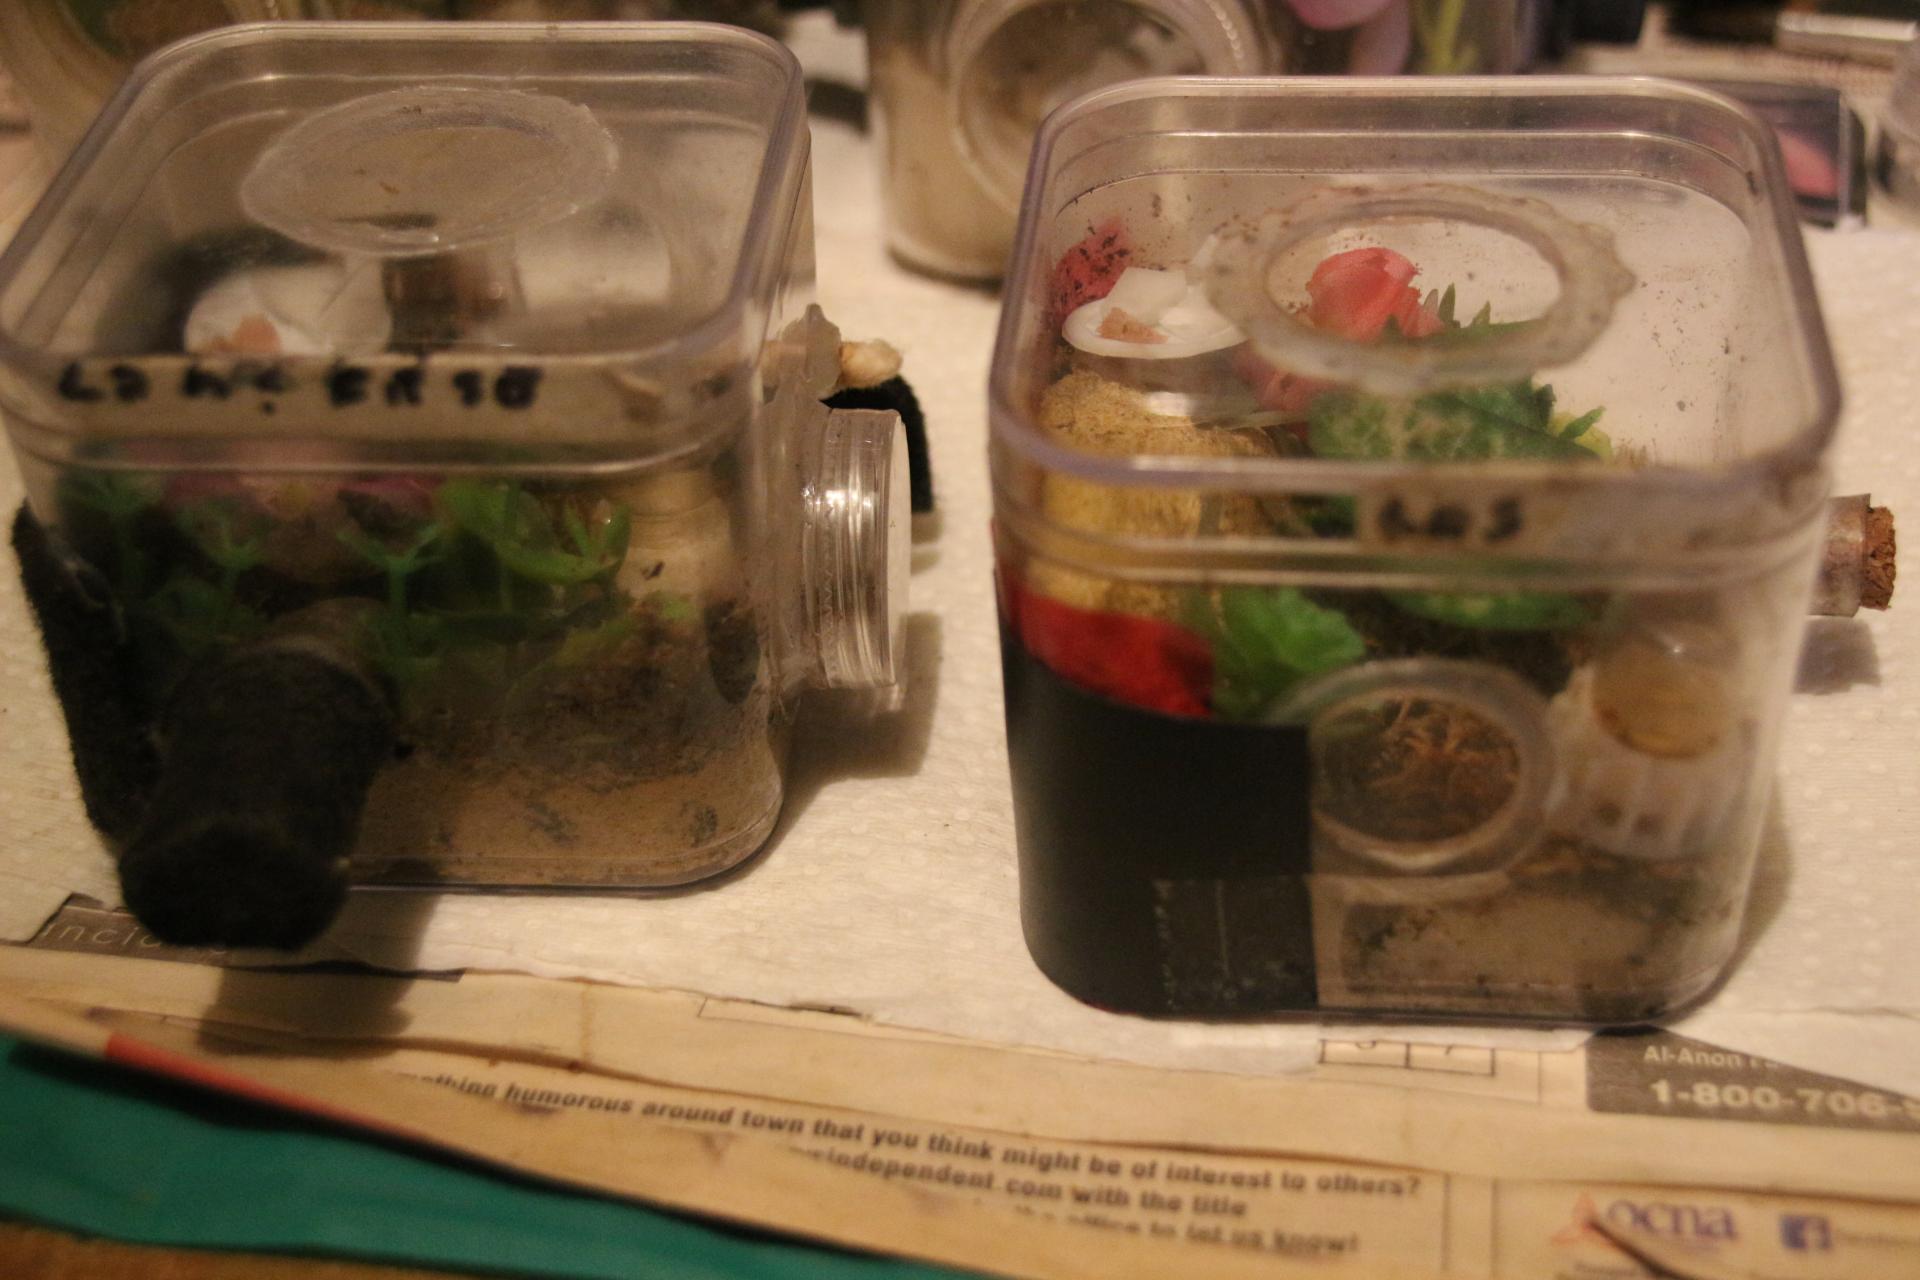
Most of my colonies are slowing right down for diapause.   The following photos will show how some representative colonies have spent the summer.


Crematogaster Colonies


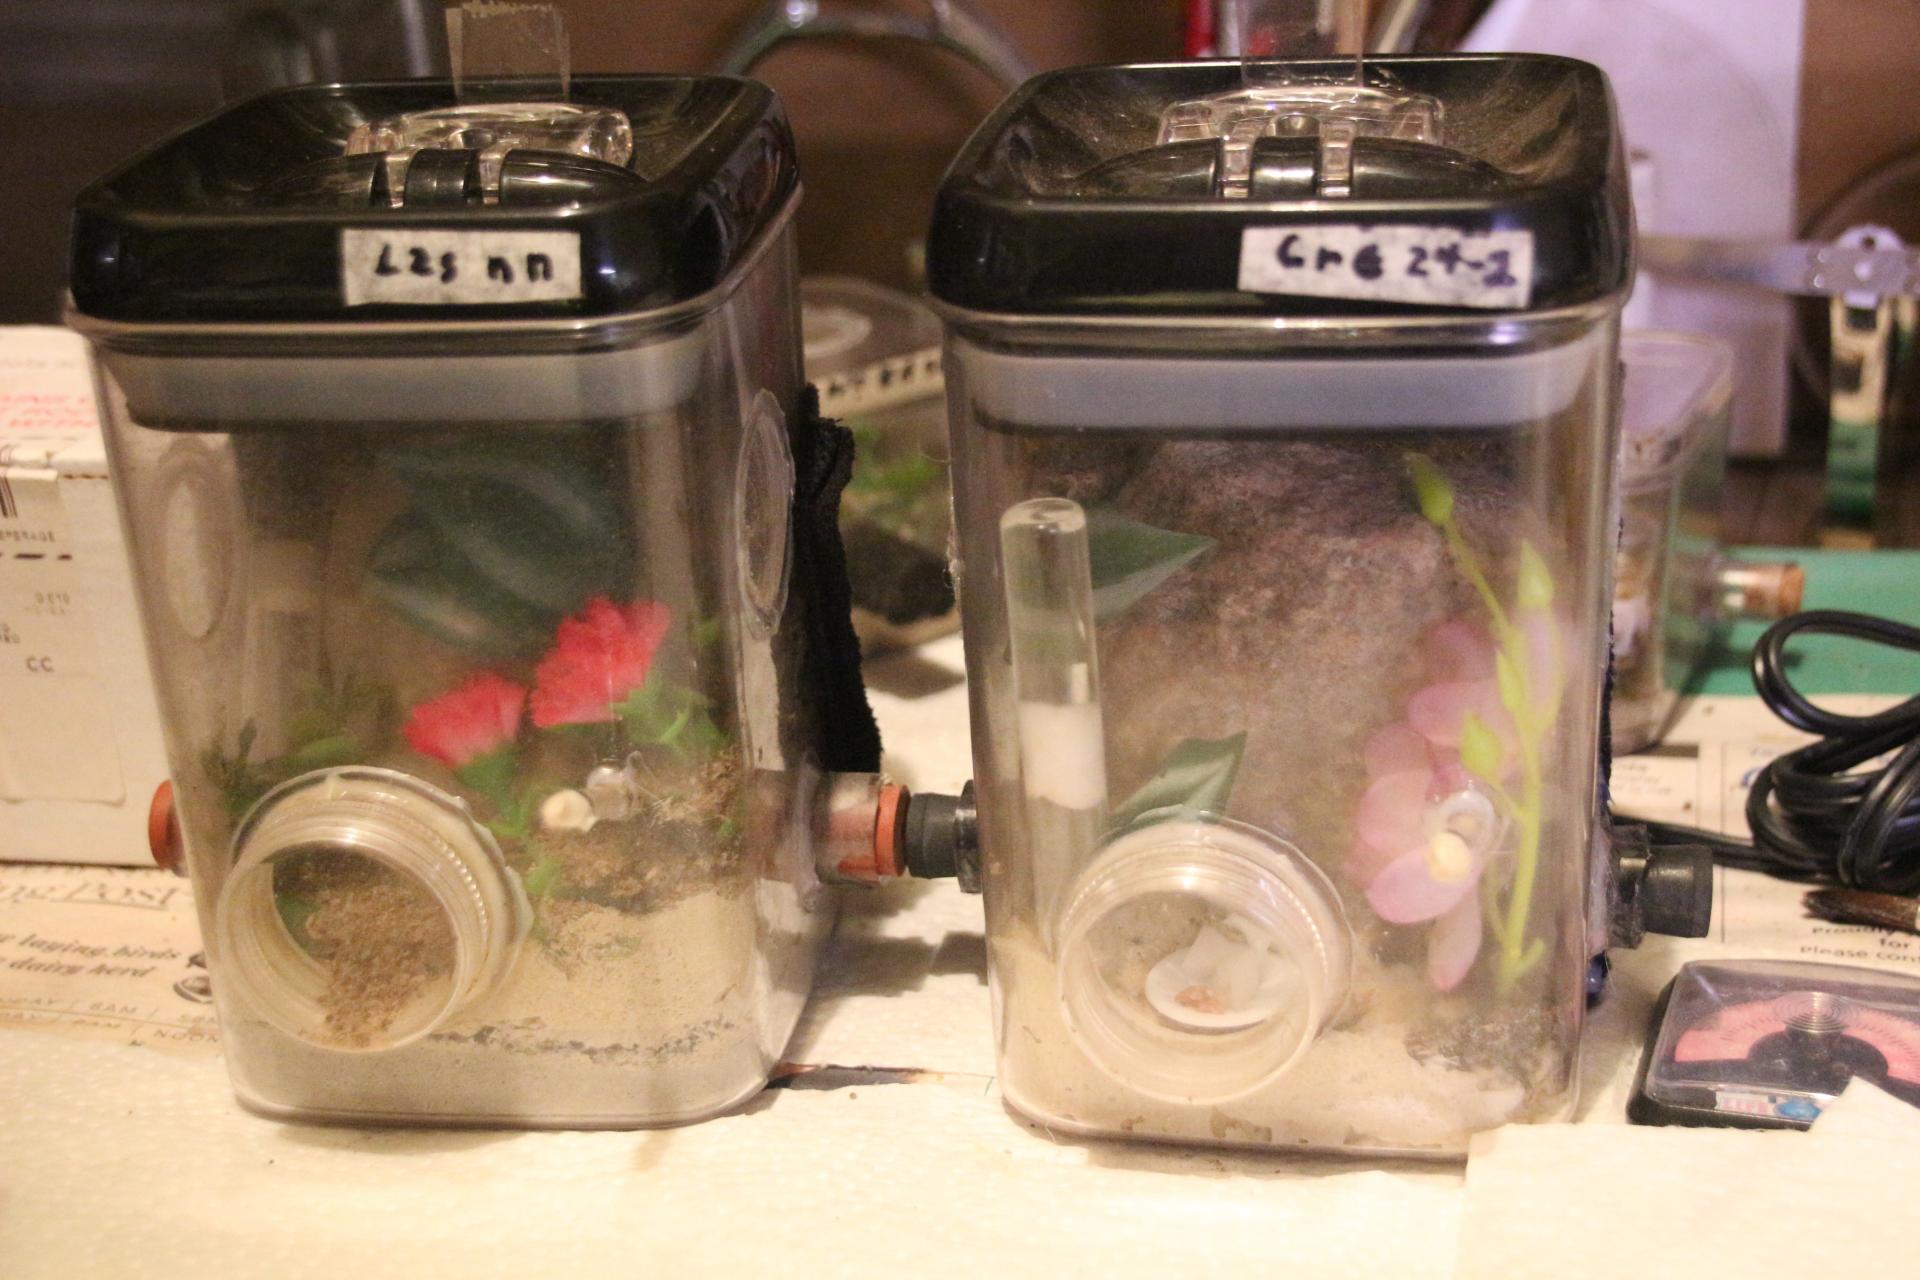
 IMG_8289.JPG


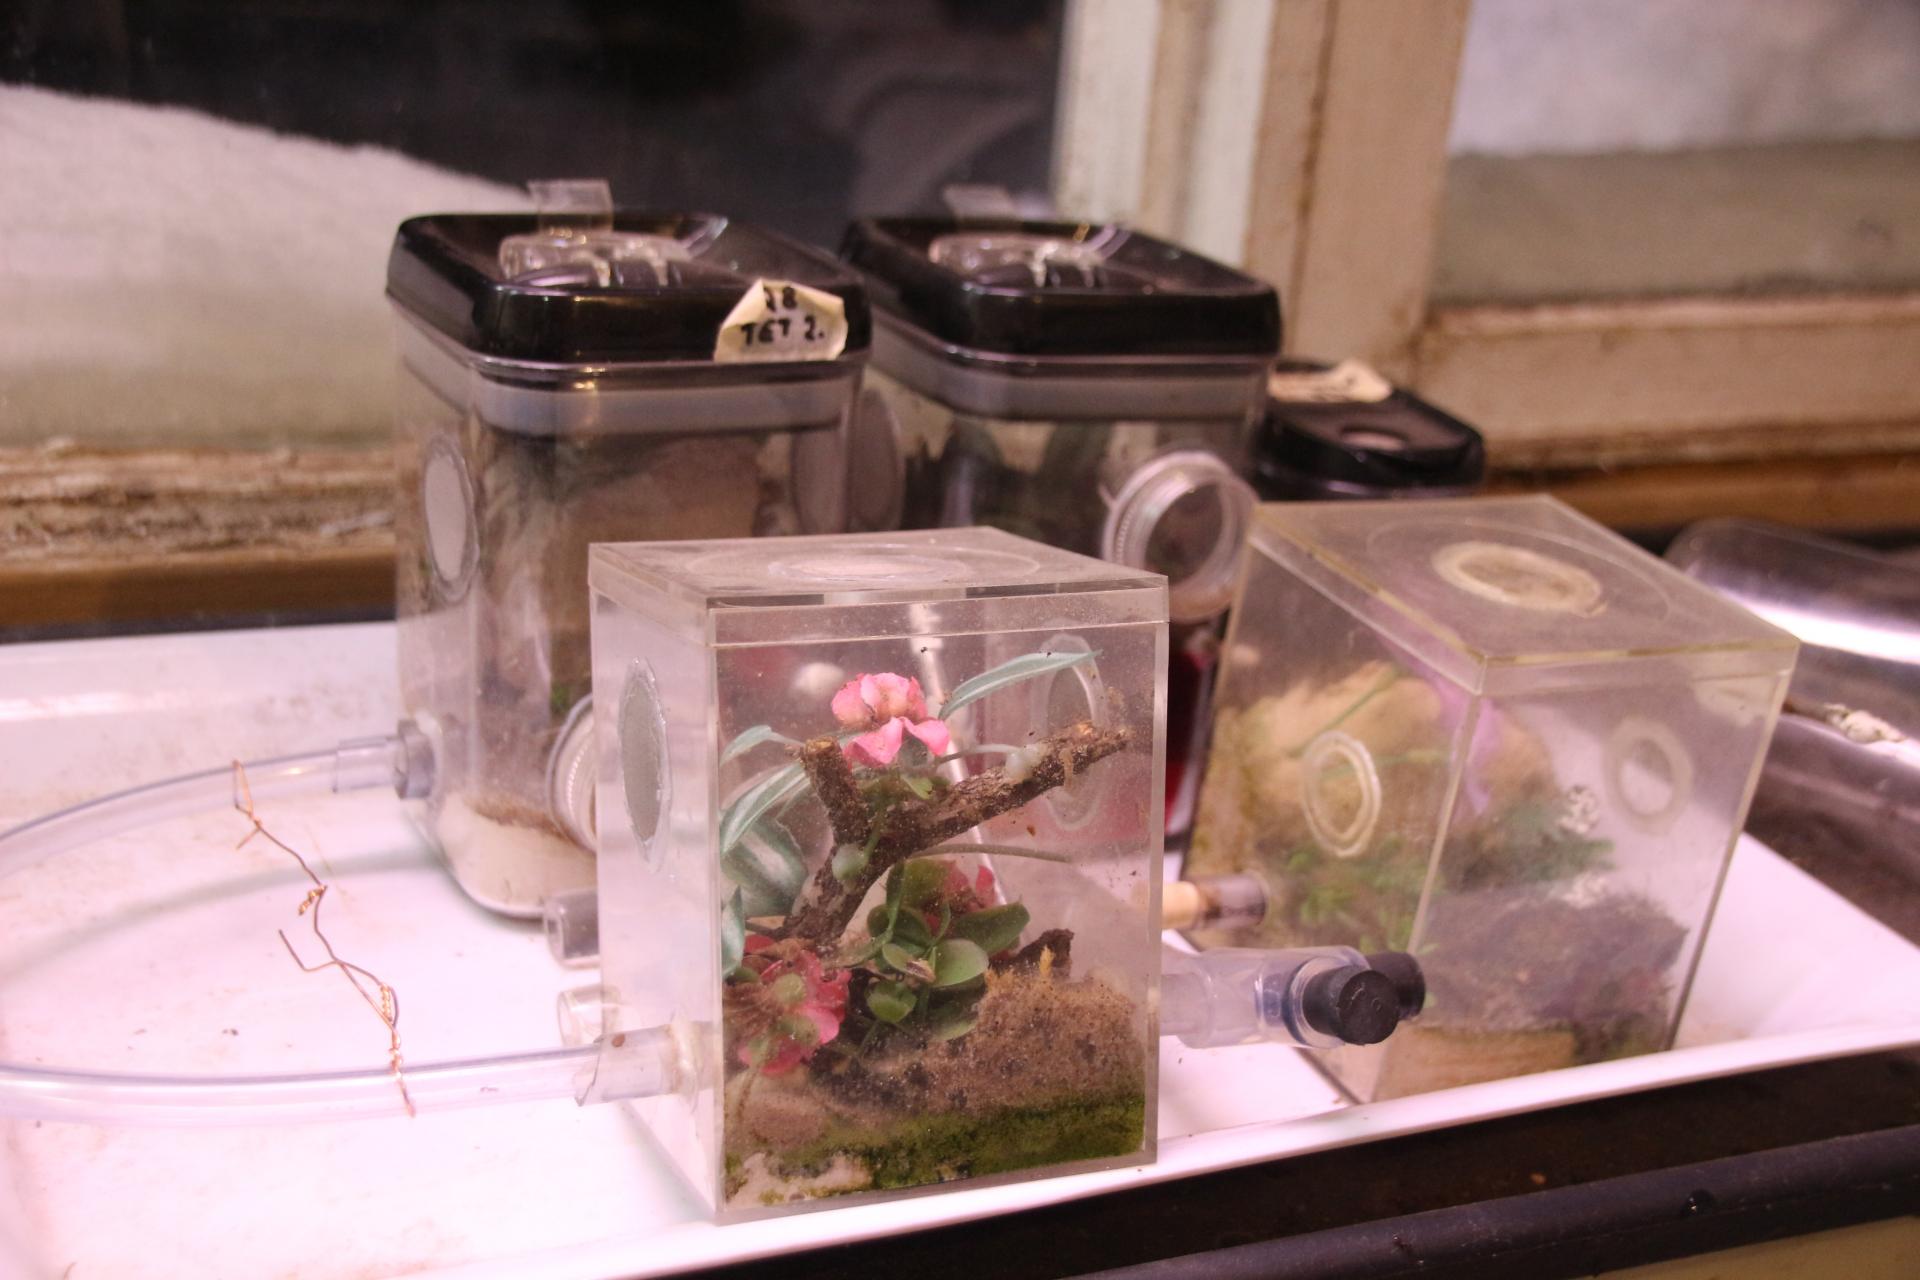
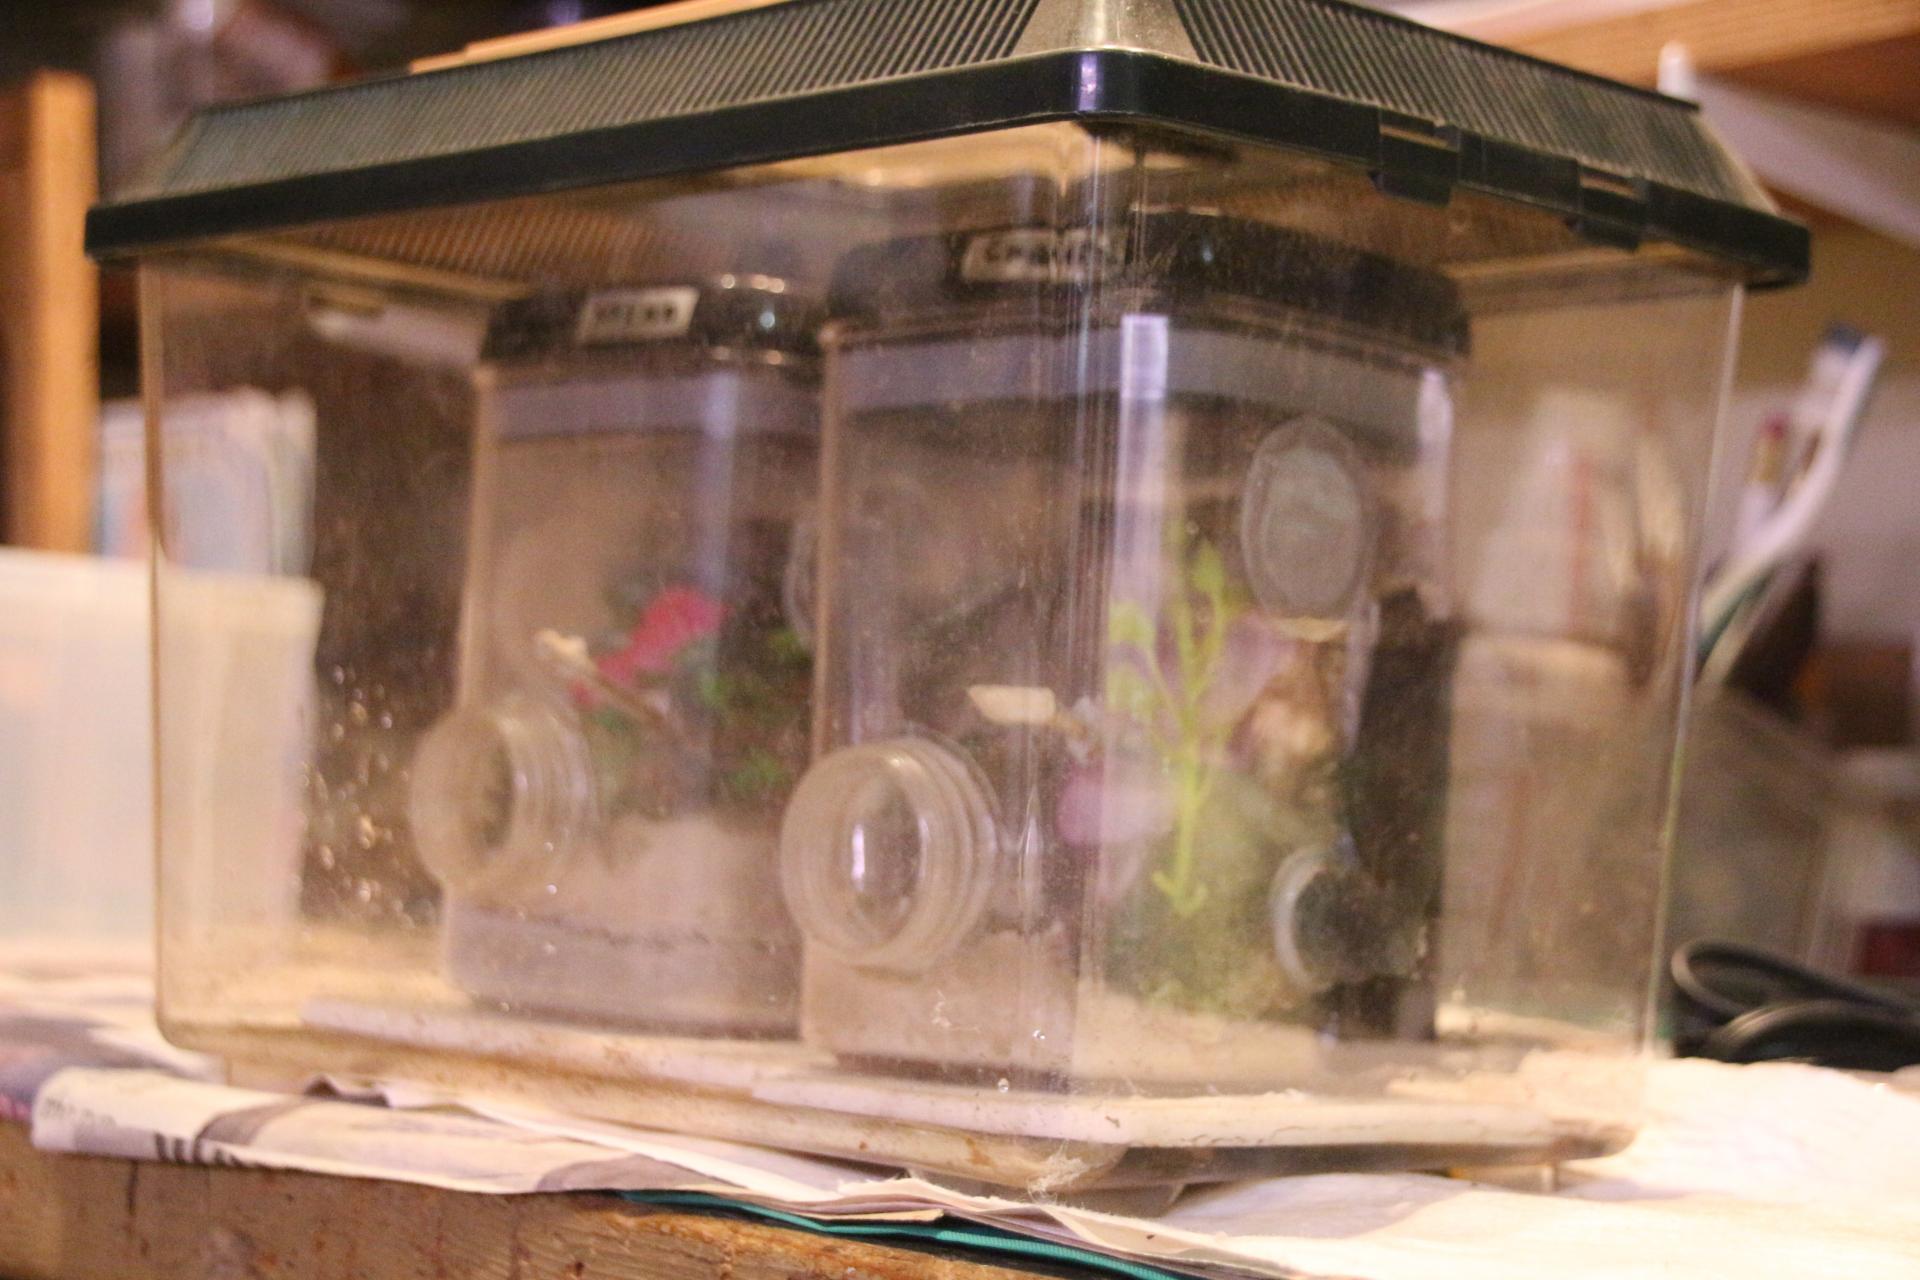
Crematogaster Colony 2, (Cre2), on the right, shared the heating mat with a Lasius neoniger colony.   


IMG_8292.JPG


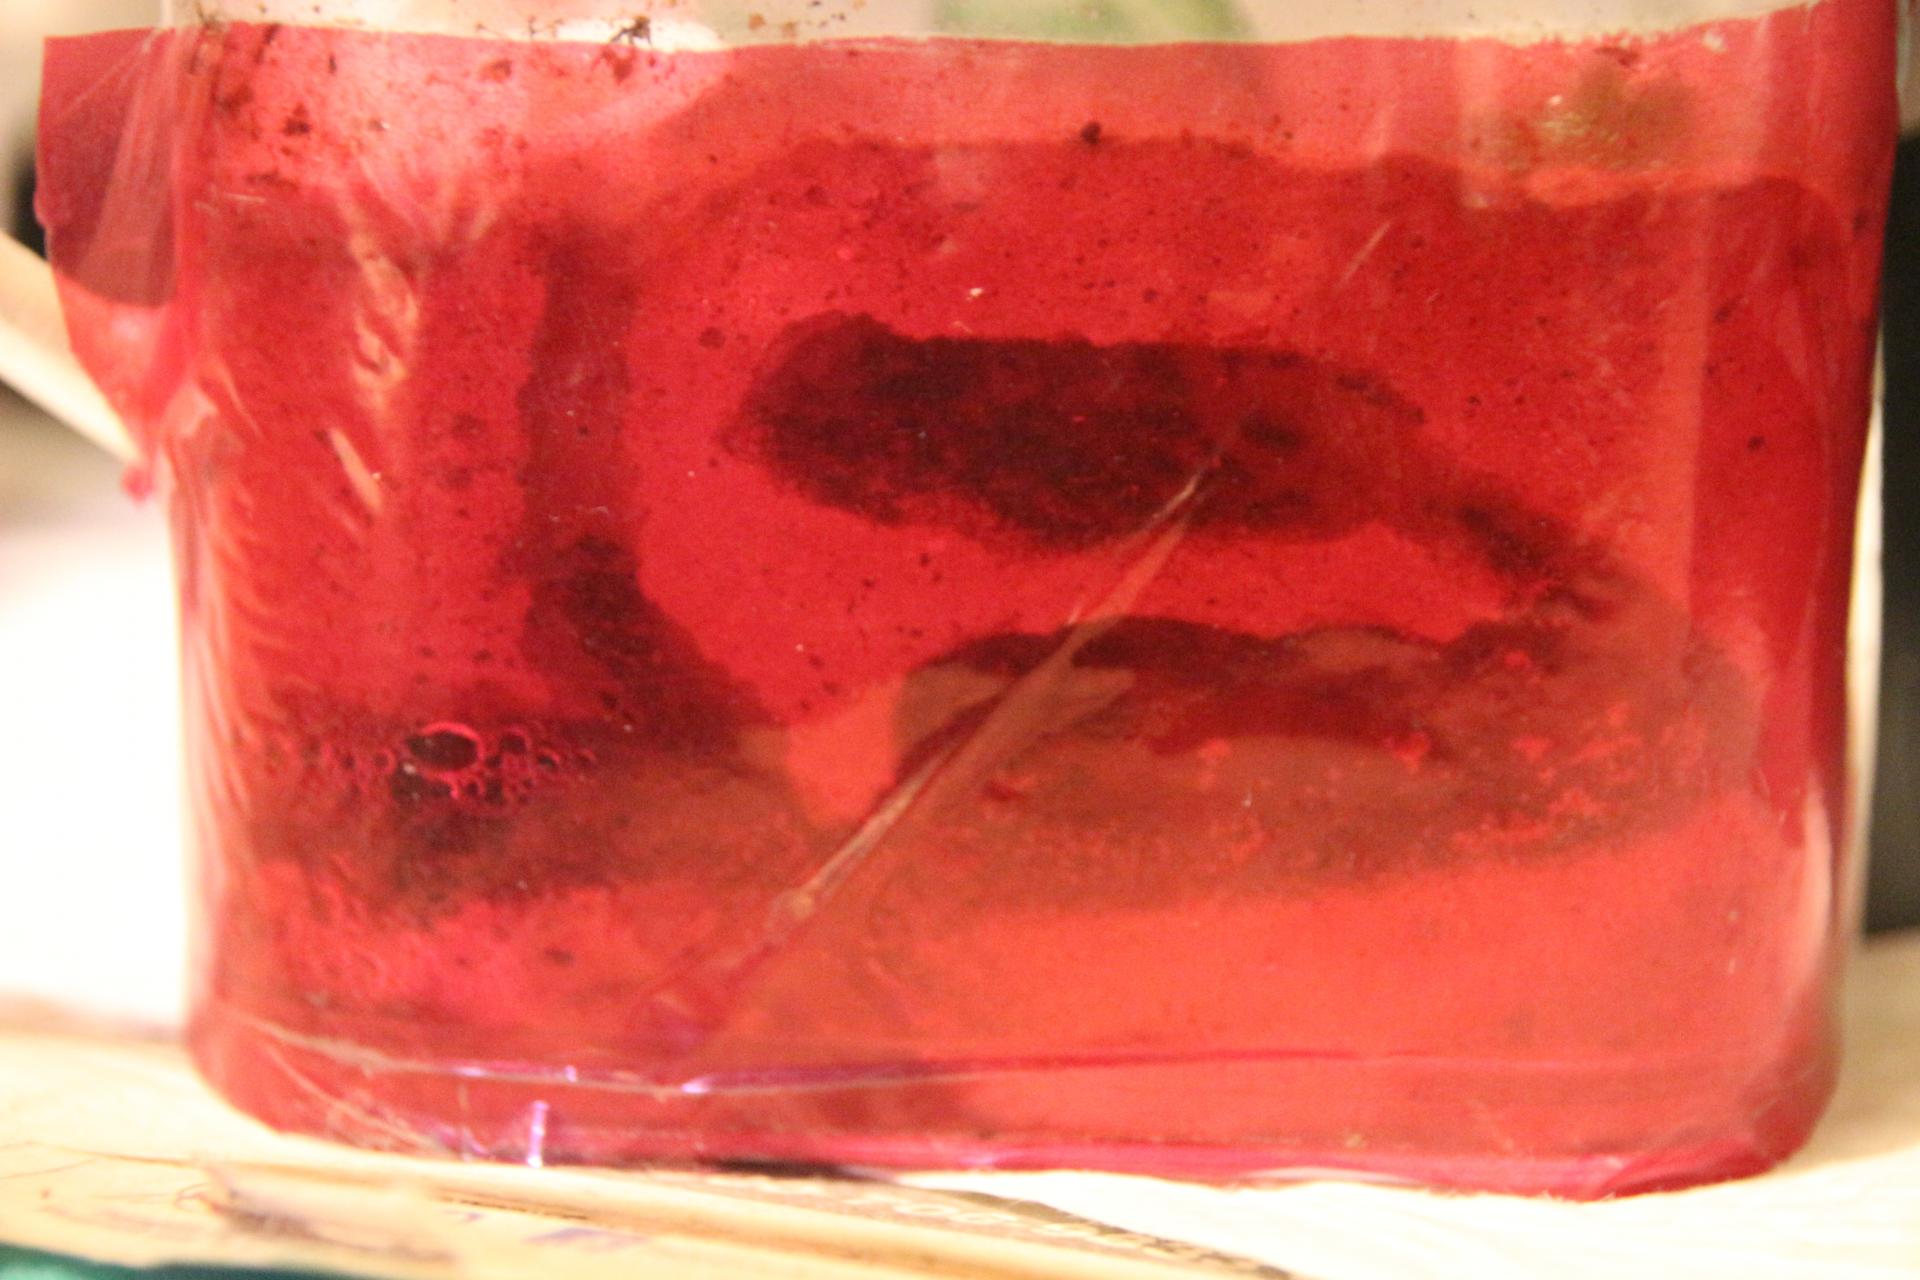
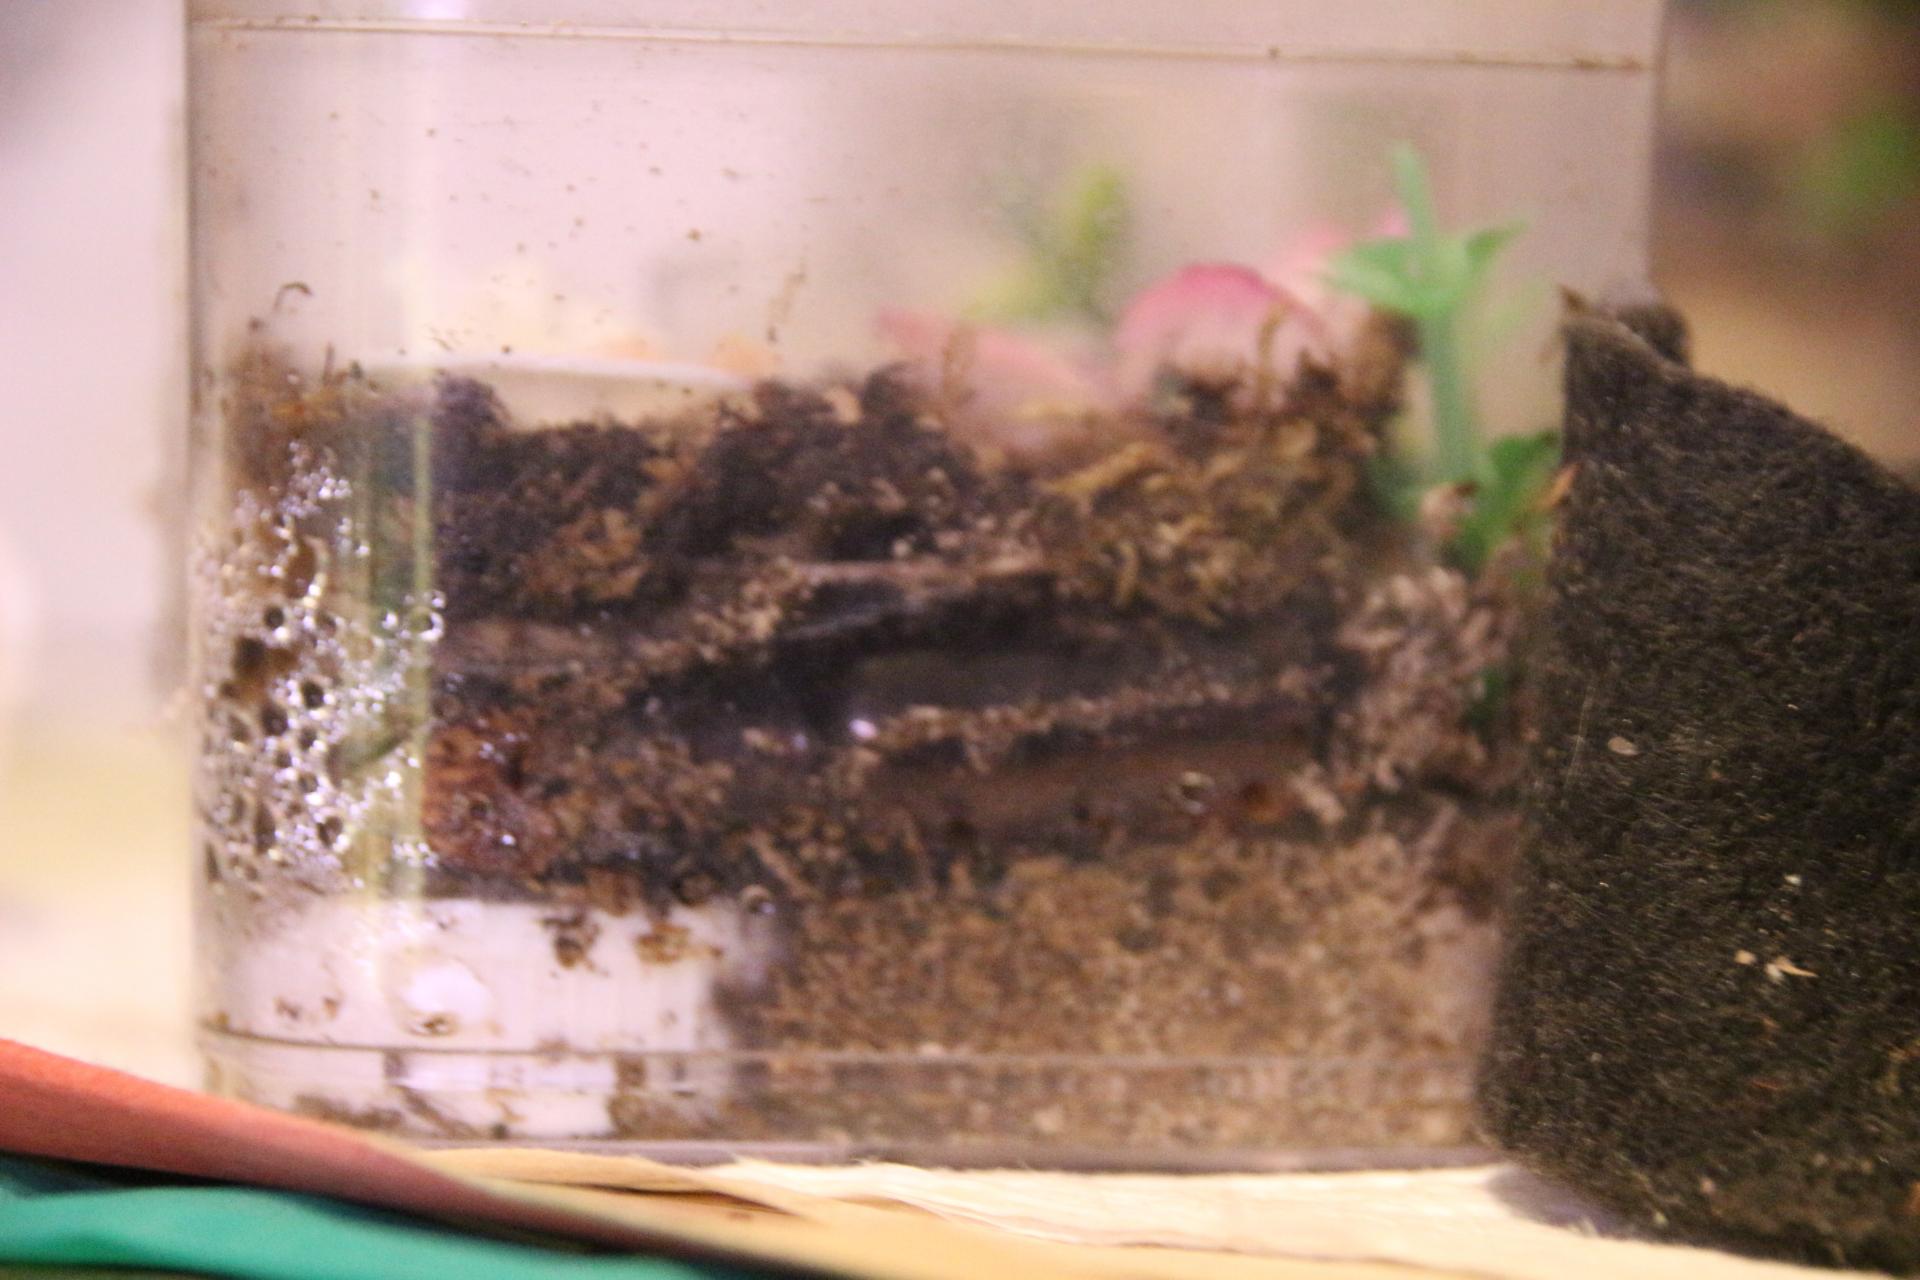
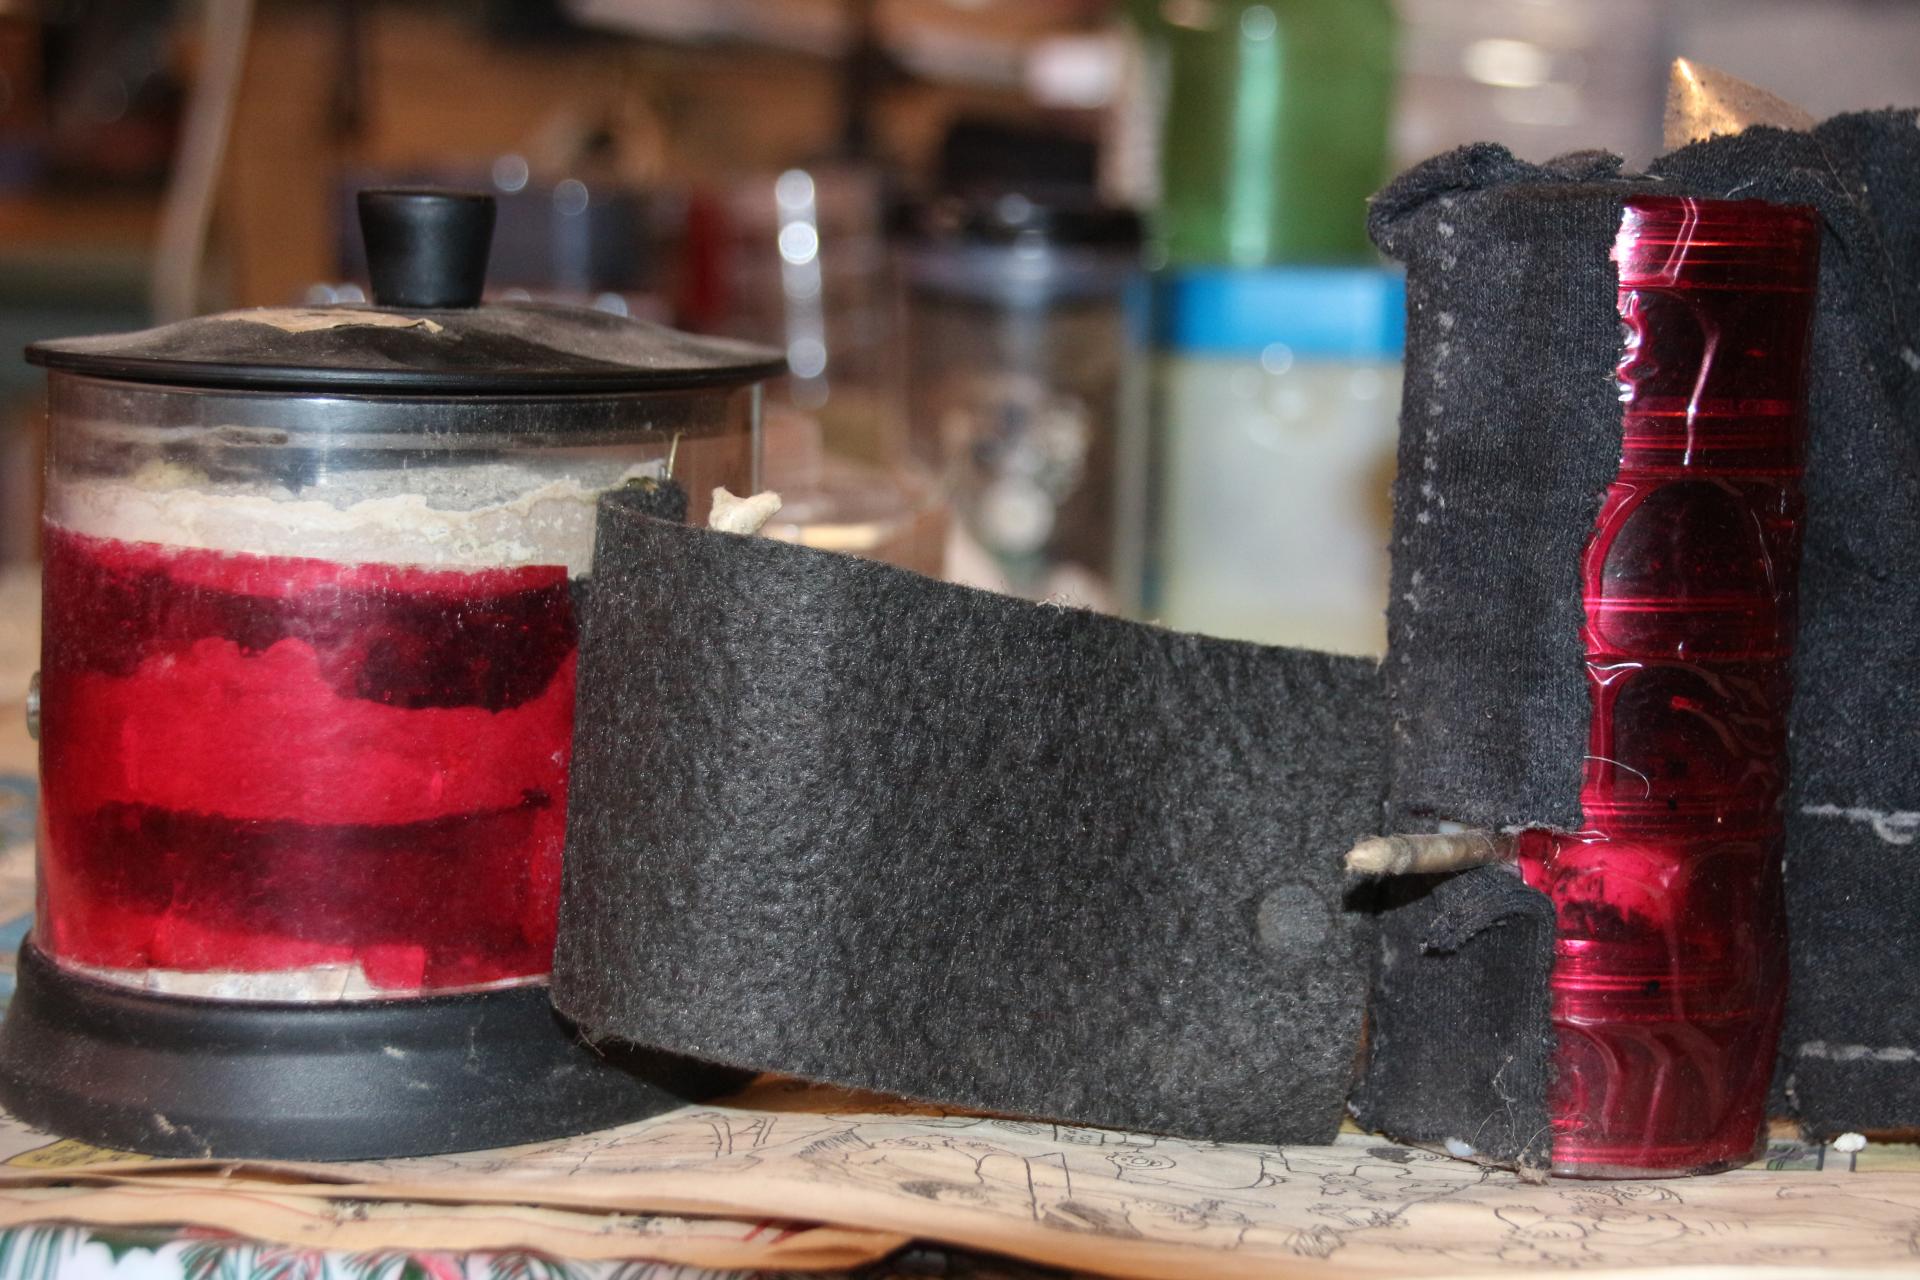
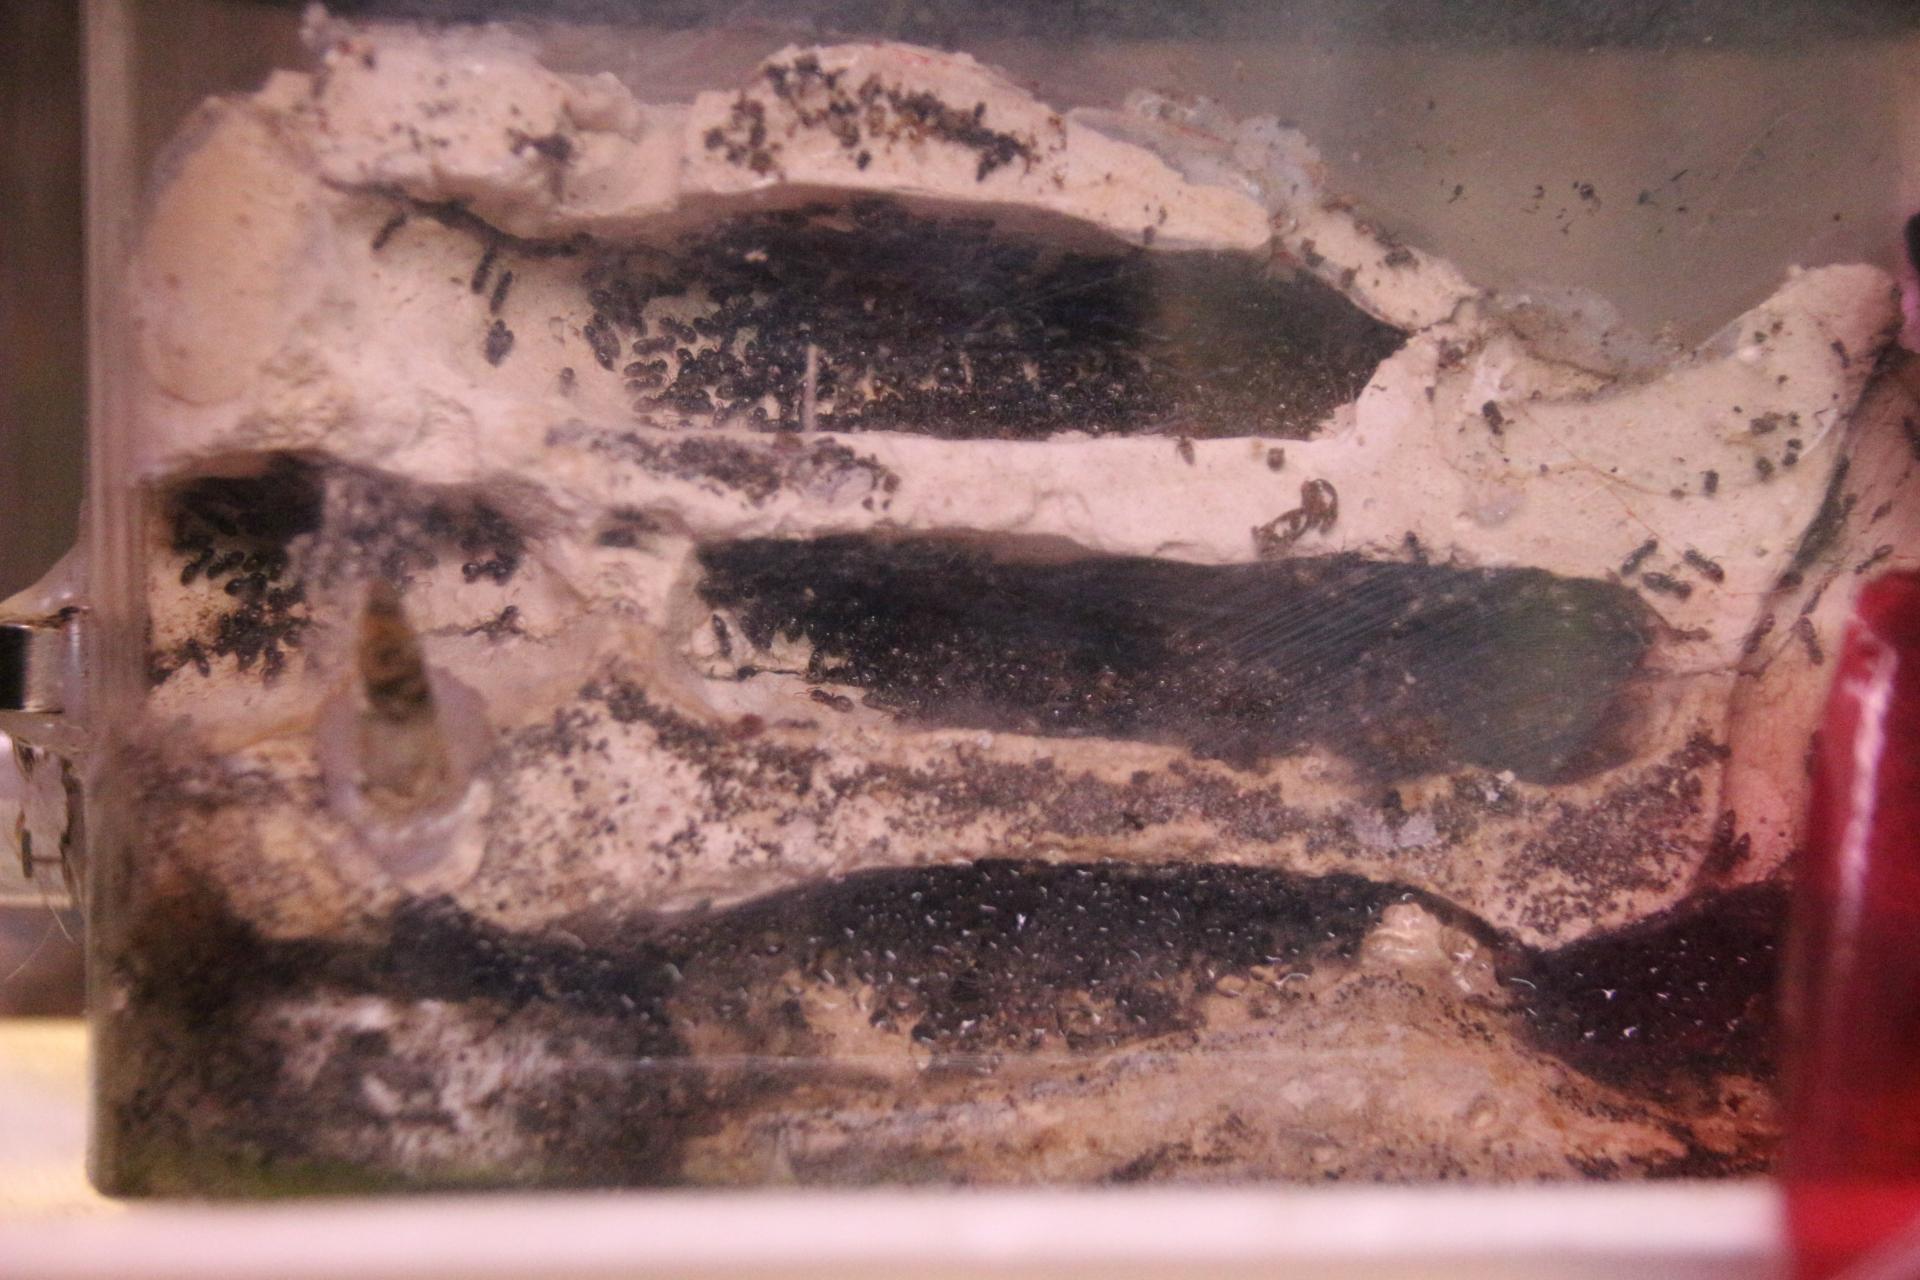
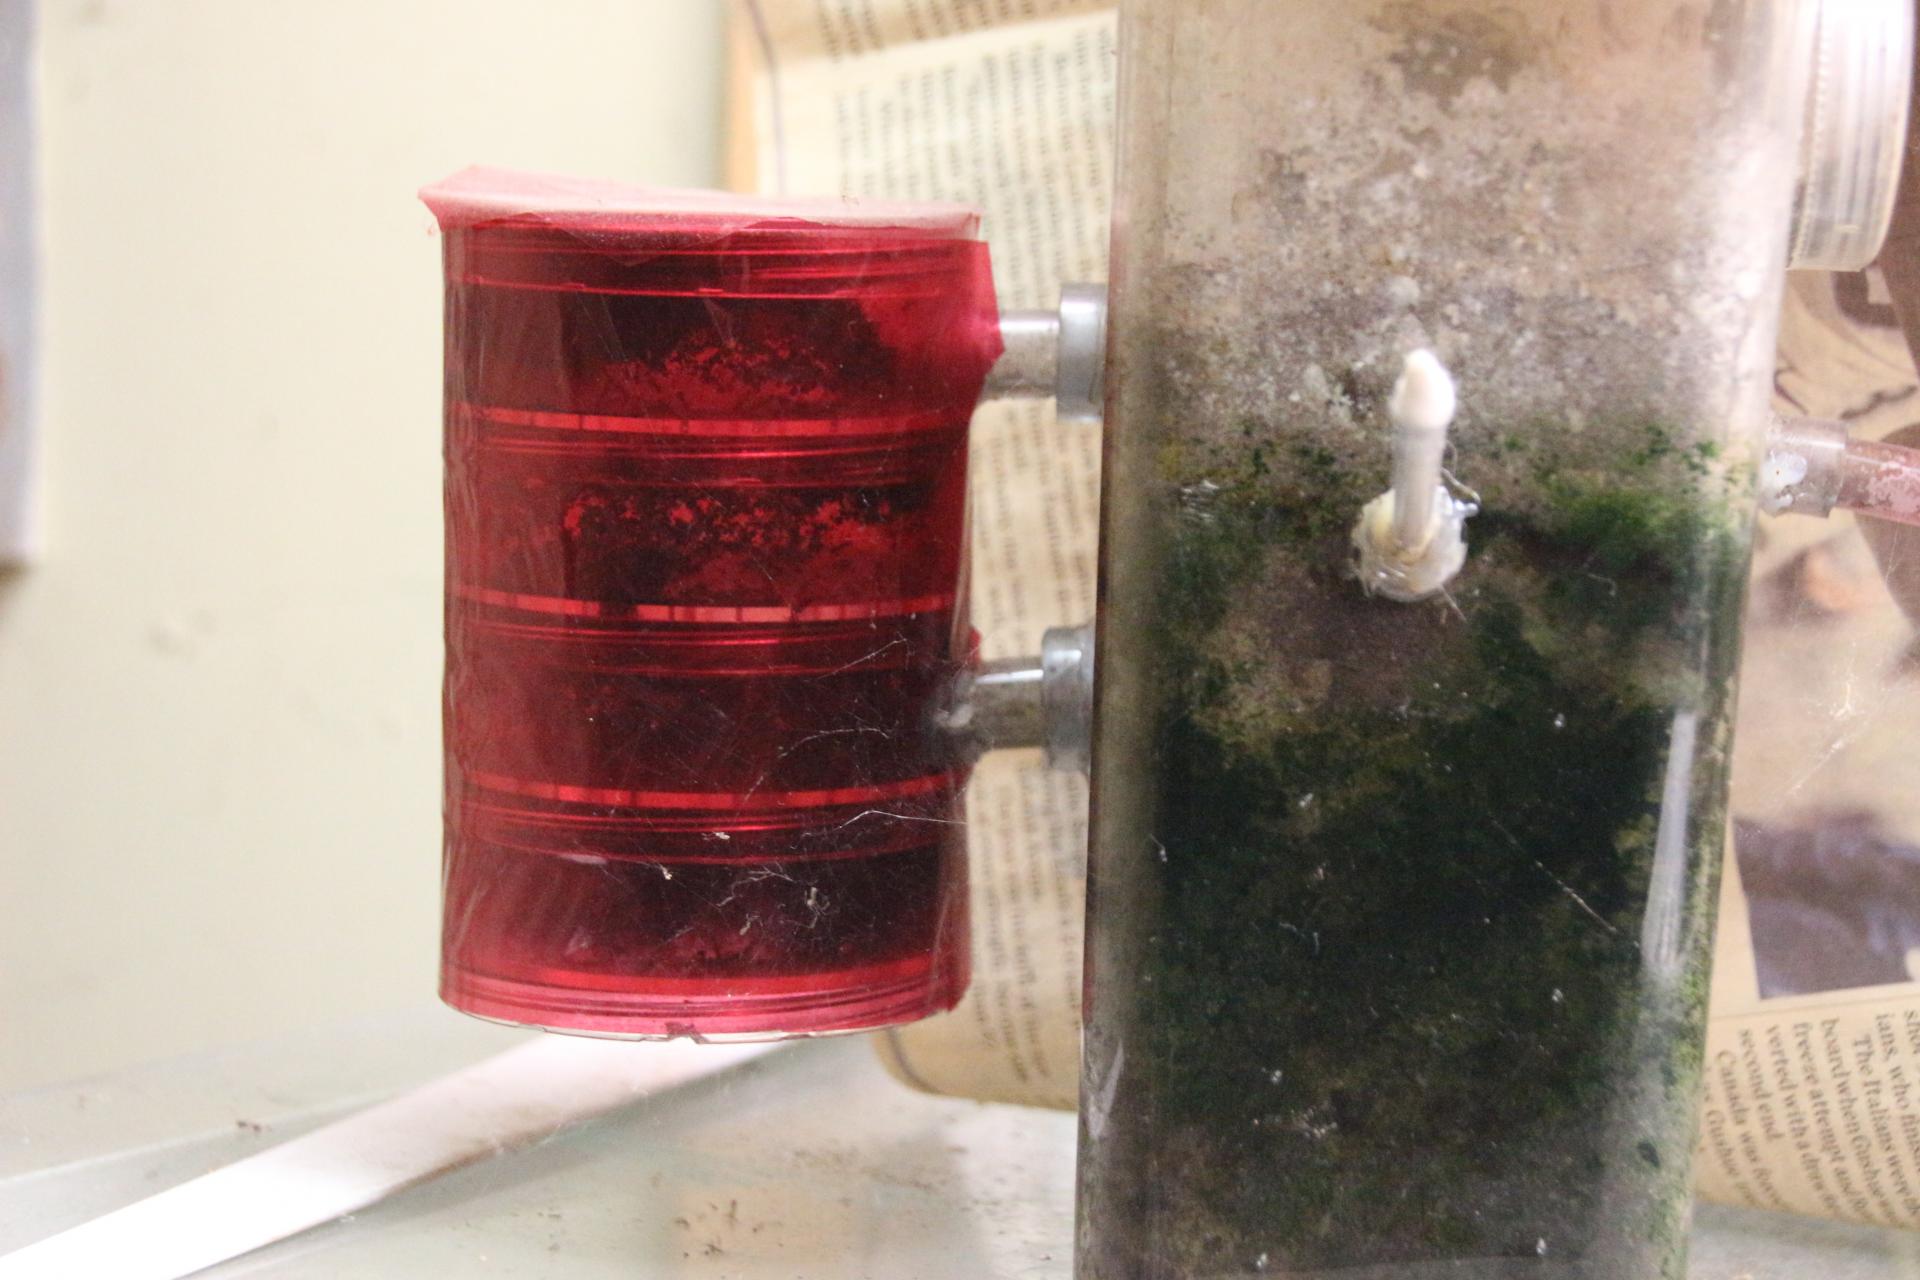
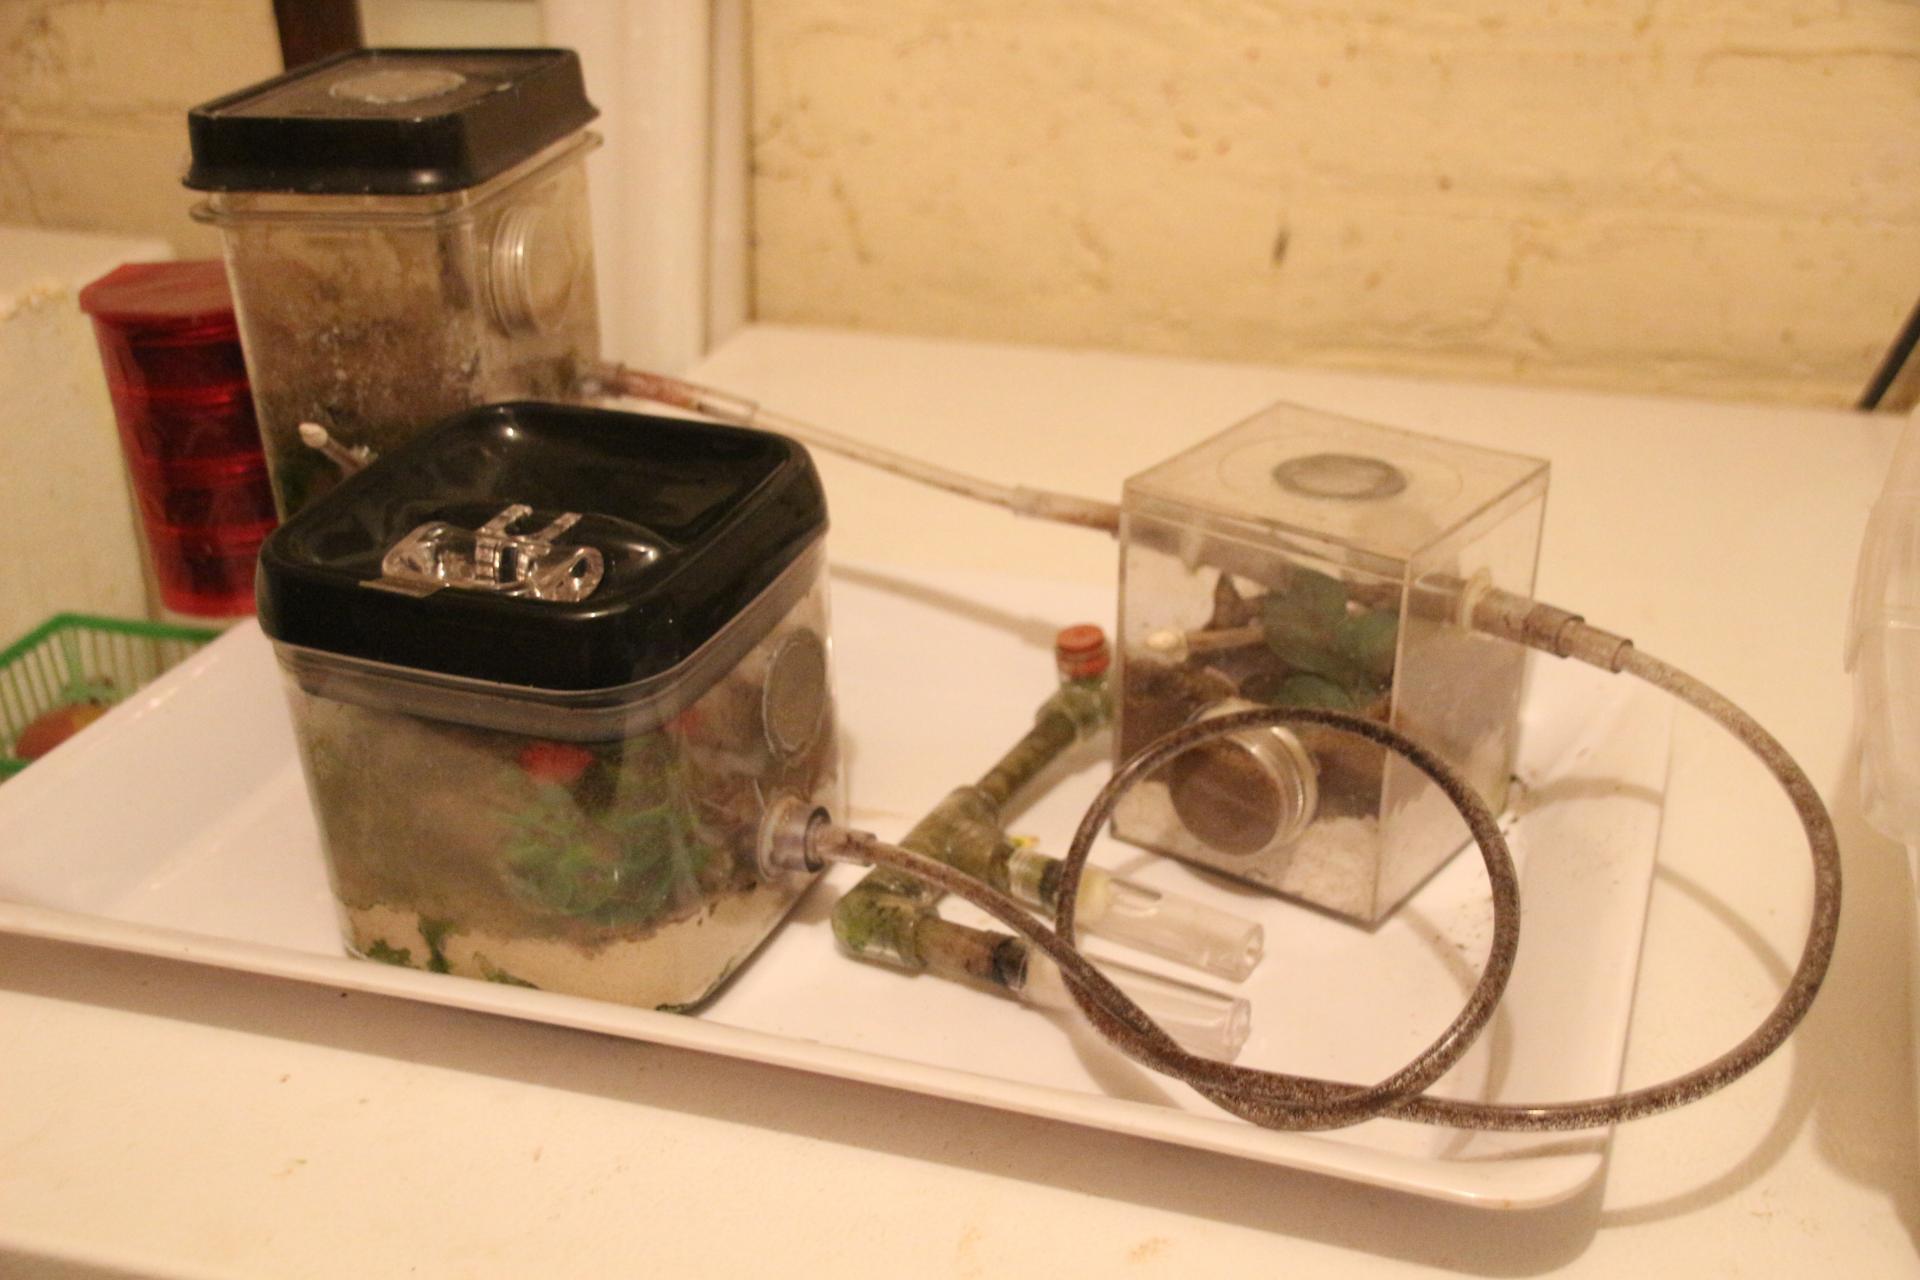
I call this type of nest "Tubes in Cubes" and it consists of stacked bottles in this case.    Each has an access hole drilled in the cap.   I also cut a piece of clear plastic that fits inside each bottle, making a second story inside the bottle and essentially doubling the nesting area of each bottle.   Cre2 colony has finally moved into the bottom bottle in this setup.   They originally lived in the lower section of moss, and they still mature their pupae down there, closer to the heat.   The queen, brood and attendees are in the bottle.  


IMG_8284.JPG


This is the setup for Crematogaster Colony 3 (Cre3).


IMG_8285.JPG


I acquired Cr3 colony late in the season, they've been in diapause mode ever since.   Their cluster has gradually become tighter and tighter, with the queen and brood at the center. 


Lasius Colonies


IMG_8296.JPG


The Lasius neoniger colony that shares the heat mat is larger and they've made more modifications to the moss in their nest.    They love the moisture of the sponge and often have their larvae right on top of it.    They usually put cocoons in one of the bottles.   


IMG_8301.JPG


These are founding Lasius colonies, both were brood boosted late in the season, and they've developed well.


IMG_8303.JPG


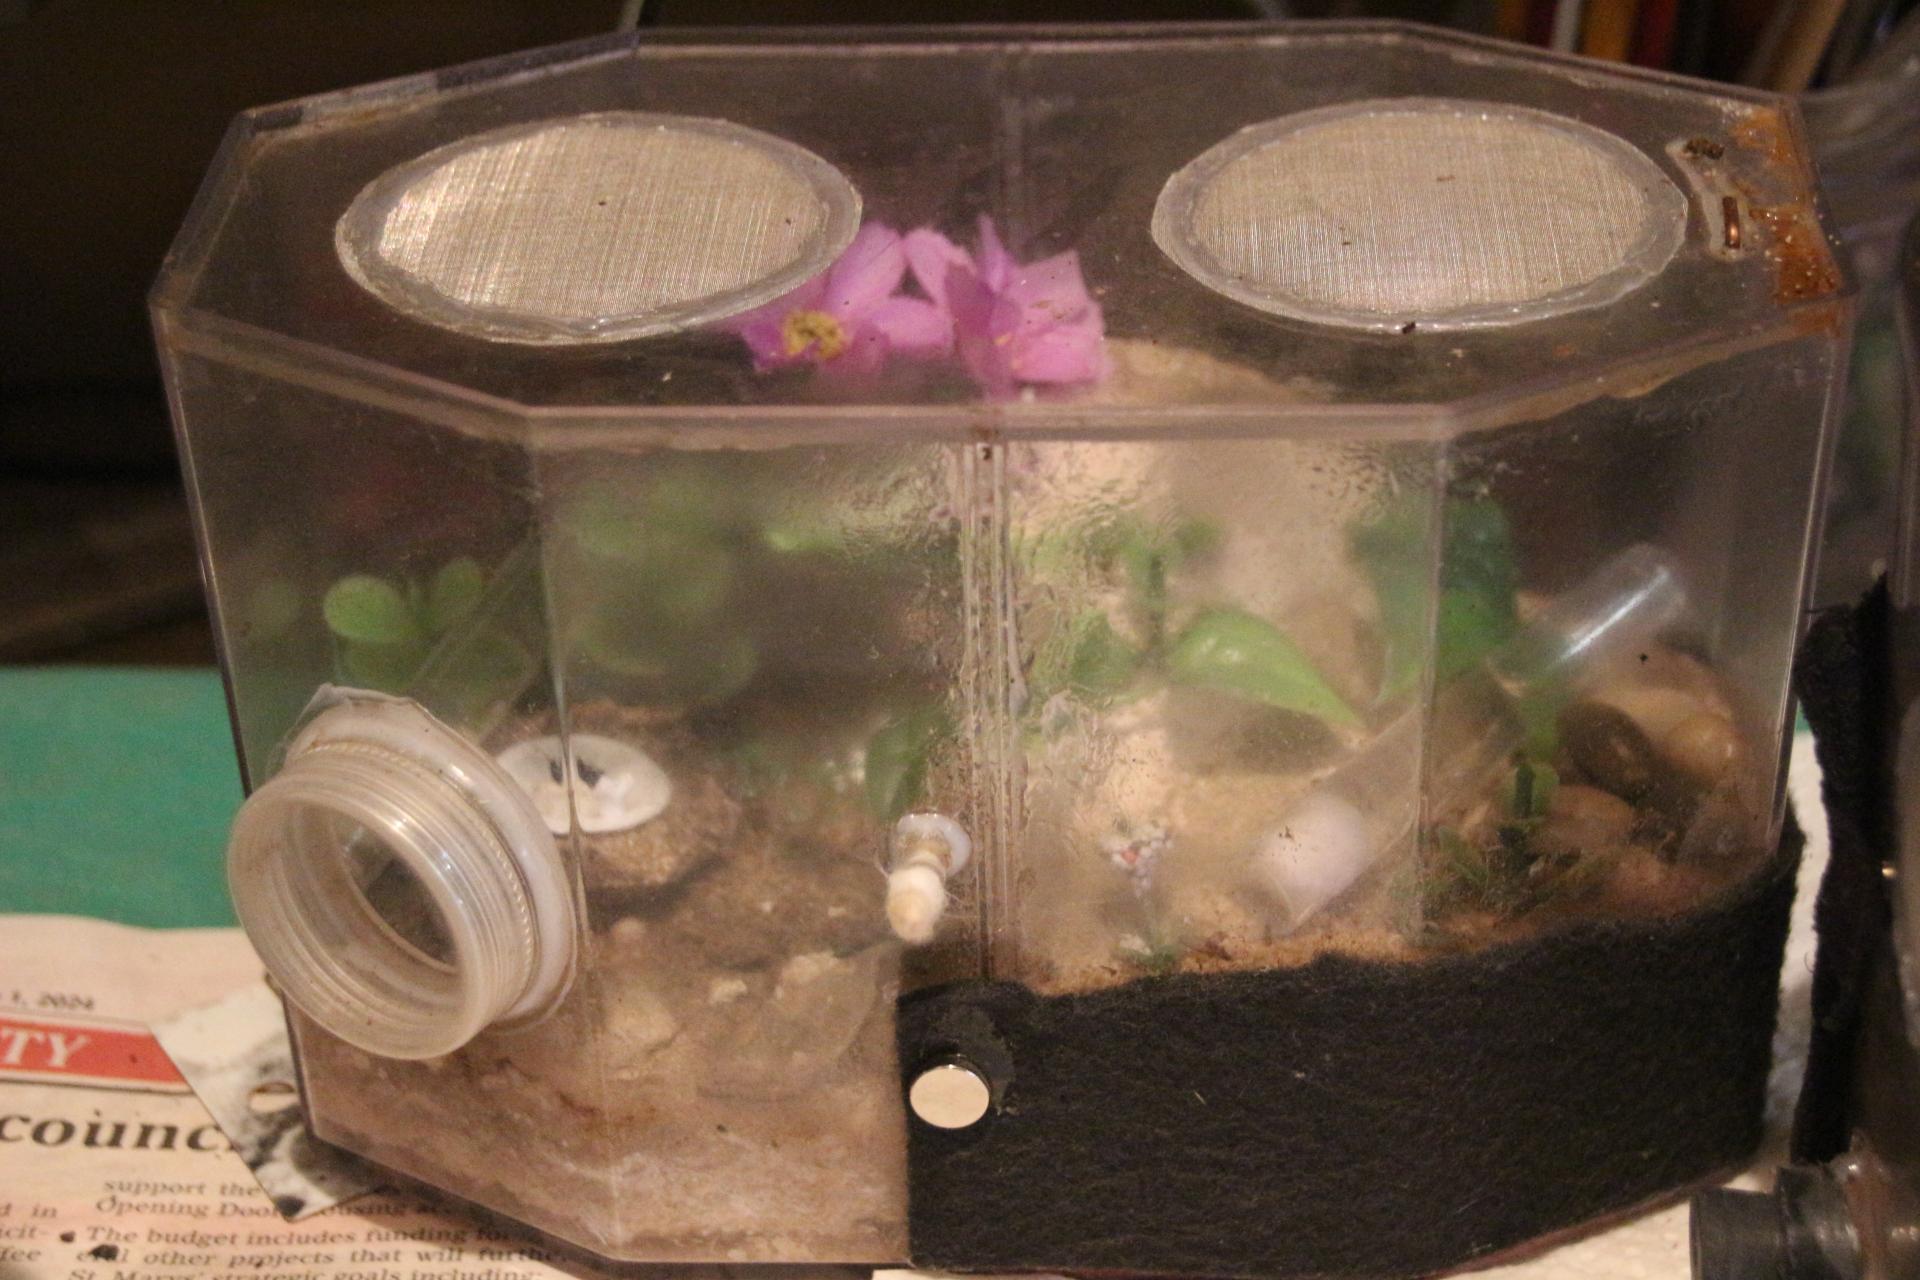
Viewing the colony is much easier in this grout chamber setup.   


IMG_8308.JPG


This colony is developing well living in the bottle in this "Tubes in Cubes" setup.


I also found two Lasius queens this summer, one is in a natural setup, and I haven't seen her since, the other is in a test tube setup and is quite happy to sit and wait for winter to be over.  Temperatures at night have been dropping to 14 deg C (58 deg F) at night and can be as high as 20 (68) on a sunny day in my workshop.   I'm still feeding protein to colonies that are still taking it, most have slowed down and will soon be ready to pack up for winter storage.

RPT


  • Karma, ANTdrew, RushmoreAnts and 3 others like this
My father always said I had ants in my pants.

#44 Offline ANTdrew - Posted November 3 2024 - 3:29 AM

ANTdrew

    Advanced Member

  • Moderators
  • PipPipPip
  • 10,001 posts
  • LocationAlexandria, VA
Putting the plastic strip in the bottles is a great idea! I wish I could send you one of the robust Crematogaster colonies I sell.
  • rptraut likes this
"The ants are a people not strong, yet they prepare their meat in the summer." Prov. 30:25
Keep ordinary ants in extraordinary ways.

#45 Offline rptraut - Posted November 4 2024 - 1:53 AM

rptraut

    Advanced Member

  • Members
  • PipPipPip
  • 528 posts
  • LocationOntario, Canada

Hello ANTdrew;


The plastic strips are the result of what my wife calls "thinking about ants way too much".   By using small bottles and test tubes I'm trying to provide an acceptable substitute for a chamber in nature, sort of a mini test tube setup.   It's great to share it with someone who understands!     I feel honored that you'd consider me as a recipient of one of your colonies.    I appreciate the gesture.   There's a limited number of Canadian ant suppliers; by the time you add taxes and delivery to the cost of the ants, buying a large colony can be an expensive thing, and they are livestock, subject to all the elements of life and death in nature.   


I haven't kept Crematogaster ants for very long, but I have watched videos, and I've read your journal.   From my experience they seem to be just as variable as other species I've kept.   Even your first three queens had their struggles and didn't perform the same.   That's why I decided to buy good sized colonies as I've lost many founding colonies.    I feel confident that they'll develop well in the workshop environment, especially with the added heat from the sunny window.   Patience and perseverance will reward the ant keeper.

RPT


  • ANTdrew, Ants_Dakota, Mushu and 2 others like this
My father always said I had ants in my pants.

#46 Offline rptraut - Posted November 9 2024 - 1:55 AM

rptraut

    Advanced Member

  • Members
  • PipPipPip
  • 528 posts
  • LocationOntario, Canada

I Was Run Over by My Truck


This isn't about ants, but I hope you'll enjoy this story.   


When I was in my thirties I worked for a local Authority, taking a no-till drill and planter to area farms for demonstration plots of conservation planting.   I had a used 3/4-ton 4x4 truck to do the hauling, it was a standard.     Soon after getting the truck, I noticed two wires hanging down below the engine, insulated wires with bare ends, no caps.   No one seemed to know the purpose of these wires, but it bugged me to have bare wires hanging under the engine.   I figured they might turn on some lights or were probably dead, after all who would leave live wires just hanging there.   A co-worker and I decided to figure it out so I slid under the truck, my waist was right behind the front tire, where I could reach the wires.   I told my buddy to turn on the key so we could watch for lights.  The parking brake was off, and it must have been in gear, because when I touched those wires together the engine started instantly, and the truck was moving forward with me still underneath.   


Everything moved in slow motion, no kidding.   I thought about rolling under the truck, it was high enough and I was already halfway there.   But I wasn't sure if I could make it under the universal and the axle.   All I could do was roll out from under the truck.   I rolled once and the rear tire grazed the side of my head as it went past and also ran over my trailing arm.   It wasn't slow motion anymore.  Most of my ear was peeled off the side of my head and I had graze marks on the side of my face.   I also had a serious bone bruise where the tire bounced over my arm.   That hurt much more than the side of my head which was numb and actually didn't bleed all that much.   What happened after that is kind of a blur as I got stitched and bandaged up.   I healed fine, if you don't mind my wonky ear and the stripes on my face when I've got a couple of days stubble.   It could have been much worse.


Those wires were apparently meant for a non-existent automatic transmission, something to do with the signal to the starter that the vehicle is in park, and it will start.   They weren't even necessary for my standard truck.  


What can we learn from this?   Something as simple as rolling out of danger saved my life.   Rolling is also one way to keep from breaking bones and other injuries when you fall.   Protecting your head is fundamental; you're probably better off to protect your head with your arms, instead of trying to break your fall with an arm, possibly breaking it, or a wrist or a collarbone.    Rolling, if possible, is one way to help break your fall.  It was the only way for me to get out of trouble.


We should all be aware of the importance of safety when working on a vehicle.    It could have been taken to a qualified mechanic.   It shouldn't have been in gear; the parking brake should have been on, and the key should have been in my pocket.   

RPT


  • RushmoreAnts, Ants_Dakota, AntsGodzilla and 1 other like this
My father always said I had ants in my pants.

#47 Offline ANTdrew - Posted November 9 2024 - 5:00 AM

ANTdrew

    Advanced Member

  • Moderators
  • PipPipPip
  • 10,001 posts
  • LocationAlexandria, VA
Crazy! I’m thankful you survived such a harrowing experience.
  • Ants_Dakota and rptraut like this
"The ants are a people not strong, yet they prepare their meat in the summer." Prov. 30:25
Keep ordinary ants in extraordinary ways.

#48 Offline rptraut - Posted November 10 2024 - 12:52 AM

rptraut

    Advanced Member

  • Members
  • PipPipPip
  • 528 posts
  • LocationOntario, Canada

Crazy! I’m thankful you survived such a harrowing experience.


Hello ANTdrew;


You and me both!   As bad as the accident was, the worst was yet to come.   For some reason, my coworkers took me to an old country doc about a month away from retirement.    The first thing he did was apply antiseptic to my ear.    The numbness I'd felt up to then was immediately replaced with searing, burning pain, my eyes were watering, and I could hardly breath.   Oops, he'd used adhesive remover, the stuff used to remove the adhesive left on your skin after taking off a bandage!   What had been a fairly painless experience suddenly became the most painful event of my life.   He finally killed the pain with an anesthetic needle and stitched me up.   I'm probably lucky to still have an ear.   

RPT


  • Karma, AntsGodzilla and 1tsm3jack like this
My father always said I had ants in my pants.

#49 Offline rptraut - Posted November 20 2024 - 1:49 AM

rptraut

    Advanced Member

  • Members
  • PipPipPip
  • 528 posts
  • LocationOntario, Canada

Update 20NO24


Preparing My Colonies for Diapause


At this time of year my workshop temperature fluctuates from 6-10 C (43 - 50 F) at night to 14-18 C (57 - 65 F) in the daytime.   It can get as warm as 20 - 24 C (68 - 75 F) on a sunny afternoon.   Despite these warm temperatures, most of my ants' biological clocks have slowed them down to the point where they've huddled together in their protective cluster around the queen and brood.   This is particularly true for the Camponotus colonies.   About three weeks ago they began to go into their winter "sleep" mode which seems to be deeper than many other ants.   There always seems to be four or five ants that remain conscious, and they can be seen collecting water and sugar/water sporadically.     The rest of the colony stays firmly packed into their winter chambers and hardly stir at all.   


Our outdoor temperatures haven't been that cold, we've only had a couple of hard frosts.   As a result, the temperature of the root cellar where I store my ants for winter is fairly warm at 13 deg C, not much different from the average temperature of my workshop.   So, I've been able to take my time and pack up each colony when they stop taking protein (feeding larvae) and have matured their last batch of pupae.    


IMG_8316.JPG


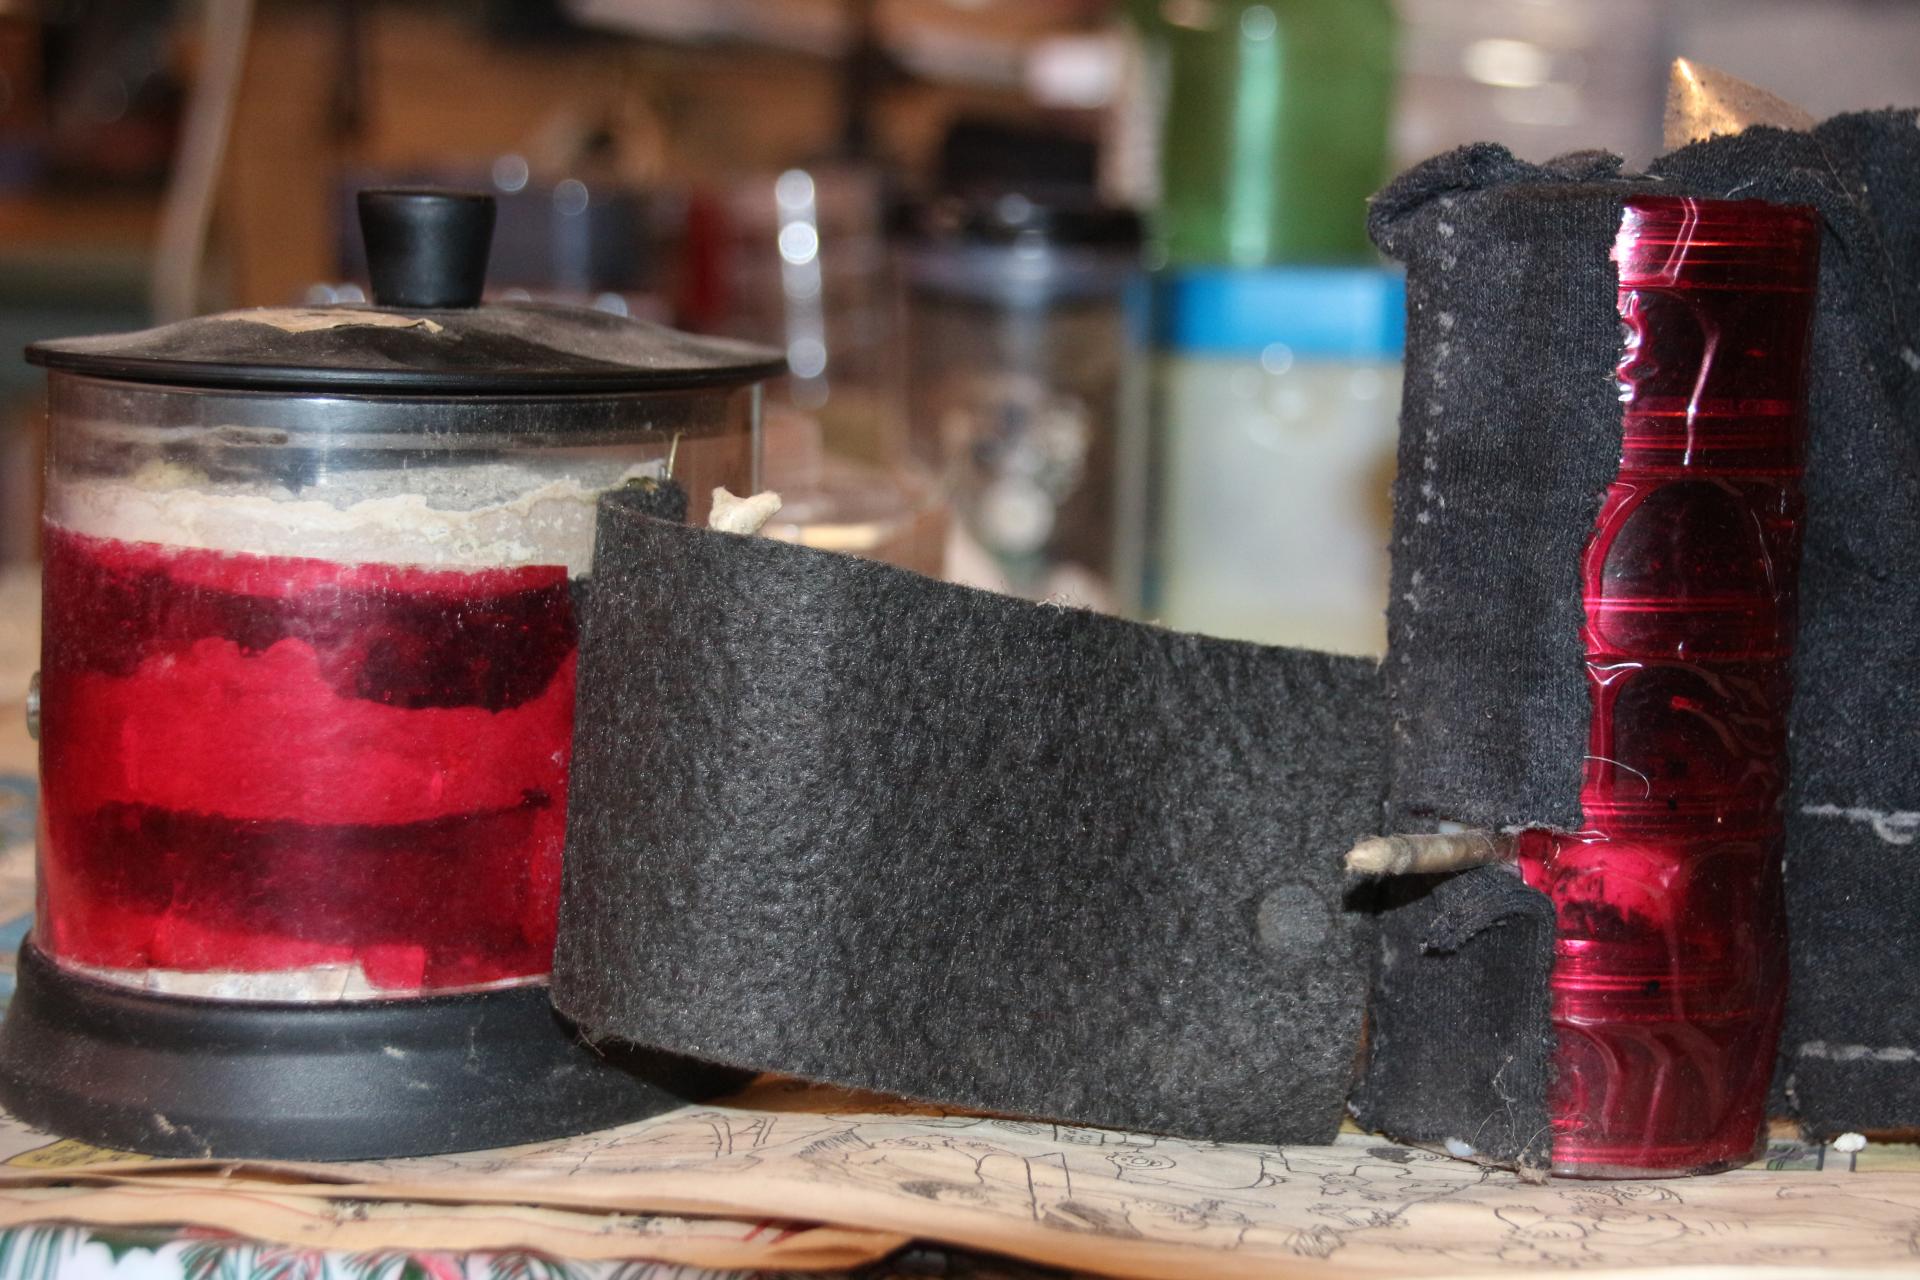
By detaching the outworld from the brood chambers of this Camponotus colony I only have to store them and their liquid feeders in the root cellar.


The Brachymyrmex depilis colony had a protein feeding frenzy about three weeks ago and have since slowed down and have closed most of their access holes into the nest.   In a wild colony that I've observed, the queen laid a large number of eggs in the fall.   This could account for the large demand for protein in my colony as the eggs hatched and the larvae were fed to diapause size.   Here's hoping!


IMG_8282.JPG


The Lasius and Tapinoma colonies are still fairly active but slowing down every day, so I still have them in the workshop.   I've kept my smaller Crematogaster colony (Cre2) heated to give them a chance to build up their numbers.   I think I'll stop heating them at the end of the month.   The larger colony (Cre3) is already in full diapause mode in their protective cluster.  


The activity of my Tetramorium colonies is regulated by the temperature.   I've still got the larger colonies in the window, with shades to prevent overheating on sunny afternoons.   They're quite happy to continue raising brood, no matter what the temperature.   I'm tempted to keep my smallest colony, the XL Tetramoriums on heat for the winter to keep me entertained.  


Before too long, it'll be cold enough outside that I'll have to fire up the wood stove in my workshop and the temperatures will then be too warm for overwintering ants, so those that are going will have to be put in the root cellar.   


The end of another season.

RPT


  • Karma, RushmoreAnts, Ernteameise and 3 others like this
My father always said I had ants in my pants.

#50 Offline rptraut - Posted November 21 2024 - 3:06 AM

rptraut

    Advanced Member

  • Members
  • PipPipPip
  • 528 posts
  • LocationOntario, Canada

Update 21NO24


Nature School


A little while ago I was asked to do a "tree talk" at a local Nature School for home schooled children.   When I told them about my ant colonies, the tree talk was quickly forgotten.   The photos below are from our first lesson, an introduction to ants and ant keeping.  Today we talked about the parts of an ant and their life cycle.   We also talked about the responsibilities of keeping a pet, whether a dog, cat or an ant, and how the keeper has to supply them with food, water, shelter, and a safe environment to live in.    I showed them some of my ant colonies and they asked many, many questions.    They're making plans to build "critter cages" and I know they'll be looking for queens come springtime.   Great Fun!

RPT


e21b1a_07bb8efec7084136ab0010602582907d~
 
e21b1a_3e31fd6495cf46188b876a0faa15b217~
 
e21b1a_03ce52f6c96a41b98f0f86aad67de76d~
 
e21b1a_4627df4452ba44ac8588117e0a71286b~
 
e21b1a_3cfcf758e87544b9941d6d1a5632fd38~


  • Karma, RushmoreAnts, Full_Frontal_Yeti and 4 others like this
My father always said I had ants in my pants.

#51 Offline rptraut - Posted November 27 2024 - 1:39 AM

rptraut

    Advanced Member

  • Members
  • PipPipPip
  • 528 posts
  • LocationOntario, Canada

Update 27NO24


Crematogaster DIY Formicarium Build


I continue to work on this project every day, but it's had to take a back seat as I put my ant colonies in winter storage.   Below photos show my progress to date.   


IMG_8342.JPG


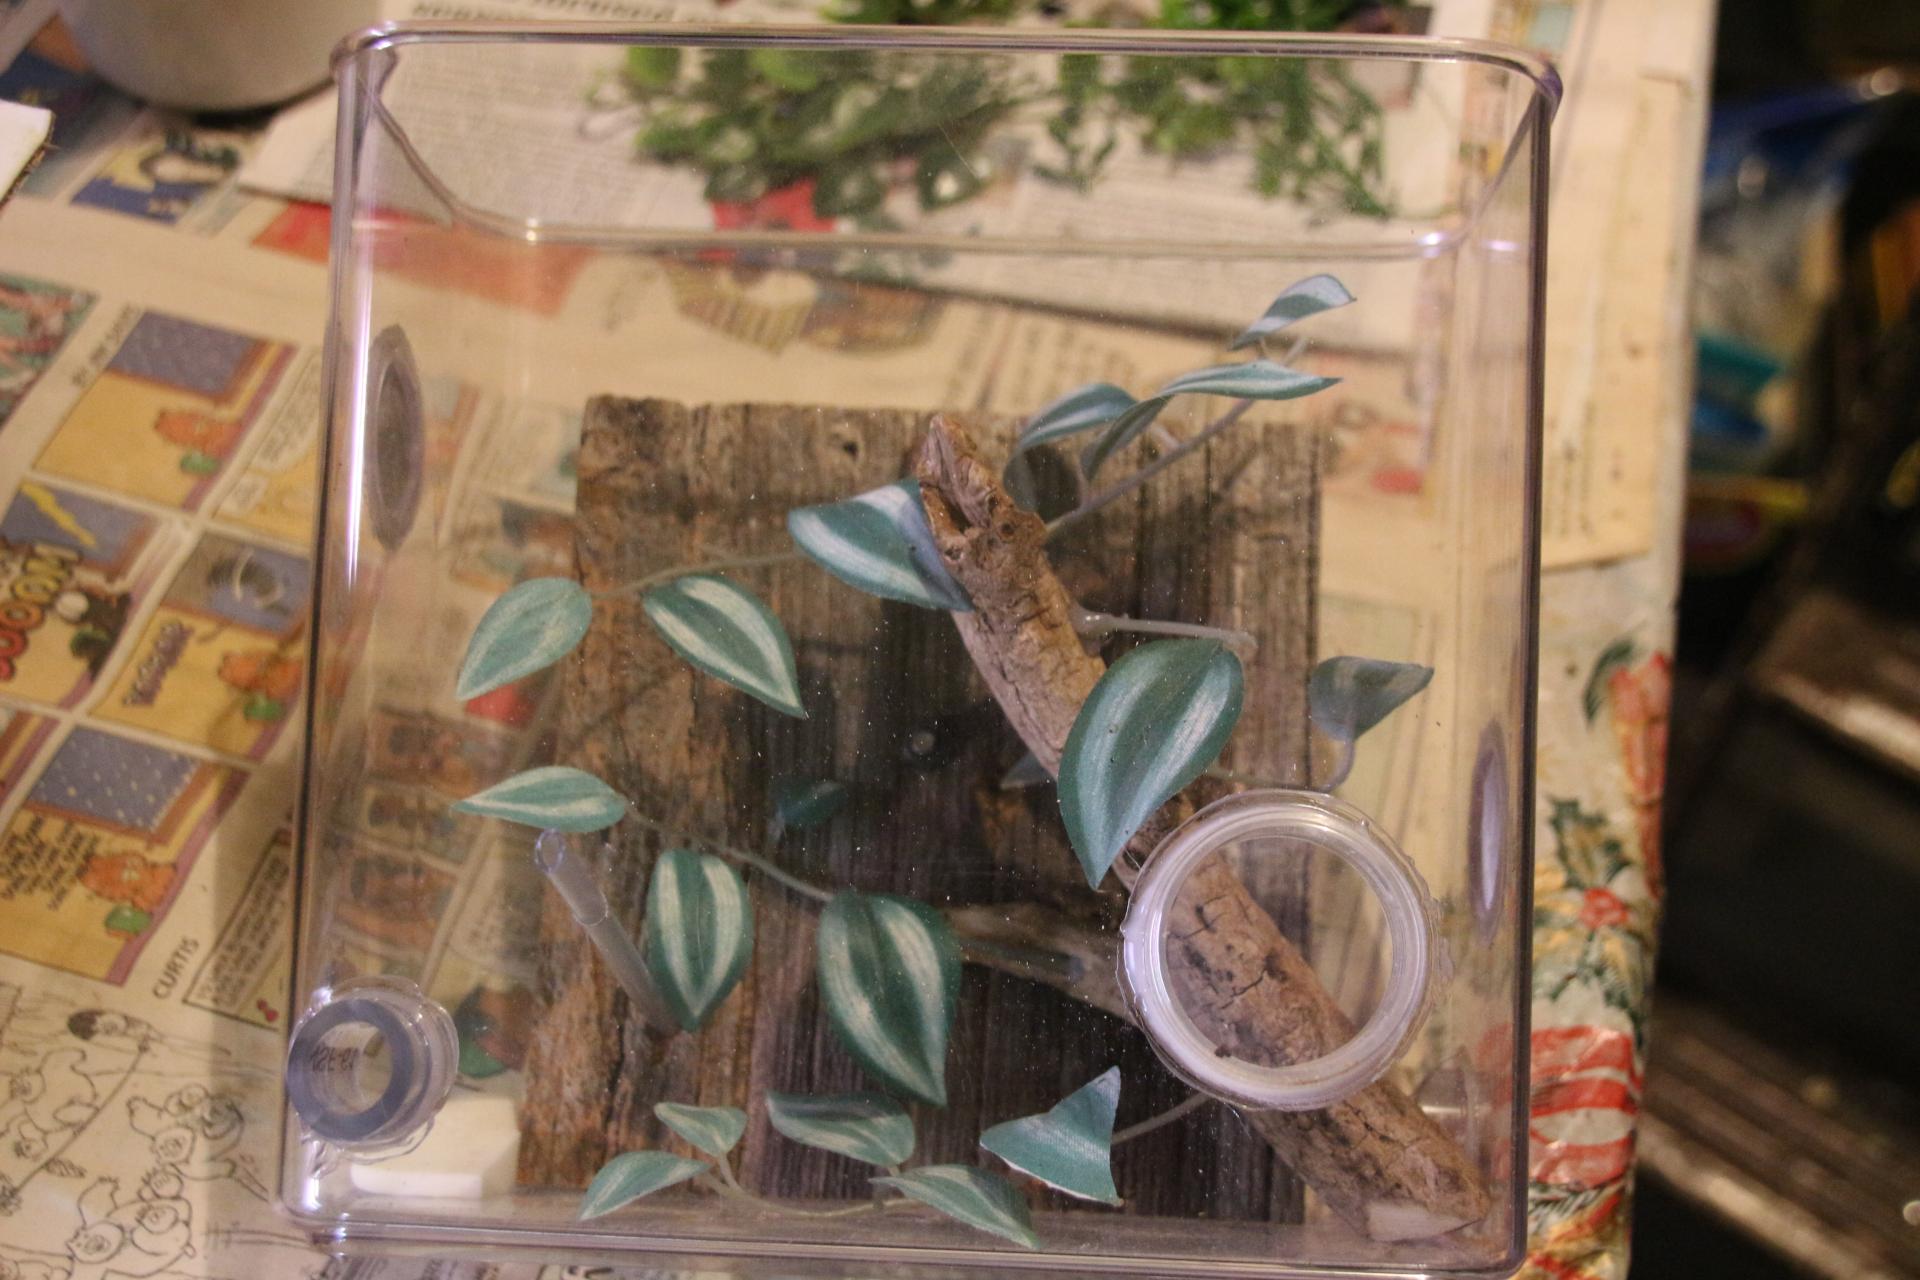
I'm going to install a small branch in this setup, I've attached some branches and leaves to it and checked the fit.   I've also cut and sorted some other greenery that I'll push into the grout when it's still wet.   I've also installed the sponge at the outflow of the nest hydrating sponge.   This will form the base for the oasis (wet hole) that will be in the back left corner.   


IMG_8343.JPG


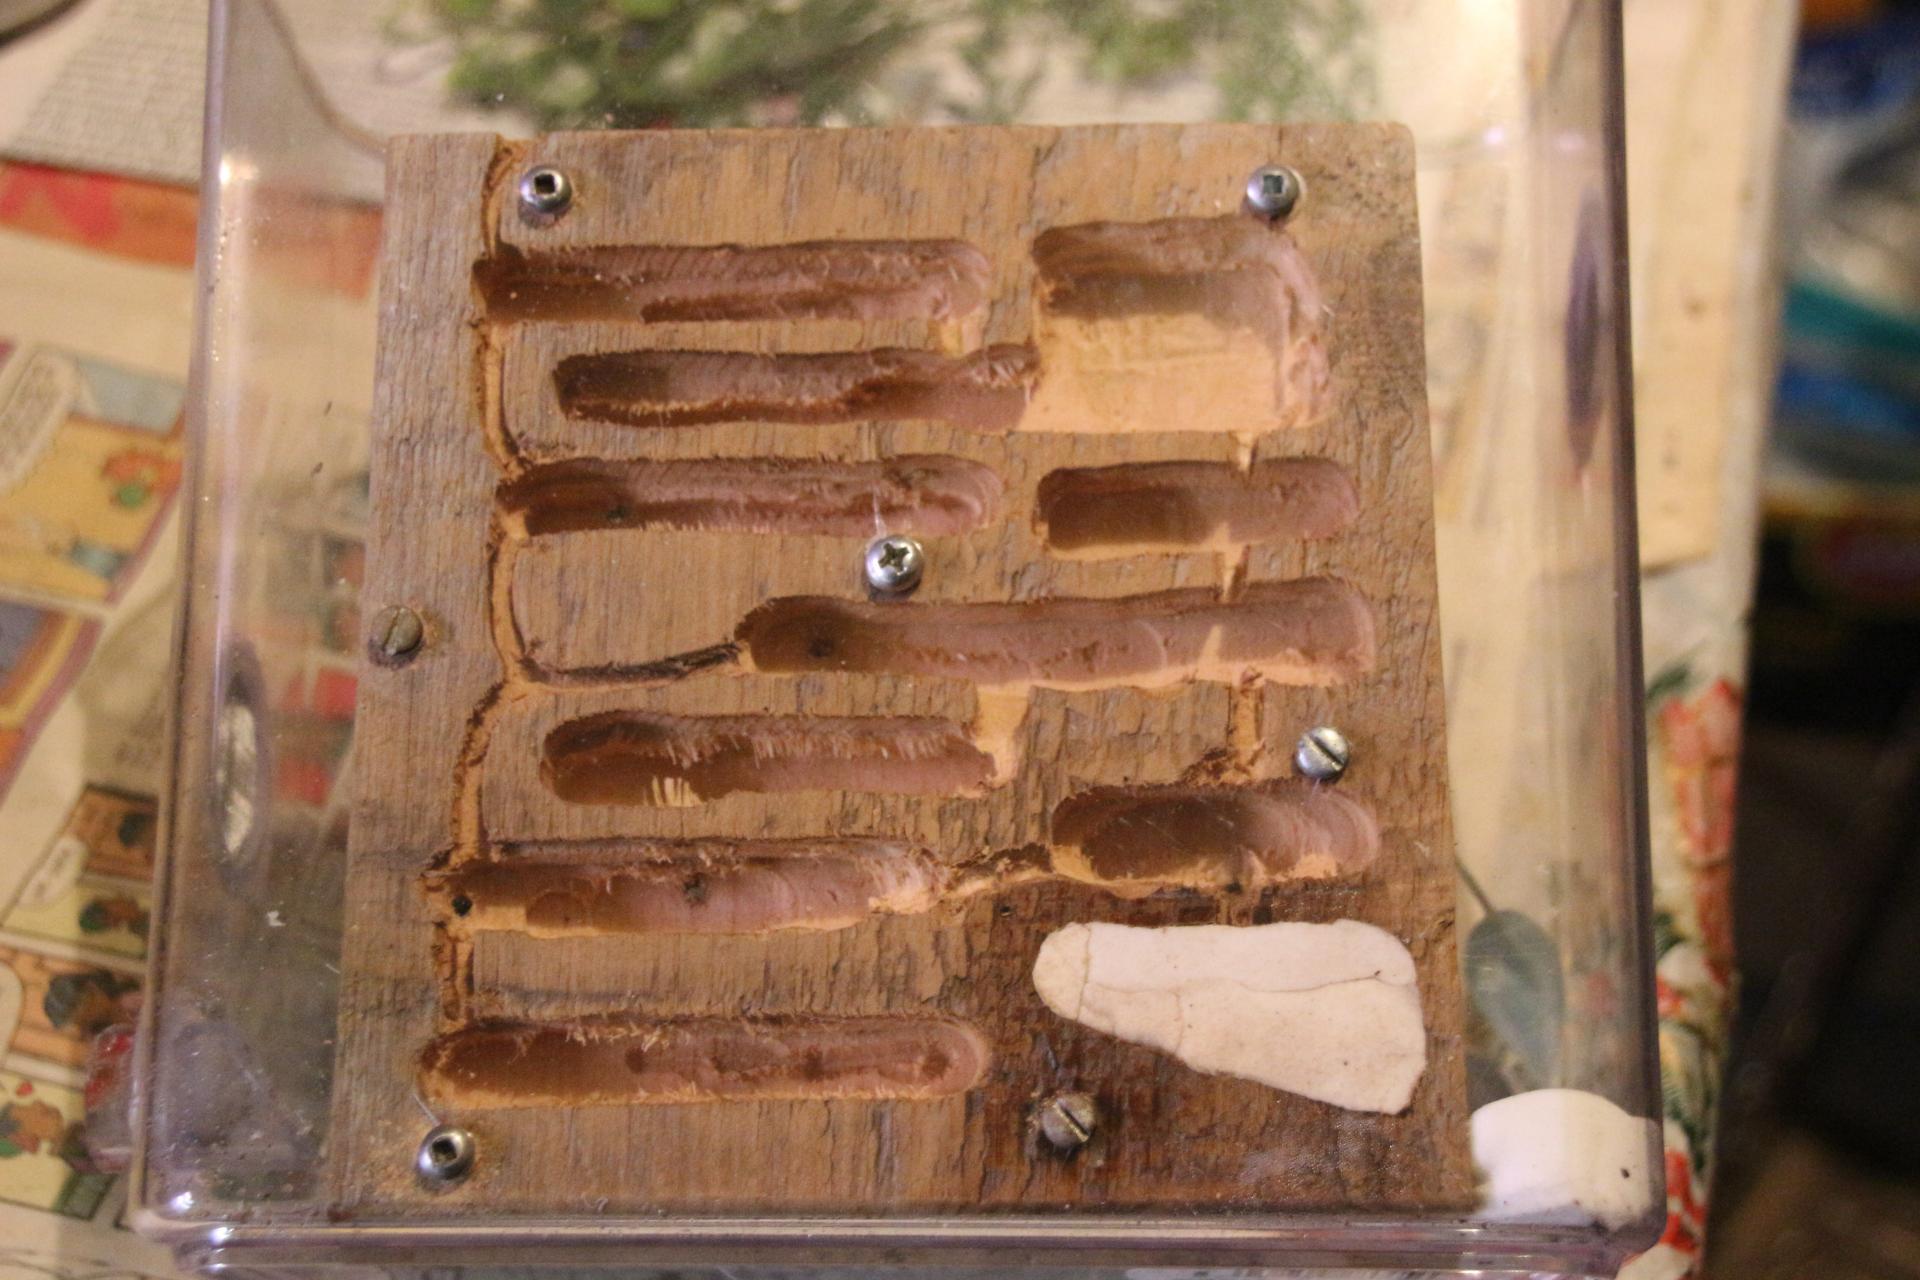
I attached the barnboard to the back of the container with additional screws to reduce the chances of warping or separation of the two surfaces.   It won't be long until I'm ready for the grout/vermiculite base and final assembly.  


Build a Brood Chamber


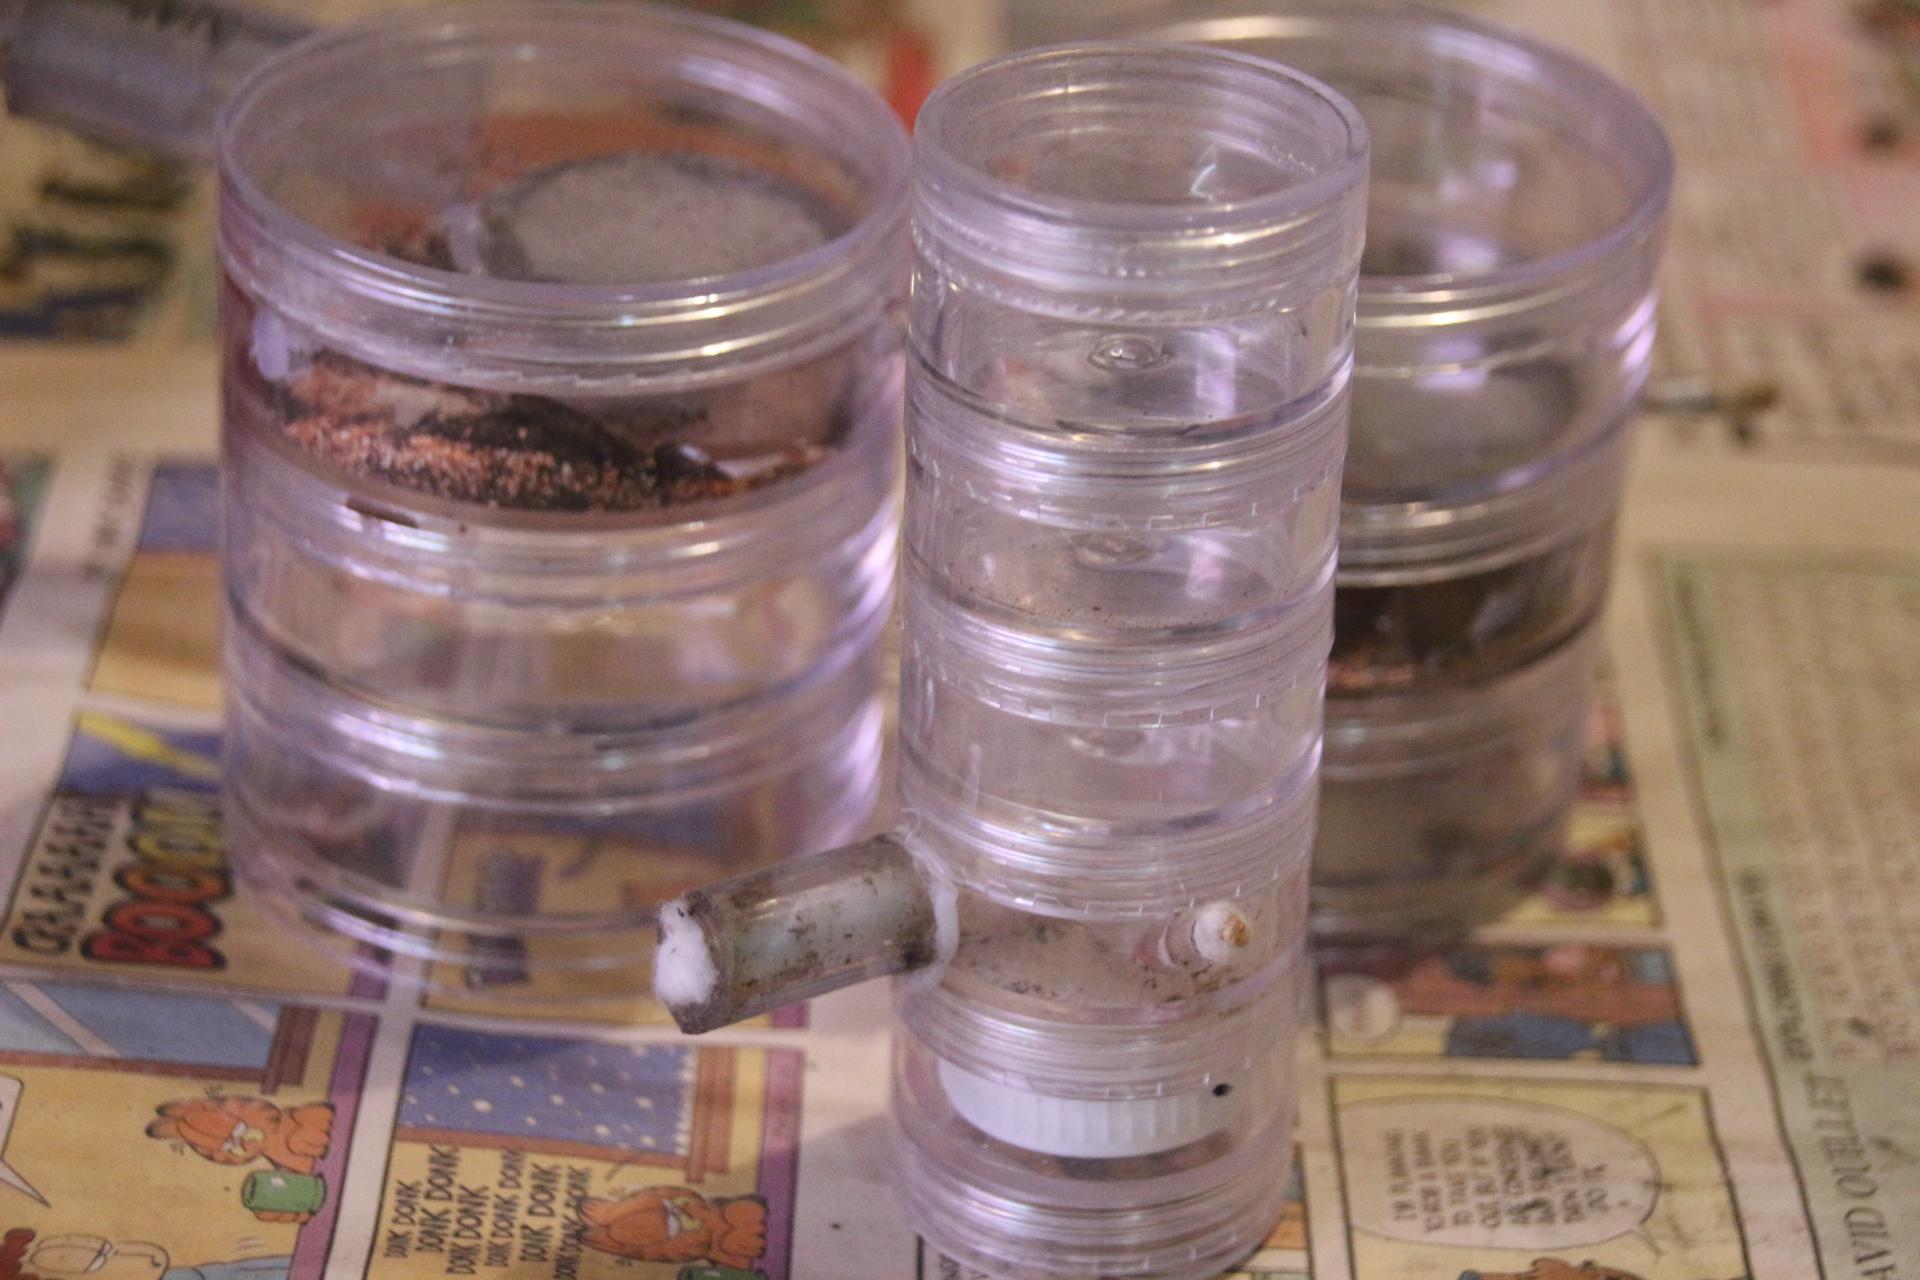
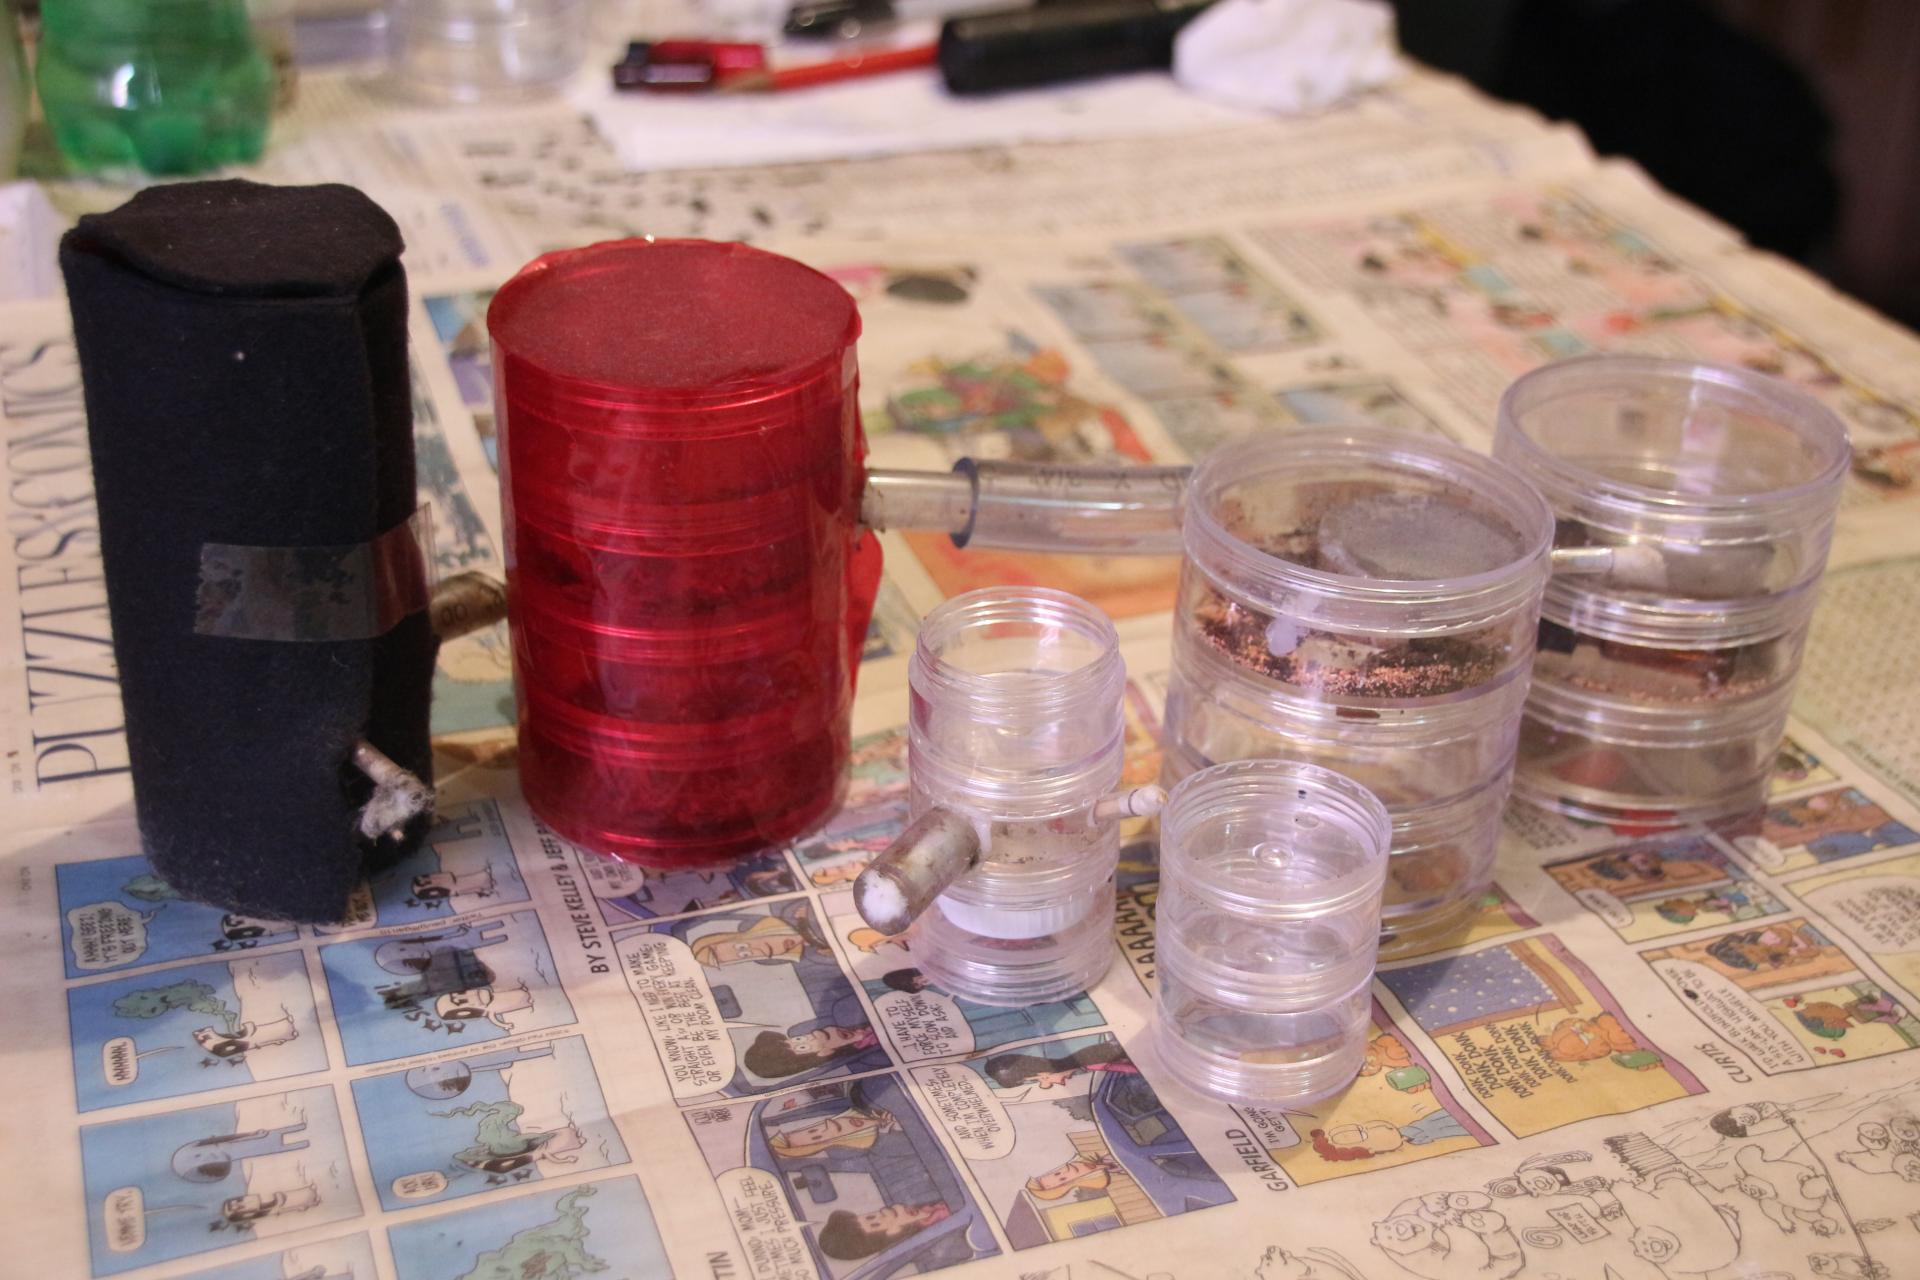
When I saw these containers in a craft store, they looked like a natural for an ant brood chamber.   


IMG_8338.JPG


Each section screws into the container below, so adding additional chambers would be easy for a growing colony allowing the nest to expand as the colony grows.   I drilled holes between each level and installed a water tower in the bottom section.   I also installed connector tubing and drilled some very small holes (micro holes) for ventilation.   


IMG_8337.JPG


The various sizes of containers allow them to be used by various sized ants and ant colonies.   They're easily covered with red cellophane and a blackout cover.   


IMG_8339.JPG


IMG_8316.JPG


So far, these brood chambers have been accepted by my Tetramorium, Camponotus and Tapinoma colonies.   

RPT


  • RushmoreAnts, Ernteameise, Izzy and 2 others like this
My father always said I had ants in my pants.

#52 Offline ANTdrew - Posted November 27 2024 - 4:16 AM

ANTdrew

    Advanced Member

  • Moderators
  • PipPipPip
  • 10,001 posts
  • LocationAlexandria, VA
All the setups are looking great. An old user named NickAnter used to have good success with those screw together containers for his colonies as well.
  • rptraut and 1tsm3jack like this
"The ants are a people not strong, yet they prepare their meat in the summer." Prov. 30:25
Keep ordinary ants in extraordinary ways.

#53 Offline ANTdrew - Posted November 28 2024 - 4:04 AM

ANTdrew

    Advanced Member

  • Moderators
  • PipPipPip
  • 10,001 posts
  • LocationAlexandria, VA
I found the post with his bead container tower setup. https://www.formicul...omeback/page-10
  • rptraut likes this
"The ants are a people not strong, yet they prepare their meat in the summer." Prov. 30:25
Keep ordinary ants in extraordinary ways.

#54 Offline rptraut - Posted December 10 2024 - 3:12 AM

rptraut

    Advanced Member

  • Members
  • PipPipPip
  • 528 posts
  • LocationOntario, Canada

Update 10DE24


Crematogaster Update 


I kept Crematogaster Colony 2 (Cr2) out of winter storage on heat until the end of November to give all their pupae time to eclose.    Colony 3 (Cr3) has been in diapause since I received them, weren't heated, and were put in the root cellar this week.   Cr2 has been off the heat for ten days now and were put in storage as well.  


IMG_4375.jpg


This is the setup that Cr2 was housed in this season.   When I made this, I put a number of small bottles in the back, between the rock and the acrylic wall, and they were used like test tubes by the ants for their nest.   For winter, I provided them with sponge pieces soaked in sugar/water and water and a test tube with drinking water is there as well.   The water tower in the nest was hydrated too.   


IMG_4378.jpg


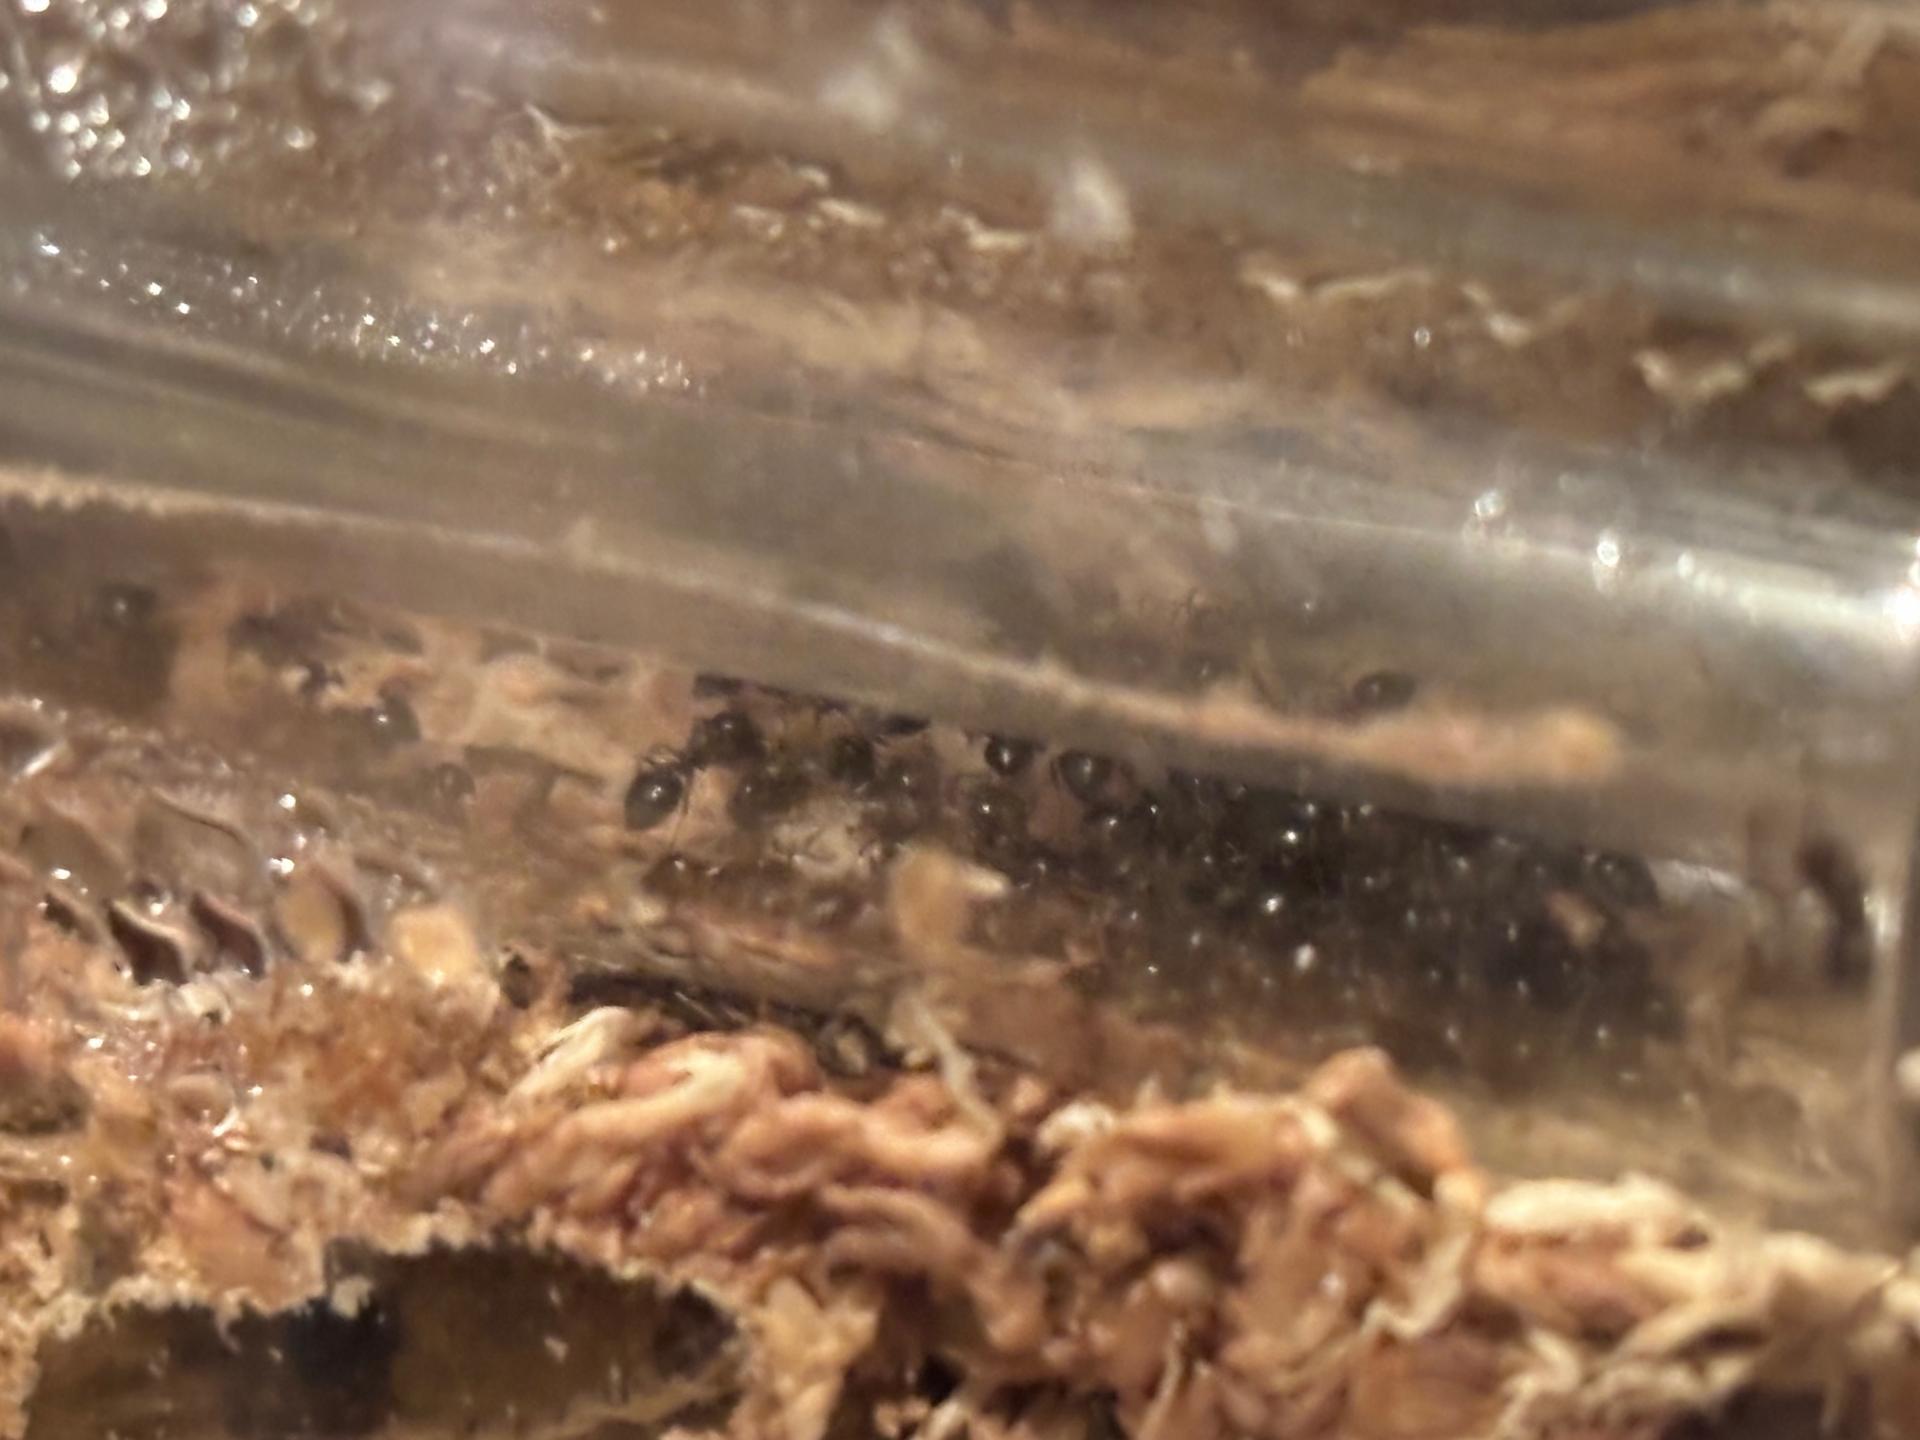
Colony Cr2 can be seen clustered in the bottom right of the lowest bottle, covering a nice pile of brood and the queen.   I put them in the root cellar yesterday.   The temperature there was 9.3 deg C (49 F) at 78% humidity.   


Tetramorium Colonies into Winter Storage


The last of my colonies to be put away for winter were the two large Tetramorium colonies.   


IMG_8350.JPG


A founding colony on the right shares the storage tray with a Tetramorium colony 2 that required longer tubing to wrap around and fit on the tray. 


IMG_8357.JPG


Some creative work with tubing was required to fit Tetramorium colony 1 onto their storage tray.   They still have access to drinking water and sugar/water, as well as some peanuts (unsalted) for protein, because they will continue to raise brood at cooler temperatures, very slowly.  


IMG_8352.JPG


I've kept my XLTetramorium colony on heat in my workshop up to now and I think I'll continue to do so.   Although they're moving slowly, they're still taking water and sugar/water and small amounts of protein.   I enjoy watching their activities.  


IMG_8355.JPG


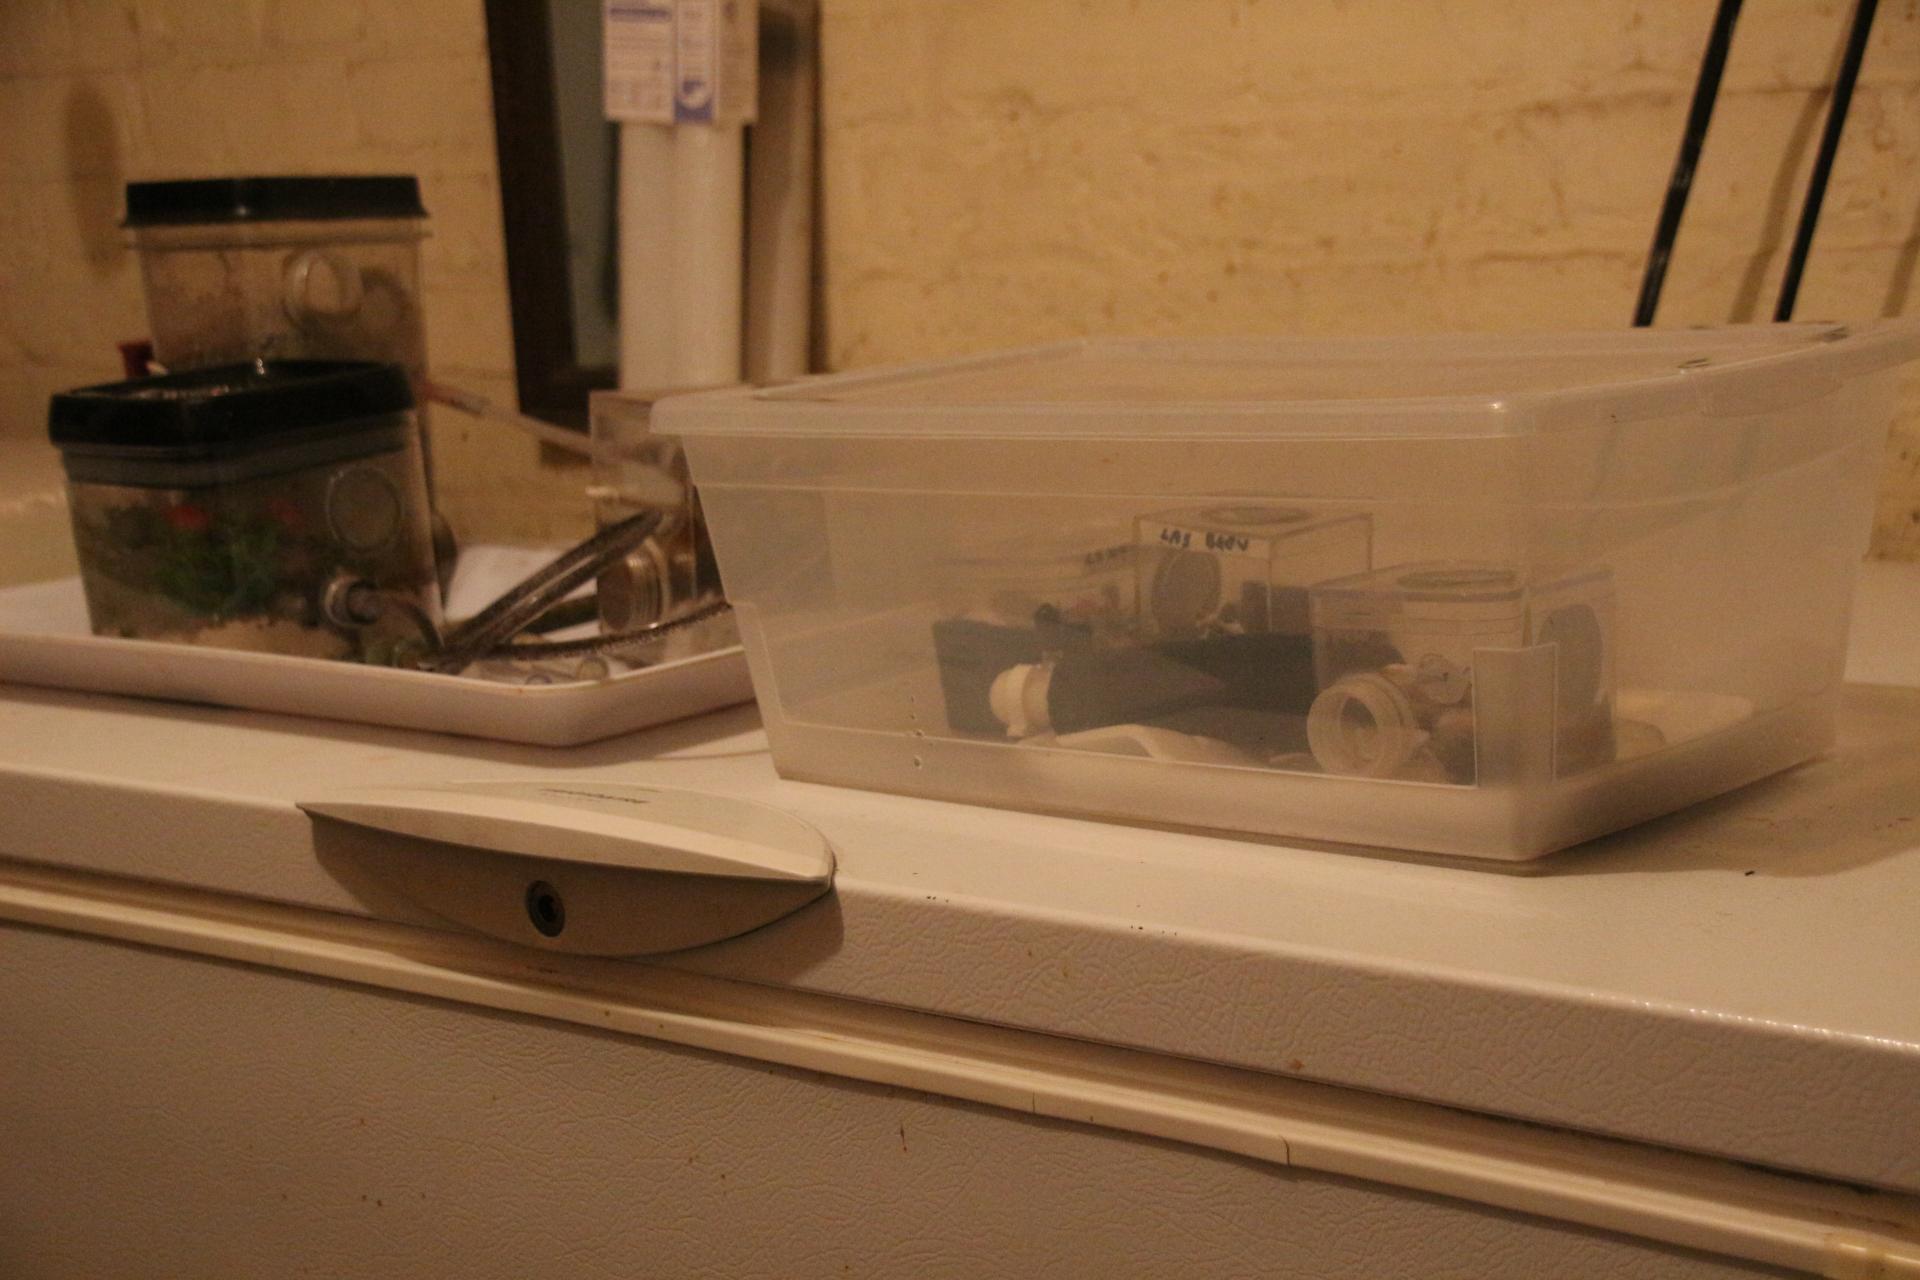
Most of my colonies are packed up in containers, like the ones on the right, for winter storage in the root cellar.   This container holds Crematogaster colony Cr3 and my founding Lasius brevicornis colony.   I usually put wet newspaper in the bottom of the container to keep air in the container humidified without keeping the nest too wet and promoting the growth of mold.  The tray on the left is Tetramorium colony 1.   They're in winter storage now, but I'll revisit these colonies on a monthly basis to make sure their hydration is adequate and that everything is okay.

RPT


Edited by rptraut, December 10 2024 - 3:16 AM.

  • ANTdrew, RushmoreAnts and AntsGodzilla like this
My father always said I had ants in my pants.

#55 Offline rptraut - Posted December 12 2024 - 3:01 AM

rptraut

    Advanced Member

  • Members
  • PipPipPip
  • 528 posts
  • LocationOntario, Canada

Update 12DE24


Crematogaster Formicarium Build - Ant Form Dry Fit


In most wood working projects, it's wise to dry fit all the pieces together before the final glue-up.    This allows for any fine tuning of the arrangement.   It's also a good time to figure out the construction procedure before adding the glue, or the grout/vermiculite (grout) mixture as in this project.    The grout won't stay pliable for very long and I usually use a fairly stiff mix so I can shape it as I add it to the bottom.   I'll try as much as possible to keep grout off the acrylic walls and the board in this project.   In the past, I used the tube from a paper towel roll and placed it so it rested on the bottom of the container.  I spoon the grout in at the top, tap it, and the grout slides down the tube to the bottom of the container without coming close to anything else.    Any smears of grout can be cleaned off with a paper towel and water if done before the grout cures.  I'll avoid scratching the acrylic.


IMG_8358.JPG


Awhile back I came up with the concept of an Ant Form (Formicarium) that would be interesting and entertaining and could be placed in a room like an aquarium.   It has to be interesting even without the fish.   To prepare for construction I've hot glued together clumps of plastic vegetation that I'll insert in the grout along with the leafy branch I've also prepared.    Why so much greenery?   I want to create a more natural outworld for these ants.   It makes their world more three dimensional and increases the useable area available for the ants, making what would otherwise be a small outworld into something larger and more interesting for me and the ants.     Something fun for my living room table.   


IMG_8359.JPG


I won't put any grout in the back left corner where the overflow for the water sponge in the nest is located.    I've placed a second sponge there so this area will be the ant's oasis.   I'll place moss there and keep it as a wet area.   


The colony I plan to put in this Ant Form is in winter storage right now, so there's no big rush on the final assembly of this project.   Let me know what you think of this setup, it's not too late to make changes, in fact it's the best time to make changes.   Once the grout hardens, then it's too late.

RPT


  • ANTdrew, RushmoreAnts, OiledOlives and 2 others like this
My father always said I had ants in my pants.

#56 Offline OwlThatLikesAnts - Posted December 12 2024 - 4:06 PM

OwlThatLikesAnts

    Advanced Member

  • Members
  • PipPipPip
  • 269 posts

Update 12DE24


Crematogaster Formicarium Build - Ant Form Dry Fit


In most wood working projects, it's wise to dry fit all the pieces together before the final glue-up.    This allows for any fine tuning of the arrangement.   It's also a good time to figure out the construction procedure before adding the glue, or the grout/vermiculite (grout) mixture as in this project.    The grout won't stay pliable for very long and I usually use a fairly stiff mix so I can shape it as I add it to the bottom.   I'll try as much as possible to keep grout off the acrylic walls and the board in this project.   In the past, I used the tube from a paper towel roll and placed it so it rested on the bottom of the container.  I spoon the grout in at the top, tap it, and the grout slides down the tube to the bottom of the container without coming close to anything else.    Any smears of grout can be cleaned off with a paper towel and water if done before the grout cures.  I'll avoid scratching the acrylic.


Awhile back I came up with the concept of an Ant Form (Formicarium) that would be interesting and entertaining and could be placed in a room like an aquarium.   It has to be interesting even without the fish.   To prepare for construction I've hot glued together clumps of plastic vegetation that I'll insert in the grout along with the leafy branch I've also prepared.    Why so much greenery?   I want to create a more natural outworld for these ants.   It makes their world more three dimensional and increases the useable area available for the ants, making what would otherwise be a small outworld into something larger and more interesting for me and the ants.     Something fun for my living room table.   


I won't put any grout in the back left corner where the overflow for the water sponge in the nest is located.    I've placed a second sponge there so this area will be the ant's oasis.   I'll place moss there and keep it as a wet area.   


The colony I plan to put in this Ant Form is in winter storage right now, so there's no big rush on the final assembly of this project.   Let me know what you think of this setup, it's not too late to make changes, in fact it's the best time to make changes.   Once the grout hardens, then it's too late.

RPT

I honestly think it is perfect, buuuuut..... Is there anything that is keeping the oasis area/sponge from leaking everywhere in the outworld? like a plastic divider? because I am pretty sure that the sponge will start to leak if there is too much drainage from the nest


  • 1tsm3jack likes this

Currently keeping:


1x Formica subsericea, 20+ workers

1x Crematogaster cerasi 2 workers with brood (still growing)


*As you watch your ants march, remember that every thing begins with a small step and continued by diligence and shared dreams*

-A.T (Me)


#57 Offline rptraut - Posted December 13 2024 - 12:41 AM

rptraut

    Advanced Member

  • Members
  • PipPipPip
  • 528 posts
  • LocationOntario, Canada

Hello OwlThatLikesAnts;


Thanks for your kind words and your question because I haven't really explained about the hydration system, I've thought a lot about it, and I think this layout is the best for a Crematogaster colony.   My impression so far is that these ants prefer a drier nest like Camponotus  rather than a wetter nest like Lasius.  


The whole hydration system starts with the grout/vermiculite (grout) mixture.   The vermiculite I use is horticultural grade and consists of small, 1/8-inch size pieces of soft, spongy rock.   The layers in the vermiculite hold water and air in the finished mix.   I use unsanded grout, (pick a colour that your ants will show well against, I picked tan) and mix it with water to the consistency of pancake batter.   Then I add enough vermiculite until it's the consistency of mashed potatoes.   This mix pretty well stays where I put it and can even be shaped during construction.    The trouble can sometimes be getting it down into every little corner.   Giving the whole thing a couple of good taps settles the grout to start.   I'll be putting enough grout on the right-hand side and shaping it so that any water will drain to the oasis on the left, I'll make it the lowest spot.   
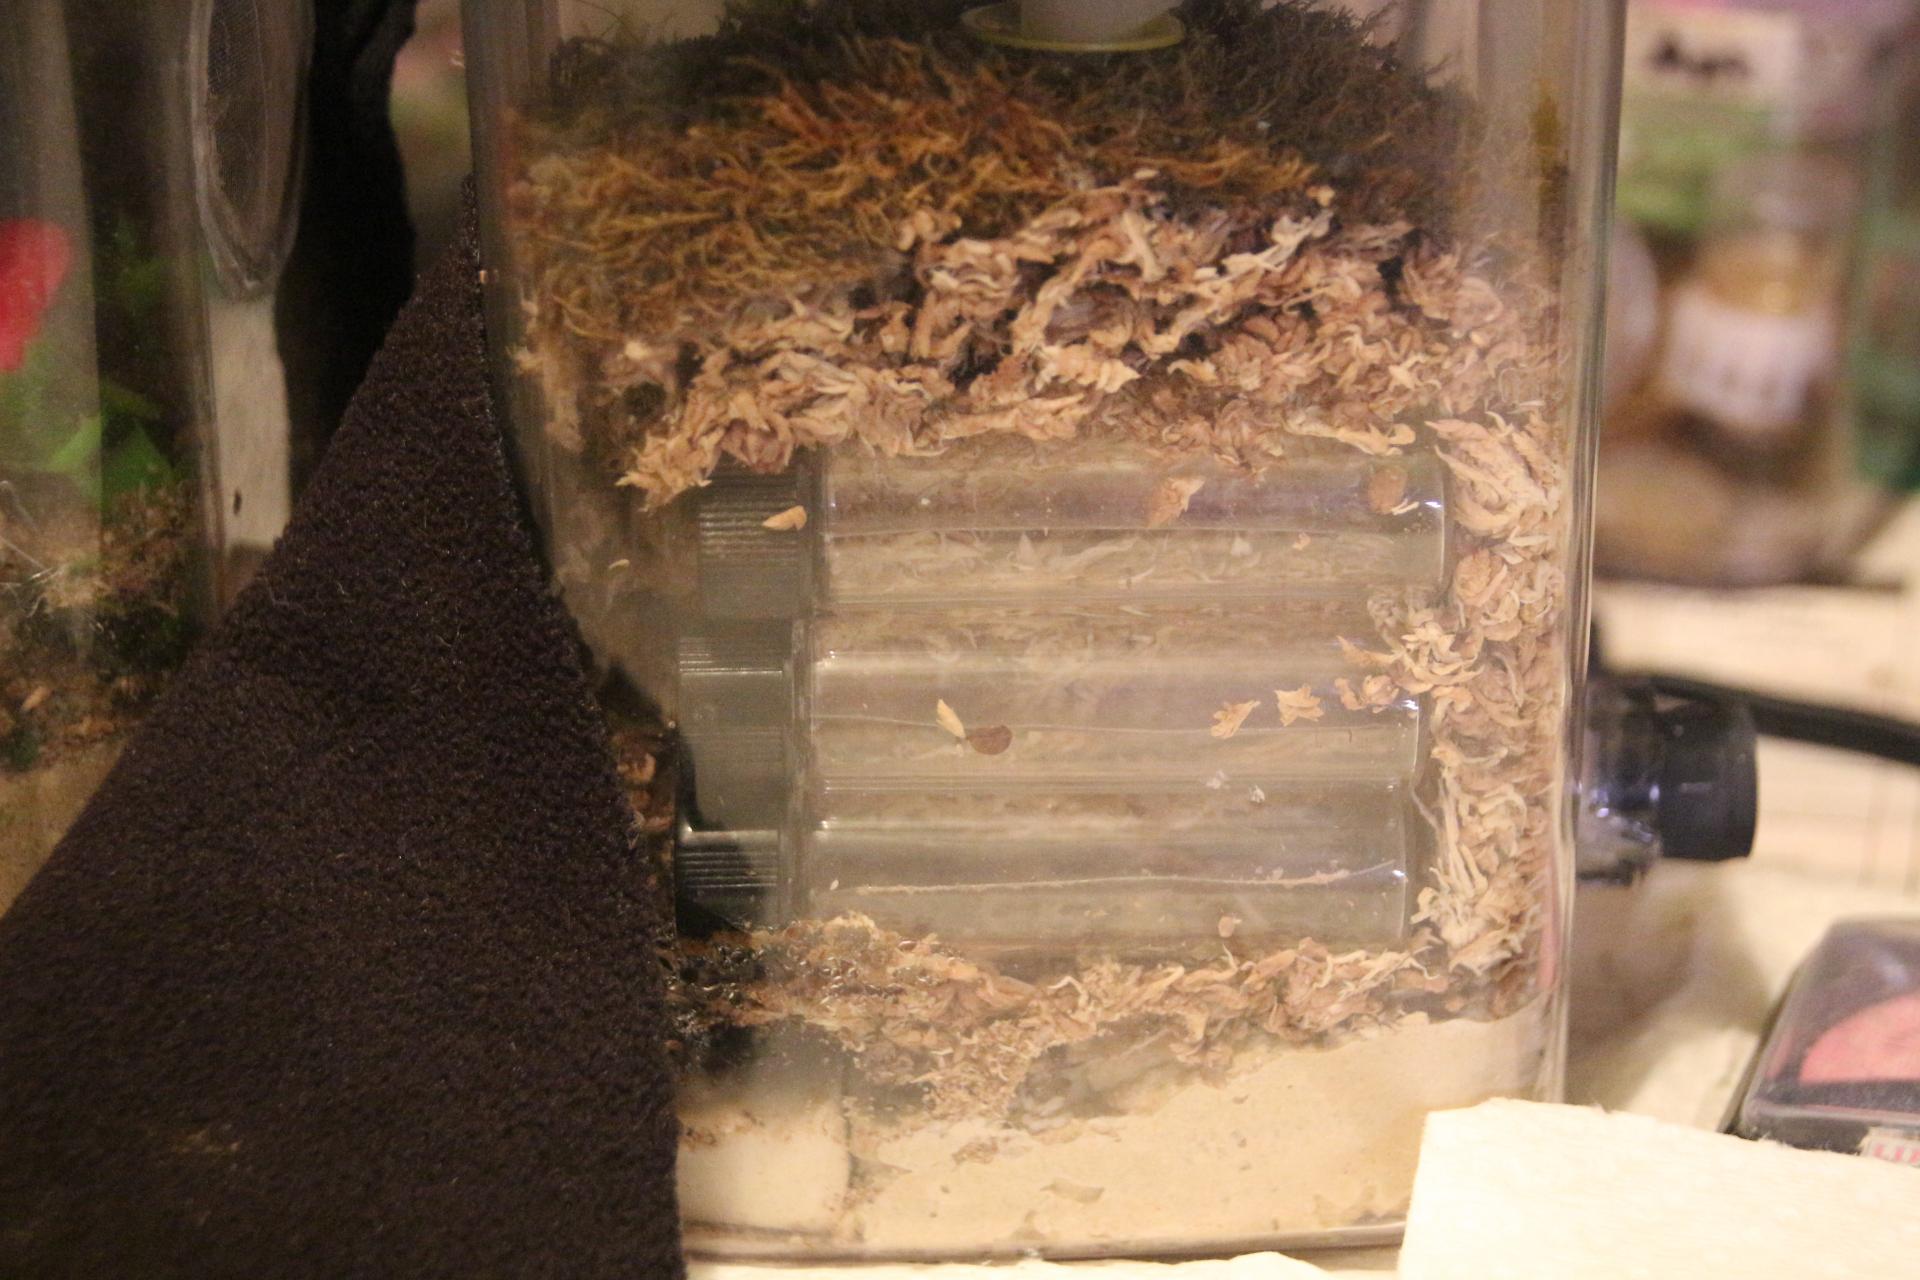


IMG_8293.JPG


You can see how I shaped the grout in this nest so water will flow to the sponge on the left, and it's always a wet area.   


The beauty of this system is also the visibility of the sponges allowing me to monitor the water while I'm refilling.   I design my water towers with an overflow that's visible at the back of the setup for monitoring because I've killed ants by flooding before.   
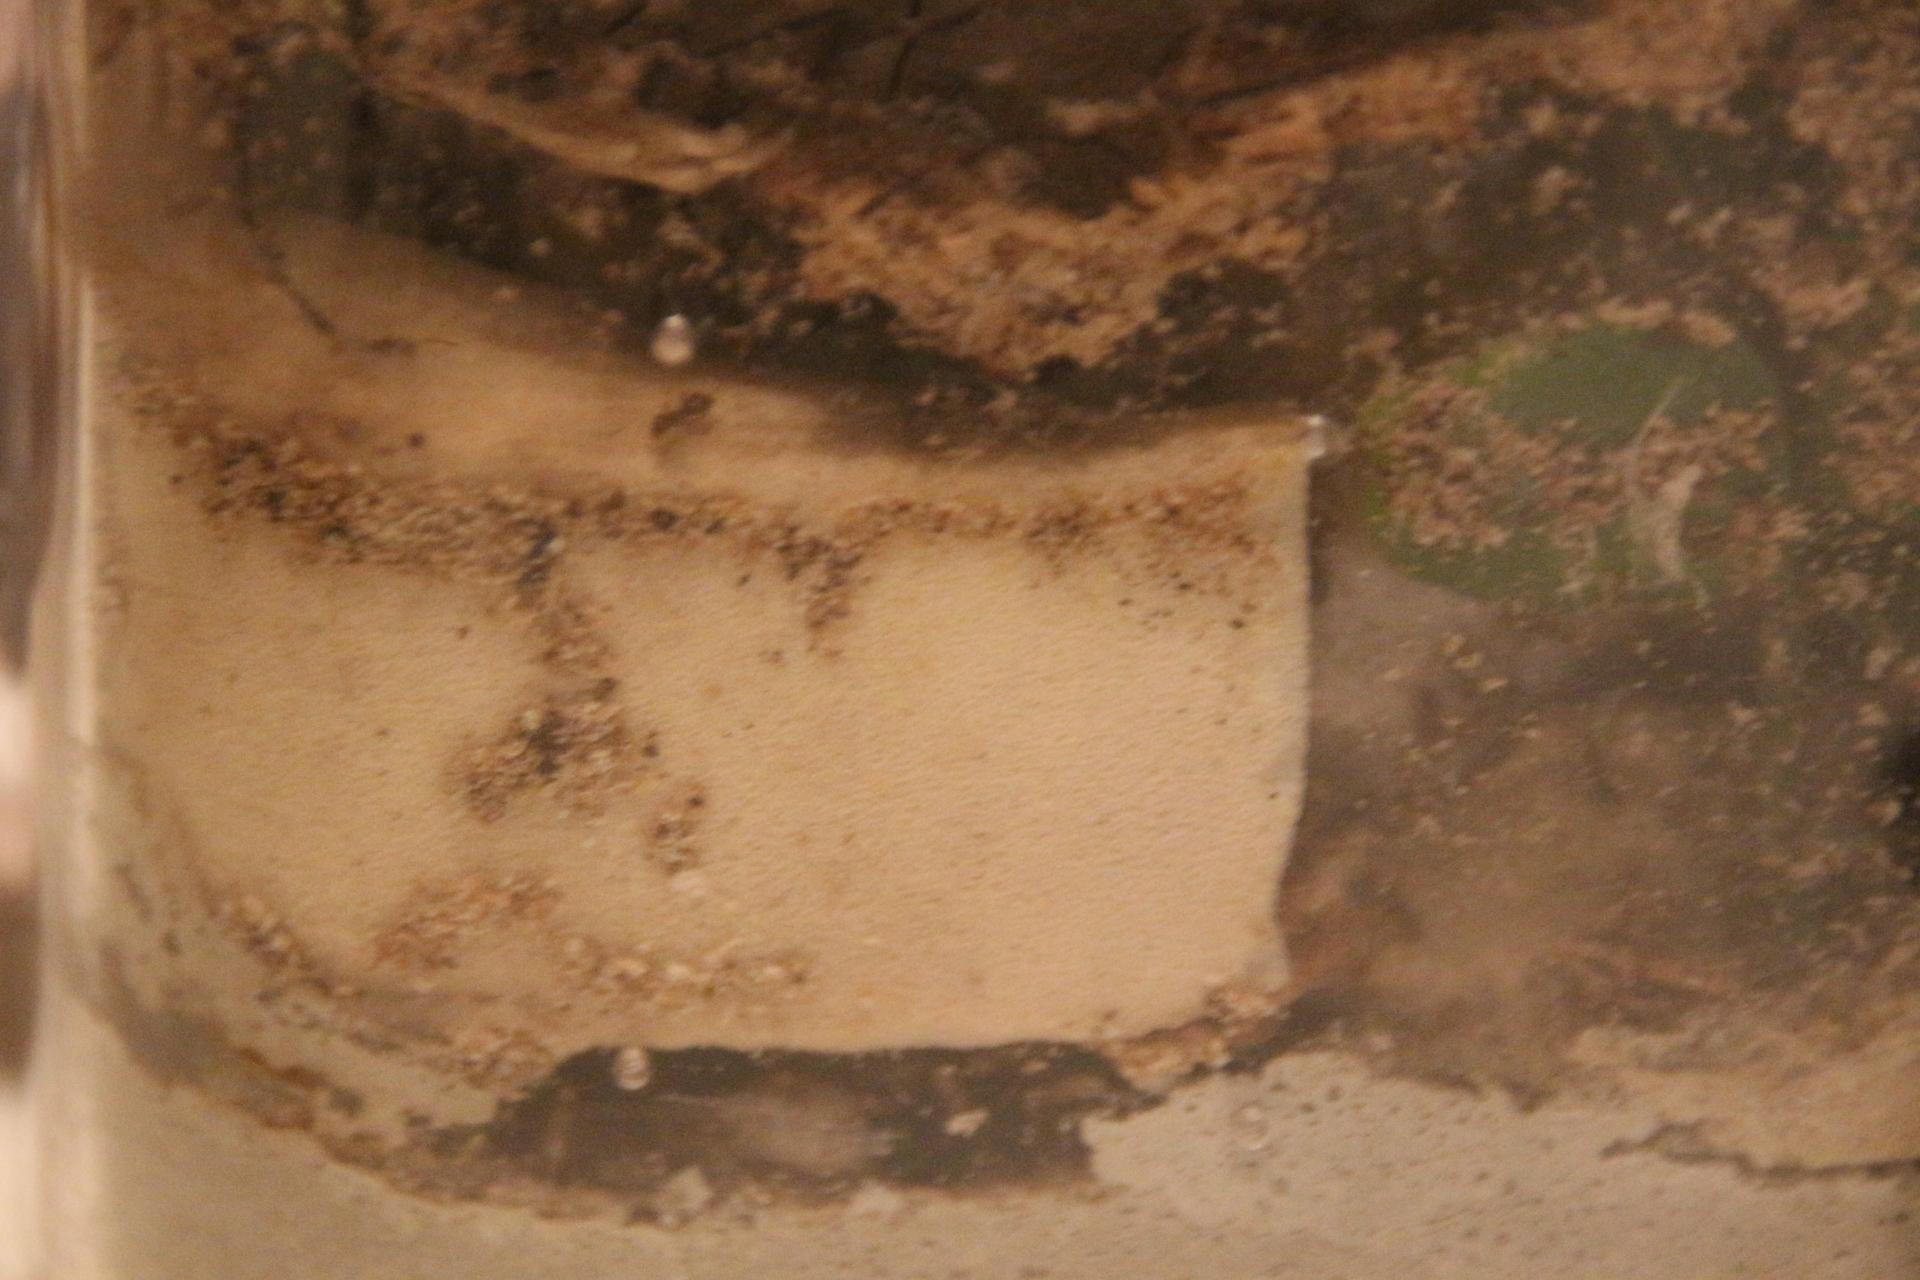


IMG_8296.JPG


Here's a problem I've had with the sponge system.   I didn't put it in a low enough spot.    The Lasius neoniger colony, at first, were happy to put their larvae on top of the sponge, but now they've managed to get under it, so I have to be very careful when refilling to avoid flooding them out.  


I never consider the water towers inside the nest to be a source of drinking water for my ants.   I don't know how they would actually get water unless the absorbent material inside is in contact with the screen, and even then, the highest concentration of water will be at the bottom.   I only expect my water towers to humidify the nest.   In my last few builds I've used pieces of sponge alone to provide the humidity and they've worked out well.    I provide their drinking water in the outworld with waterers or test tubes as well as their sugar/water.
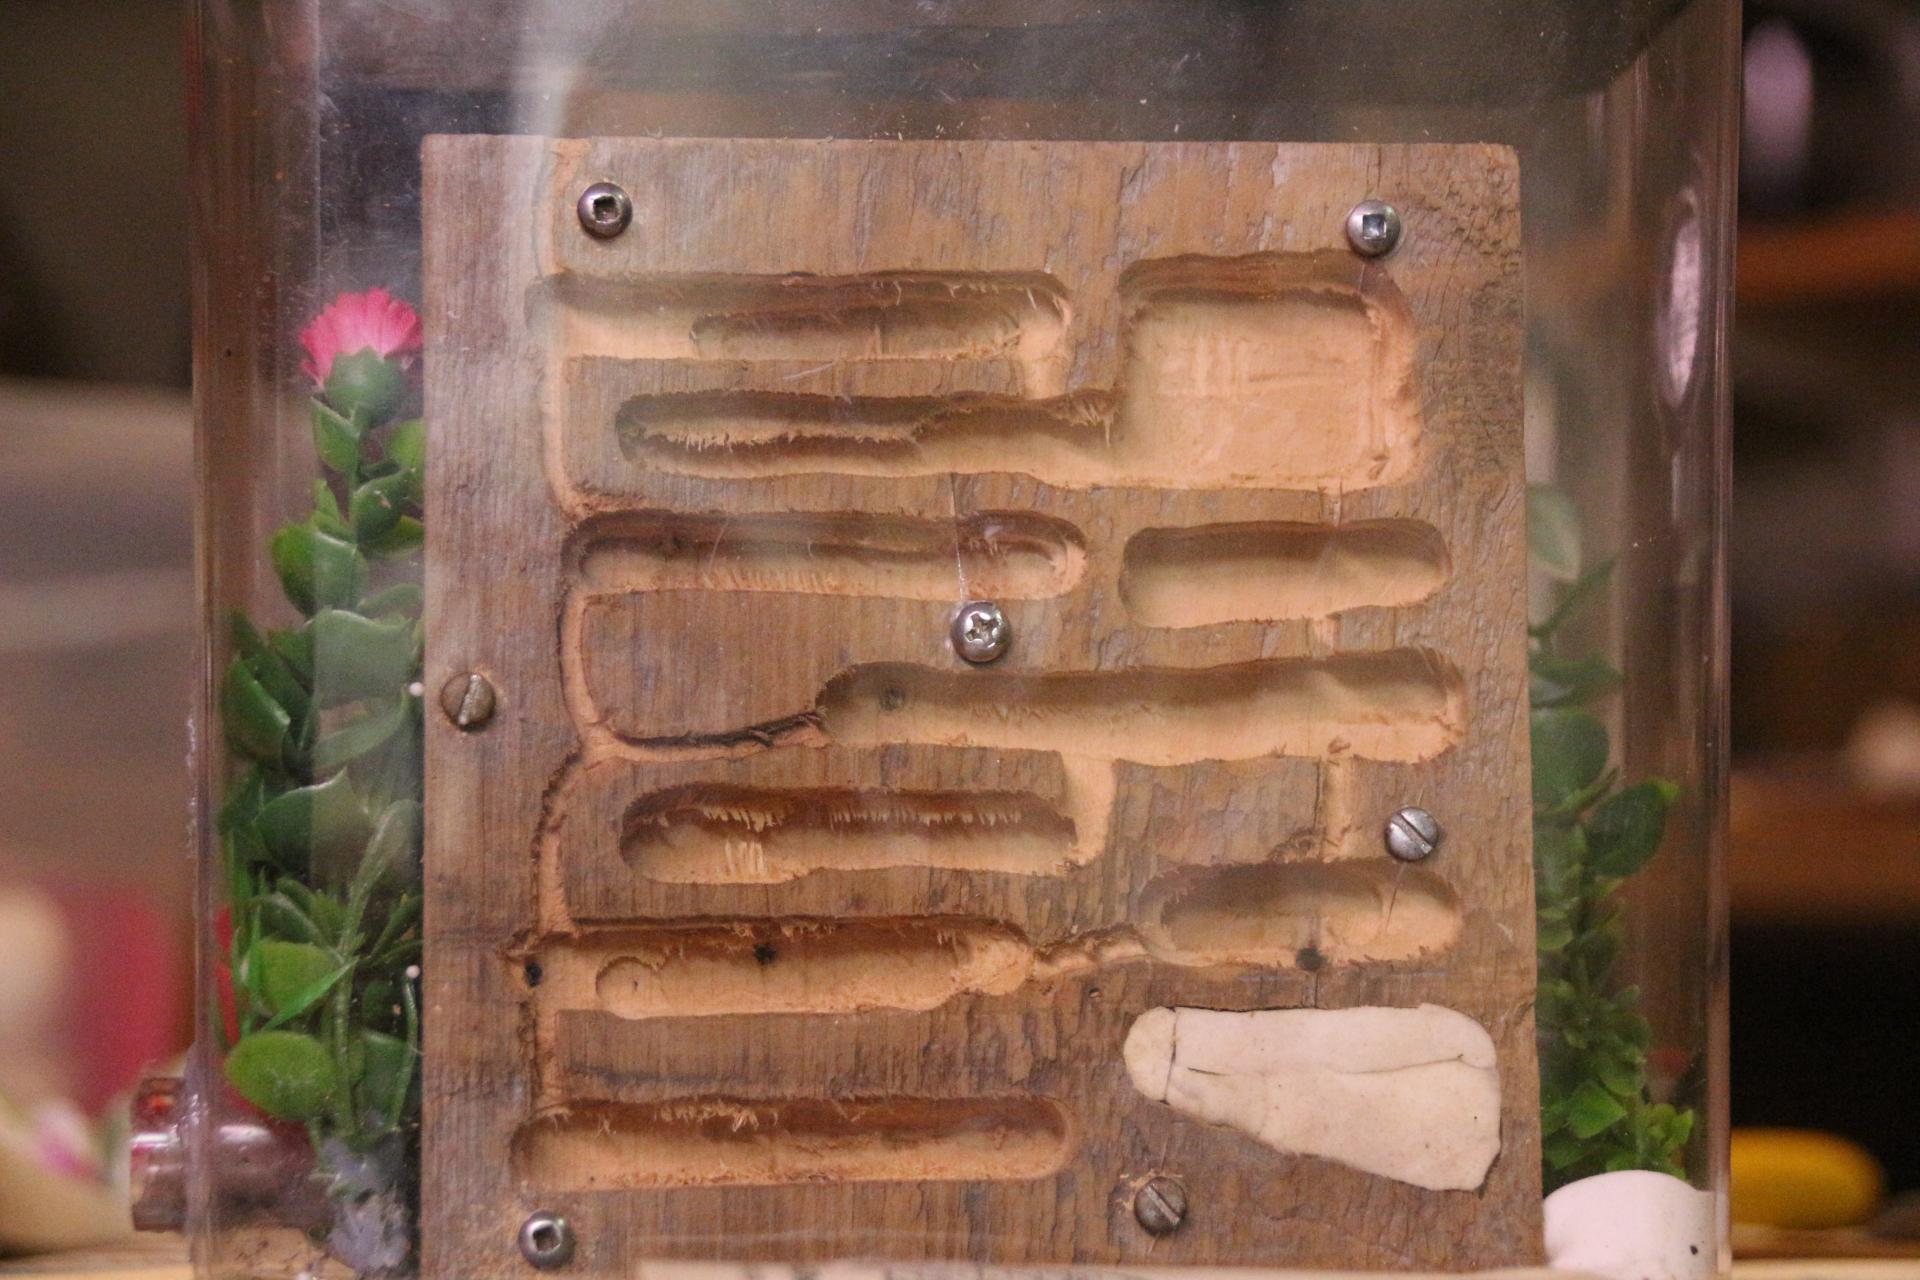


IMG_8360 (1).JPG


 I've hydrated the sponge in this setup; the water soaks into the wood, so I don't think hydration will be a problem for these ants.   Overflow from the sponge will not only be soaked up by the oasis sponge on the right but is also soaked up by the wooden board that's in contact with the bottom for its' entire width.   To finish off the oasis I usually put some sphagnum moss and green moss over the whole thing.   They absorb a lot of water too and I often water the oasis and not the nest for dry loving ants.    I can extend the low moss area for moisture loving ants like Lasius and queens will often find seclusion there.     


You might notice that the chambers look a little more "hairy" than in previous photos.    I dampened the entire board, raising the grain, and when it's dry, that's what happens.   I'll bet the ants will keep busy shaping it to their own specifications.  


Lastly, that grout/vermiculite mixture absorbs more water than a pure grout mix and this helps humidify as well.   I've found that Camponotus, Lasius brevicornis and Tetramorium ants are able to make tunnels and chambers through it which helps keep them occupied and out of trouble.    By their reputation I'm sure Crematogaster will be able to do the same and that's another reason why I feel this is the best Ant Form for them that I can make.   


I know from past experience that it's almost impossible to mix a small enough amount of grout and vermiculite to do one small project like this, so, I like to have a couple of other projects ready to go as a place for extra grout.    I'll show you what I'm working on before construction day.

RPT


  • RushmoreAnts and OwlThatLikesAnts like this
My father always said I had ants in my pants.

#58 Offline OwlThatLikesAnts - Posted December 15 2024 - 9:15 AM

OwlThatLikesAnts

    Advanced Member

  • Members
  • PipPipPip
  • 269 posts

Hello OwlThatLikesAnts;


Thanks for your kind words and your question because I haven't really explained about the hydration system, I've thought a lot about it, and I think this layout is the best for a Crematogaster colony.   My impression so far is that these ants prefer a drier nest like Camponotus  rather than a wetter nest like Lasius.  


The whole hydration system starts with the grout/vermiculite (grout) mixture.   The vermiculite I use is horticultural grade and consists of small, 1/8-inch size pieces of soft, spongy rock.   The layers in the vermiculite hold water and air in the finished mix.   I use unsanded grout, (pick a colour that your ants will show well against, I picked tan) and mix it with water to the consistency of pancake batter.   Then I add enough vermiculite until it's the consistency of mashed potatoes.   This mix pretty well stays where I put it and can even be shaped during construction.    The trouble can sometimes be getting it down into every little corner.   Giving the whole thing a couple of good taps settles the grout to start.   I'll be putting enough grout on the right-hand side and shaping it so that any water will drain to the oasis on the left, I'll make it the lowest spot.   


You can see how I shaped the grout in this nest so water will flow to the sponge on the left, and it's always a wet area.   


The beauty of this system is also the visibility of the sponges allowing me to monitor the water while I'm refilling.   I design my water towers with an overflow that's visible at the back of the setup for monitoring because I've killed ants by flooding before.   


Here's a problem I've had with the sponge system.   I didn't put it in a low enough spot.    The Lasius neoniger colony, at first, were happy to put their larvae on top of the sponge, but now they've managed to get under it, so I have to be very careful when refilling to avoid flooding them out.  


I never consider the water towers inside the nest to be a source of drinking water for my ants.   I don't know how they would actually get water unless the absorbent material inside is in contact with the screen, and even then, the highest concentration of water will be at the bottom.   I only expect my water towers to humidify the nest.   In my last few builds I've used pieces of sponge alone to provide the humidity and they've worked out well.   

I provide their drinking water in the outworld with waterers or test tubes as well as their sugar/water.


 I've hydrated the sponge in this setup; the water soaks into the wood, so I don't think hydration will be a problem for these ants.   Overflow from the sponge will not only be soaked up by the oasis sponge on the right but is also soaked up by the wooden board that's in contact with the bottom for its' entire width.   To finish off the oasis I usually put some sphagnum moss and green moss over the whole thing.   They absorb a lot of water too and I often water the oasis and not the nest for dry loving ants.    I can extend the low moss area for moisture loving ants like Lasius and queens will often find seclusion there.     


You might notice that the chambers look a little more "hairy" than in previous photos.    I dampened the entire board, raising the grain, and when it's dry, that's what happens.   I'll bet the ants will keep busy shaping it to their own specifications.  


Lastly, that grout/vermiculite mixture absorbs more water than a pure grout mix and this helps humidify as well.   I've found that Camponotus, Lasius brevicornis and Tetramorium ants are able to make tunnels and chambers through it which helps keep them occupied and out of trouble.    By their reputation I'm sure Crematogaster will be able to do the same and that's another reason why I feel this is the best Ant Form for them that I can make.   


I know from past experience that it's almost impossible to mix a small enough amount of grout and vermiculite to do one small project like this, so, I like to have a couple of other projects ready to go as a place for extra grout.    I'll show you what I'm working on before construction day.

RPT

seems like you don't even need a barrier from how many absorbent materials you have


  • rptraut likes this

Currently keeping:


1x Formica subsericea, 20+ workers

1x Crematogaster cerasi 2 workers with brood (still growing)


*As you watch your ants march, remember that every thing begins with a small step and continued by diligence and shared dreams*

-A.T (Me)


#59 Offline rptraut - Posted December 15 2024 - 9:41 AM

rptraut

    Advanced Member

  • Members
  • PipPipPip
  • 528 posts
  • LocationOntario, Canada
Hello OwlThatLikesAnts;

Actually, in the finished build, the grout becomes the barrier.
RPT
  • RushmoreAnts and OwlThatLikesAnts like this
My father always said I had ants in my pants.
#60 Offline rptraut - Posted December 26 2024 - 11:28 PM

rptraut

    Advanced Member

  • Members
  • PipPipPip
  • 528 posts
  • LocationOntario, Canada

Update 27DE24


Checking Colonies in Diapause


I knew when I put these colonies into the root cellar that they'd need to be checked soon after for hydration.   It's hard to know just how wet a diapaused colony should be to maintain high enough humidity for the colony to survive and yet not so wet that mold or bacteria will flourish.   These two colonies, one is a second season colony of Lasius neoniger ants and the other is a second season Crematogaster colony (Cre2), are relatively the same size, and I purposely housed them in similar formicaria so their development can be compared.   


So far I've noticed the L. neoniger colony prefers to live close to the humid areas of the nest where the Crematogaster colony seems to enjoy some separation from moist areas.    This preference for moisture could become a problem with the long-term care a Lasius colony.   Keeping the nest consistently moist without letting it dry out too much or flooding it out from overwatering can be a delicate thing.    I find Camponotus ants to be much easier to care for than some ants simply because of their ability to survive in a dry nest.    I have a feeling the Crematogaster colony may be more like this, I hope so.   


IMG_8369.JPG


I hydrated these colonies and packed them in this lidded container for return to the root cellar.    In the bottom of the container is wet newspaper and then thin pieces of foam on which the colonies sit.   Temperature of the storage was 8.3 C (47 deg F) and 78% humidity.   I expect to check all my colonies about once a month, primarily for hydration. 


My Christmas Wish


Those of you who've read my Journal and stories will know that my wife has one strict rule about me keeping ants.   They're not allowed in the house, only in my attached workshop.   I've always wanted to be able to promote ant keeping as something like having an aquarium with fish.    I like the idea of an Ant Form (formicarium), something that can be displayed in the living room.   With all this in mind, my Christmas wish this year was to be allowed to keep one ant colony in the house.   After all, I've been a good boy and solidly on Santa's nice list all year.  I was granted permission, and I'm absolutely thrilled. 


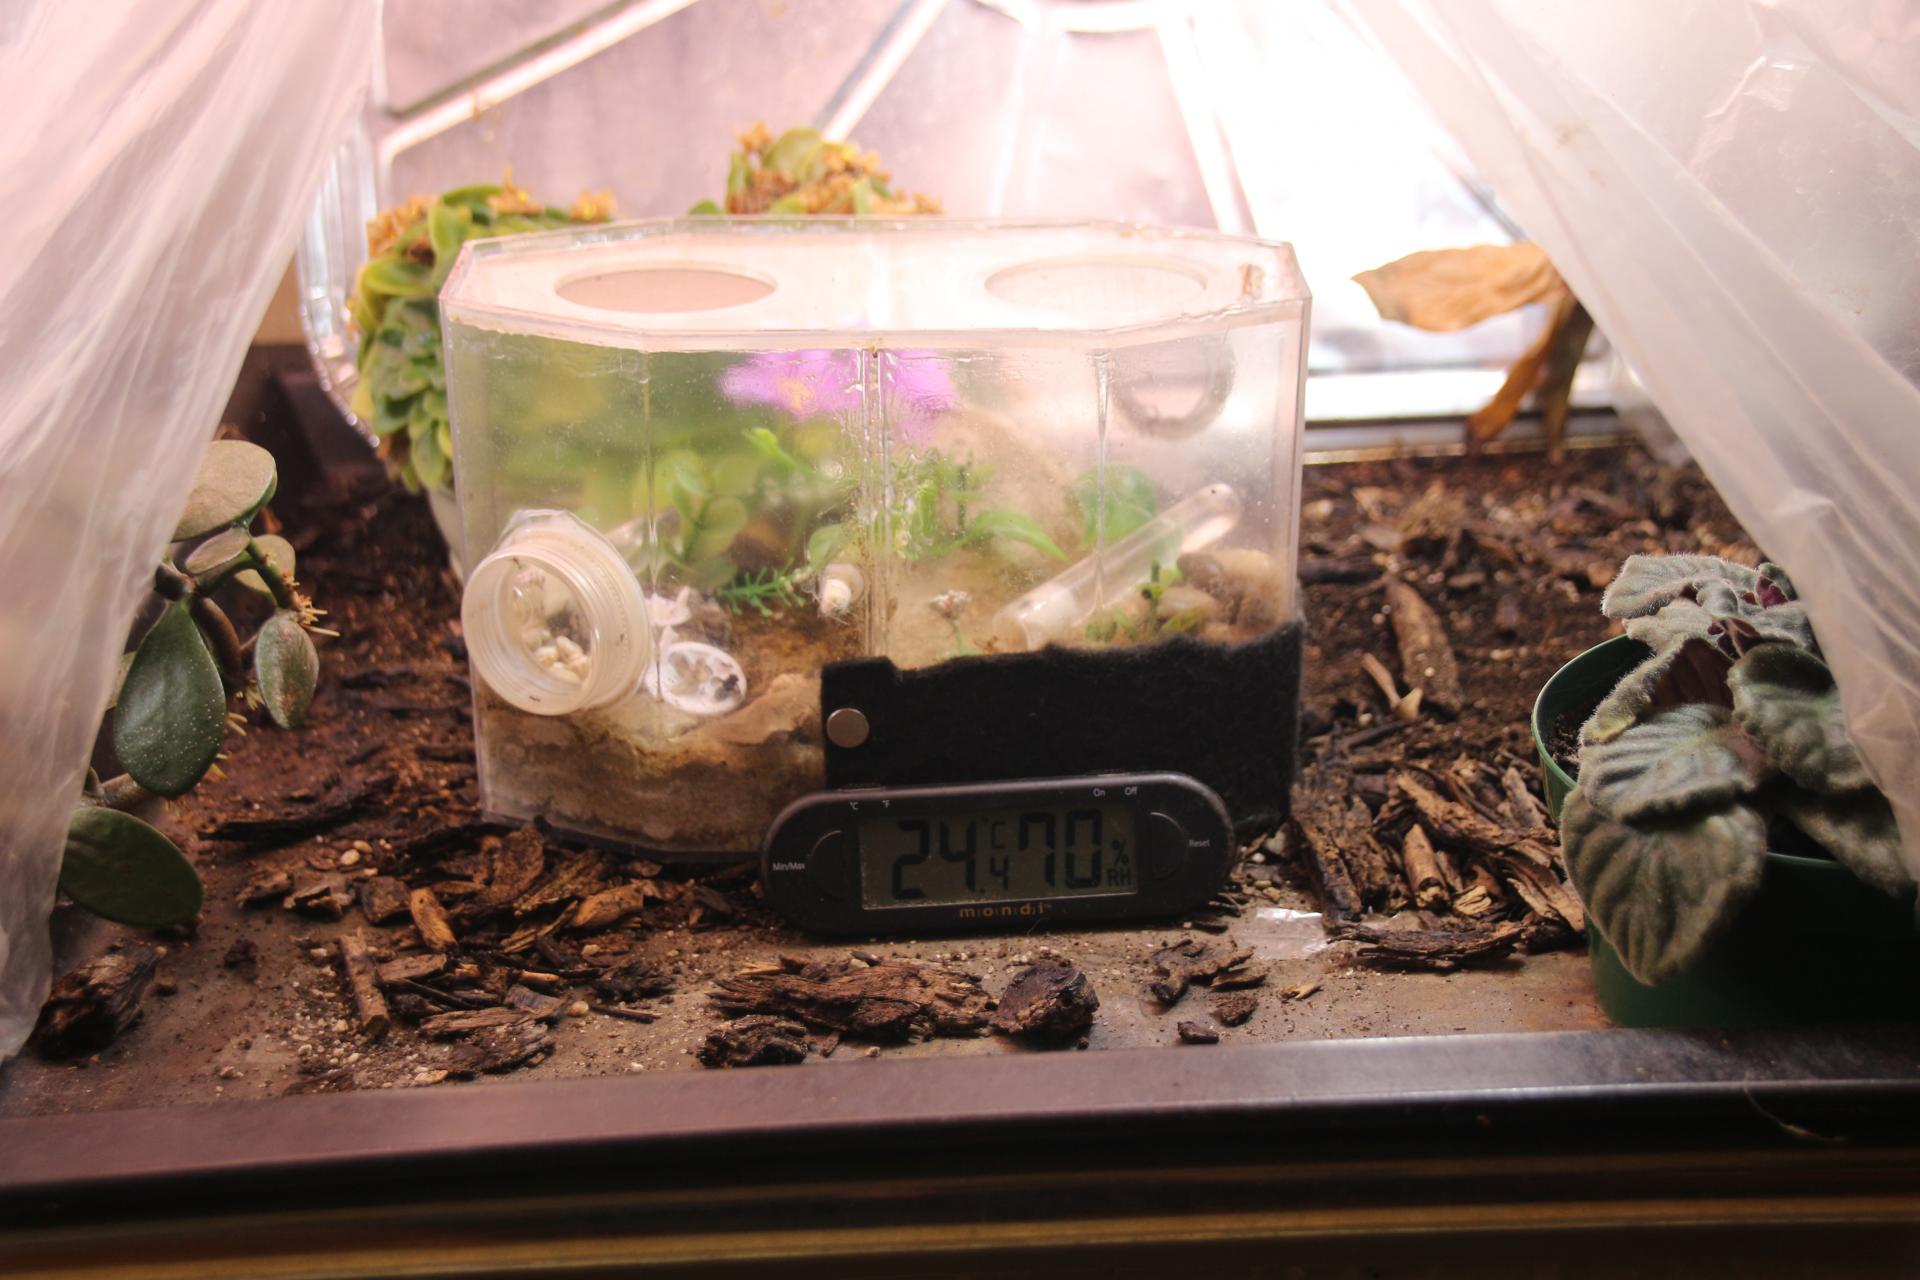
IMG_8371.JPG


It just so happens; I've been keeping my XL Tetramorium colony on heat in my workshop up to now as I've been nurturing them along and getting them stronger.    I moved them into the plant room, under the lights where they'll be "in the house" but out of mind while my wife gets comfortable with their presence.   I'm sure that eventually she'll accept them on display in the living room.    Until then, the colony's being heated quite nicely by the lights from the level below so they should grow well - and I'm quietly rejoicing! 

RPT 


  • RushmoreAnts, Ernteameise, AntsGodzilla and 1 other like this
My father always said I had ants in my pants.


Also tagged with one or more of these keywords: camponotus, tetramorium, brevicornis, neoniger, depilis, crematogaster

1 user(s) are reading this topic

0 members, 1 guests, 0 anonymous users