- Formiculture.com
- Forums
- Gallery
- Members
- Member Map
- Chat
RPT's Journal
Started By
rptraut
, Jul 30 2024 6:24 PM
camponotus tetramorium brevicornis neoniger depilis crematogaster
109 replies to this topic
#101
 Offline
-
Posted December 26 2025 - 5:58 PM
Hello ANTdrew and all my other friends;
This is an example of growing plants in bonsai pots, other than trees. Originally I planted two miniature African Violets in the pot and they’ve since developed many crowns on each plant, something that’s considered undesirable to the violet purists, nevertheless, it’s very common with miniatures. I think you’ll agree that when they all bloom at the same time, they make a beautiful display. When they’re done blooming I’ll split them up and have probably ten separate plants that I’ll give away to friends and family. The Christmas theme of loving and giving will continue well into the new year. I wish you all the best in 2026!
RPT
- ANTdrew likes this
My father always said I had ants in my pants.
#102
 Offline
-
Posted December 28 2025 - 9:48 AM
Thanks, RPT, these violets sound beautiful and I love the idea of giving violets away to your friends and family to continue the festive cheer! I was wondering if you have any tips on how to get started in growing plants especially indoors this winter and spring.
Wishing you a happy new year as well!
Evan
- rptraut likes this
#103
 Offline
-
Posted December 28 2025 - 11:50 PM
Hello evanmancini2011;
I'm glad to hear you like the African Violets and I welcome your question, so I'll tell you the kind of things we do with seeds and plants in winter.
Sprouts and Microgreens
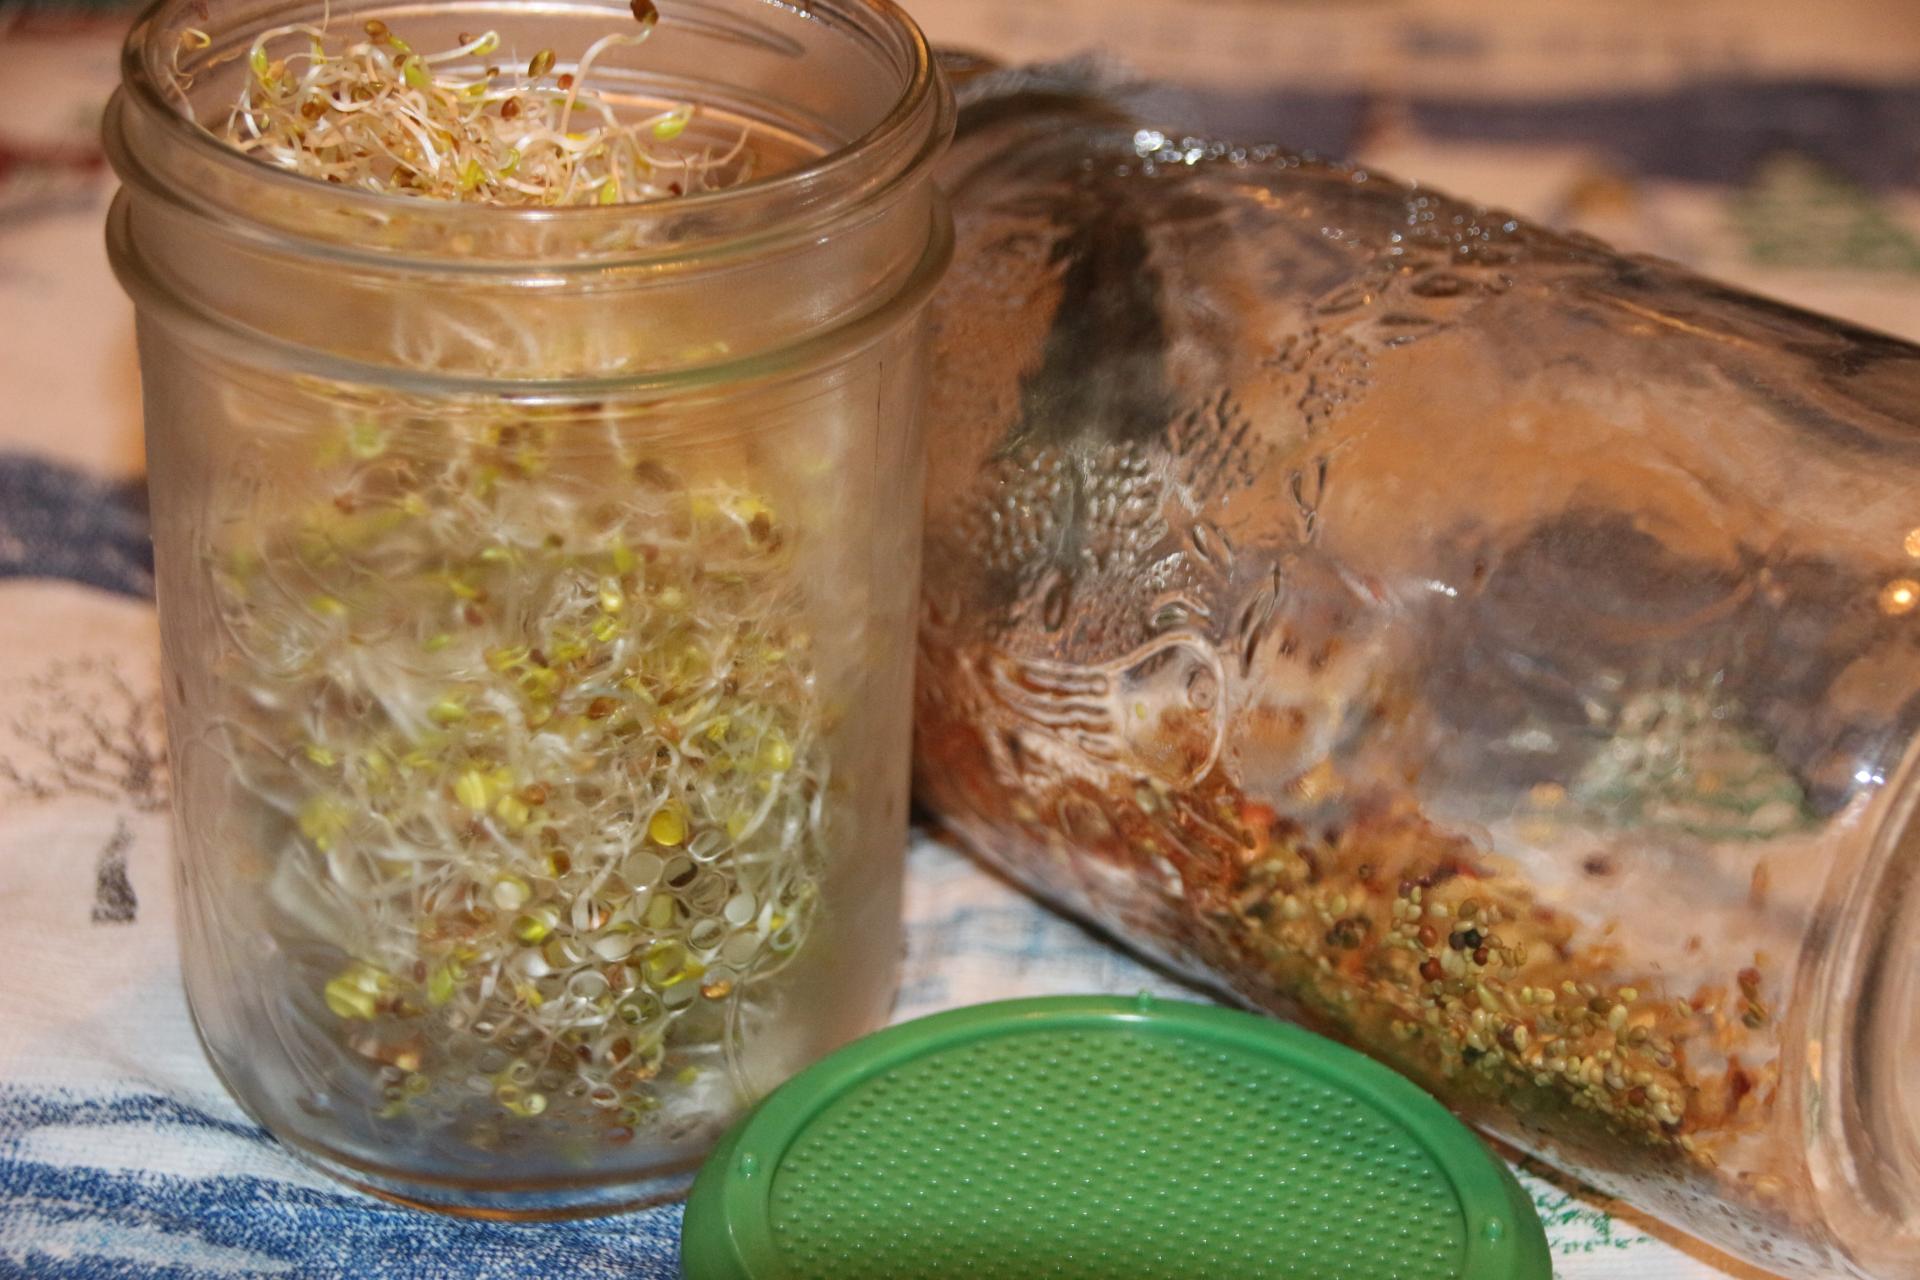
During the winter months we grow sprouts and microgreens. We put these into salads and they're also great on sandwiches, adding vitamins and minerals to every bite. We buy organic seeds that are meant for sprouting. We usually grow a mix of alfalfa, red clover, mustard and we also sprout broccoli seedlings. To grow sprouts all you need is a large jar, a sealing rim, and a piece of screen (I use mosquito screen) that you put about a tablespoon of seed into and soak them overnight. Each day after that, the seeds and growing sprouts should be rinsed and drained, twice a day. We just keep them in the sink to make it easy. It only takes about a week to have sprouts that are big enough to go in the refrigerator where you can keep them fresh while you use them until the next bunch of sprouts is ready.
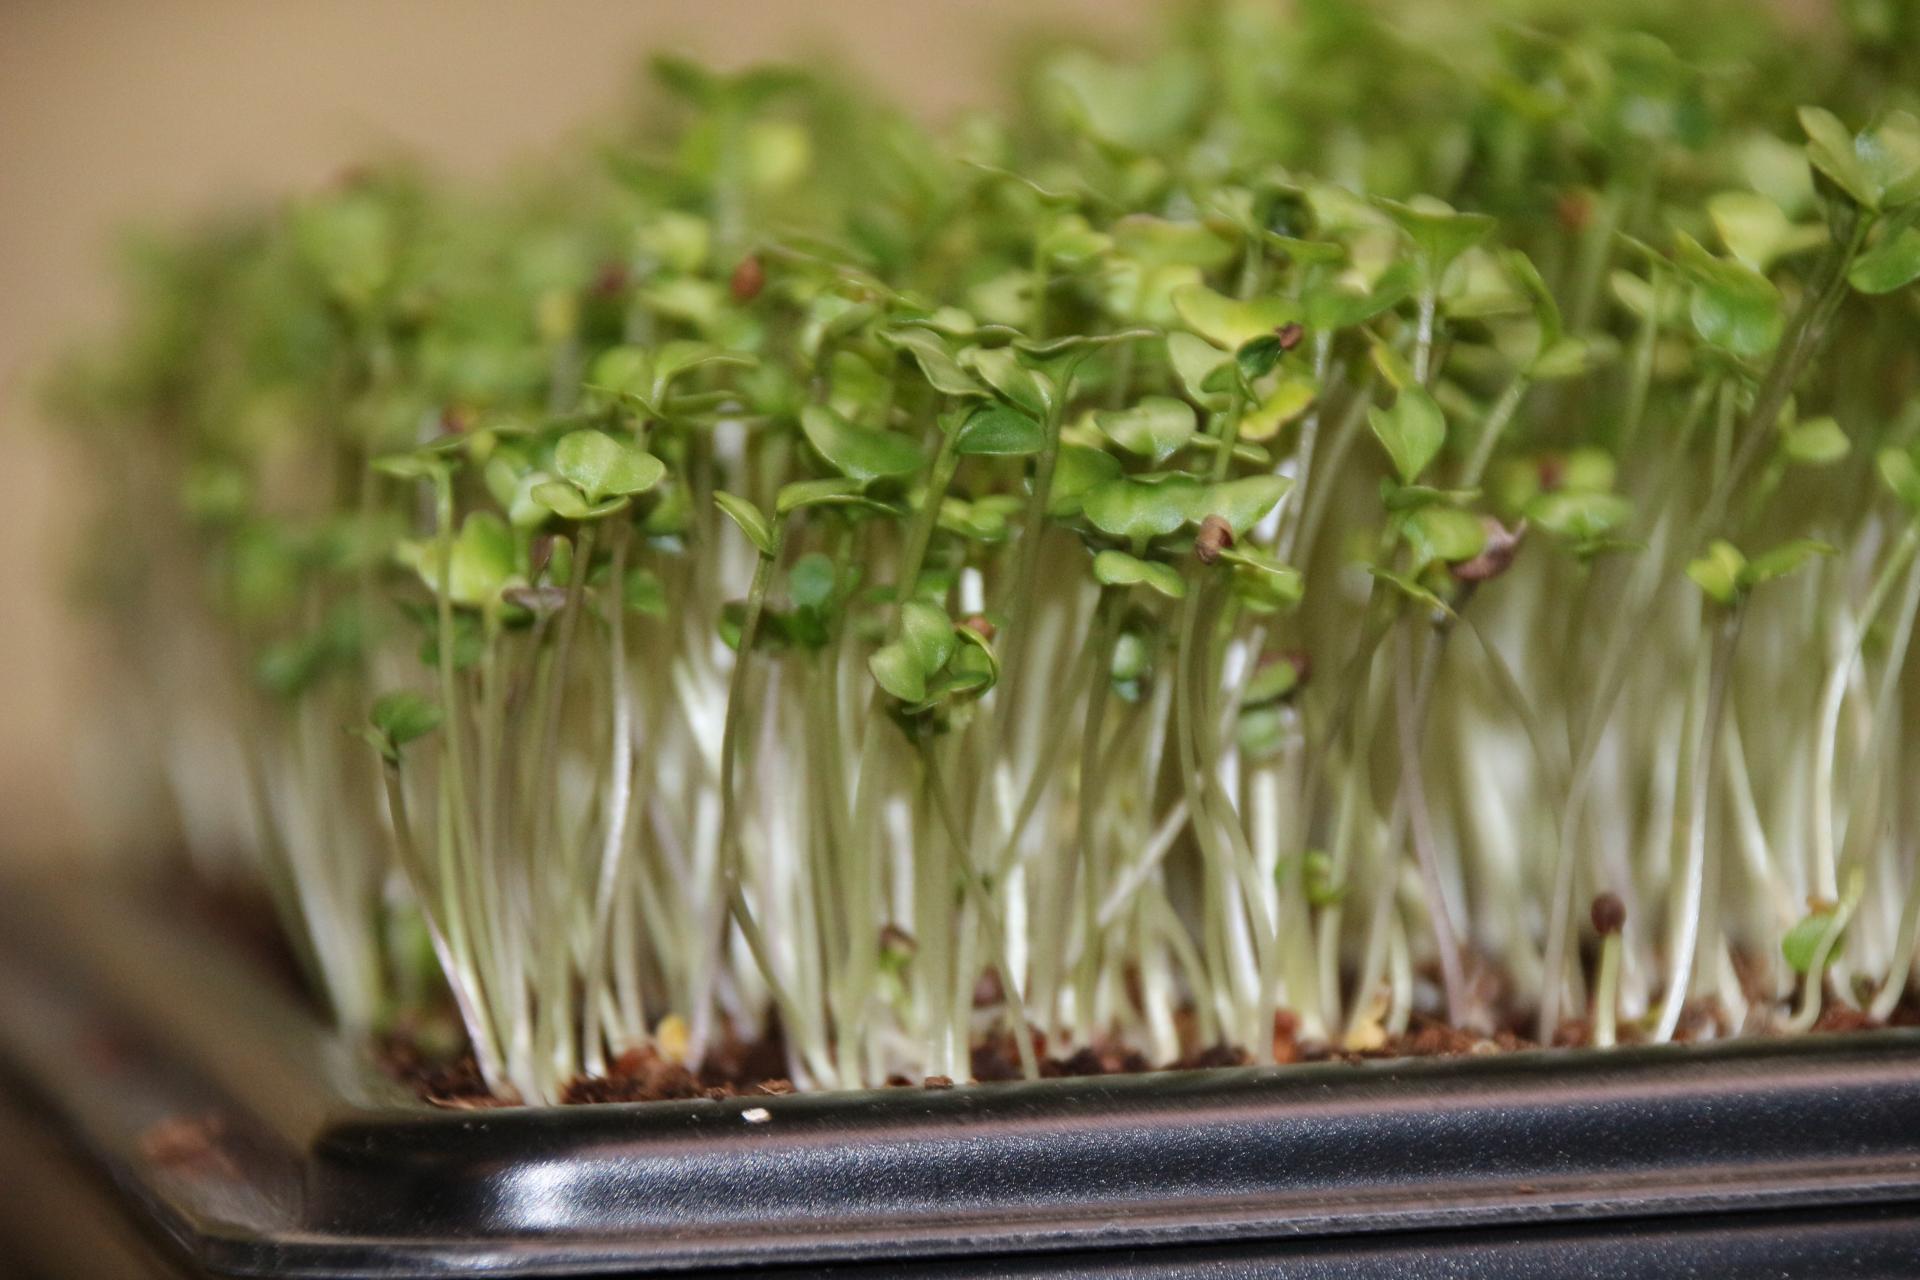
Microgreens are just a larger version of sprouts that we grow in coconut fiber, in small plastic trays. The seeds we use are the same as we use for sprouting and I also like to grow sunflower seeds that I get from our bird seed bag. They make beautiful large greens that are great in any salad. I let the seed leaves completely develop, I clip them with scissors and they're ready to eat. There are videos on YouTube that will give you more details of each system.
In this photo you can see the large sprouting jar and screen on the right with newly sprouting seeds that need to be rinsed twice a day. Once those sprouts are large enough, we store them in a jar like the one on the left, in the refrigerator and use them from there.
This is an example of microgreens (organic broccoli) growing in trays of coconut fiber. They're at the right stage to start clipping them for salads and sandwiches. Larger greens like sunflower seed sprouts are also great in stir fries.
Growing Plants in Winter
Artificial Light
Growing plants here in Canada during the winter, when there's very little actual sunlight, means we have to supply light and all the necessary requirements for plant life. You may live in an area with more sun, lucky you, as you might be able to grow plants without artificial lights on a south facing windowsill. Depending on the number of plants you want to grow, you might need to use a fluorescent desk lamp or for a larger number of plants, two tube fluorescent fixtures, or led fixtures that are made for growing plants. Planting systems are also available that contain lights, planting pots, and an irrigation system that waters twice a day and drains into a reservoir. I use a timer to turn my lights on for 14 hours of light which should be satisfactory for most plants. I water my plants by hand.
Water and Watering
We like rainwater for our plants, when we can get it, but usually we use well water at room temperature. Whatever water you use, make sure it's at room temperature or lukewarm, so you don't shock small roots with cold water. If your water is treated with chlorine, let it sit for at least 24 hours to degas, and it'll be safe for your plants. Watering plants consistently, without overwatering is the fine line you must tread when growing small plants. Check your plants every day and be observant.
Plants can dry quickly in our heated houses in winter, I usually water twice a week. You can extend that time by increasing the humidity in the plant area by setting your plants on a tray of wood chips and keeping them wet. Covering small plants with clear plastic will keep humidity in and placing a single plant in a plastic bag with ventilation slits will do the same thing. I often find that water will flow right through a pot of dry soil, so I often water each pot two or three times to make sure they're thoroughly wetted. Sometimes, allowing a pot to soak in water for 20 minutes and then draining it, will accomplish the same thing. Watering small seedlings from the bottom is the best. A shallow tray underneath the container can have water added to it until it stops being absorbed, or I just fill it two or three times when I see the plants beginning to wilt. Just don't let plants sit in water any longer than 20 minutes - pour off the excess water.
Fertilizer
Most potting soils contain adequate nutrients for early plant growth. Fertilizer is really only required by actively growing plants. If your plants are resting, not growing or dormant, they don't need fertilizer. Many kinds of house plants take a dormant break during winter and only need enough water to keep them alive; they won't need much water, so overwatering can be a problem at this time if plants are saturated for too long.
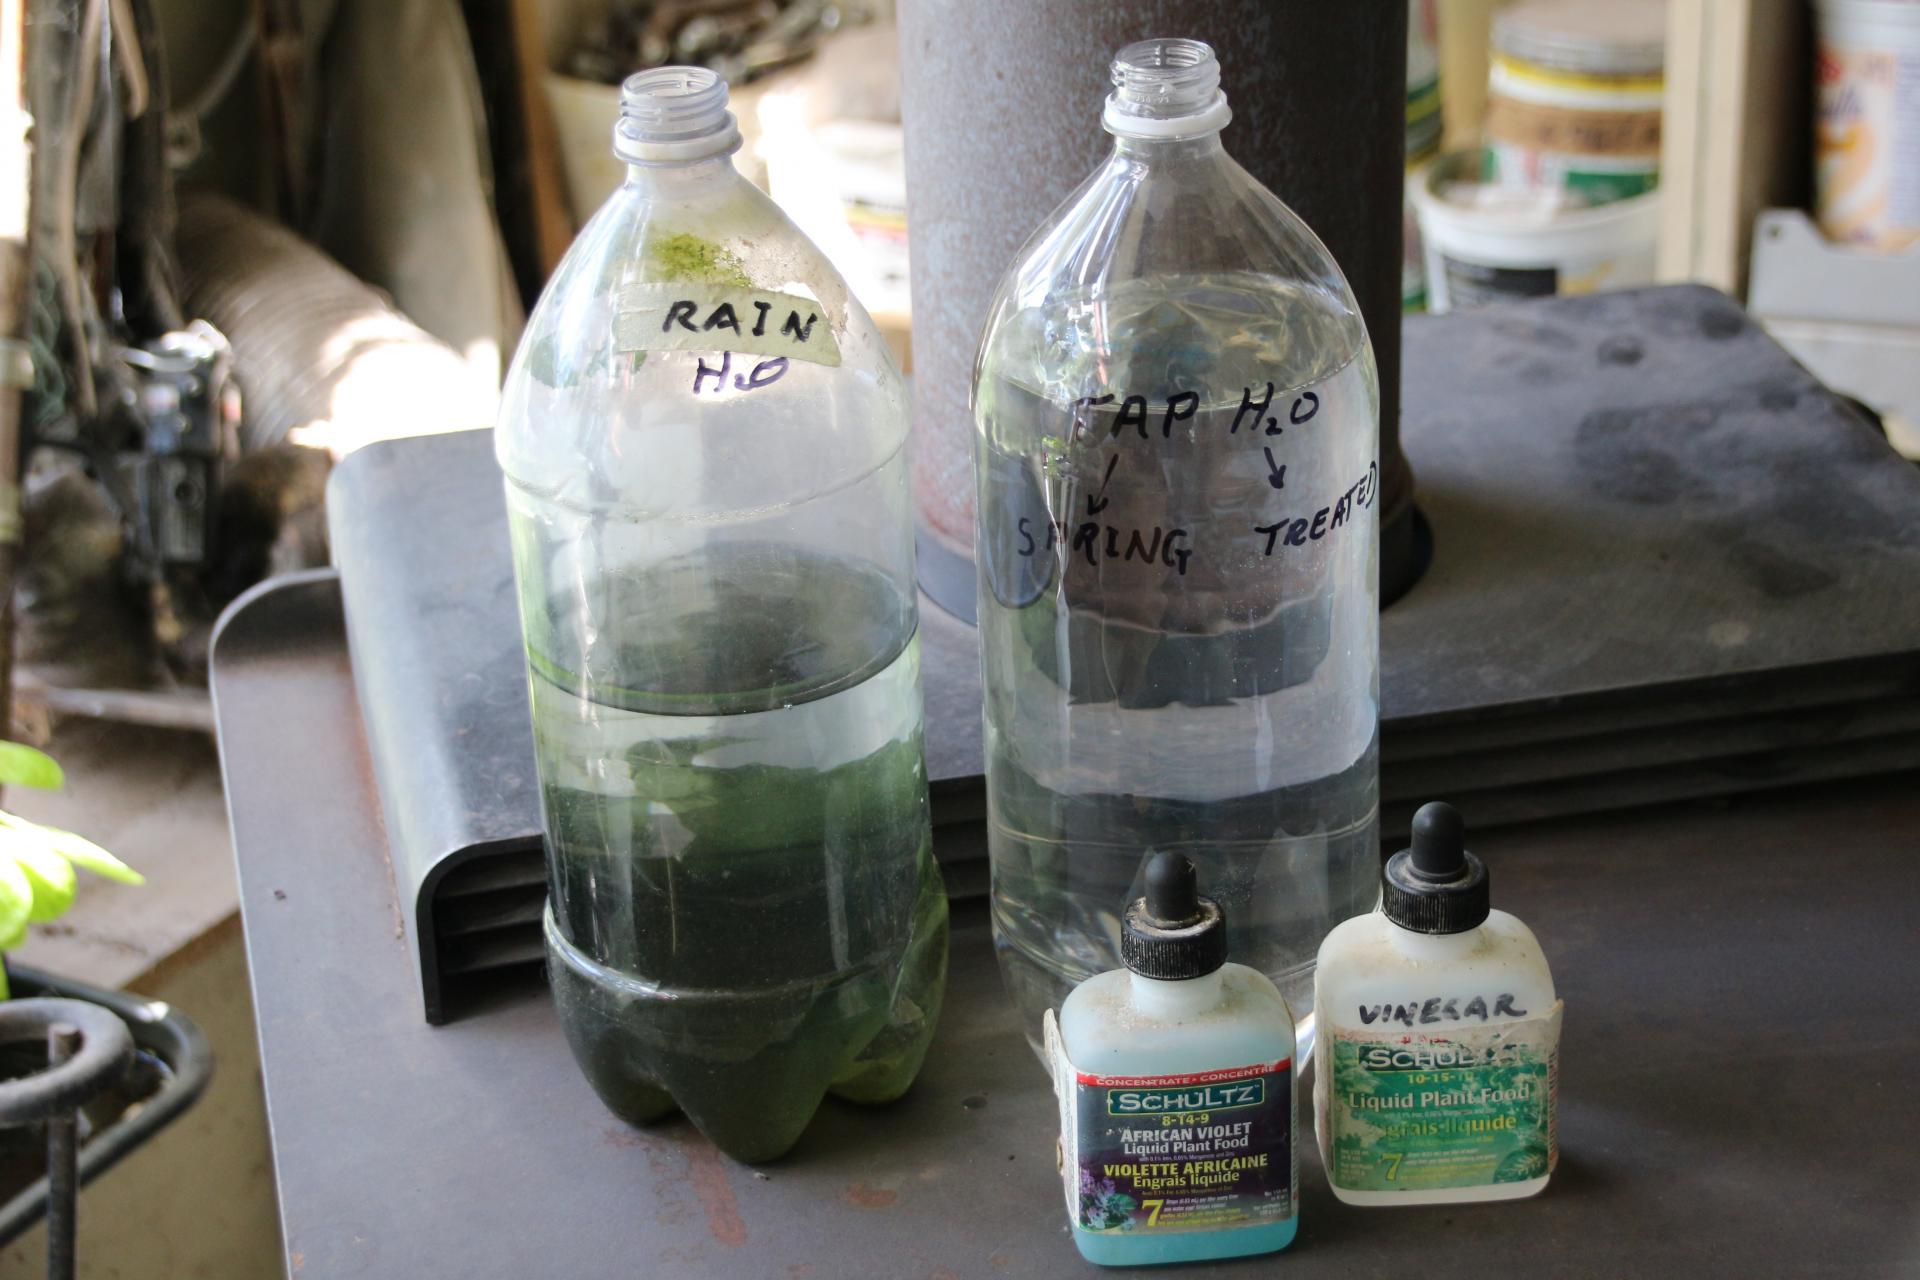
When plants are actively growing, I use a commercial liquid fertilizer made for house plants like African Violets (10-15-10), at half the recommended label rate, but I use it each time I water, instead of the full rate once a month that's recommended on the label. Our water is very basic, 8.2 pH, so I usually add vinegar to the water at a rate of 7 drops for a 2-liter container which brings it closer to neutral.
Soil and Pots
The safest soils to use for house plants are those that are sterilized to ensure they contain no harmful pathogens like the fungus that causes damping off, a disease that attacks new seedlings and rots them at the soil surface. Seedlings are most vulnerable while larger plants are hardly affected. Nevertheless, I use sterile coconut fiber, peat moss, vermiculite, perlite, and coarse sand in my potting mixes. No garden soil or compost. A little research will tell you about the best combination for the plant you're potting up.
Almost any container can be used as a pot as long as it has holes in the bottom for drainage. I like to use the clam shell containers that things like croissants come in, with the lid down they make a mini greenhouse for your little seedlings. Just make sure you poke holes in the bottom for drainage. A slot screwdriver, heated on the stove, will melt holes in most plastic for that purpose.
Seeds and Plants
This is a great time of year because seed catalogues are out or soon will be. You'll also find garden centers are a great source for seeds and plants. I've had good luck buying specialty seeds like tropical pitcher plants on eBay. Make sure any seeds you want for sprouting are organic or free from pesticides or seed treatments. Seed treatment, however, can be beneficial for seedlings that you intend to transplant into your garden in spring. This is another way you can make use of seedlings like tomatoes, peppers, any other plants that need a long growing season and will benefit from a head start when transplanted outside into your veggie garden. Don't eat tomato or potato sprouts, plant them in your garden. Some perennial flowers can be quite expensive to buy as plants but are quite easy to grow from seed. Collect seeds from the ones you like and grow them from seed, much cheaper.
Resources
Seed catalogues are a great source of growing information, and the internet, especially YouTube, is a ready reference. Gardening books and magazines can also be a great source of information and inspiration. You might also consider joining your local Horticultural Society where I'm sure you'll find people who'll be very helpful and good sources of information about your local conditions and plants that do well there. I might not be an expert on your local situation, but I'm pleased to answer any other questions about how we grow seeds and plants. Good Luck
RPT
- ANTdrew, Ants_Dakota, evanmancini2011 and 1 other like this
My father always said I had ants in my pants.
#104
 Offline
-
Posted December 29 2025 - 8:26 AM
Hi RPT,
Thank you so much for all your help and for taking the time to share such detailed info. I really appreciate the care you put into explaining everything and it is incredibly helpful for me!
So, I am curious based on what you are growing right now, what would you personally recommend as a good plant or seed to start indoors at the moment.
Thanks again for everything,
Evan Mancini
Edited by evanmancini2011, December 29 2025 - 8:27 AM.
#105
 Offline
-
Posted December 30 2025 - 12:35 AM
Hello evanmancini2011;
I'm very pleased you find my replies helpful. It does take time and thought to write them.
You seem to like the African Violet plants and flowers, and these plants would seem to be a good option for you to grow. I learned to grow these plants from my grandparents when I was eleven, sixty years ago. Both of them were very competitive, entering their plants in Horticultural competitions, winning many ribbons. But they also competed with each other very actively, both used totally different systems to grow their plants. My grandfather grew his violets in the basement under fluorescent lights, next to a nice warm furnace. He showed me how to take leaf cuttings and grow new plants. African Violet plants have a lifespan, young plants flower best, and they eventually mature into large plants that flower sporadically. Miniature violets grow many crowns that mature and can be cut from the parent plant and rooted as individual plants. These small plants are the kind of thing I give away as they'll develop quickly into little flowering plants that are easy to grow. I think you'll find that growing miniature African Violets is very enjoyable.
My grandmother grew her plants on an east facing windowsill in the living room, near a hot air register, with no artificial light. She taught me about the importance of fertilizing plants that are growing, but not to fertilize when they are flowering or dormant. She told me about turning the plants every few days as the plants grew towards the light of the window. My grandfather's plants grew much flatter with the light always directly from above.
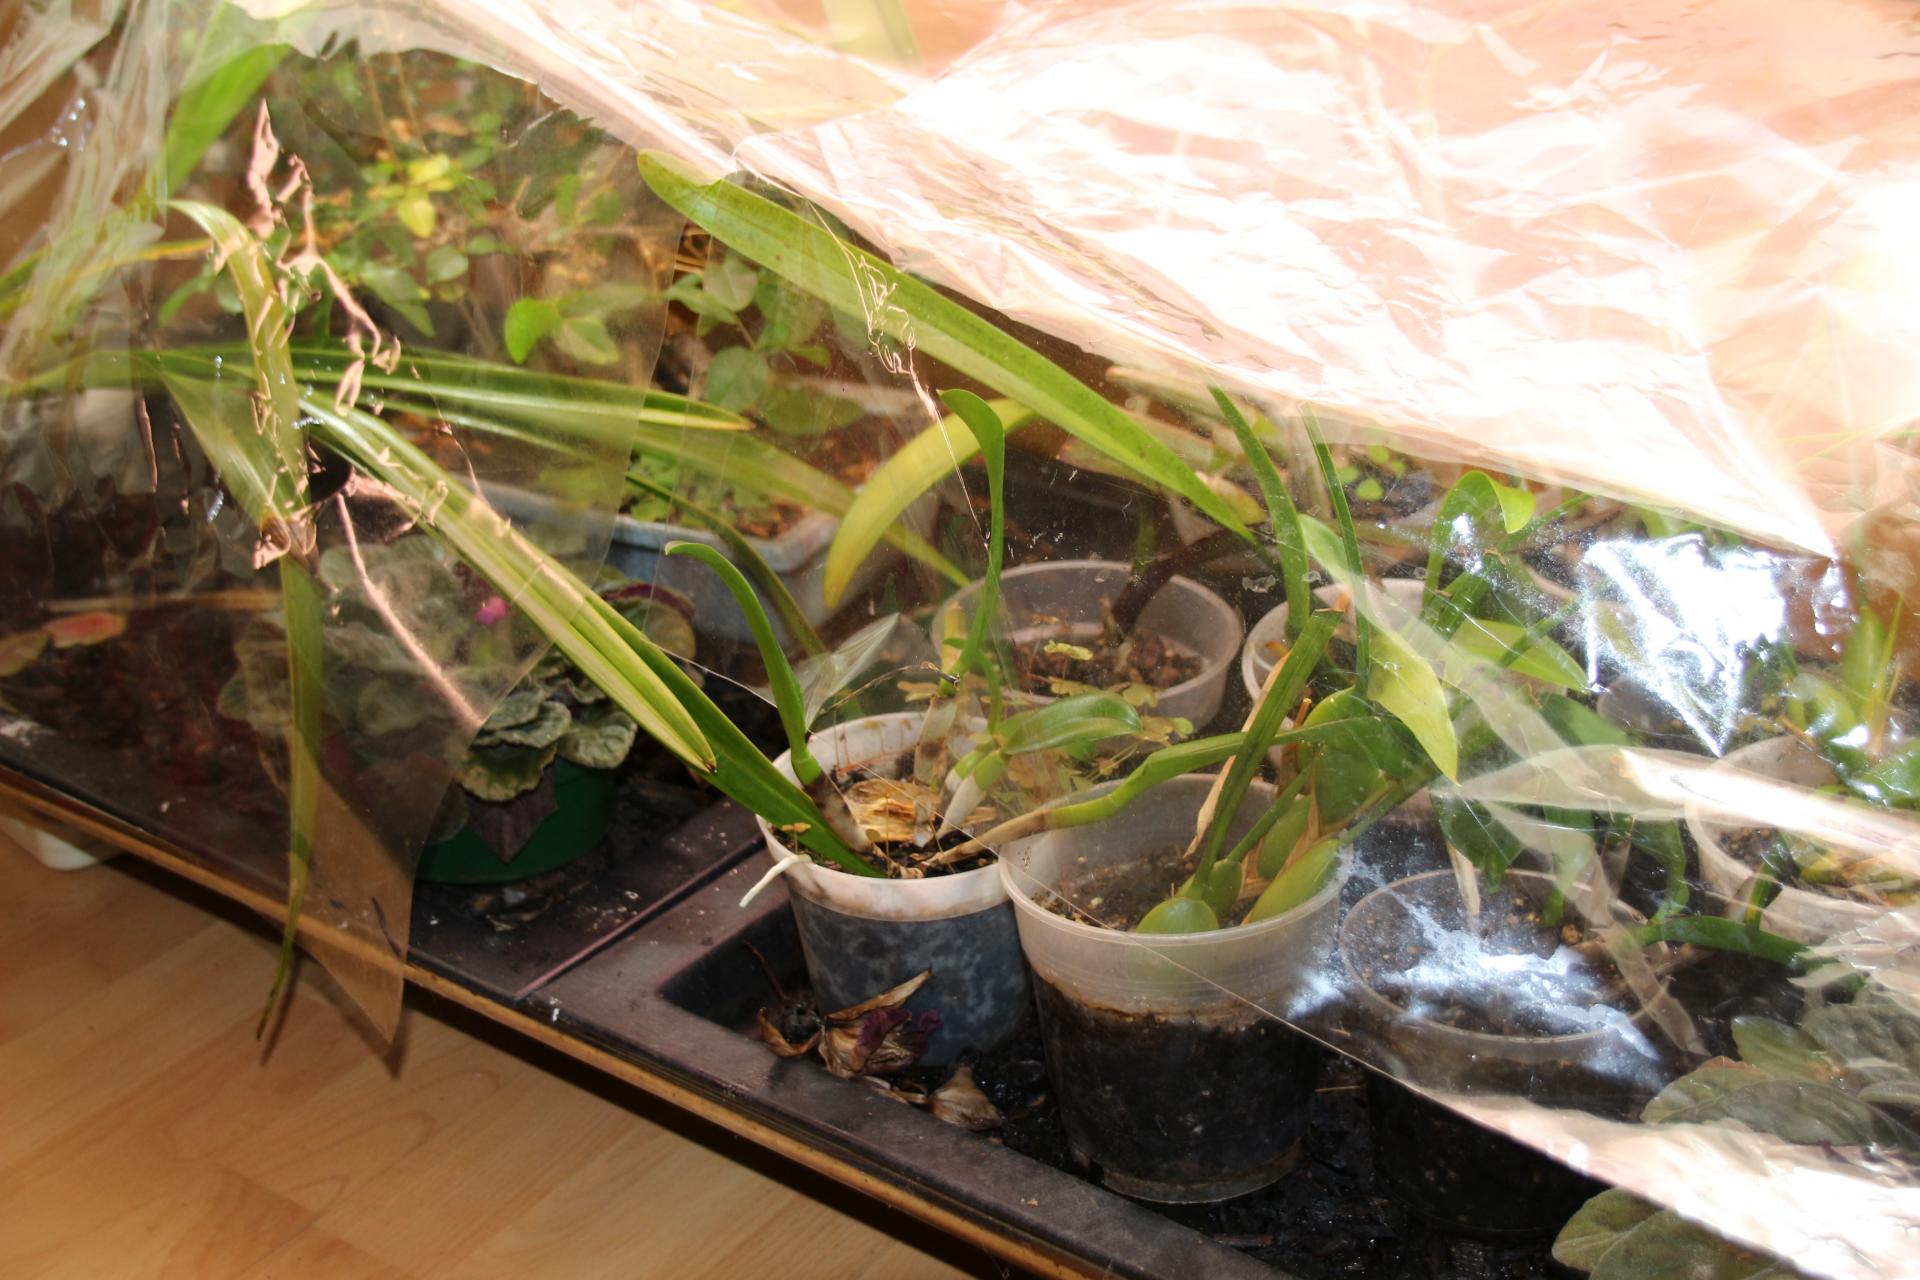
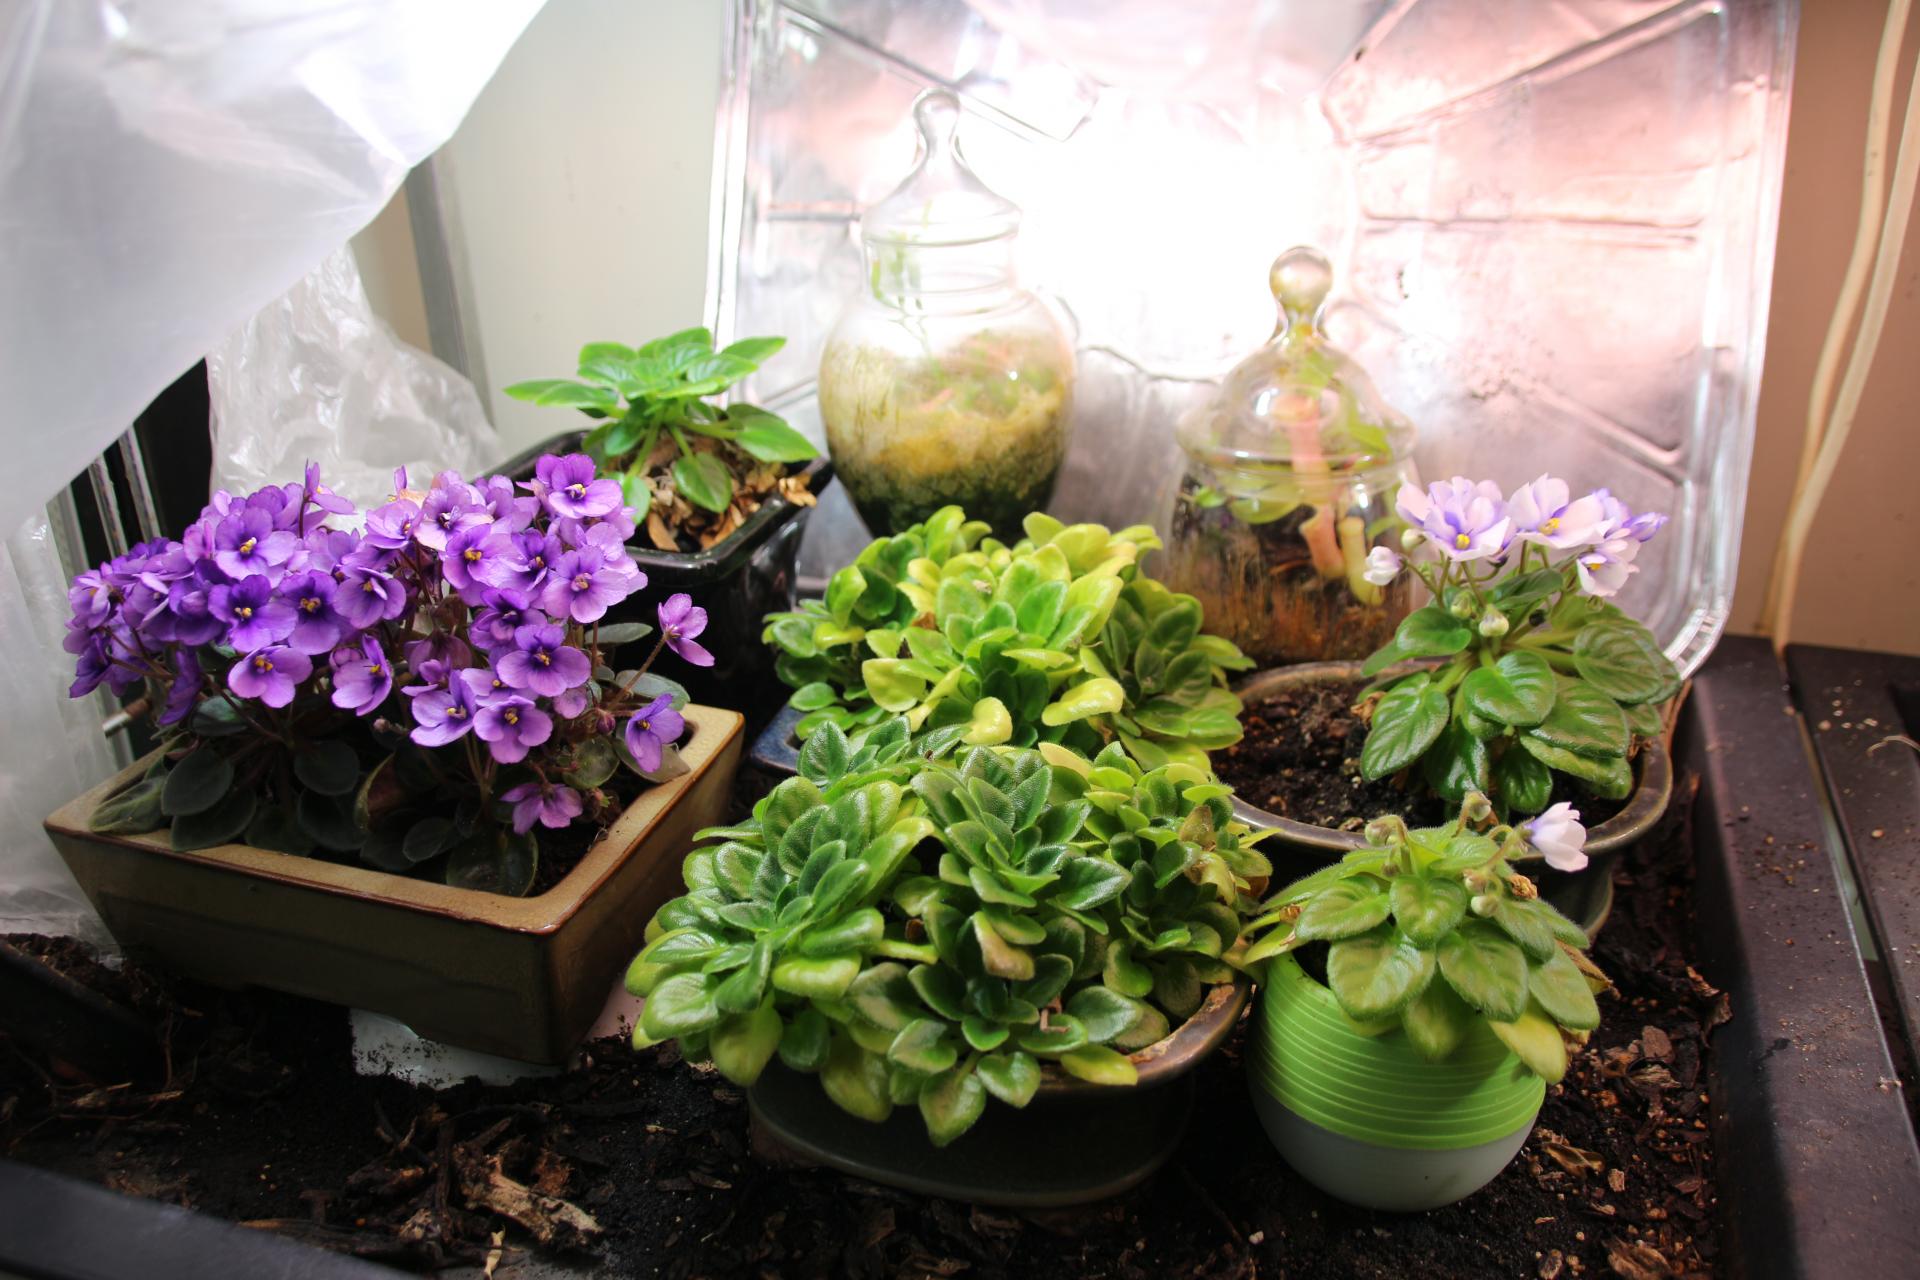
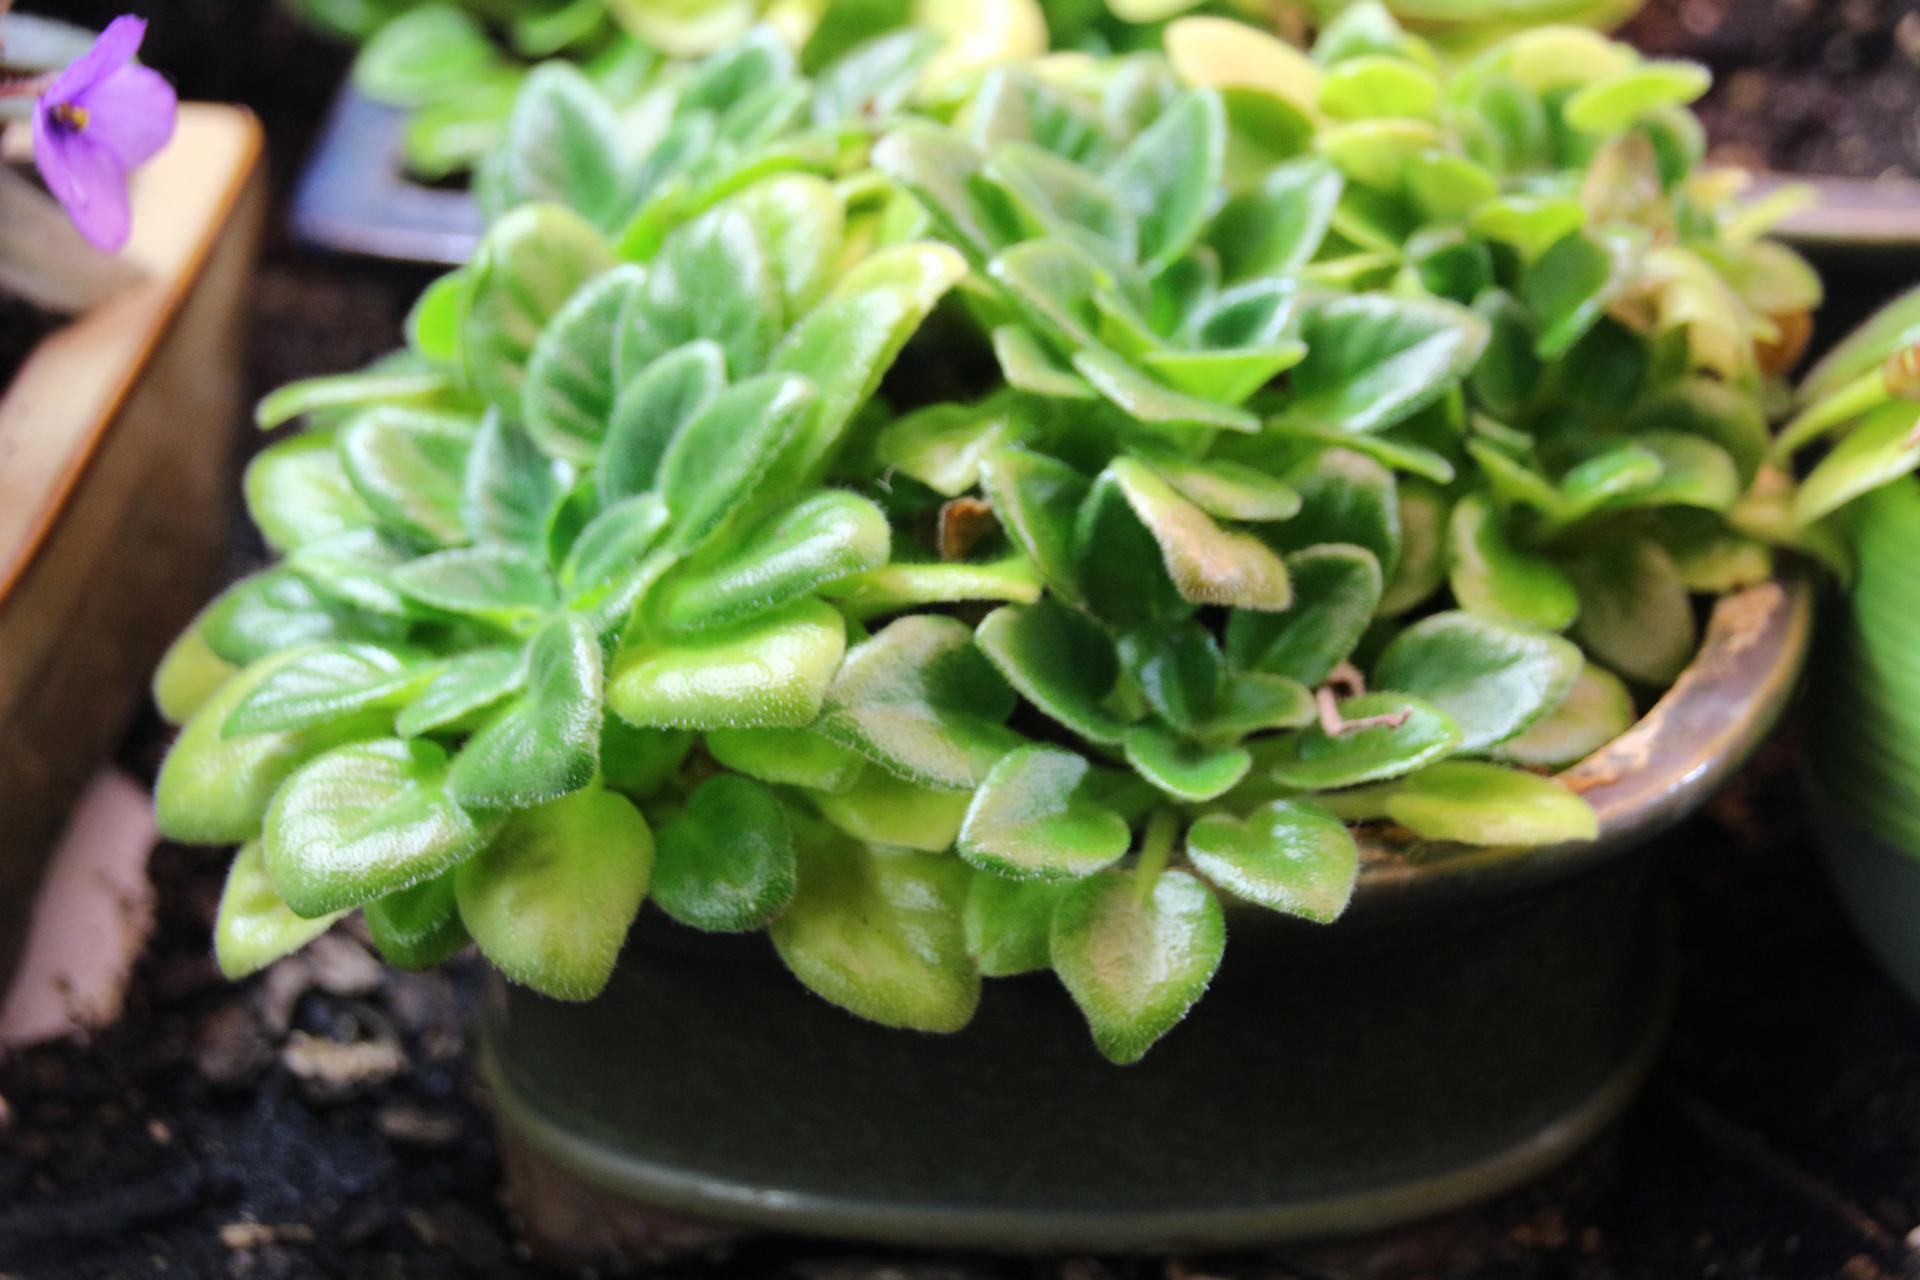
Most of these plants are dormant having flowered already this past season. You can see the many crowns these plants have developed, a growing point at the center differentiates the individual crowns. You can also see the drainage tray with wood chips and the plastic shroud around the light area that I've pulled back for the photo. I also put a clear plastic sheet over the entire plant area; this is to keep the humidity high which means the plants stay moist longer and require fewer waterings. I also grow small plants in covered, glass containers as you see in the background. Many small succulents can be grown this way.
In the new year, I'll be splitting these crowns up and repotting them, probably in twos or threes in bonsai pots. They have to be cut out from the parent plant, dusted with rooting hormone, placed on moist soil and then put into a ventilated plastic bag. It's surprising how quickly they'll root.
You can grow a large number of miniature plants in a small area, meaning you can use a smaller setup of artificial light to grow them. Despite the fact that my grandmother's plants did well, they did go through a winter rest period and followed a yearly cycle. A fluorescent or led light is easy to set up in a windowsill, table, or plant stand and at fourteen hours a day, will promote growth and flowering all season long.
I won't go through the specifics for growing these plants, you can find that information on the internet. If you have a problem, let me know. One of the things you might read is to only water them from below by filling a tray under the plant. Don't do that. I water all my plants from above until I see water running out the drainage holes and I know the soil is wet. These plants can dry out quickly as small pots will do that, so you can see I plant a couple of plants in a larger pot. Small plants look best when grouped together.
My grandfather taught me to stick my finger in the soil and feel if it was wet. Consistent watering is critical, keeping the plants moist but not wet. These plants can survive drying out between waterings, but they should be watered at the first sign of wilt. It helps to keep the humidity up in the plant area by using something like the shroud around lights or even a plastic cover made from a clam shell container. A drainage tray can contain wood chips, gravel or anything that holds the plants above the wet area. Dead flowers and leaves can mold, so remove them as quickly as possible.
One of the pleasures of growing miniature African Violets is looking for them in our local nurseries and plant stores. They're small but come in many colours and patterns and are usually reasonably priced. Shopping for them is half the fun.
If you eat salad or make stir fries, consider growing sprouts this winter too. Order the seeds online or find them in some nurseries or health stores. The sprouts are easy to grow and a tasty addition to any meal. Good Luck
RPT
- ANTdrew and evanmancini2011 like this
My father always said I had ants in my pants.
#106
 Offline
-
Posted December 30 2025 - 4:16 PM
Thank you so much for taking the time to write all of that. I really appreciate how much thought you put into your responses it really does mean a lot to me. I’m definitely excited to try miniature African Violets, and I’ll have to stop by the nursery soon to look for some. I also just planted a bunch of marigold seeds I had saved, so it’ll be fun to see how everything grows this winter.
Thanks again for all the advice! I’m really enjoying learning all this cool plant stuff from you.
Evan Mancini
- rptraut likes this
#107
 Offline
-
Posted December 30 2025 - 6:37 PM
Hello Evan;
It’s my pleasure to help you. It’s good for me to write this stuff down for you and other readers, now and in the future. I still have the page with all the growing instructions for Violets that my grandfather made me write out so many years ago and nothing has changed in all those years. A very smart friend of mine recently passed away and took all his years of learning and knowledge with him. This way I can share what I know before I go. It’s a very important thing for me to do.
Marigolds are great seeds to start early for your flower garden and many people plant them around vegetable gardens to keep out pests. I’ve started some lettuce seeds, but I’ll wait until February or March to start the majority of my plants for the vegetable garden. If I start them too early, they can get too big and too many to look after by the end of May when we transplant them out to the garden.
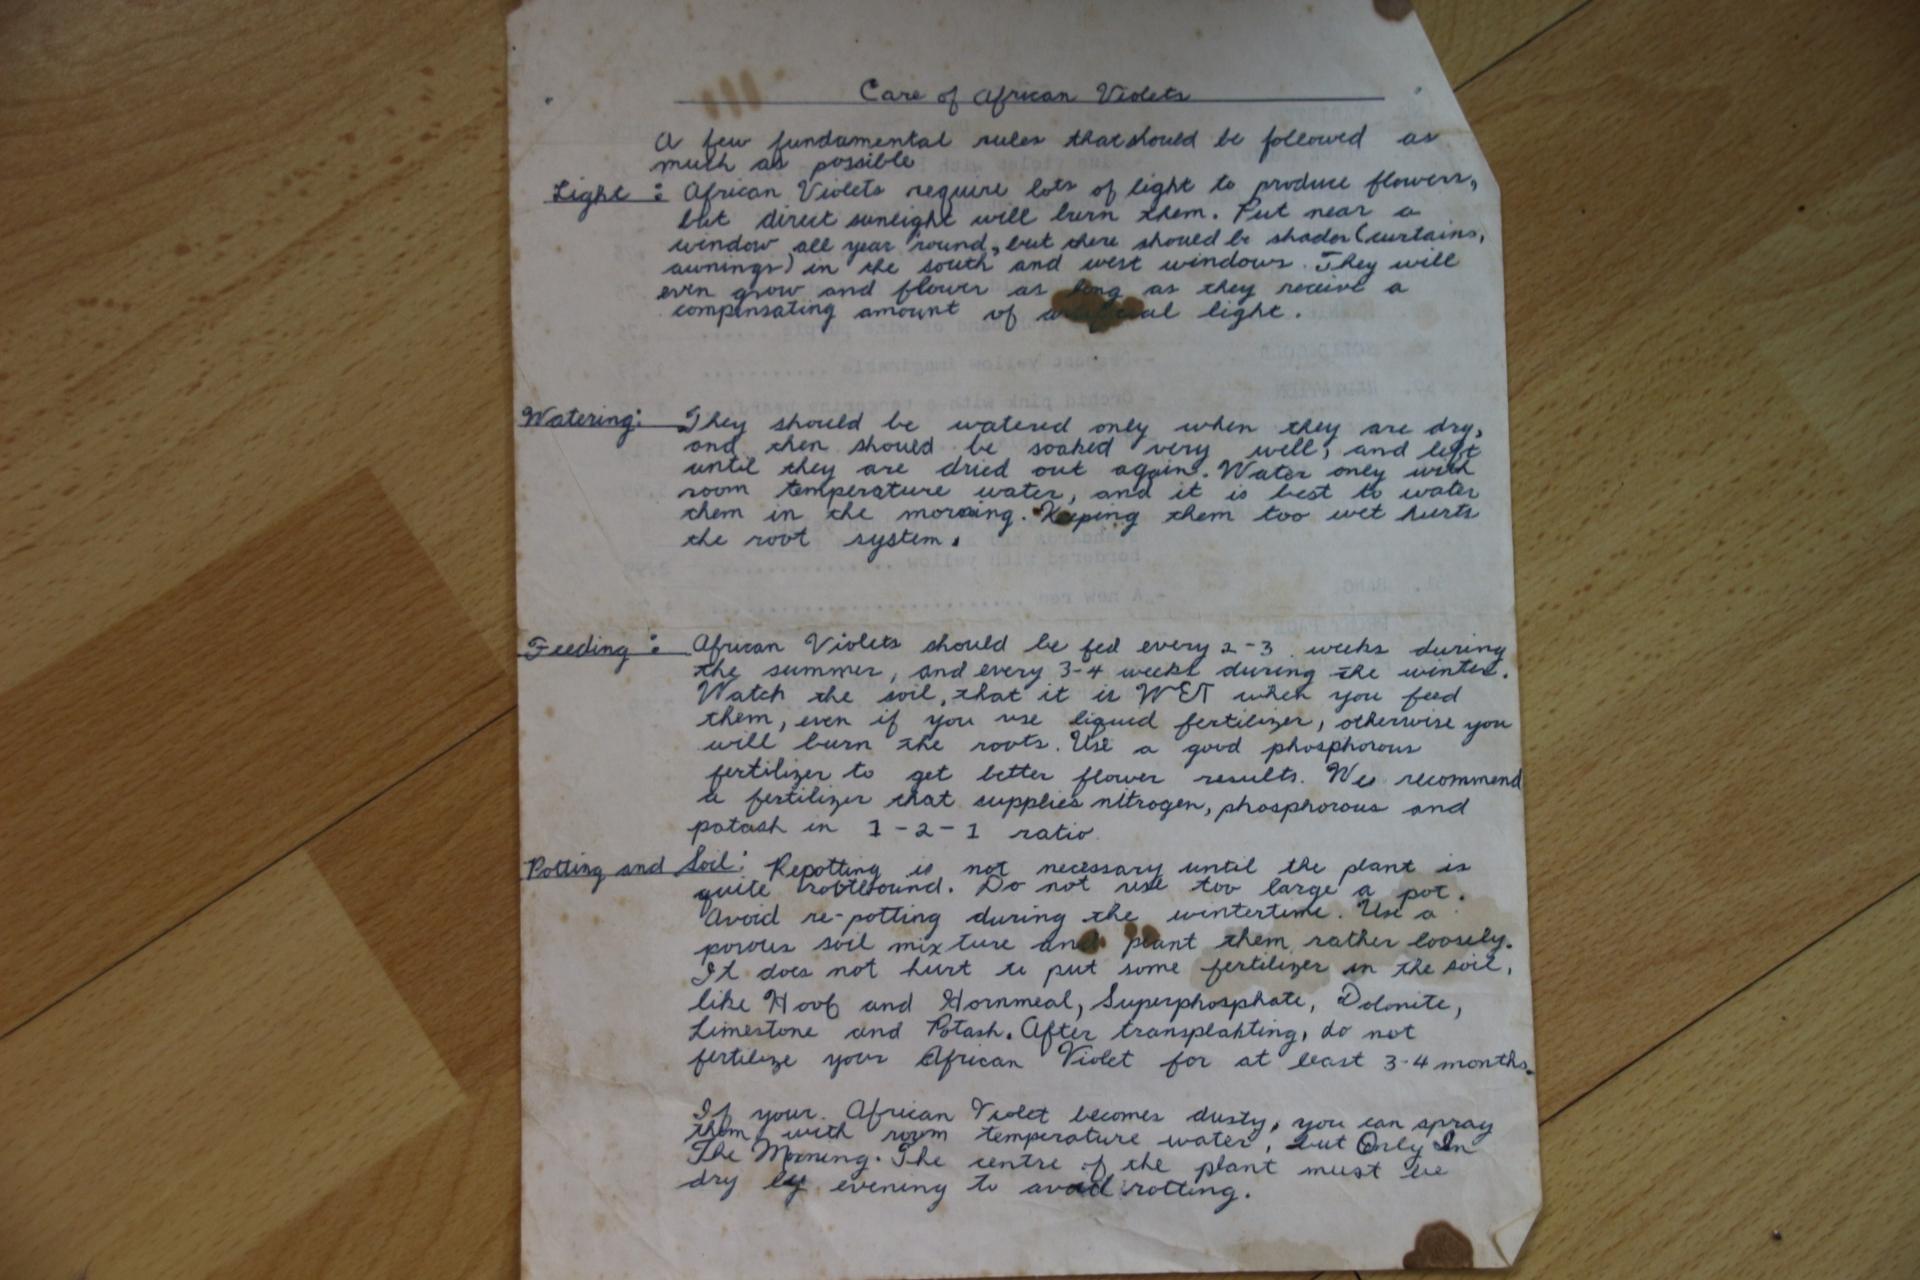
Here's the page of instructions I wrote out from a growing guide. I hope you can read them; it was my best writing! The blotted-out word is artificial. Blowing it up a little might help reading, it's all still good information.
Robert
Edited by rptraut, December 30 2025 - 10:37 PM.
- ANTdrew likes this
My father always said I had ants in my pants.
#108
 Offline
-
Posted January 4 2026 - 5:35 PM
Hey, sorry for the late response I have been just very busy with new year's. But thank you so much for providing this page that you wrote. It means a lot to me, and I have already printed it out as a guide for the violets (And wow you have some great beautifal handwriting)! The violets I am getting soon from an order, and I have already planted the Marigold seeds that I had, and surprisingly they have already sprouted.
Thank you so much for your help!
Evan Mancini
- rptraut likes this
#109
 Offline
-
Posted January 14 2026 - 8:39 PM
Any updates on the crematrogaster coming soon? they are very fun to watch and I would love to see how they are doing.
- rptraut likes this
Currently keeping: 2 C.vicinus colonies.2 C.sansabeanus. 1 C.leavissimus. 2 C.Ca02. 1 V.pergandei. 4 T.immigrans.1 F.pacifica. 1 C.hyatti
1 M.ergatognya
Trying to get my hands on :C.modoc,A.vercicolor, and Any Honeypots
#110
 Offline
-
Posted January 15 2026 - 12:19 AM
Hello GOCAMPONOTUS;
In the short time I've kept Crematogaster ants, I've also enjoyed watching them and their activities. I was very disappointed last year when Queen Cr3 died; her colony was my largest Crematogaster colony and I had high hopes for them. When I put them into their winter storage, they appeared to still have some larvae from that queen, and I think I'll see what happens in spring.
My Cr2 colony did well last season and they seemed in good condition when they went into winter storage. There isn't much to report while they're in diapause, I'll certainly update their status when they reactivate in spring. I'm also anxious to see how the two Crematogaster queens I found last season perform in spring. I'll let you know what happens.
RPT
- GOCAMPONOTUS likes this
My father always said I had ants in my pants.
Also tagged with one or more of these keywords: camponotus, tetramorium, brevicornis, neoniger, depilis, crematogaster
Ant Keeping →
Ant Keeping Journals →
Antz_Straya's Australian AntsStarted by Antz_Straya , Sep 7 2025 |
|
|
||
Anting →
Ant ID Requests →
Camponotus ID?Started by Turtle , Jul 24 2025 |
|
|
||
Ant Keeping →
General Ant Keeping →
Ant Colonies for Sale, Tetramorium, Lasius, ManicaStarted by Stubyvast , Jul 23 2025 |
|
|
||
Ant Keeping →
Ant Keeping Journals →
Ants_Dakota's Camponotus sp. JournalStarted by Ants_Dakota , Jul 13 2025 |
|

|
||
Ant Keeping →
Ant Keeping Journals →
AntTx's Camponotus sansabeanus JournalStarted by AntsTx , Jun 17 2025 |
|
|
1 user(s) are reading this topic
0 members, 1 guests, 0 anonymous users


