Jump to content

  • Chat
  •  
  •  

Welcome to Formiculture.com!

This is a website for anyone interested in Myrmecology and all aspects of finding, keeping, and studying ants. The site and forum are free to use. Register now to gain access to all of our features. Once registered and logged in, you will be able to create topics, post replies to existing threads, give reputation points to your fellow members, get your own private messenger, post status updates, manage your profile and so much more. If you already have an account, login here - otherwise create an account for free today!

Photo

Dspdrew's Formicarium 05 Research and Design (Updated 11-22-2023)

formicarium container out world enclosure how-to diy design dspdrew nest tutorial

  • Please log in to reply
237 replies to this topic

#61 Offline Gregory2455 - Posted September 21 2014 - 12:00 PM

Gregory2455

    Advanced Member

  • Members
  • PipPipPip
  • 3,286 posts
  • LocationCalifornia

That is interesting, I would look into why that is happening. Is this made of Ytong?


#62 Offline dspdrew - Posted September 21 2014 - 12:17 PM

dspdrew
  • LocationSanta Ana, CA

Yes. You should read the thread; I tell all about it. :)


#63 Offline dspdrew - Posted October 27 2014 - 11:05 PM

dspdrew
  • LocationSanta Ana, CA
I've finally started working on the computer design of the nest portion to have laser cut.  I should have some prototypes cut out within the next week.
 
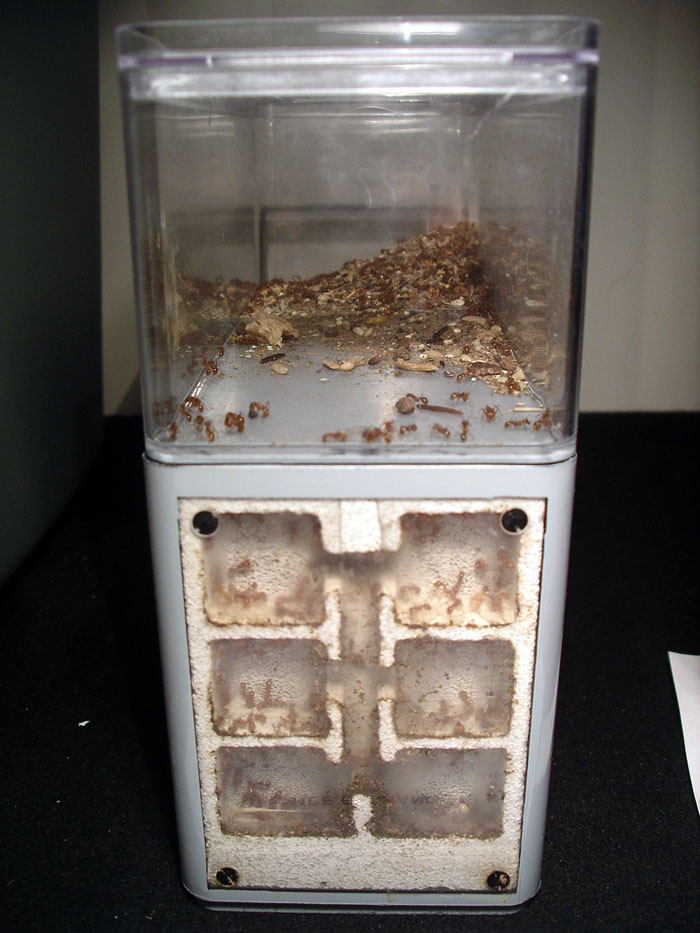
This will be the actual nest portion, that you can see here in the bottom container. In this first prototype it was made purely out of Ytong, but will eventually be cut out of plastic, most likely acrylic.
 
gallery_2_72_31185.jpg
 
 
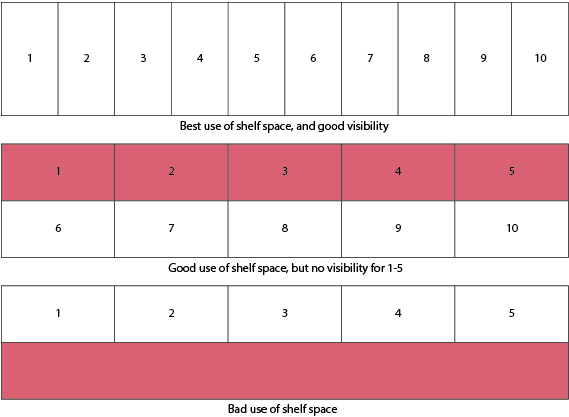
I get asked a lot why I'm putting the nest on the ends of these containers, when I could fit a much larger one on the sides. Other than the fact that I don't think one of these containers makes a large enough out world for the amount of ants that can fit in a nest that size, they would make terrible use of shelf or counter space that way. Since I'm making this particular formicarium for storing, and not displaying ants, it makes sense to keep things as compact as possible. Even though it should be pretty obvious, I made a little diagram showing exactly how the shelf space would be utilized.
 
gallery_2_131_7275.png
 
 
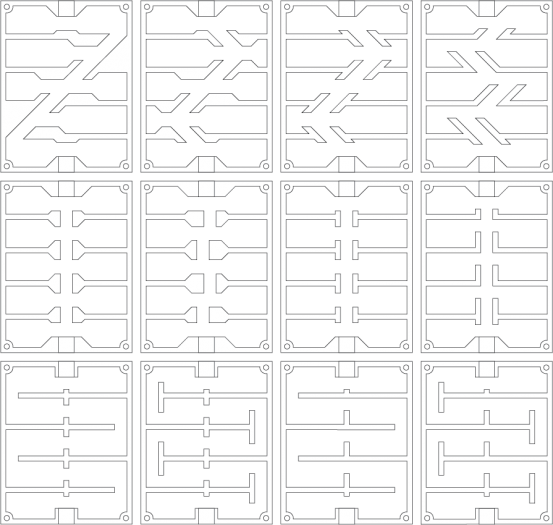
Here are some of the nest ideas I came up with. Some look cool, but don't utilize the space as well, while others maximize the chamber space, but don't look so cool. Also some are separated by more of a doorway as opposed to more of a tunnel, which could have a slight affect on the differences in humidity between the chambers. One other problem I encountered with this first prototype, was that the ants sometimes had a very hard time carrying anything out of the nest because of the long vertical tunnel running all the way up to the top entrance. Many times they accidentally dropped what they were carrying, and it fell all the way back down to the bottom. I watched the honeypot ants spend an entire week just trying to get a moldy chunk of a cricket out of the nest. A lot of these designs are made specifically to solve that problem.
 
Do me a favor and let me know which design you think is the best. I would like to hear everyone else's opinions.
 
med_gallery_2_131_34012.png
  • antnothinglikeit likes this

#64 Offline Tpro4 - Posted October 28 2014 - 7:56 AM

Tpro4

    Advanced Member

  • Members
  • PipPipPip
  • 304 posts
  • LocationNorth Hills, CA
The very first one
Remember Dragon Warrior, anything is possible when you have inner peace. - Master Shifu

Current Queens:
1 Unknown Pogomyemex
1 Solenopsis Xyloni

#65 Offline Gregory2455 - Posted October 28 2014 - 10:39 AM

Gregory2455

    Advanced Member

  • Members
  • PipPipPip
  • 3,286 posts
  • LocationCalifornia
Try them all, but I still prefer naural looking nests. ;)

#66 Offline DesertAntz - Posted October 28 2014 - 12:50 PM

DesertAntz

    Advanced Member

  • Members
  • PipPipPip
  • 202 posts
  • LocationArizona

Agree on natural nests.  (y)  


I like the 2nd from the right on the first row. 


The good man is the friend of all living things. - Gandhi 


#67 Offline AntsAreUs - Posted October 28 2014 - 1:02 PM

AntsAreUs

    Advanced Member

  • Members
  • PipPipPip
  • 1,041 posts
  • LocationIndiana

From the very top left design, go down 2 then right 2. I really see success with that design, and the flow from chambers to the exit is not very far so the ants don't waste as much trying to get out/in.


The one to the right of the design looks like it can hold more brood/food (depending on species) if the nest is going to be vertical.


Edited by Gaige Daughtrey, October 28 2014 - 1:04 PM.


#68 Offline Gregory2455 - Posted October 28 2014 - 4:37 PM

Gregory2455

    Advanced Member

  • Members
  • PipPipPip
  • 3,286 posts
  • LocationCalifornia

It makes me laugh that you have so many ants, shelf space needs to be considered! :lol: rofl


#69 Offline dspdrew - Posted October 28 2014 - 7:12 PM

dspdrew
  • LocationSanta Ana, CA

Agree on natural nests.  (y)


I do too, if they are there to be displayed. These are not exactly for that purpose; they are more for storage (which also explains why I want them space-efficient). It's kind of like going camping, and when looking at the motor-home saying "yeah I don't know, I'm more into sports cars".


It makes me laugh that you have so many ants, shelf space needs to be considered! :lol: rofl


Haha, it's not just that. It never makes sense to spread stuff out and take up more table space, shelf space, or counter top area than necessary. Many things are designed to be space efficient. Even if I lived in a mansion, I would still want to keep my ant keeping area confined. I would rather there be more formicariums in my field of view, than empty, unusable shelf space. It's mainly an organization thing.
#70 Offline dspdrew - Posted November 2 2014 - 12:14 AM

dspdrew
  • LocationSanta Ana, CA
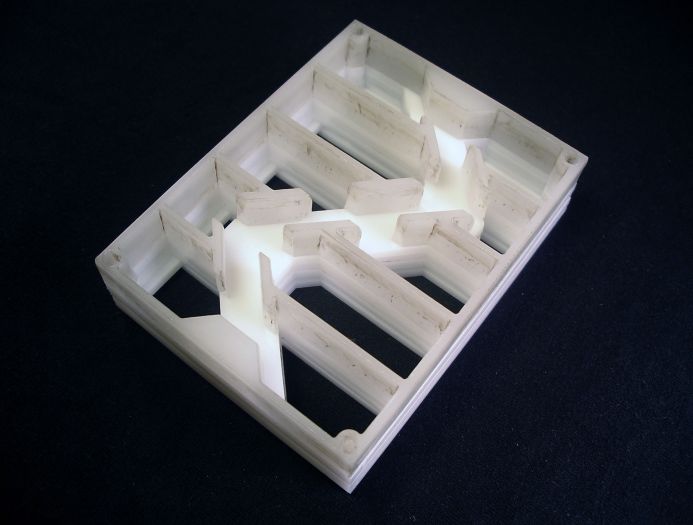
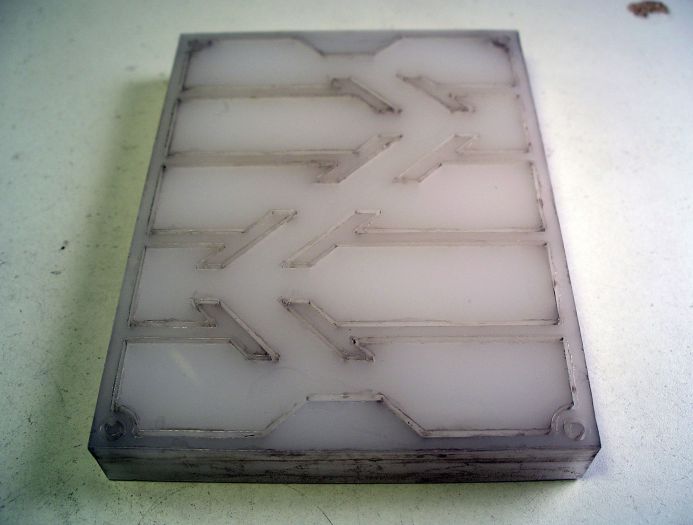
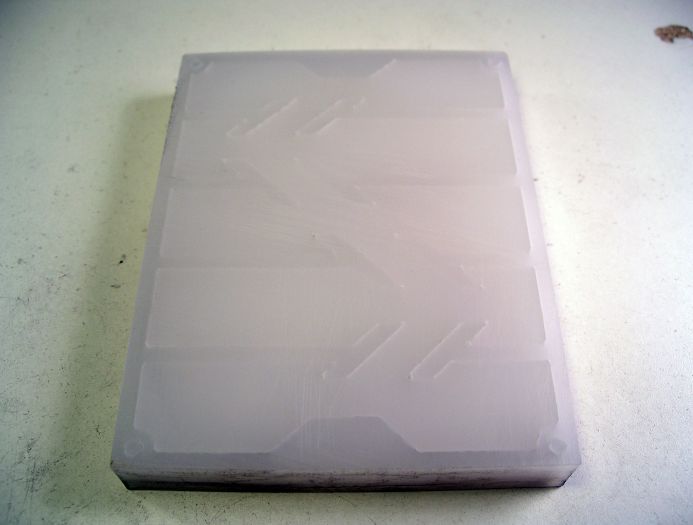
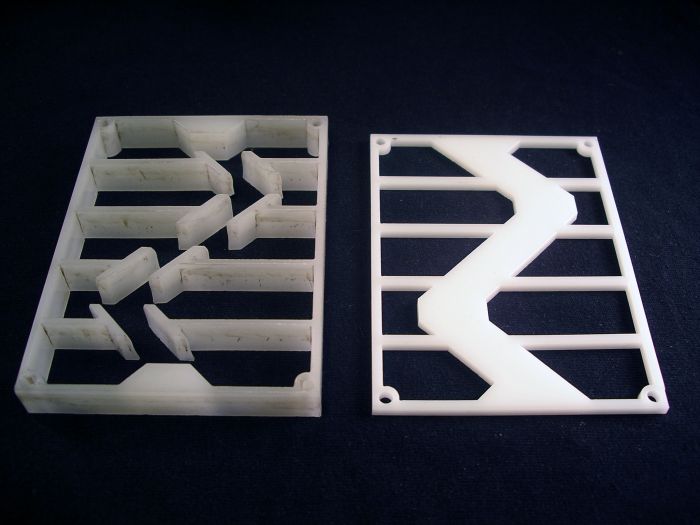
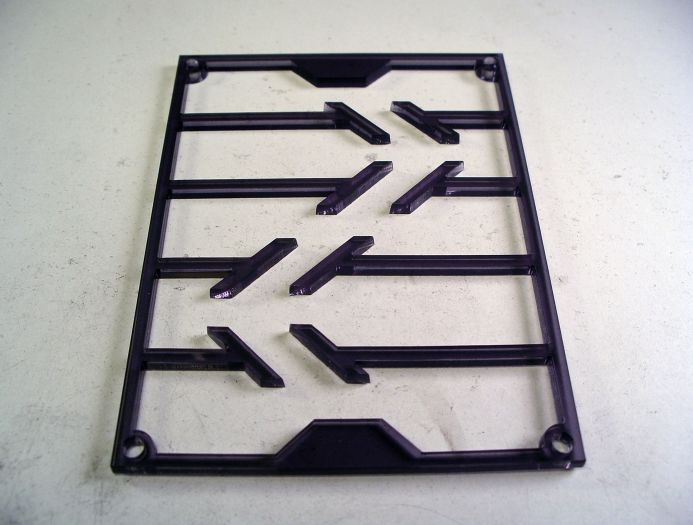
The other day, I got access to a laser cutter. I didn't actually run it myself, but I was about as close as you could get to running it. This was perfect for making a couple prototypes with some scrap pieces of acrylic I bought from the plastic store. Working this closely with the laser cutter made me realize what changes I could make to the specific design that's actually fed into the laser cutter, to help get much better results.
 
This laser cutter was 75 watt, which had a hard time cutting through the 12mm piece of acrylic. It took about four passes to get all the way through it. Here's what it looked like when it didn't make it all the way though.
 
med_gallery_2_131_294627.jpg
 
med_gallery_2_131_314997.jpg
 
 
Here's the one that we made it all the way through. along with one of the thinner chamber extension plates next to it. You can see how nicely it cuts much thinner pieces of acrylic.
 
med_gallery_2_131_304175.jpg
 
 
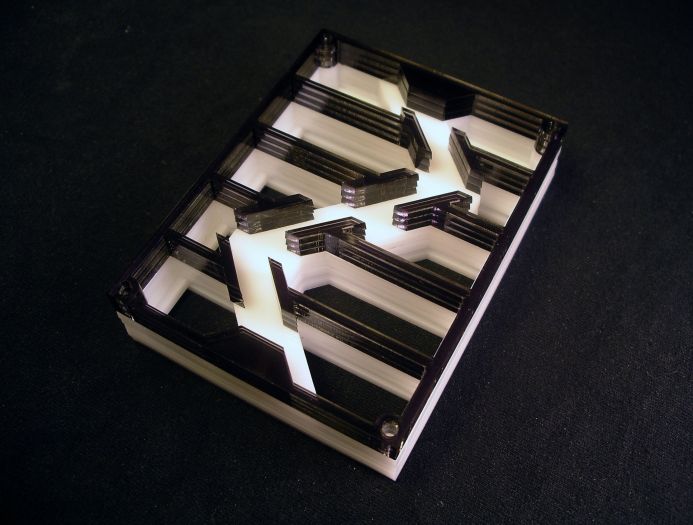
I also cut the main tunnel & chamber design out of a few 3mm smoked grey pieces of acrylic I found. I'll just weld all three of these together to create one much cleaner cut 9mm piece for now.
 
med_gallery_2_131_604578.jpg
 
 
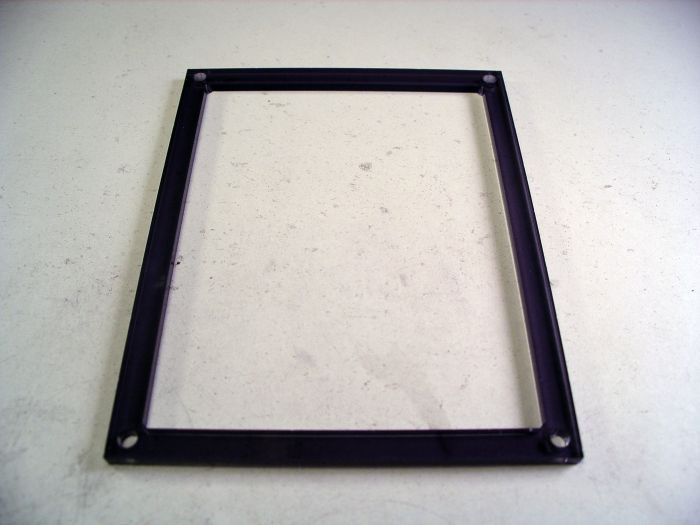
Here's the back brace that the bolts will screw into, holding all the pieces together tightly.
 
med_gallery_2_131_252102.jpg
 
 
Finally, here's an idea of what the nest will look like, just without the block of Ytong in back. never mind all the random colors, and levels of opacity, these were just scraps I was working with for the prototype.
 
med_gallery_2_131_191454.jpg
 
med_gallery_2_131_229609.jpg
  • antnothinglikeit likes this

#71 Offline Crystals - Posted November 2 2014 - 8:54 AM

Crystals

    Advanced Member

  • Moderators
  • PipPipPip
  • 2,049 posts
  • LocationAthabasca, AB (Canada)

You made it much wider than I originally thought.

Looks good.  I like how you layered the black with the white.


So, where are the ants?  :D


I assume water evaporation will maintain your humidity, like in your original ytong one?


"Always do right. This will gratify some people, and astound the rest." -- Samuel Clemens


List of Handy Links   (pinned in the General section)

My Colonies


#72 Offline dspdrew - Posted November 2 2014 - 10:18 AM

dspdrew
  • LocationSanta Ana, CA

You made it much wider than I originally thought.

Looks good.  I like how you layered the black with the white.


Thanks. Yeah, those colors were just what I had available in those sizes at the time.


I assume water evaporation will maintain your humidity, like in your original ytong one?


Yes. These will work the same way, only the Ytong will only make up the back wall, similar to a test tube setup.


#73 Offline AntsAreUs - Posted November 2 2014 - 4:10 PM

AntsAreUs

    Advanced Member

  • Members
  • PipPipPip
  • 1,041 posts
  • LocationIndiana

Are you going to sell these?


#74 Offline dspdrew - Posted November 2 2014 - 9:41 PM

dspdrew
  • LocationSanta Ana, CA

Probably, if they're not too much trouble to make.


#75 Offline dspdrew - Posted November 4 2014 - 10:45 AM

dspdrew
  • LocationSanta Ana, CA
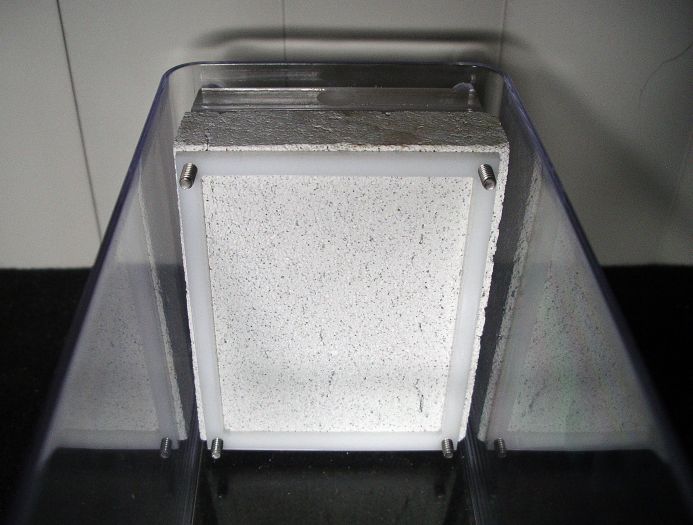
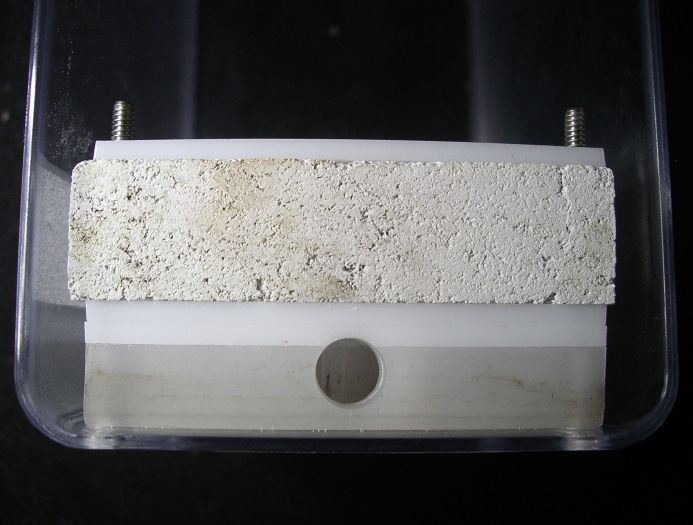
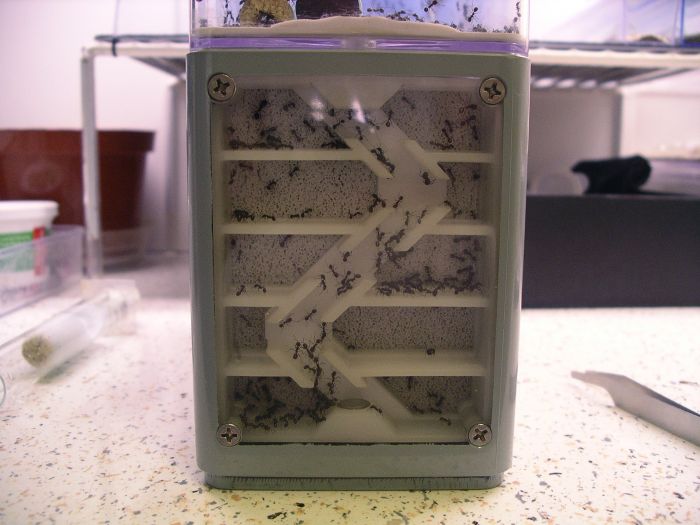
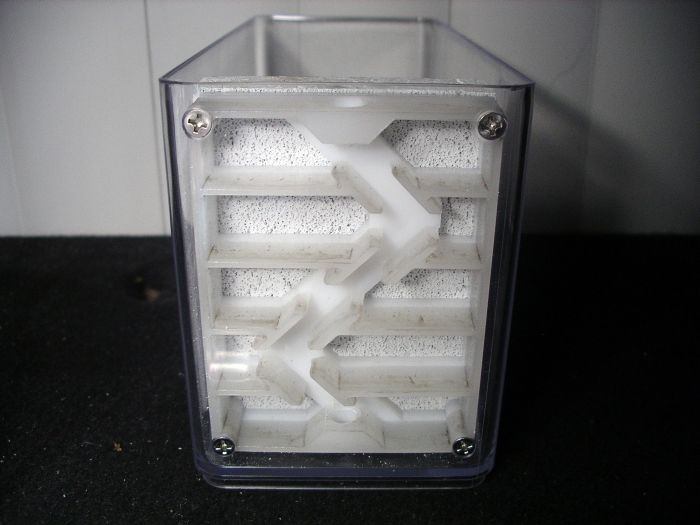
Here's what the nest portion looks like bolted together inside the base container. I ran into a few problems that should be easily fixed with a few changes to the design.
 
 
Front
 
med_gallery_2_131_46732.jpg
 
 
Back
 
med_gallery_2_131_612712.jpg
 
 
Top
 
med_gallery_2_131_637451.jpg

#76 Offline dspdrew - Posted November 6 2014 - 7:49 AM

dspdrew
  • LocationSanta Ana, CA
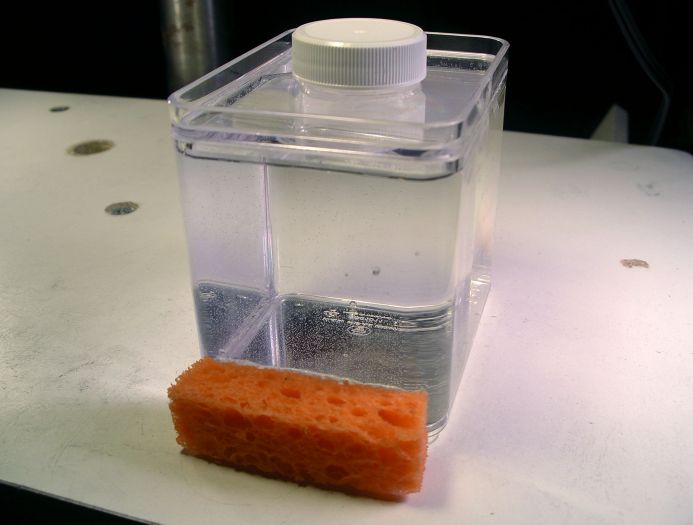
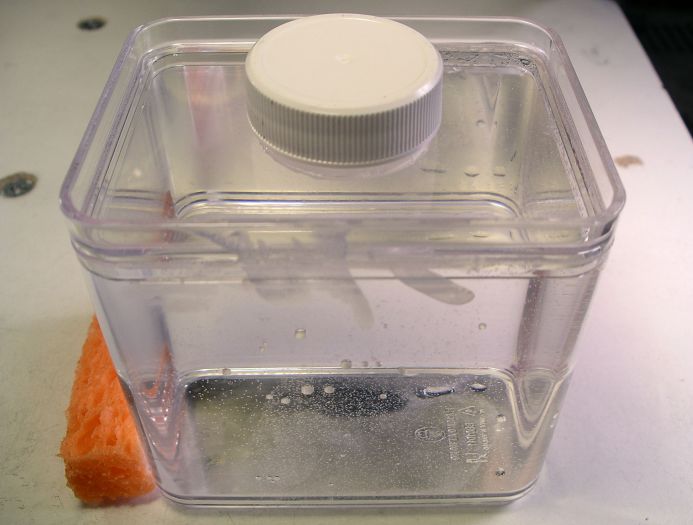
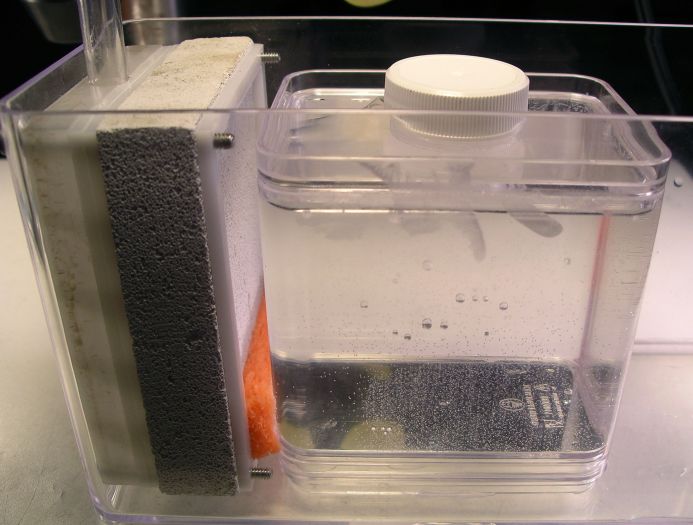
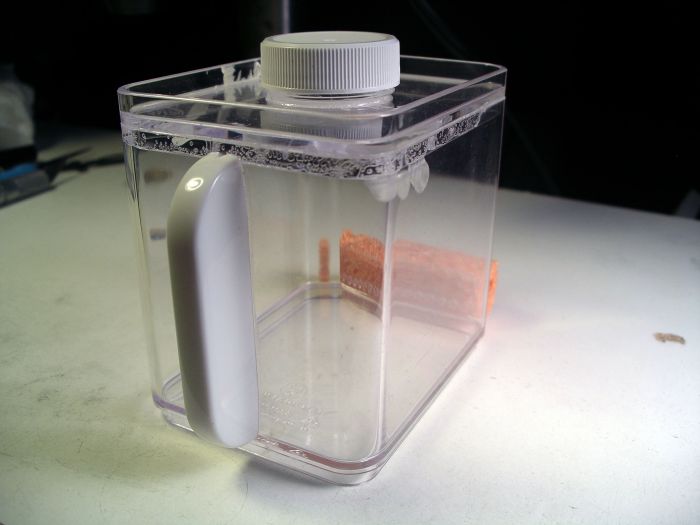
I have changed my mind a bit on the design of how the water tank is going to work exactly. Instead of lifting up the top out world container or second nest container, and swiveling it around to the side to pull the water tank out, I decided to make it removable from the back of the base container. I will cut a large hole in the back of the container--almost the entire wall, and put a handle on the back of the water tank so it can be pulled out. I figured trying to lift up the out world, or multiple formicariums stacked on top to pull the water tank out would probably end up being very difficult and annoying, and possibly disastrous if the tube pulled all the way out; pulling it straight out the back makes so much more sense. I'm now using a sponge to transfer the water to the Ytong block, instead of just a solid piece of plastic with holes. This allows the tank to be fixed in one spot, instead of having to be movable forward and back to allow the foam rubber between it and the back wall of the base container to push it tightly against the nest. This is what also allows the back wall of the base container to be opened up, and the tank to easily slide out. This will obviously allow a lot more ventilation inside the base container, so I might seal off the back of some of the Ytong block to cut down on evaporation. All these changes should be very easy to make.
 
Here's the water tank now, with the sponge attached to the holes instead of a plastic or Ytong plate. For now I'm only using one whole small container, instead of cutting two of them and joining them together to make a slightly larger tank like I did before. Attaching the sponge is very simple using a bead of hot-melt glue around the edge, and it seems to hold very well, as hot-melt glue usually does on plastic.
 
med_gallery_2_131_23294.jpg
 
 
This time I used some seal-able polystyrene screw-top containers (http://www.ebay.com/itm/400733691653) for the mouth of the tank. These were much easier to attach than what I used last time, since they could just be solvent-welded on.
 
med_gallery_2_131_443850.jpg
 
 
I also did a little better job drilling the holes this time, when of course now, it matters much less. :P You can see the bead of hot-melt glue all around the edge of the sponge.
 
med_gallery_2_131_46937.jpg
 
 
To hold the tank in place, I conveniently used one of the container's own lids. I just used a little hot-melt glue to hold it down for now, since I wasn't sure exactly where I wanted it. I would obviously solvent-weld it down permanently once it's complete. You can also see the moisture level in the Ytong already from having the tank in place for a few minutes.
 
med_gallery_2_131_305704.jpg
 
 
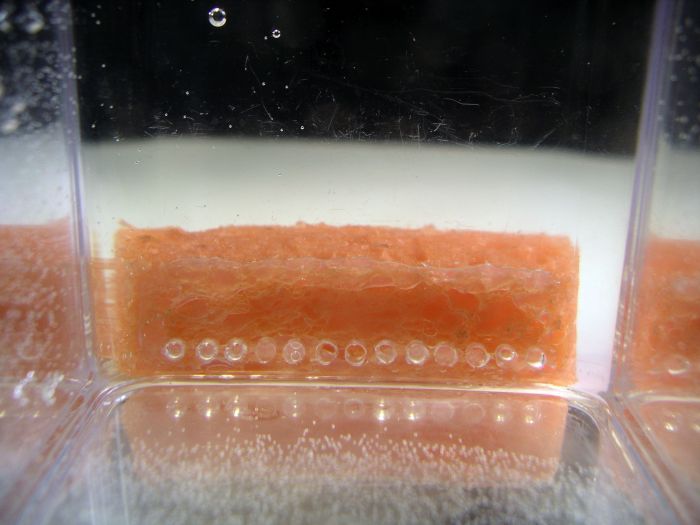
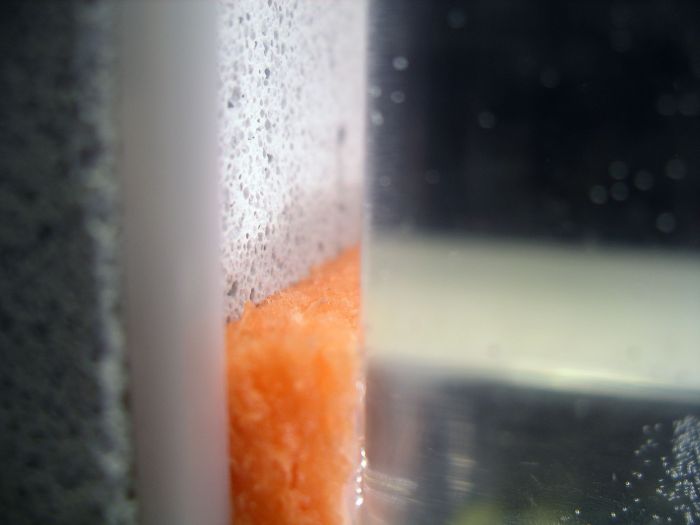
Here it is with the tank in place, and the sponge compressed up against the Ytong block.
 
med_gallery_2_131_237469.jpg
 
 
The water quickly transferred to the Ytong from the sponge.
 
med_gallery_2_131_350332.jpg
 
 
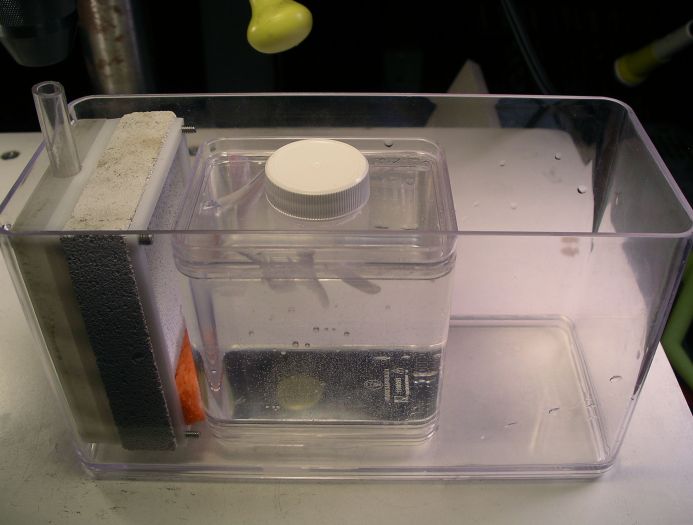
Here's a picture of the entire thing. It's been about 12 hours now, and so far no water has leaked from the tank, or dripped from the sponge. The moisture level on the Ytong seems a little low for some reason. Even though where it's at would probably be just fine, I think I'll still look into it if it doesn't go any higher.
 
med_gallery_2_131_368616.jpg

#77 Offline dean_k - Posted November 6 2014 - 8:31 AM

dean_k

    Advanced Member

  • Members
  • PipPipPip
  • 845 posts
  • LocationWaterown, Ontario, Canada

You could place another nest setup on right side and use it to house two ant colonies instead of one. Of course, dividing the outworld would be a must.


#78 Offline dspdrew - Posted November 6 2014 - 9:05 AM

dspdrew
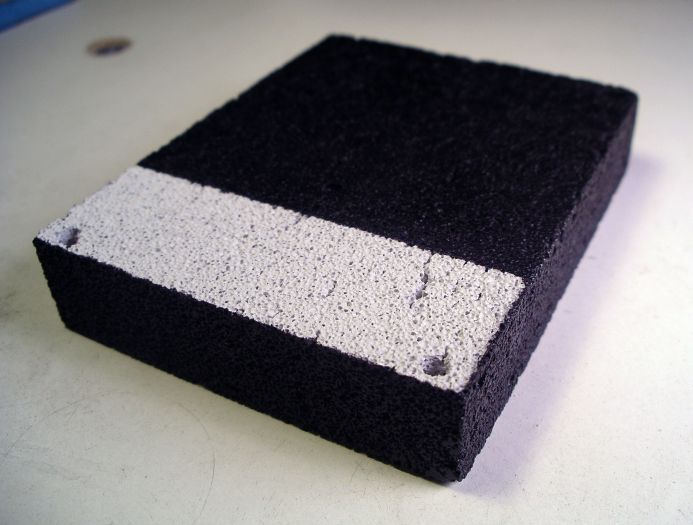
  • LocationSanta Ana, CA

In the very beginning, I tried making a formicarium that would hold three small colonies, but later thought it was a bad idea, because if one needs to be cleaned out or worked on in some way, you will have to disturb, or possibly even completely move the other colonies out first. I also have designed everything to the right size for only one colony the size of what would fit in that nest.
#79 Offline dspdrew - Posted November 7 2014 - 7:31 AM

dspdrew
  • LocationSanta Ana, CA
I took the nest back out and scraped off some of the burn marks created during the laser cutting process. I also roughed up the surface a bit more.
 
I coated the Ytong block with some black Plasti Dip (Edit: I wouldn't use this stuff; It killed a lot of my ants.) to cut down on the evaporation. I left just the area that the sponge touches bare. I decided that ventilation inside the nest might not be as important as I originally thought, seeing how my Pogonomyrmex colony has the most mold-friendly conditions inside their bottom chambers, yet don't have even the tiniest bit growing in there. I'm pretty sure that this is because of the ants' anti-fungal saliva, and the fact that there are so many of them packed into that small of a space; they probably have no problem keeping everything cleaned and free of any fungus. The problem is when you have mold-friendly areas in the nest, with little to no ants in there; I think THEN you'll probably end up with fungus growing. Most ant nests in the wild don't have any ventilation down underground anyways.
 
med_gallery_2_131_83061.jpg
 
 
I added a little handle to the water tank so it can easily be taken out and put back in through the back of the base container, according to my new plan. I also decided I should put the mouth of the tank on the front side, next to the sponge, so that way the water doesn't keep pouring out through the sponge as I fill it. I'll probably make this change on the next one.
 
med_gallery_2_131_448184.jpg
 
 
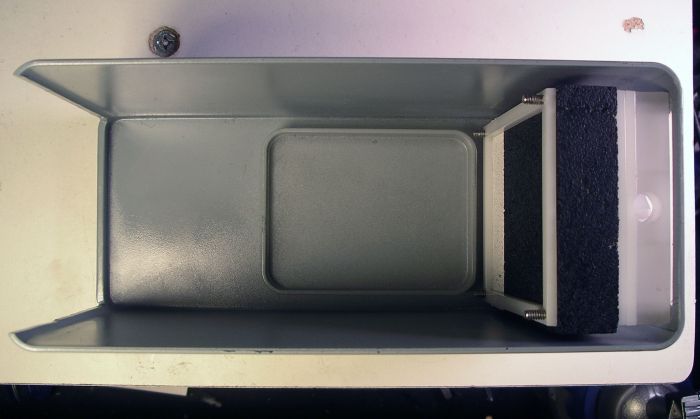
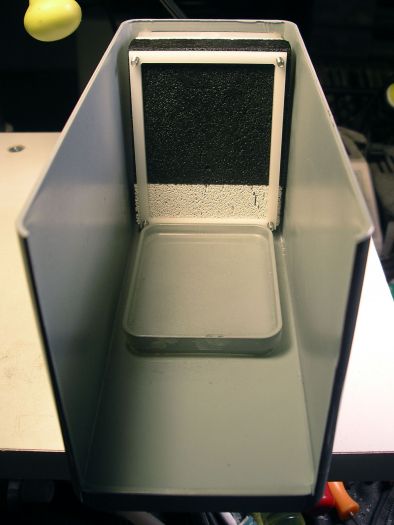
Here it is with the back cut out and the coated Ytong block and nest in place.
 
med_gallery_2_131_125829.jpg
 
med_gallery_2_131_477101.jpg

Edited by dspdrew, June 20 2020 - 8:42 PM.

#80 Offline dspdrew - Posted November 8 2014 - 5:05 PM

dspdrew
  • LocationSanta Ana, CA
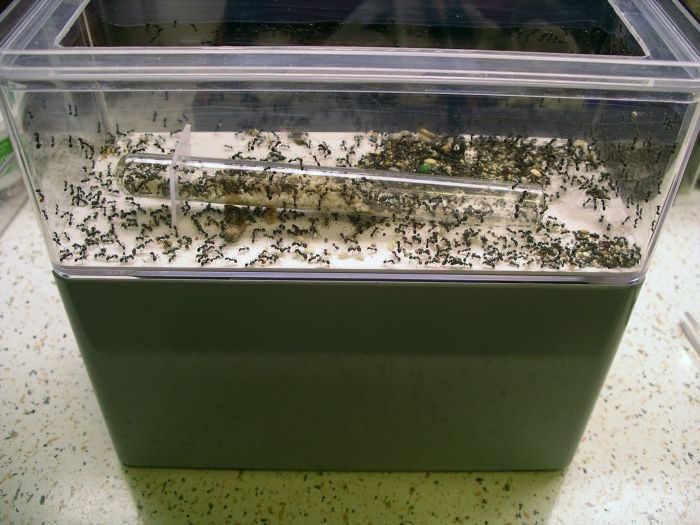
This second prototype is now complete, and my 700 worker Veromessor pergandei colony is in the process of moving in.
 
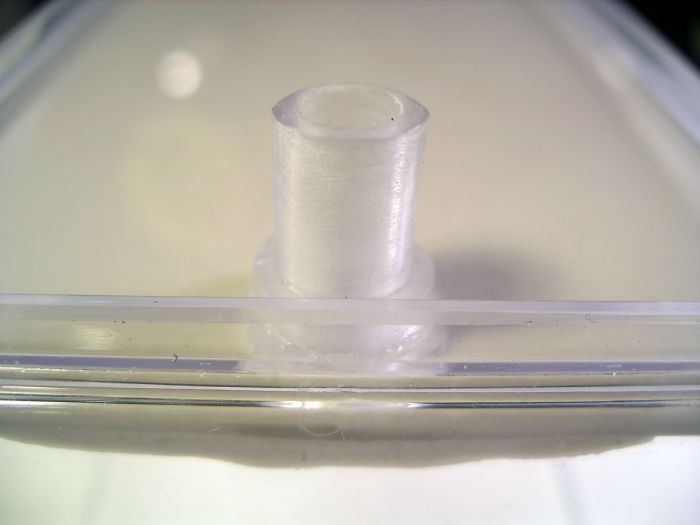
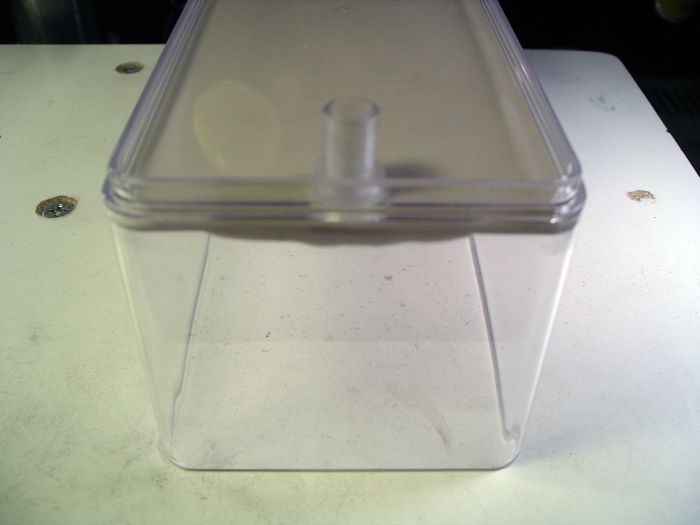
Here's the out world after I poured about 3mm of Hydrostone in the bottom. The small piece of vinyl connector tubing is in the port I created for it.
 
med_gallery_2_131_218102.jpg
 
med_gallery_2_131_121808.jpg
 
 
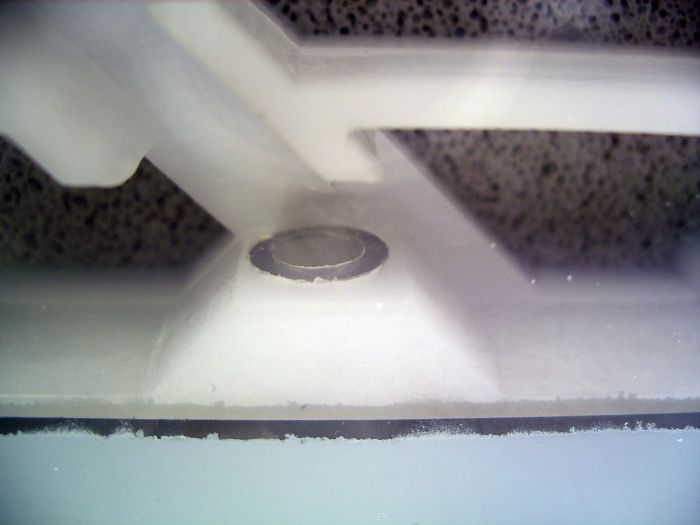
Here's the bottom port, after putting the plug in it. To make the plug, I simply glued a 1/4 inch piece of acrylic rod inside a piece of vinyl tubing.
 
med_gallery_2_131_630280.jpg
 
 
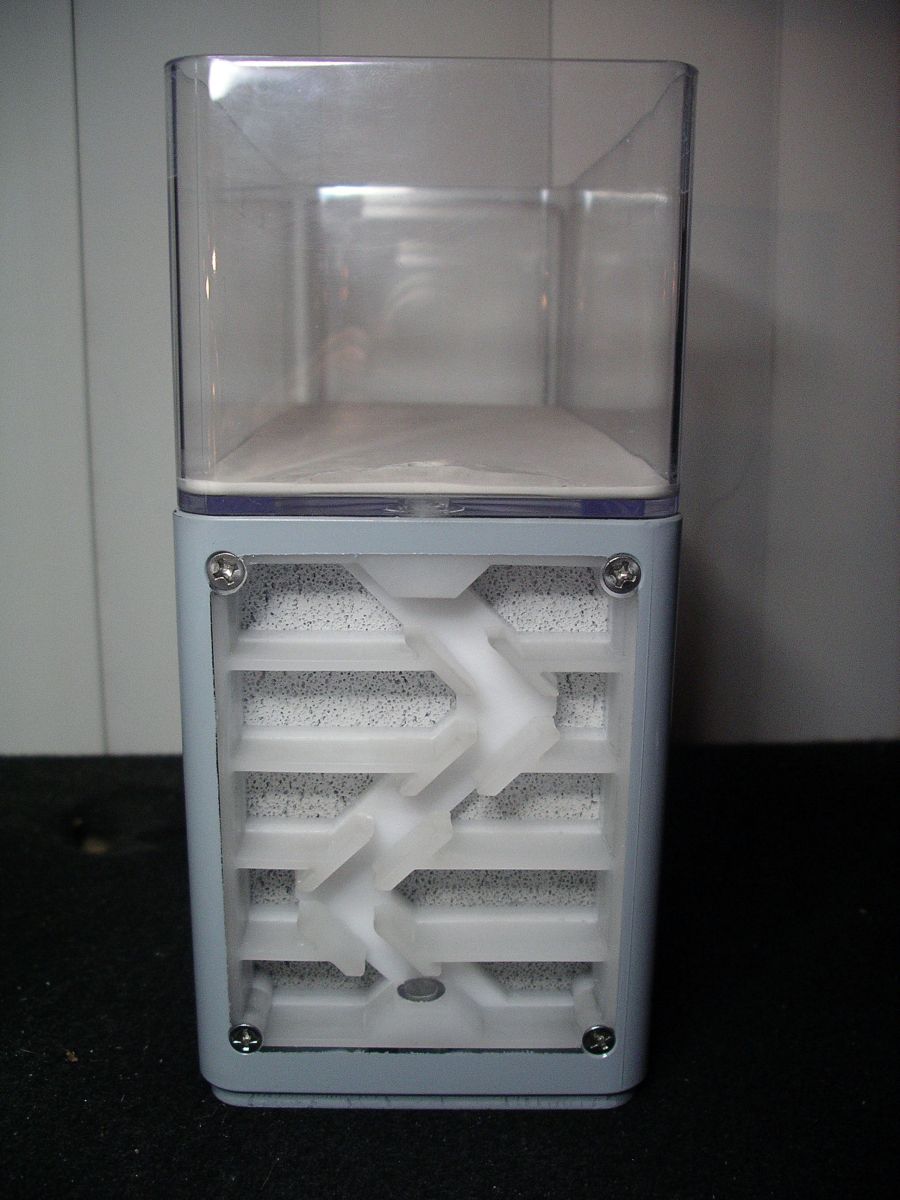
The finished product... for now.
 
gallery_2_131_528768.jpg
 
 
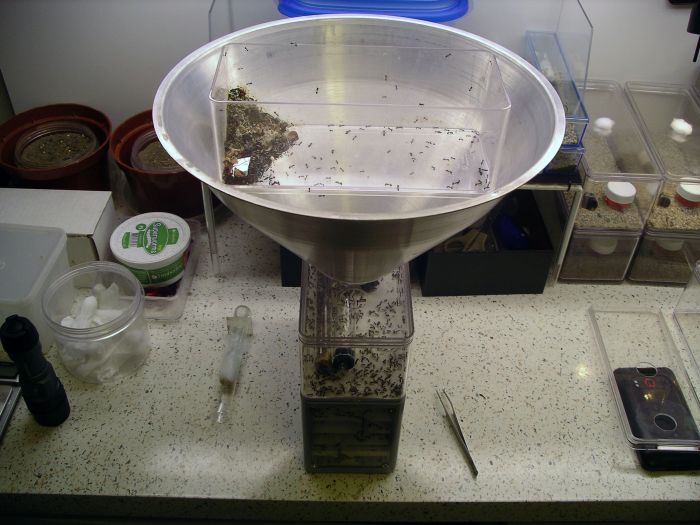
To move my ants into this, I coated one of the black light trap funnels I got from Bioquip.com with Fluon, and placed it into a large hole in a lid I cut out just for this. I then set their current container inside the funnel, and waited for them to slowly climb out and fall into their new nest.
 
med_gallery_2_131_111564.jpg
 
med_gallery_2_131_152103.jpg
 
 
I dumped a couple of the test tubes out, leaving the main one with the queen and the majority of the brood.
 
med_gallery_2_131_87759.jpg
 
 
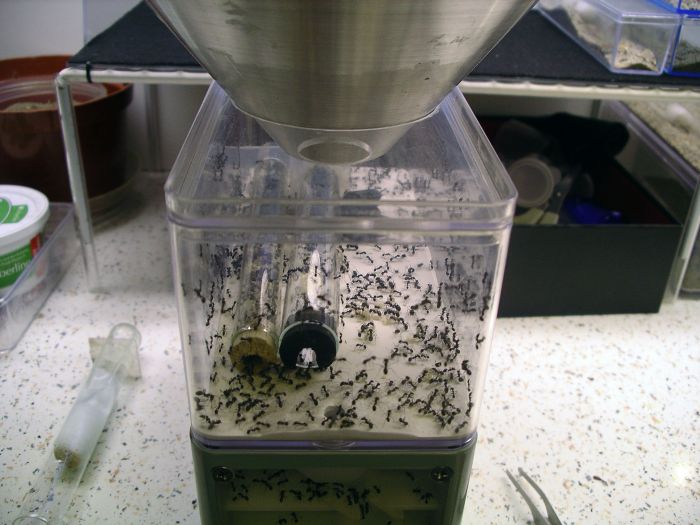
Right away they started exploring their new nest. I'll update this once they are completely moved in.
 
med_gallery_2_131_795768.jpg
  • Okeedoke22 likes this


Also tagged with one or more of these keywords: formicarium, container, out world, enclosure, how-to, diy, design, dspdrew, nest, tutorial

1 user(s) are reading this topic

0 members, 1 guests, 0 anonymous users