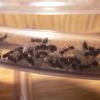
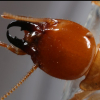
So if you've looked around the termite keeping community a little bit, you've probably heard of the Termitat. Unfortunately, this product only ships in the US, so for everyone else out there, professional, safe, nice looking termite displays seem to be off the table. In experimenting with DIY setups, I haven't found anything that's simple, functional, and looks nice, and I've found that test tubes and small containers just aren't very conducive to observation.
That leaves only the petri dish. In the past, I've tried keeping subterranean termites (Reticulitermes flavipes) in a petri dish setup, but it's never worked out well - either the dish dries out, or the termites just aren't visible. So recently, I decided to try my hand at a petri dish design once again, but I'd do it differently this time - more like a termitat. So far, this design's worked out super well, so I decided to share the design here with the hopes that others can improve upon it or come up with even better designs.
What you'll need
- 1x petri dish (glass is probably best as plastic can be flimsy and scuff easily. A height of around 15mm has worked well for myself with both dampwood and subterranean termites. A larger diameter to your dish will mean more wood can be kept inside, so I wouldn't go with any dish smaller in diameter than 100mm - if you can find 150mm or 200mm dishes, even better. Additionally, ensure your dish isn't airtight - don't want the termites suffocating. Most dishes that have ventilation have gaps large enough to facilitate air exchange but small enough to prevent something like a termite from escaping.)
- 2-3x binder clip (make sure the clip can spread wide enough to comfortably clip around the entire height of the dish, you don't want this thing flying off and sending termites everywhere)
- 1x elastic band (make sure it can fit around the circumference of the petri dish)
- 1x syringe (tip should be small enough to fit between the lid and the bottom of the petri dish to allow for watering of the setup)
- Wood (I'll talk more about this at the end, so be sure to read that first before you start assembling the setup)
- Scotch tape (optional)
Assembling the Setup
1. Fill your petri dish with wood - if you're cutting a piece to fit perfectly into the dish, either cut its height to be slightly lower than that of the dish so that the termites aren't squished, or carve out chambers for your termites to start in.
2. Add substrate - if you're using pieces of wood, such as bits of wood collected from a rotten log, feel free to add substrate to the dish such as coconut husk, soil or sand (if you're keeping subterranean termites) so that the pieces of wood aren't freely bumping around. The dish should be full of primarily wood in any case - that's what the termites will both eat and live in.
3. Add the termites - I dumped mine right on top of the wood and they quickly ran around and found cracks and crevasses to hide in. If you've carved out chambers, try to dump the termites directly into the chamber.
4. Place the rubber band around the upper part of the side of the petri dish - if your dish doesn't fit extremely snugly with it's lid, add a rubber band to act as a gasket and prevent material and termites from falling out of the setup. If your rubber band is sealing off air flow entirely, I'd recommend using either a smaller band, or none at all - air circulation is still important.
5. Put the lid on the dish - termites are fairly squishy, so you can place the lid gently ontop of the setup even if the termites are still wandering around ontop of the wood. You may see them squish if they're caught in a tight spot, but don't worry - this doesn't harm them. Don't press down on the lid, instead lift it and allow the termite to move to a more suitable position, or move it manually with a q-tip. You should get to the point where you can place the lid on and let it sit there without squishing any termites, then you can proceed to the next step.
6. Clip the binder clips to the sides of the dish. Binder clips apply a fair amount of pressure, which is why I recommend using a sturdier glass dish - my flimsy plastic dishes aren't the greatest for this purpose. Simply use the clips to clip the lid to the bottom of the dish. I would recommend using three clips each an equal distance away from eachother around the dish.
7. Finally, stand the dish up on two of the clips - you're done!
8. Add water whenever the wood looks dry (once a week perhaps?) using the syringe. Simply fit the syringe between the bottom of the dish and the lid. Ensure that you don't add too much water - there shouldn't be loose water or condensation in the setup, as this poses a risk to your termites.
FAQ
- Which kind of termite should I put in this setup? Will this work for every species of termite? Only use this setup for a wood dwelling species of termite. This includes species from the families Archotermopsidae/Termopsidae (dampwood termites), Kalotermitidae (drywood termites), and Rhinotermitidae (subterranean termites). Yes, you can put subterranean termites into a setup like this. Subterranean termites rely upon soil and substrate to travel between feeding sites (pieces of wood), but they do not live in, and are not dependent upon substrate. A wood based setup will work well for them. Species from the families Homotermitidae and Termitidae are not suitable for this type of setup, as they do not, for the most part, live directly in wood, at least not in the manner of this setup.
- Which kind of wood should I use for this setup? Can I use cardboard or paper as well? The type of wood you use depends on the type of termite you intend to keep. Subterranean termites and drywood termites can exist fine in ordinary lumber as long as said lumber is not treated with harmful chemicals. You will need to water the setup for the former if you're using lumber, or provide substrate to hold moisture, as in my experience ordinary lumber does not hold moisture as well as rotten wood. Dampwood termites will need damp, rotten wood. Surprisingly enough, there are many different kinds of rotten wood, and dampwood termites can be very peculiar about which type of wood they inhabit. Using the Western Dampwood Termite (Zootermopsis spp.) for example, rotten softwood has been found to be preferred, though ensure that said wood is not resinous, like cedar. Alternatives to wood, such as cardboard or paper, are only really suitable for subterranean termites like Coptotermes spp. or Reticulitermes spp. Even then, I would avoid using cardboard or paper if possible, as wood should provide higher quality cellulose, and I have found that my colonies do better on wood than cardboard or paper.
- How often should I water my setup? There's no formula or number for how often and how much you should water your setup, but make sure that the setup does not dry out. Condensation is a good indicator of moisture, so if you see condensation, it is likely that you do not need to add water. Loose drops of water or pools of water should be avoided, as they can prove fatal to termites.
Refilling the Setup
If you have a large species (such as Zootermopsis spp.), you may find that they eat all the wood in the petri dish within a few weeks or months. If your colony is too large for the dish, you may want to consider moving them into a larger dish or an actual container. However, if they're still small enough that they don't fill up the whole dish, you may want to consider simply adding more wood to the dish. Here's how I'd go about something like that:
- Empty out the dish - simply take off the lid, and dump the contents of the dish gently onto a large saucer or into a small container temporarily.
- If the termites have eaten most of / all of the wood in the dish, you will find that it is filled with termite poop - little hexagonal pellets with a soil-like consistency. You may wish to dump these into another container for safekeeping. Termite frass serves as good fertilizer, and also contains beneficial fungus spores that can inoculate wood and make it suitable for termite consumption.
- Refill the petri dish with wood - you may wish to clean the dish out with warm, soapy water first if the termites have plastered frass across the thing, which may happen. Ensure that the dish has been thoroughly rinsed and dried, and add more wood to the container in the same way as the farm was initially set up. Ensure there are pockets, cavities, and chambers for the termites to hide in. You may want to add some frass back into the container to cushion the wood and inoculate it with the aforementioned beneficial fungus.
- Add the termites back into the dish.
- Reassemble as seen above.
I think that's about it. I hope you enjoy your new termite setup - I keep both Zootermopsis nevadensis and Reticulitermes flavipes in setups like this, and have had a good view of both colonies, which is really a new thing for me as I've been keeping them in test tubes and containers before now. Let me know how the setup turns out if you make something like this, or if you have any suggestions for improvements / alternative setups.
Thanks for reading.
Edited by Nare, January 23 2021 - 10:32 PM.


