How to Build a Horizontal Sand Formicarium
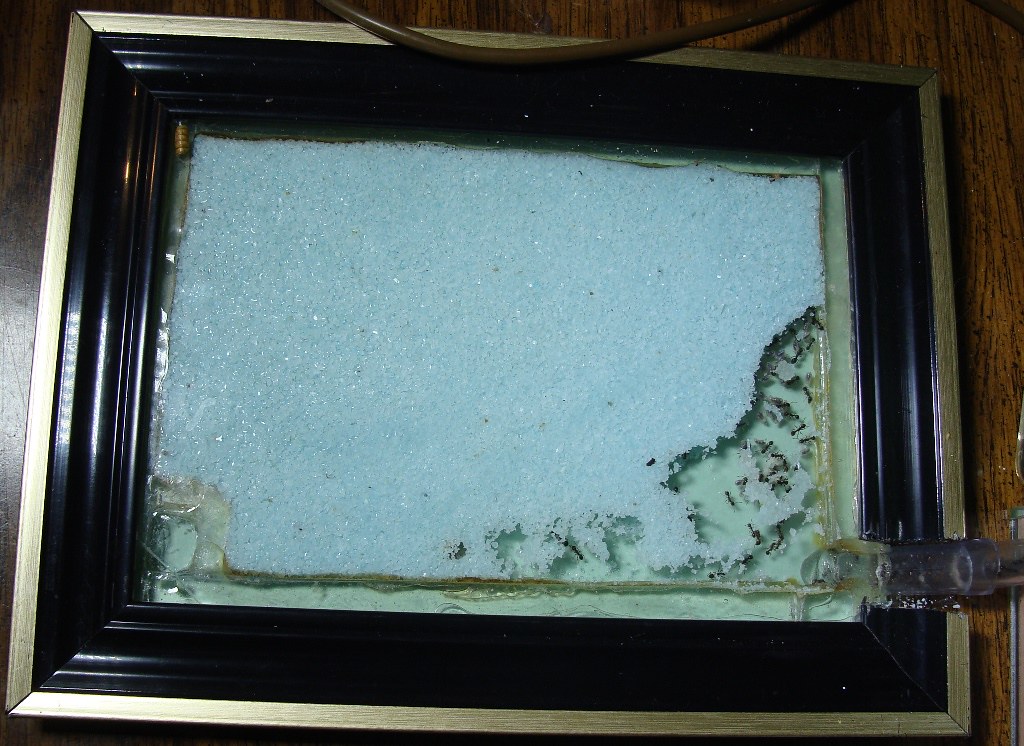
I am going to how you how to build a horizontal formicarium fill with sand.
Why a flat horizontal nest? Less chance of tunnel collapses.
You will need:
2 pieces of glass the same size (or buy 2 pictures frames and use the glass so you know it will fit - dollar stores have cheap frames - and then you have a nice frame to boot)
stripes of acrylic/glass (I cut stripes out of one of those stand-up acrylic picture holders with no frame from the dollar store)
silicone or 2 part epoxy (if silicone, ensure it is 100% silicone and has no anti-molding properties)
Coarse Sand (colored sand can be bought from pet stores or dollar stores in the vase section)
Vinyl tubing - choose a larger size that can fit over the glass and acrylic strips, rather than one that will fit inside.
Take the sand first and rinse it well to get rid of any dust. If you are nervous about using dollar store sand, soak it in a bleach/water mixture for 10min (use bleach that only contains ammonia). Then rinse with fresh water 10 times or so. Then soak it in fresh water with a good aquarium conditioner that neutralizes ammonia for 2 hours or so. Drain and let it dry - we will need it bone dry to get it into the nest when we are done.
While we wait for the sand to dry, lets build our formicarium.
Note: Take care with glass, edges are often sharp and hurt way more than a paper cut.
Take the 2 pictures frames and remove the glass from the picture frames (or take just the pieces of glass). If you have frames put them aside, we can use one or both later.
Put them together to check if they are the same size, or if there is some difference. Clean them with water and a cloth/paper towel to remove any oils from the factory.
Also check for scratches. Take the best one and put it aside - it will be the top piece.
Put the bottom piece down. Take your stripes of acrylic and make a border with a small hole as wide as your tubing (or a bit less wide). The pieces of acrylic should be no more than 2x as tall as the workers (making allowance for the queen to stand comfortably if a large size difference is present).
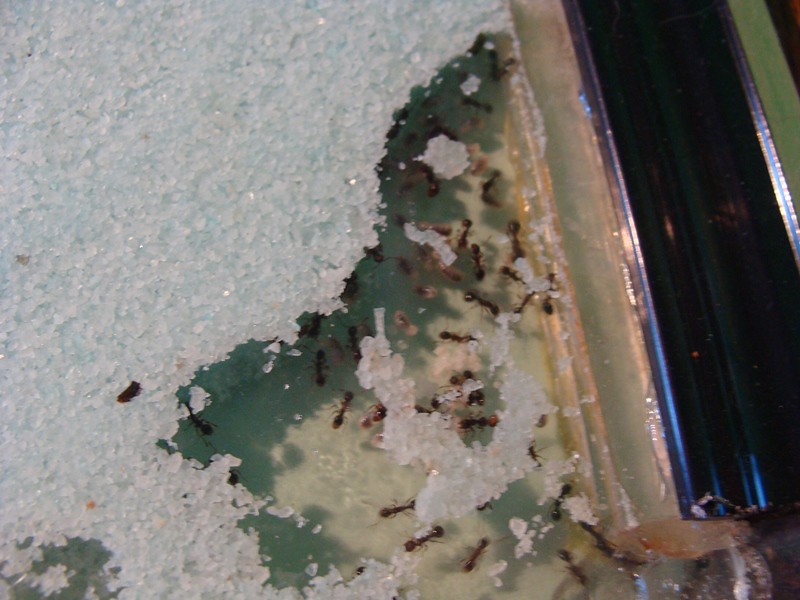
In a far corner, make a small box - this will be your watering tunnel. (the picture is of the watering tunnel in my finished nest)
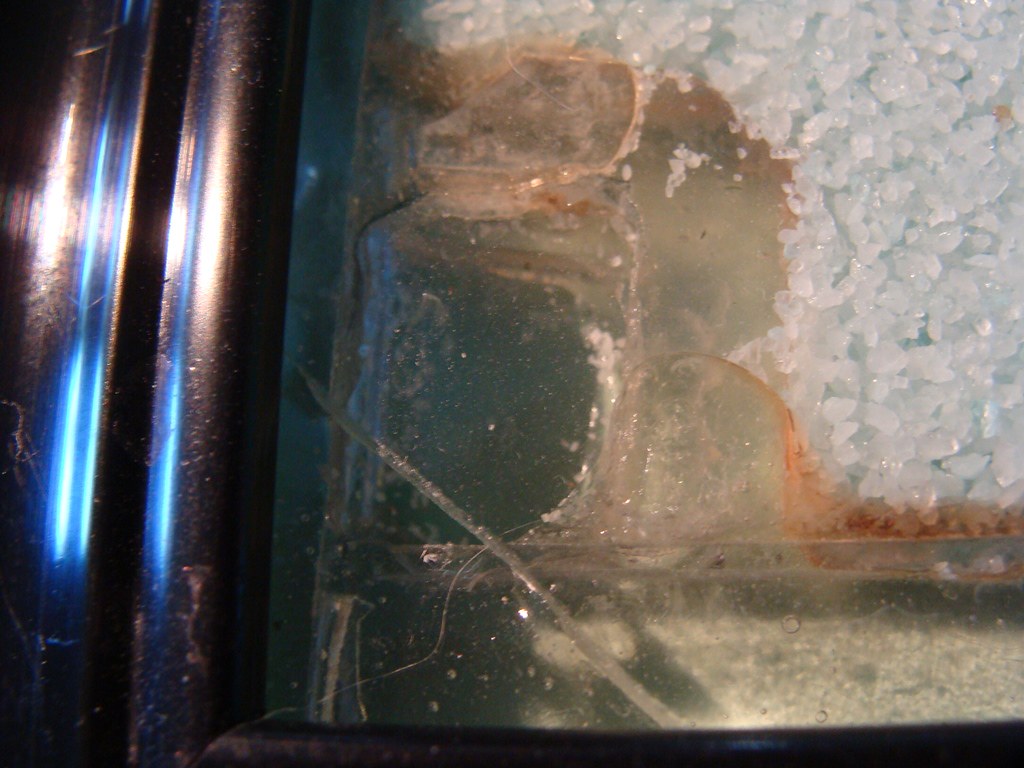
Take your top piece of glass and put it on top of your acrylic strips. Check to ensure it doesn't wobble too much.
When you like the layout, pick up the pieces one by one and silicone or epoxy them down on the bottom piece of glass. For the watering tunnel box, ensure there is no gaps between the pieces of acrylic and the side walls. Let it dry.
Once dry, ensure that there is no gap in the water tunnel.
Take your top piece of glass and put it on top of your acrylic strips. Take a marker and make a straight line above the watering tunnel - you are going to cut the tip off of the top piece of glass so we can water the nest easily. Ensure it doesn't touch the actual nest or we will have escapees.
Cut the glass with a glass cutter and sand it with some sand paper so it isn't sharp. Or you can bribe a neighbor, or pay a glass shop to cut the corner for you.
Put the cut glass on the bottom half of the nest - does it still fit good? If yes, then take your silicone/epoxy and put some on the strip of acrylic on the perimeter - do NOT put silicone on the inside section of the watering tunnel. Put it on the pieces on outside section, but not on pieces on the inside section. This will allow water to seep into the sand properly.
Ensure there are no gaps in the silicone border, then put the glass carefully on top and add weight (a dictionary works well).
Let it dry for 24 hours. While waiting, check the sand, if it is still damp, stir it up or put it in the sun or under a furnace vent.
Once the nest is dry take it and the tubing. You will trim the sides off of the tubing, leaving a top and bottom flap that fit on the outside of the nest - acting as an anchor flap. I found an exacto blade handy for this step. The flap should be at about 1cm long. Once it fits snugly, take silicone (or preferably, 2 part epoxy as it has no give) and glue it onto the nest.
Let it dry. Once dry ensure there are no gaps by the entrance, if there are any, add a second coat of epoxy.
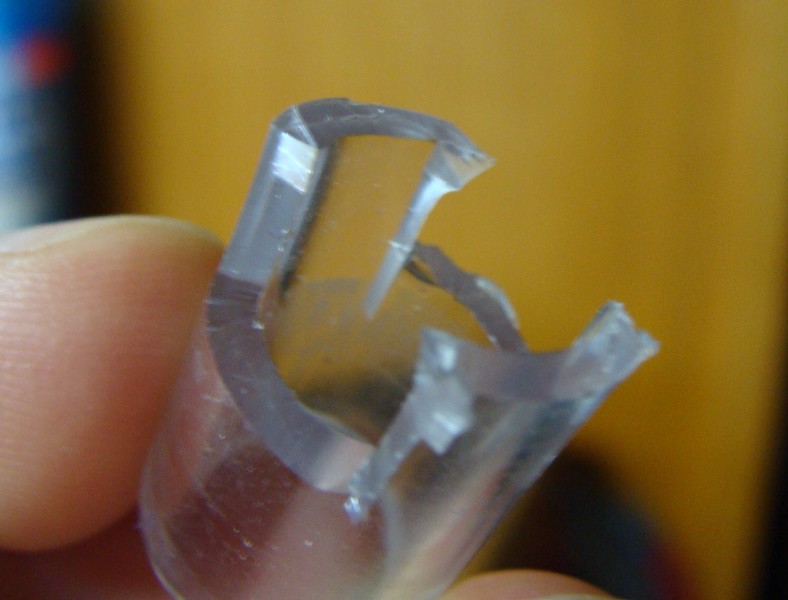
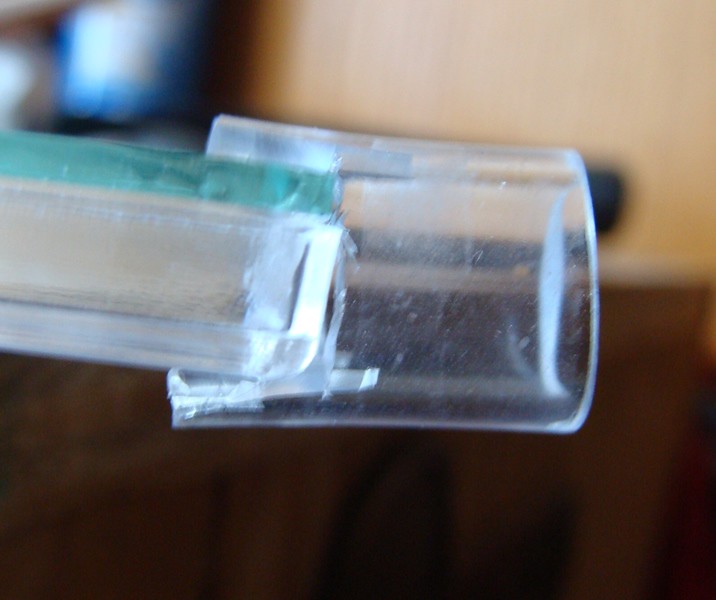
You can add a frame onto the nest (this is an optional step). You may have to trim the frame to make allowance for the tubing. A scrollsaw, dremel or fine saw work to cut most frames. Silicone the frame on.
Once your nest and sand are dry, slowly add sand to the nest. I used a small funnel made out of paper. As you add the sand tap and jiggle side to side a lot to encourage it to settle. Once full, tap it a lot, it should settle more - add more sand.
Once the sand is almost up to the tubing, add some water down the tubing, this will anchor the coarse sand in place as long as it remains damp. I use a twig or skewer to poke a small "tunnel starter hole" into the sand.
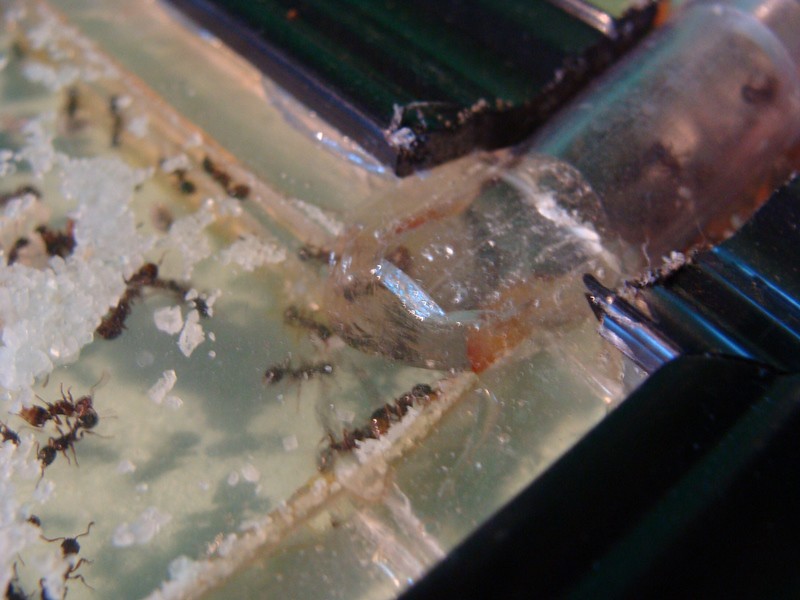
Now you can connect the nest to a foraging area and add your ants.
As the ants tunnel, if they stick any coarse sand on the glass surface, it has a tendency to dry out and fall back down as the nest slowly dries out in between waterings.
They are able to dig with minimal risk of tunnel collapses. I have not seen any mold in the nest I made like this, and it has been up over 3 months with a small Myrmica colony in it.
Tip: Pick a color of sand that your ants and brood will stand out against.
You can tape a colored piece of paper to the back of the glass. I chose a blue close to my sand color because my ants would stand out against it.

Edited by Crystals, July 16 2017 - 7:30 AM.


