Jump to content

  • Chat
  •  
  •  

Welcome to Formiculture.com!

This is a website for anyone interested in Myrmecology and all aspects of finding, keeping, and studying ants. The site and forum are free to use. Register now to gain access to all of our features. Once registered and logged in, you will be able to create topics, post replies to existing threads, give reputation points to your fellow members, get your own private messenger, post status updates, manage your profile and so much more. If you already have an account, login here - otherwise create an account for free today!

Photo

How to build an ant waterer or liquid feeder

crystals

  • Please log in to reply
38 replies to this topic

#1 Offline Crystals - Posted September 25 2013 - 7:10 AM

Crystals

    Advanced Member

  • Moderators
  • PipPipPip
  • 2,049 posts
  • LocationAthabasca, AB (Canada)

I found ant waterers to save me lots of time and to come in very handy.  I will share how I make them.  Please remember to change the contents regularly and give the waterers a good wash in between uses.


Here are two tutorials:  Gravity feeder and Wick feeder


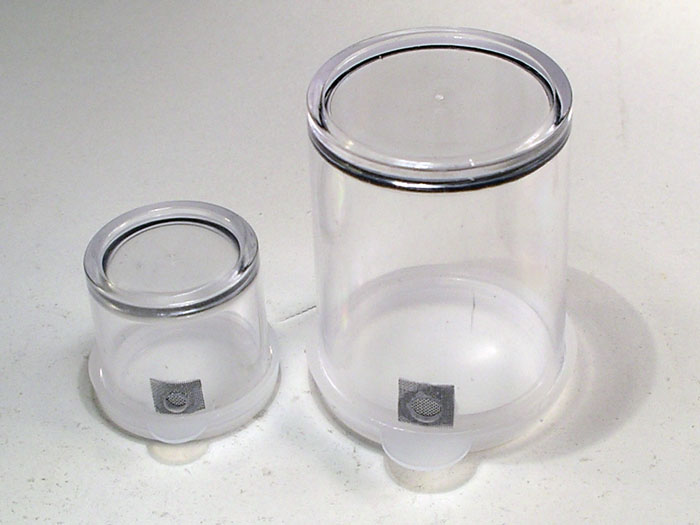
For either feeder, get an airtight container.  Mine come from dollar stores and almost any place that carries beads, paint, and craft supplies. 
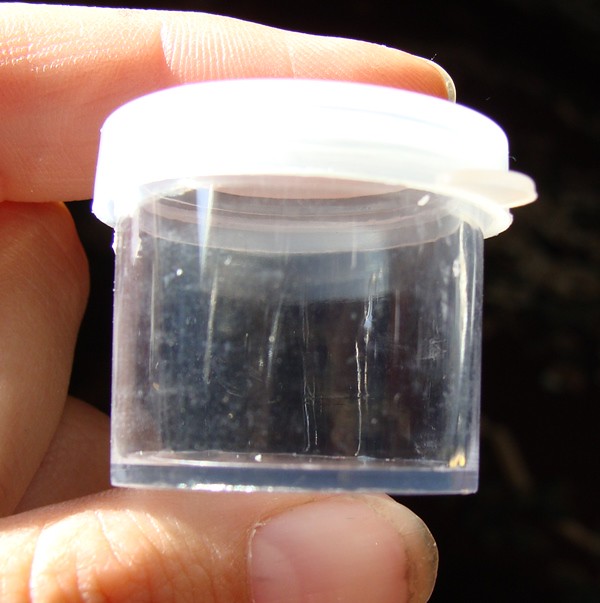
 

35048132984_cd113a488b_z.jpg


Gravity Feeder:


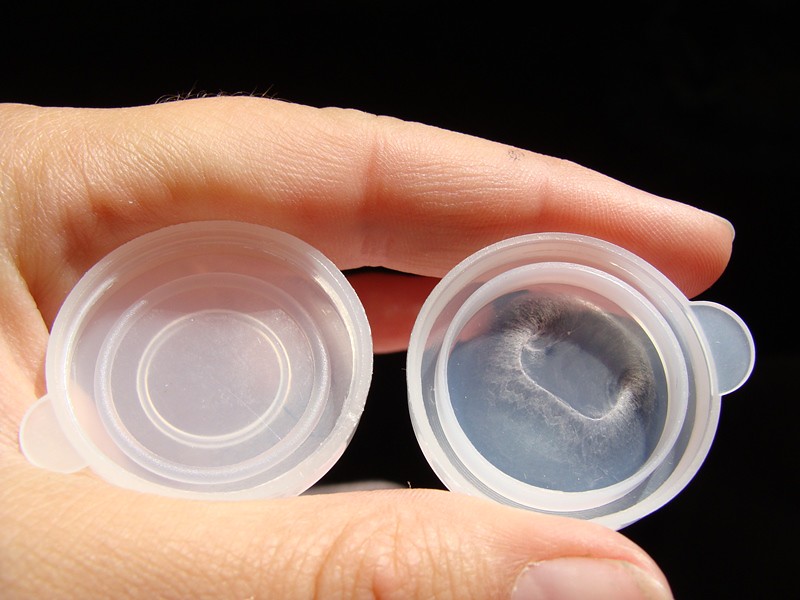
There are two different types of lids that are very common.  If possible, choose the one on the left - without the inside lip.  Or you can trim/cut the inside lip to make it work.
 

35887699785_757366327d_b.jpg


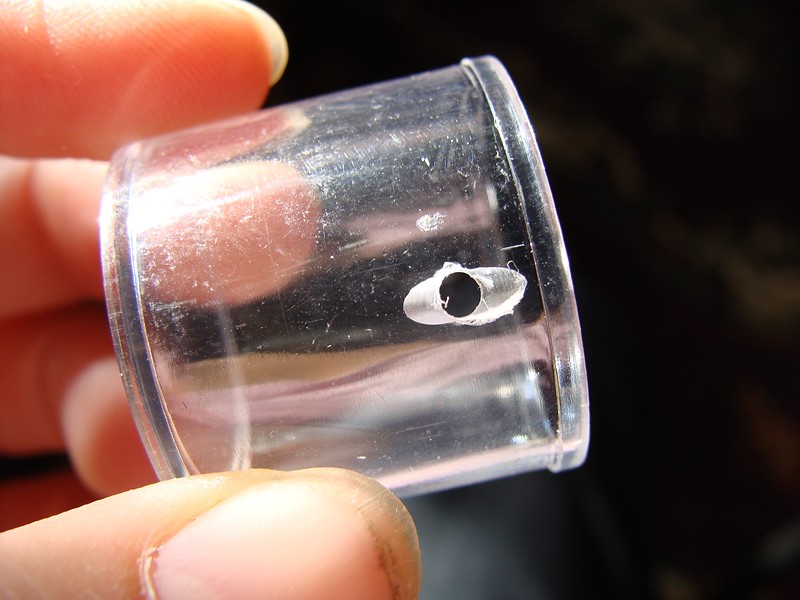
Get a drill and drill bit.  I use an 3/32 drill bit.  While the lid is on, start the drill hole as close to the lid as possible. Remove the lid and finish drilling the hole. While the bit is in the hole tilt the container so the bit is at an angle.  It helps keep the water/feed right at the hole.  (I have tried smaller bits, they don't work quite as well)
 

35048133544_3ec70d97ec_b.jpg


See the angle?  The container opening is on the right.  It allows air to more easily enter the container.
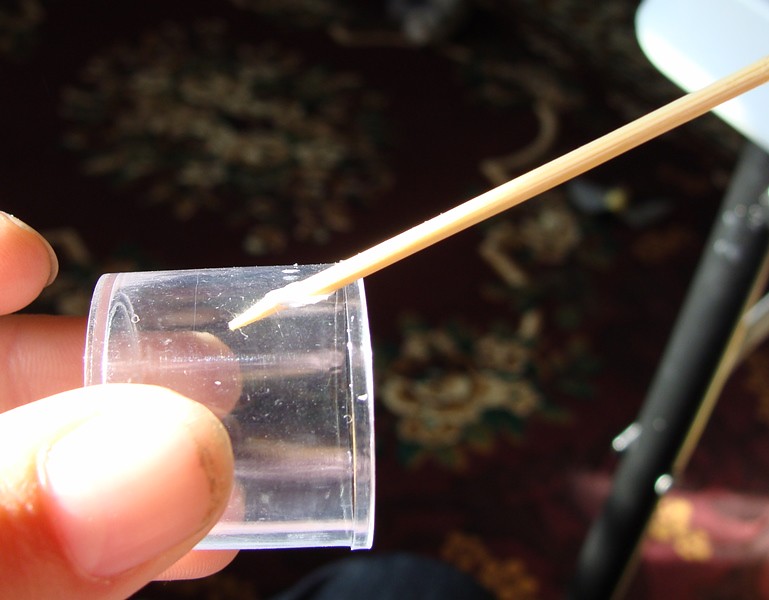
 

35887700185_6443048e9f_b.jpg


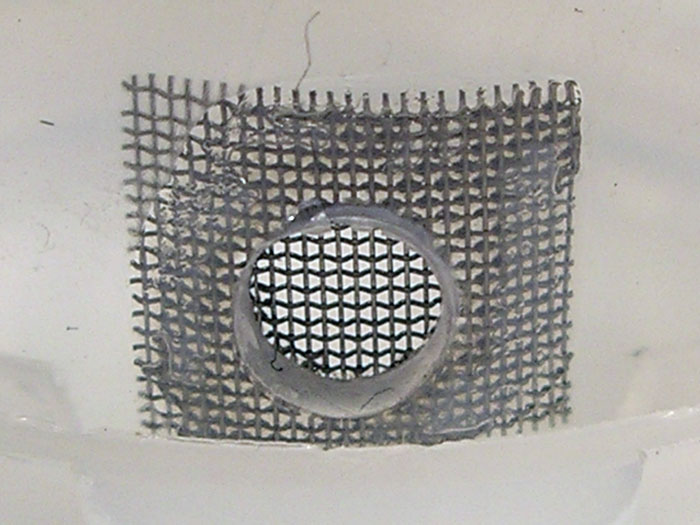
Get some mesh, I just used some leftover plastic screen door mesh (use stuff that won't rust, so try to avoid metal unless it is stainless teel).  The white plastic craft mesh also works well.

Cut it into pieces about 1cm wide by 1.5cm tall.  Size doesn't really matter, just make sure it has ample coverage of the hole drilled.
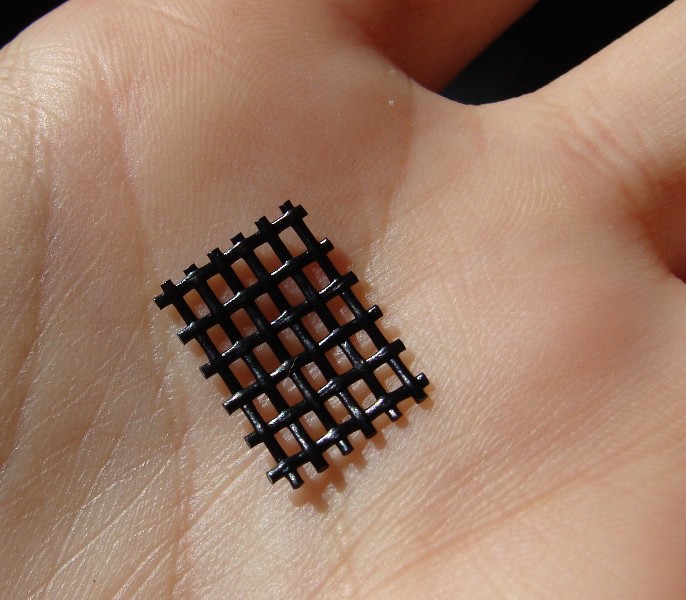
 

35887700745_976b2f1ffd_b.jpg


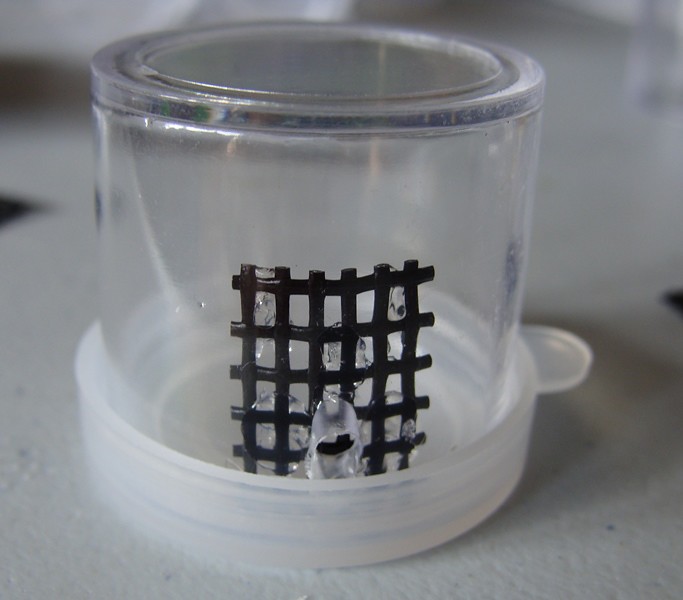
Get some aquarium silicone.  Add a dab to both sides of the hole as well as above and below.


35048134154_5c2c3b3b36_b.jpg


Take a piece of mesh, fold it in half for a second.  This will allow it to fit more snuggly to the curve of the container.
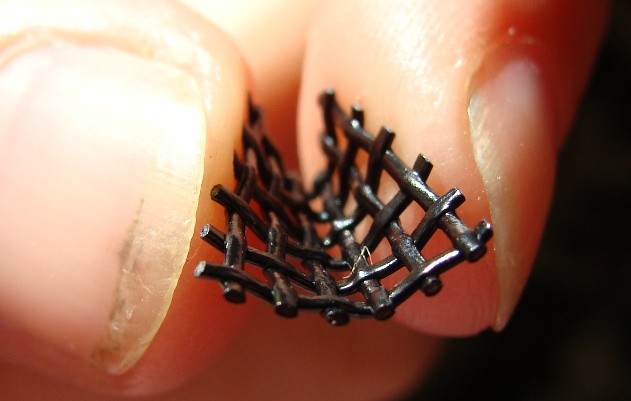
 

35048134734_08d6f19980_z.jpg


Place the mesh on the silicone and pat it down. I usually use tweezers for this, but your finger will work. Just don't move it side to side as the silicone may block the holes in the mesh; and you don't want the mesh in the hole opening plugged. If the mesh has rectangular holes, try to have them pointing up and down.  You can add extra sliicone if you want, I added more to the top section after taking this picture.  Ensure that the bottom of the mesh is above the lip of the container or you will have problems later.


[img][/img
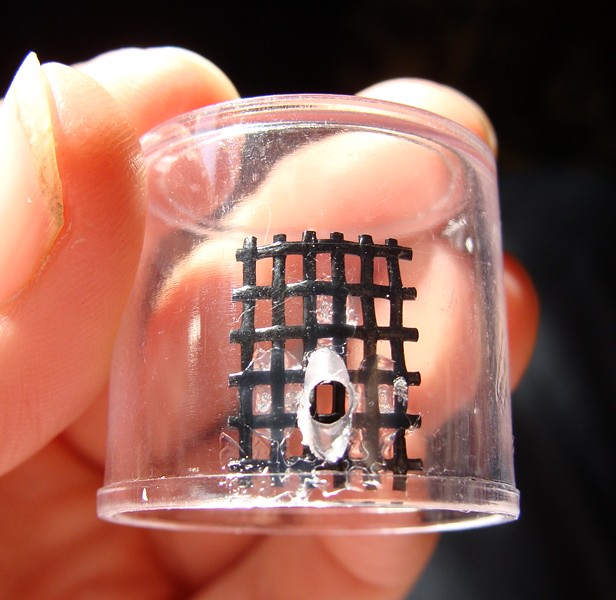


Leave the lid off and let it dry at least 48 hours before using it.
 

35048135234_d336781500_b.jpg


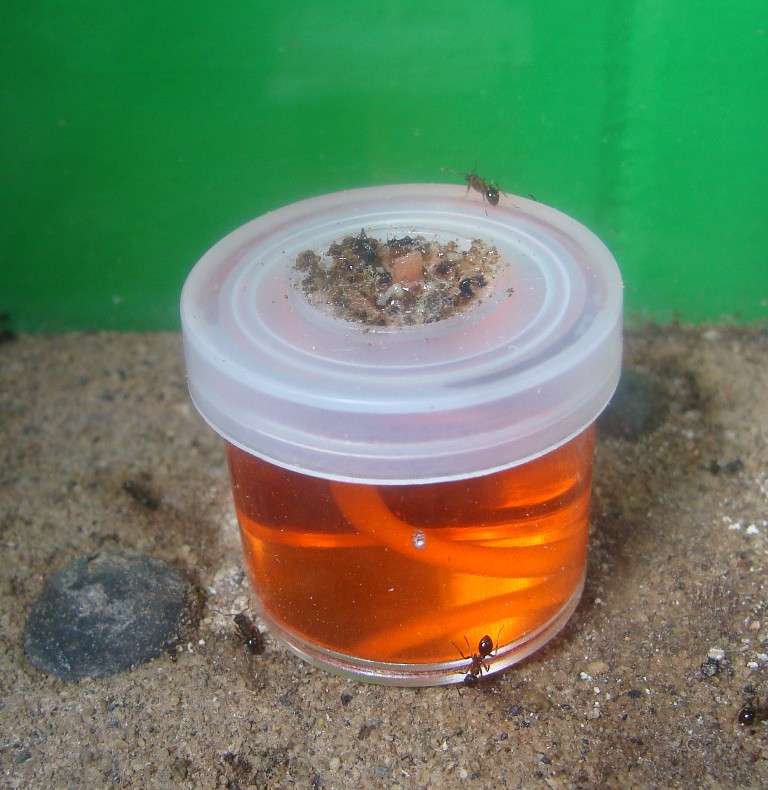
I have used this with water, honey water, and hummingbird nectar with almost no problems.  The only problem I have ever encounted was when I didn't have the mesh and very small ant species would crawl inside of the container if there was an air bubble and I would have to rescue them when the bubble went up.  The mesh and the slightly larger drill hole on an angle seems to eliminate the problem.


If you don't have mesh, you can just put a small twist of cotton in the hole, just tuck one end in the hole and the other end between the lid and the container.


Wick Feeder


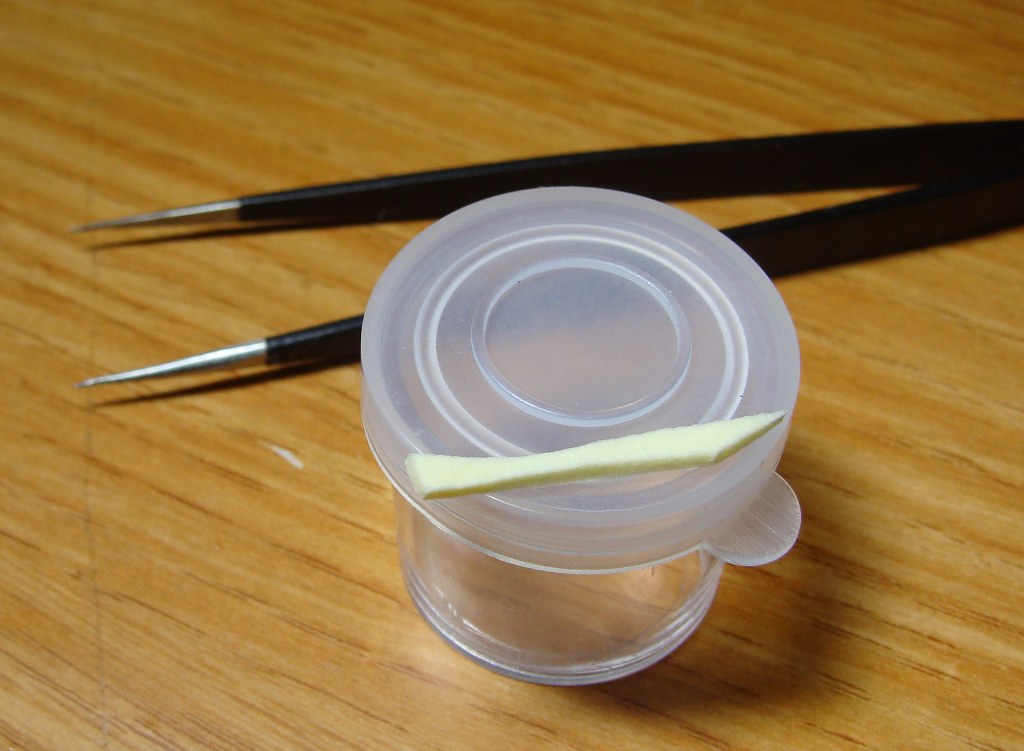
You will need a container, sharp object, and a wick.  The wick can be made from various materials, I used a thin piece of chamois cloth, but yarn, cloth, cotton or many other absorbent materials also work. Here is another thread discussing this idea.
 

35903121701_e2b4d46c2b_b.jpg


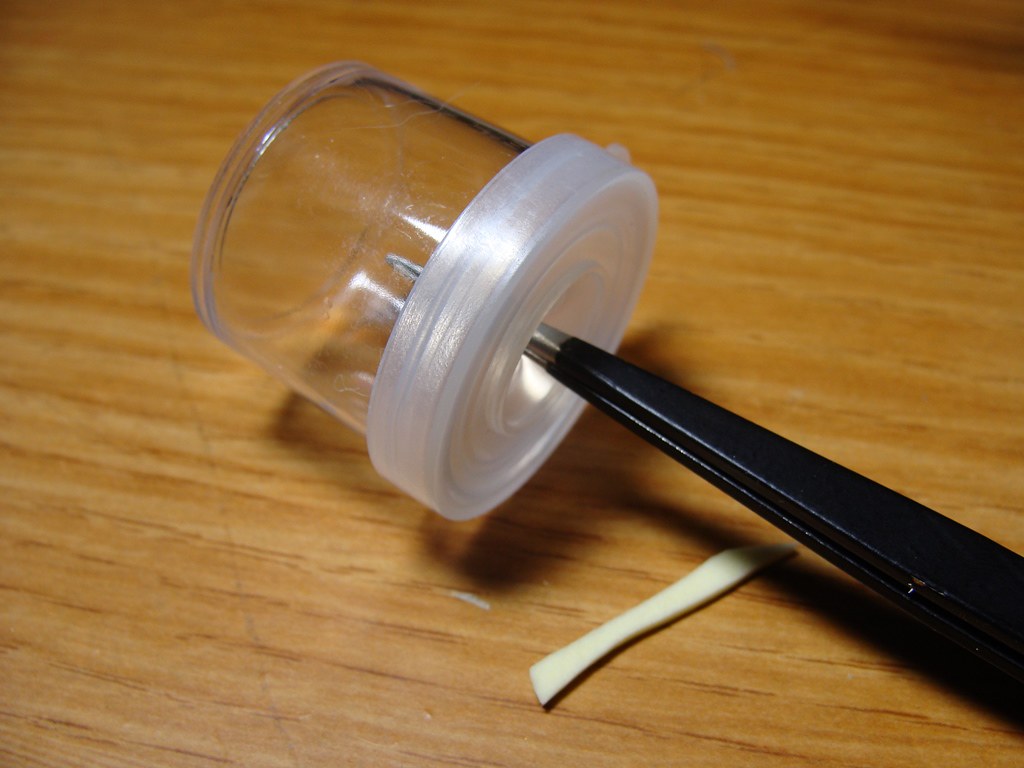
Take the sharp object and make a hole that will fit the wick material snuggly.  (I used anti-static tweezers, but a knife, exacto blade, or even a nail will work.  You can even drill a small hole.)
 

35865812072_444203100d_b.jpg


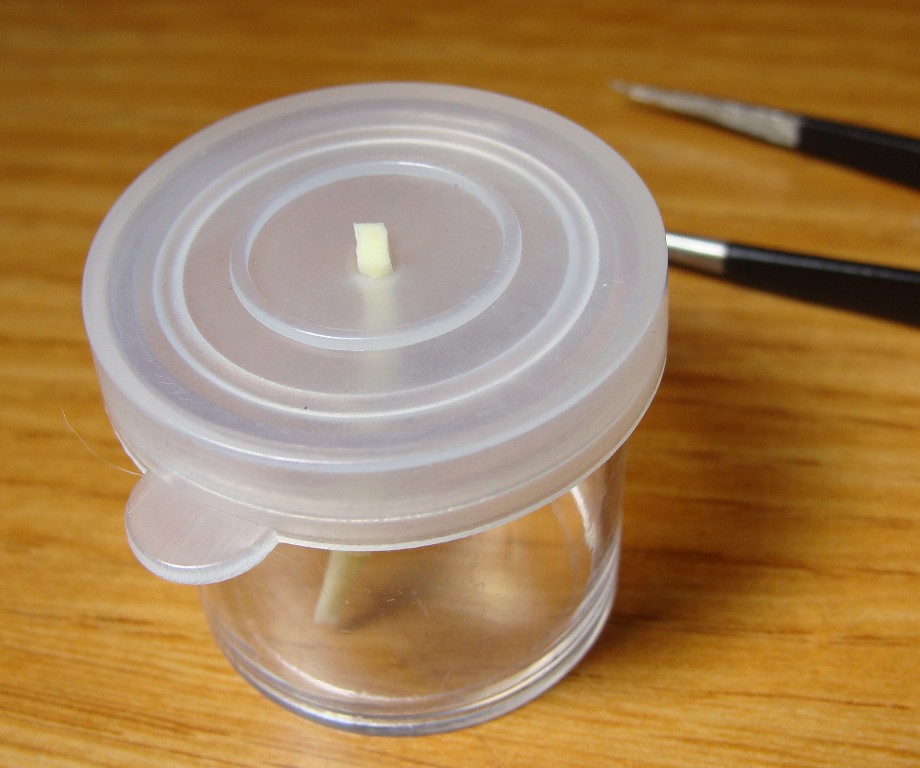
Place the wick in the hole.  It should fit snuggly, but not so tight as to cut off the wicking action.  Watch it closely for the first few days to ensure it is damp, but the ants can not get inside.
 

35903122851_d2f454a3db_b.jpg


Add nectar, sugar water, or water.


35865812672_bfc7d1bcab_b.jpg


Video on how to make both types of waterers:


Edited by Crystals, July 19 2017 - 7:16 PM.

  • T.C. and Rrar like this

"Always do right. This will gratify some people, and astound the rest." -- Samuel Clemens


List of Handy Links   (pinned in the General section)

My Colonies


#2 Offline dspdrew - Posted September 25 2013 - 11:01 AM

dspdrew
  • LocationSanta Ana, CA

Nice tutorial, thanks for posting. This basically uses the same vacuum concept that the test tube uses, but is obviously a little more practical. I've been laying test tubes on their sides full of water plugged with cotton, but I think I may have to give this a try with maybe a little added elaboration.


#3 Offline Crystals - Posted September 25 2013 - 11:06 AM

Crystals

    Advanced Member

  • Moderators
  • PipPipPip
  • 2,049 posts
  • LocationAthabasca, AB (Canada)

It uses less space than the test tubes.  I always had a hard time with honey water escaping test tubes, but it works with this.

It is something similar to what Mordam (TarHeelAnts) uses.


"Always do right. This will gratify some people, and astound the rest." -- Samuel Clemens


List of Handy Links   (pinned in the General section)

My Colonies


#4 Offline dspdrew - Posted January 2 2014 - 1:07 PM

dspdrew
  • LocationSanta Ana, CA

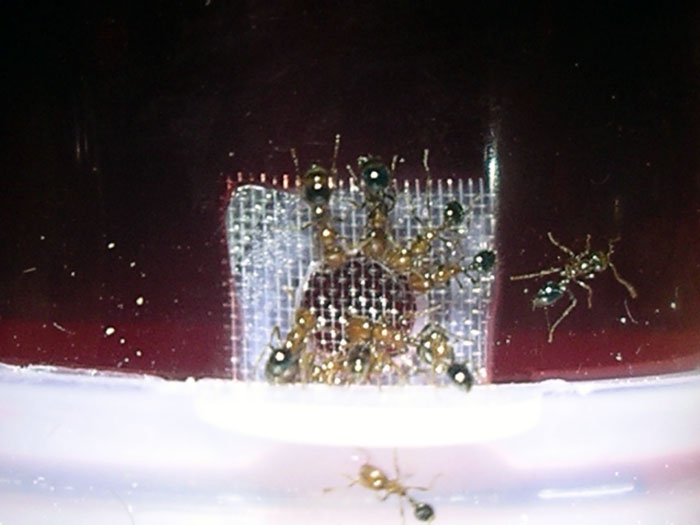
I just made some of my own using steel mesh, and so far they're working great.


liquid-feeder-1.jpg


liquid-feeder-2.jpg


Here's some S. xyloni trying it out for the first time. :)


liquid-feeder-3.jpg


#5 Offline Crystals - Posted January 2 2014 - 3:20 PM

Crystals

    Advanced Member

  • Moderators
  • PipPipPip
  • 2,049 posts
  • LocationAthabasca, AB (Canada)

Nice.


I think it will take those little ants a while to empty that waterer.  :D


"Always do right. This will gratify some people, and astound the rest." -- Samuel Clemens


List of Handy Links   (pinned in the General section)

My Colonies


#6 Offline Mercutia - Posted June 2 2014 - 6:19 PM

Mercutia

    Advanced Member

  • Members
  • PipPipPip
  • 621 posts
  • LocationToronto, Canada

Do you think using a smaller drill bit would still work?


#7 Offline Crystals - Posted June 2 2014 - 7:06 PM

Crystals

    Advanced Member

  • Moderators
  • PipPipPip
  • 2,049 posts
  • LocationAthabasca, AB (Canada)

It can, but some ants have a hard time getting to the mesh in hole, especially Camponotus and larger Formica.

The slightly bigger holes also reduce the chance of an ant getting caught in an air bubble.


"Always do right. This will gratify some people, and astound the rest." -- Samuel Clemens


List of Handy Links   (pinned in the General section)

My Colonies


#8 Offline dspdrew - Posted June 2 2014 - 7:27 PM

dspdrew
  • LocationSanta Ana, CA

I'm going to try to make some that have nothing but holes drilled in them (extremely tiny holes), making them easier to clean.


#9 Offline Mercutia - Posted June 2 2014 - 8:56 PM

Mercutia

    Advanced Member

  • Members
  • PipPipPip
  • 621 posts
  • LocationToronto, Canada

What about holes going all the way around. 360 holes.


#10 Offline dspdrew - Posted June 3 2014 - 5:26 AM

dspdrew
  • LocationSanta Ana, CA

I made one like that at first, but realized it's just way too much work for no real benefit; the ants will find the hole.


#11 Offline dermy - Posted June 4 2014 - 1:06 PM

dermy

    Advanced Member

  • Members
  • PipPipPip
  • 1,392 posts
  • LocationCanada

Ants are good at finding the hole, it may take them awhile, but once they've found it they'll never forget it[unless you move it often]


#12 Offline ParaStatic - Posted July 18 2014 - 8:12 PM

ParaStatic

    Advanced Member

  • Members
  • PipPipPip
  • 114 posts
  • LocationMichigan, USA
I'm definitely making some of these.
Owner and operator of Ant-topia, find me on Facebook at https://m.facebook.com/ant-topia

#13 Offline Mathiacus - Posted July 18 2014 - 10:28 PM

Mathiacus

    Advanced Member

  • Members
  • PipPipPip
  • 421 posts
  • LocationNSW, Australia
Awesome tips here. I think I will jump on board too. :-D

#14 Offline Crystals - Posted July 19 2014 - 6:09 AM

Crystals

    Advanced Member

  • Moderators
  • PipPipPip
  • 2,049 posts
  • LocationAthabasca, AB (Canada)

I spent about $25 and made about 100 of these.  :D

I have the extras in a container so I always have spares on hand.


"Always do right. This will gratify some people, and astound the rest." -- Samuel Clemens


List of Handy Links   (pinned in the General section)

My Colonies


#15 Offline dspdrew - Posted July 19 2014 - 7:06 AM

dspdrew
  • LocationSanta Ana, CA

Oh man that must have been tedious.


#16 Offline Crystals - Posted July 19 2014 - 8:54 AM

Crystals

    Advanced Member

  • Moderators
  • PipPipPip
  • 2,049 posts
  • LocationAthabasca, AB (Canada)

I did the drilling and glueing while watching tv when it was -40C (-40F) outside, so it wasn't so bad. 

Opened them all, drilled them all, glued them all, done.  :D

I am very happy that I did that many at once though, I never run out.  :D


"Always do right. This will gratify some people, and astound the rest." -- Samuel Clemens


List of Handy Links   (pinned in the General section)

My Colonies


#17 Offline Mathiacus - Posted July 19 2014 - 9:25 AM

Mathiacus

    Advanced Member

  • Members
  • PipPipPip
  • 421 posts
  • LocationNSW, Australia
For large lots, process working is the way to go. Do all of one task. Then all of the next etc. Bit I bet you were glad when you completed the last one!

#18 Offline Crystals - Posted July 19 2014 - 9:53 AM

Crystals

    Advanced Member

  • Moderators
  • PipPipPip
  • 2,049 posts
  • LocationAthabasca, AB (Canada)

I was a bit tired of drilling and glueing when I finished each lot, but it wasn't bad as I didn't really want to go outside anyways.  I drilled one day, and glued the next day.


"Always do right. This will gratify some people, and astound the rest." -- Samuel Clemens


List of Handy Links   (pinned in the General section)

My Colonies


#19 Offline dermy - Posted July 19 2014 - 12:44 PM

dermy

    Advanced Member

  • Members
  • PipPipPip
  • 1,392 posts
  • LocationCanada

Wow 100!


Yeah who goes out when it's -40 anyway, I don't, unless I'm forced to.


#20 Offline dspdrew - Posted July 20 2014 - 9:37 AM

dspdrew
  • LocationSanta Ana, CA

For large lots, process working is the way to go. Do all of one task. Then all of the next etc. Bit I bet you were glad when you completed the last one!

That is definitely the most efficient way to work.


Also tagged with one or more of these keywords: crystals

2 user(s) are reading this topic

0 members, 2 guests, 0 anonymous users