Jump to content

  • Chat
  •  
  •  

Welcome to Formiculture.com!

This is a website for anyone interested in Myrmecology and all aspects of finding, keeping, and studying ants. The site and forum are free to use. Register now to gain access to all of our features. Once registered and logged in, you will be able to create topics, post replies to existing threads, give reputation points to your fellow members, get your own private messenger, post status updates, manage your profile and so much more. If you already have an account, login here - otherwise create an account for free today!

Photo

Firebrick Formicarium

firebrick formicarium diy dremel

  • Please log in to reply
45 replies to this topic

#1 Offline Yosigi - Posted October 5 2018 - 2:14 PM

Yosigi

    Member

  • Members
  • PipPip
  • 23 posts
  • LocationSaranac, NY

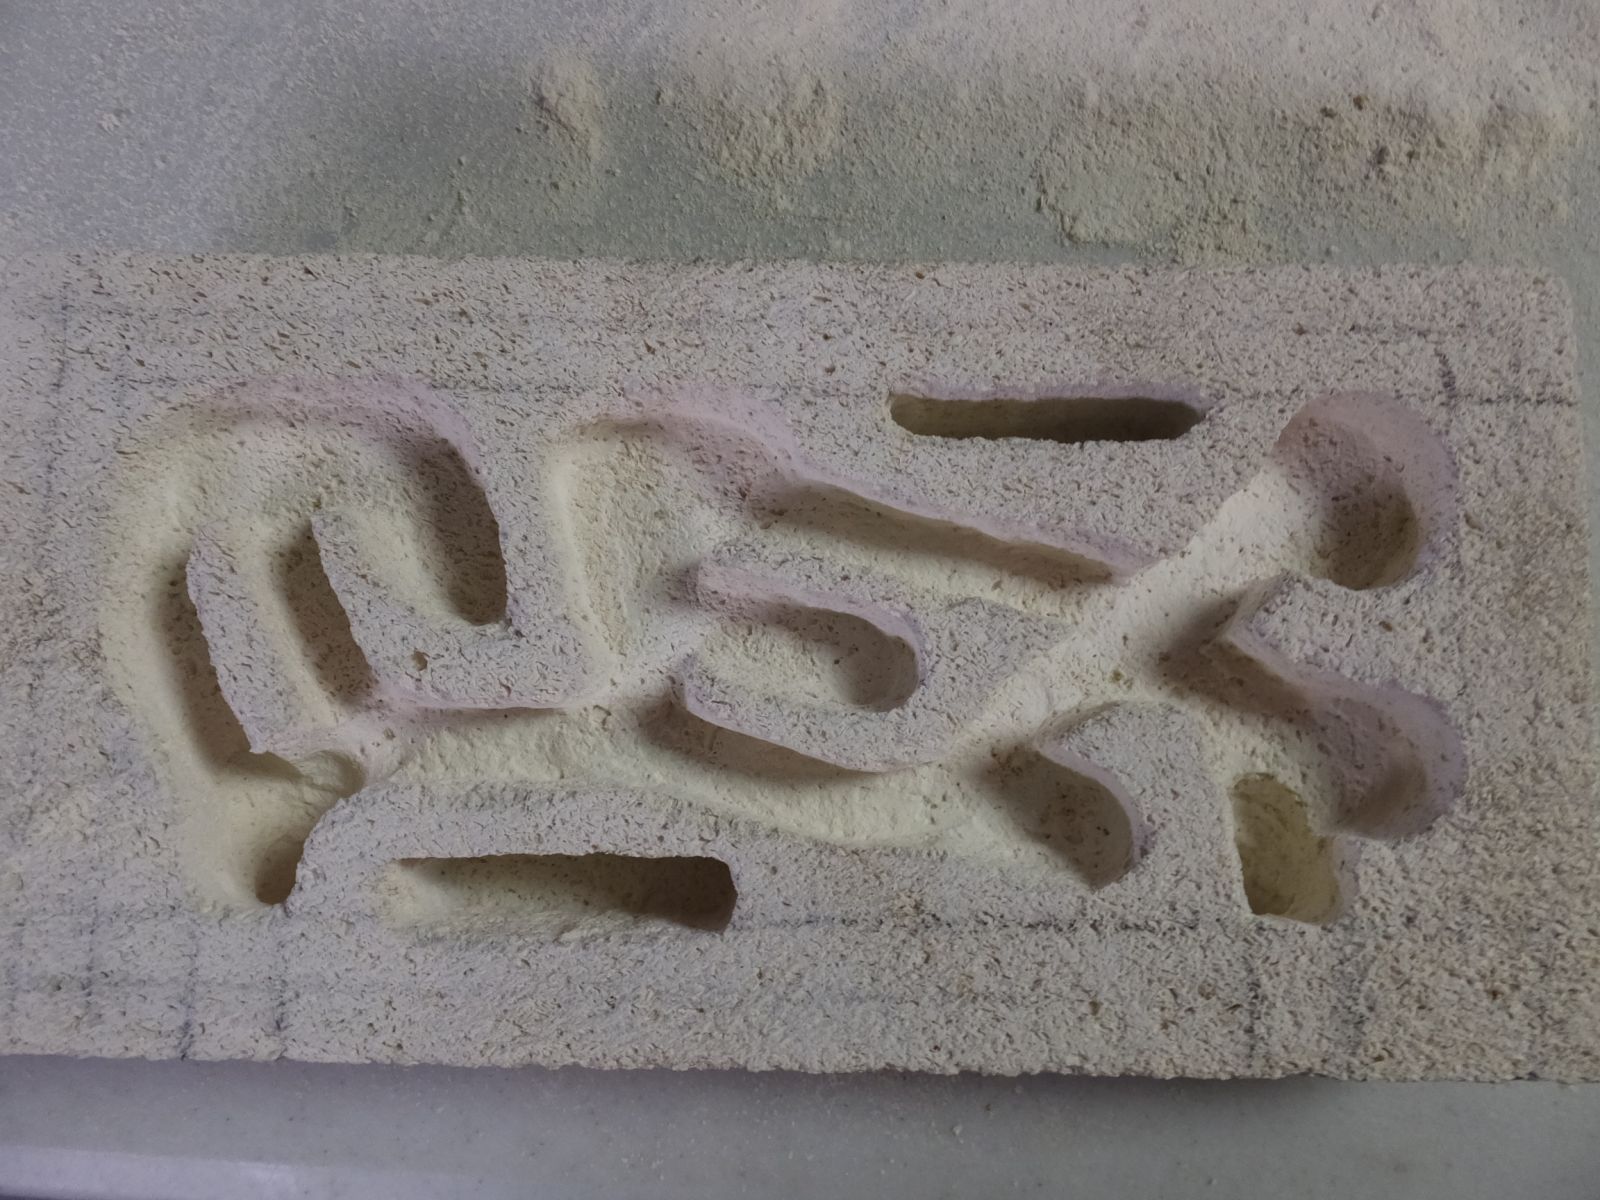
So I've been looking around for a bit, and it seems that those of us in the USA are just out of luck when it comes to getting AAC here.  I know I'm not the first to think of using firebrick, but I did want to try and make a small tutorial on how someone else would make a formicarium out of firebrick.  Specifically, the K-23 firebrick used in pottery kilns.  I picked up two 4.5"x9"x2.5" and one 4.5"x9"x3" bricks for about $15 from a pottery supplier near me.  I was able to make a nest in about 2.5 hours with only the AntsAus guide on making a nest out of AAC for reference, and even to my eyes it looks pretty good for a first try.
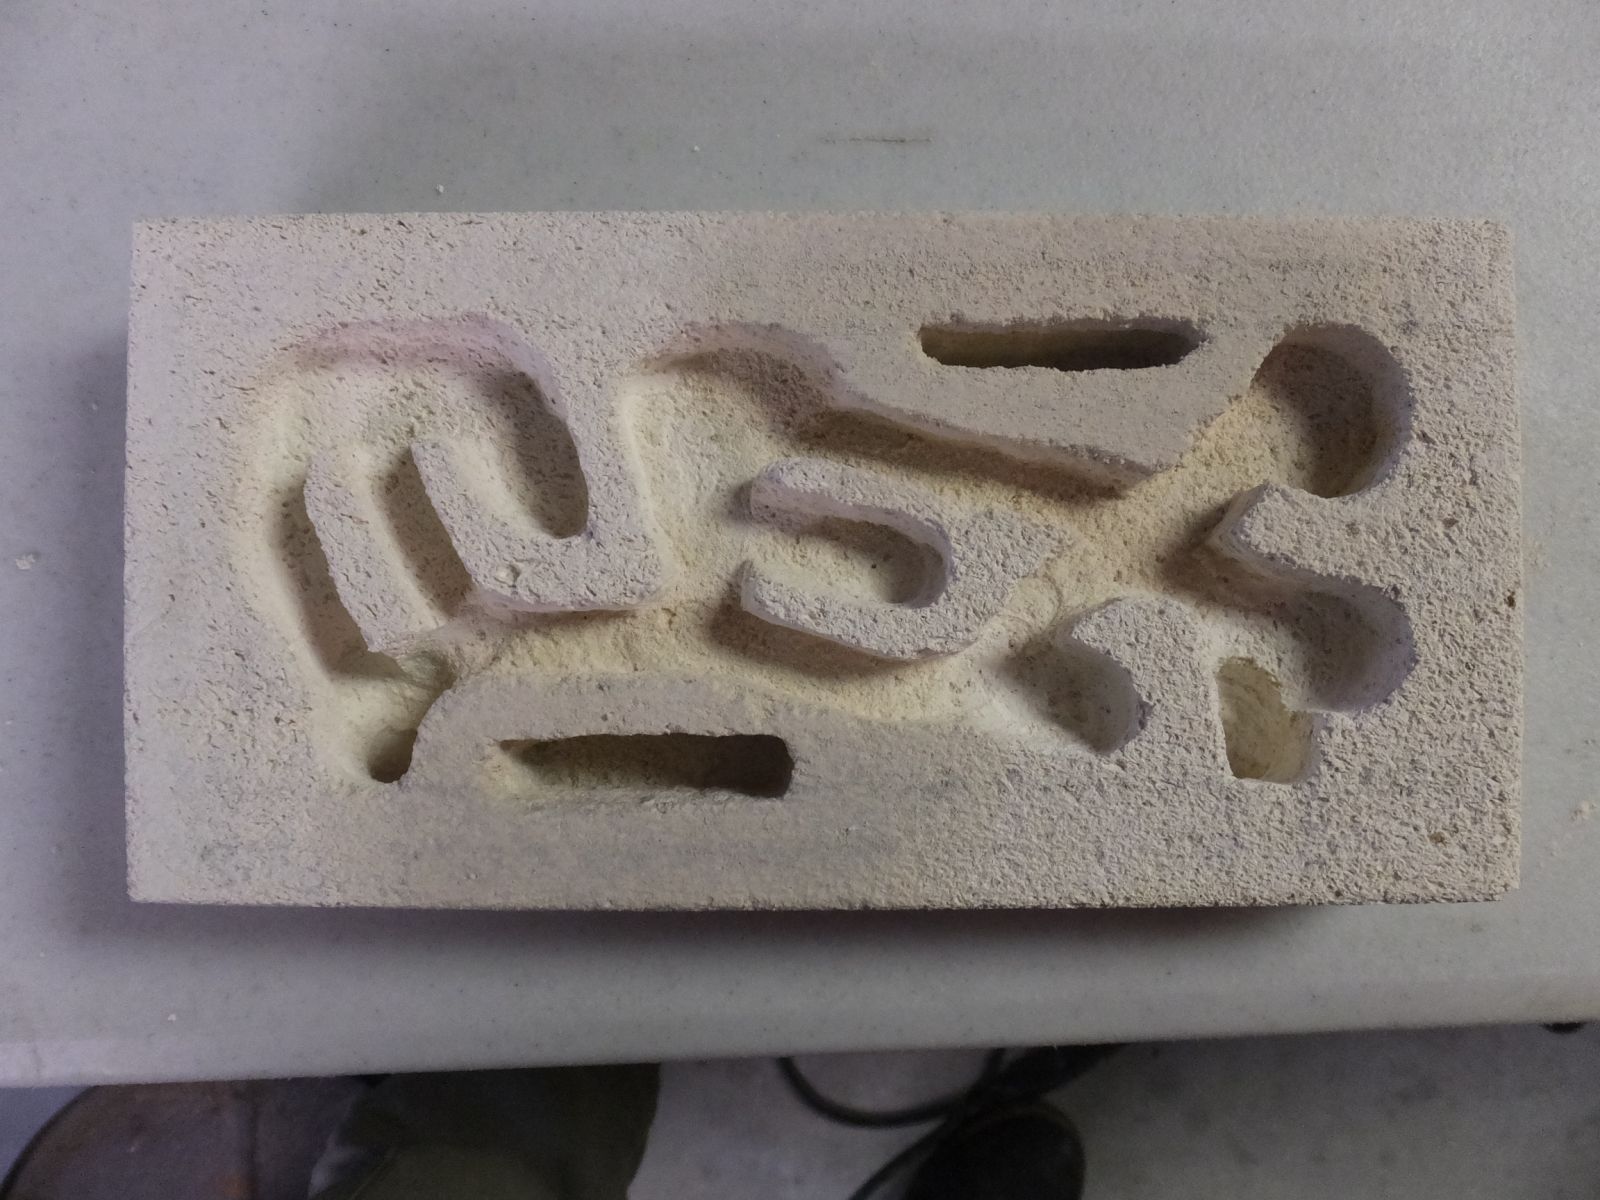
DSCF0334


Before you take the dremel or any other tools to the brick, I have one VERY IMPORTANT THING to say:

WEAR SAFETY GLASSES AND A DUST MASK!!!!!!

It doesn't matter what you are using, whether it's screwdrivers and chisels or a dremel and a drill.  Tiny pieces of firebrick are going to be flying through the air, and that stuff WILL damage your eyesight if you get a piece in there.  The dust mask is because most pottery firebricks are made of fired clay, and breathing that stuff in will quickly cause silicosis, otherwise known as potter's rot.  It's not a pleasant thing, and is very easily avoided by just wearing the mask.  You can minimize the dust by dumping water on the brick, but you should still wear the mask and the glasses whenever you are doing anything to the brick.  Once you have the proper safety gear on, you can continue.


I started off with a 4.5"x9"x3" brick.  I decided that 3" thick was just unnecessary, but didn't want to waste anything.  I figured I could probably get two nests if I cut it in half down the 3" side.  I used a carpenter's saw, one of the ones that come with a plastic frame with slots in it to make sure you cut straight down.  It worked better than I thought it would, I didn't really need to apply any pressure to cut the brick.
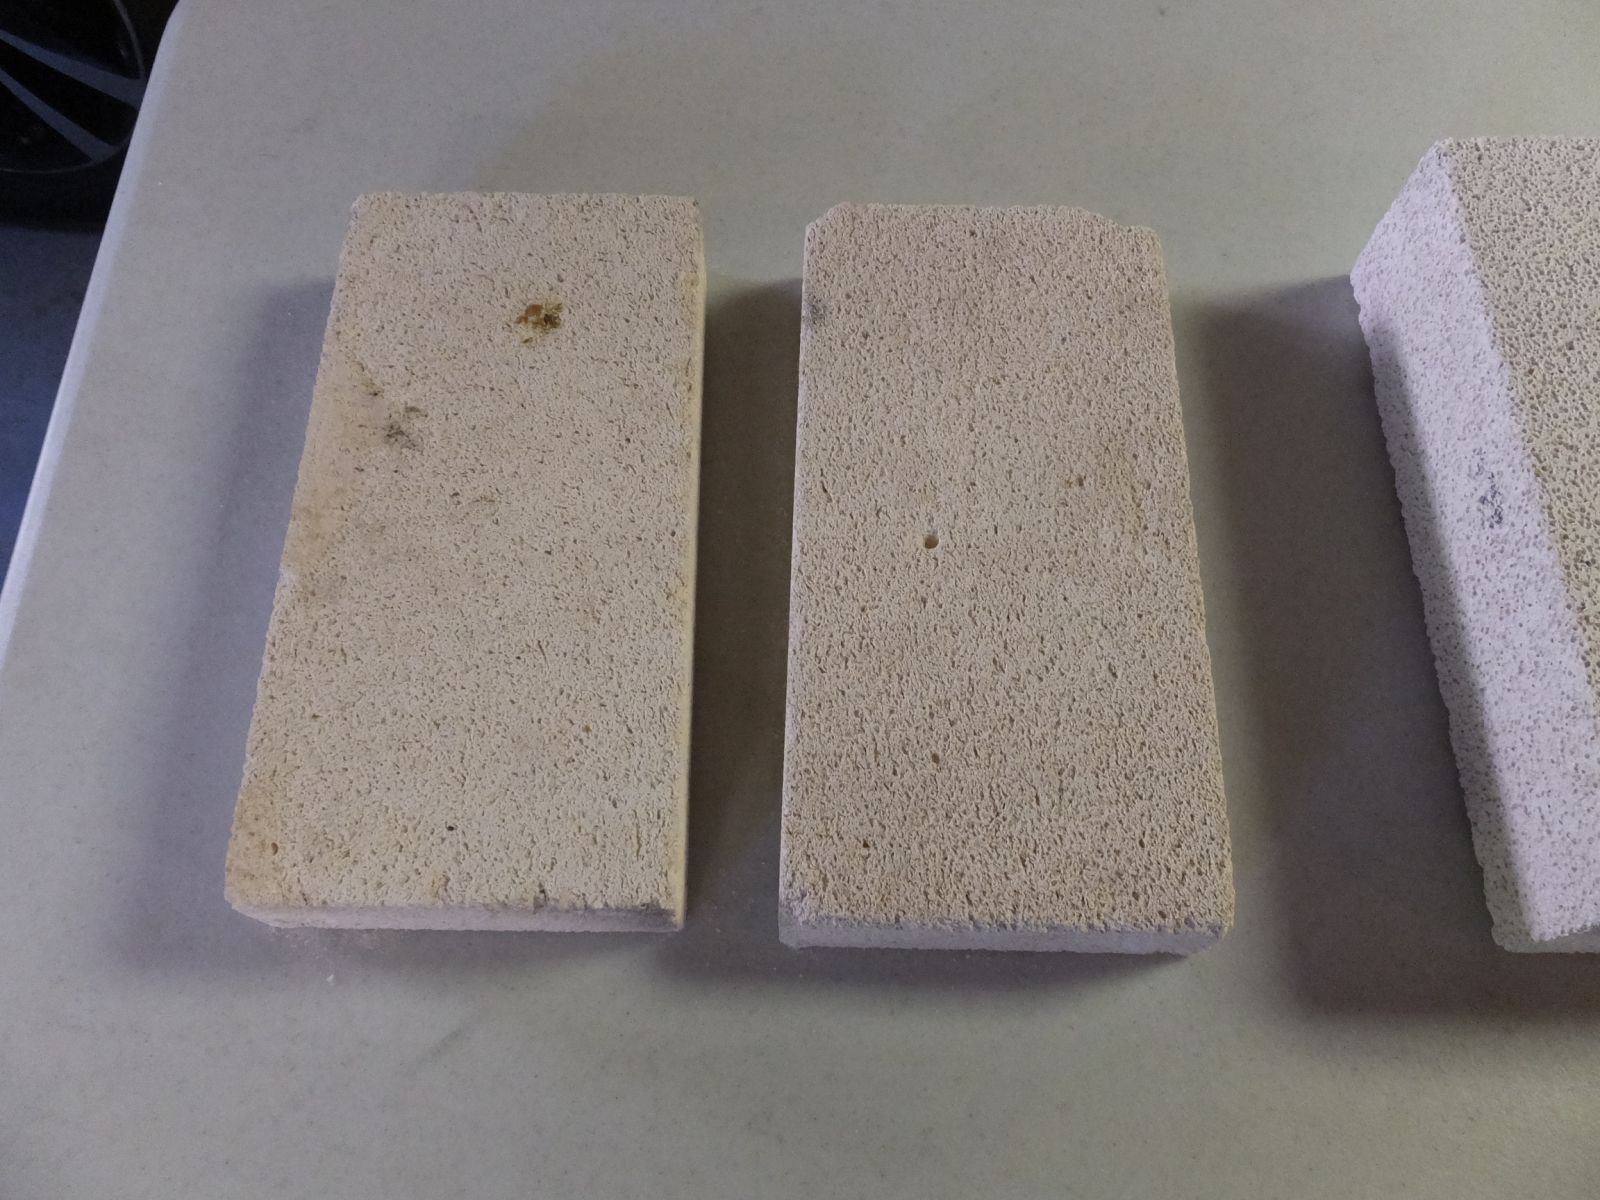
two 4.5x9x1.5 bricks


I marked in about 3/8" from the edge of the brick with a pencil, to show where the cover would be.  I then marked a further 3/8" from that line (for a total of 3/4" from the edge of the brick) to make sure that I didn't make any tunnels too close to the edge of the cover.  Don't want any ants escaping, now do we?  I decidedthat since it was so long it would have two entrance holes, so I marked out two 1/2" spaces roughly where I wanted the entrances to be.
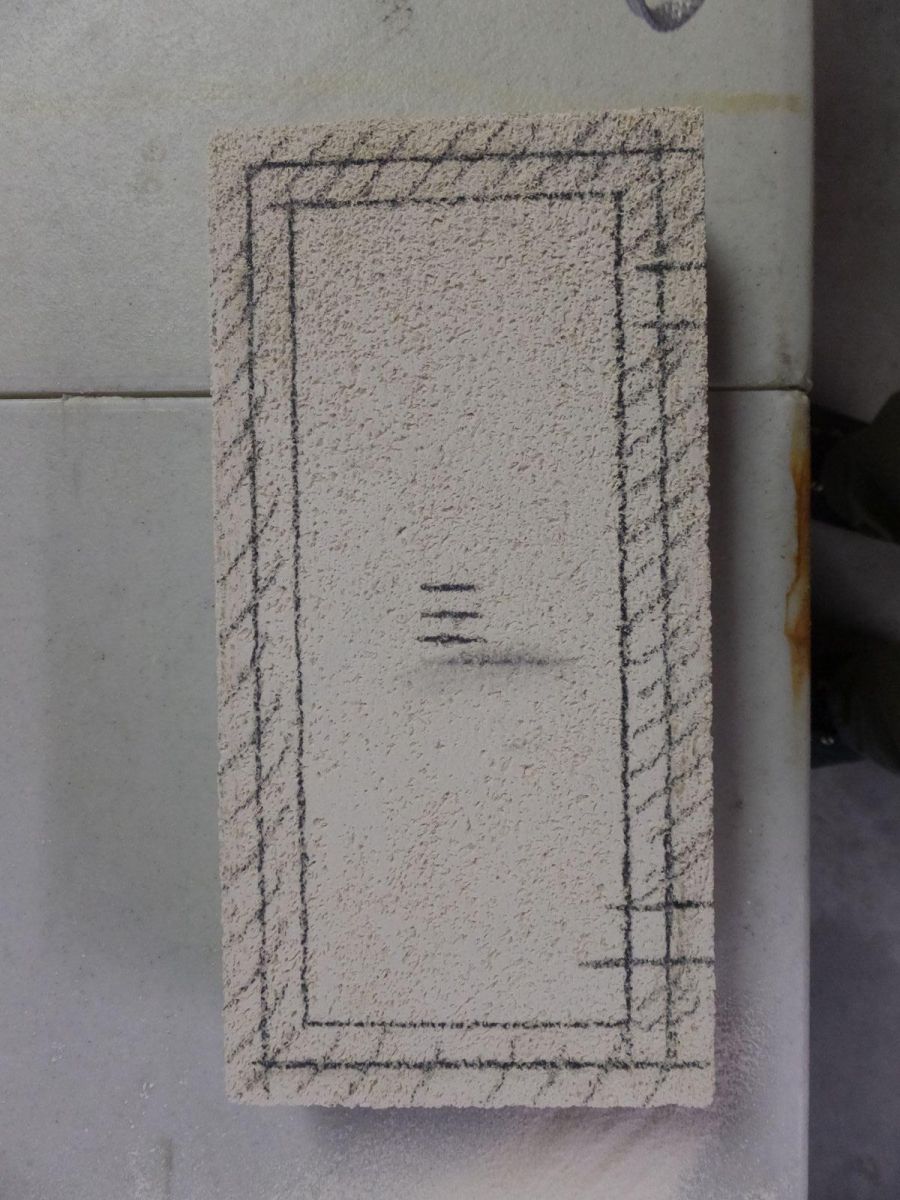
safety margins drawn for the plastic cover


From there, I just free-handed all of the tunnels and chambers.  I did draw them all out with the pencil first before I took the dremel to the brick, but I forgot to take pictures of that due to having too much fun.  I also drew out where I wanted the water resevoirs to be, and made them big enough that I'd be able to put a small piece of a sponge in there.  I used a dremel to carve everything out, but this stuff is soft enough that a flat-headed screwdriver or a small chisel would work just fine.  Just be gentle and work slowly.  You can always carve away more brick, but you can't put it back if you take too much off.  I used a small engraving bit to carve over the lines for the tunnels/chambers I drew with my pencil, as I noticed that the marks would get covered up in dust very quickly.
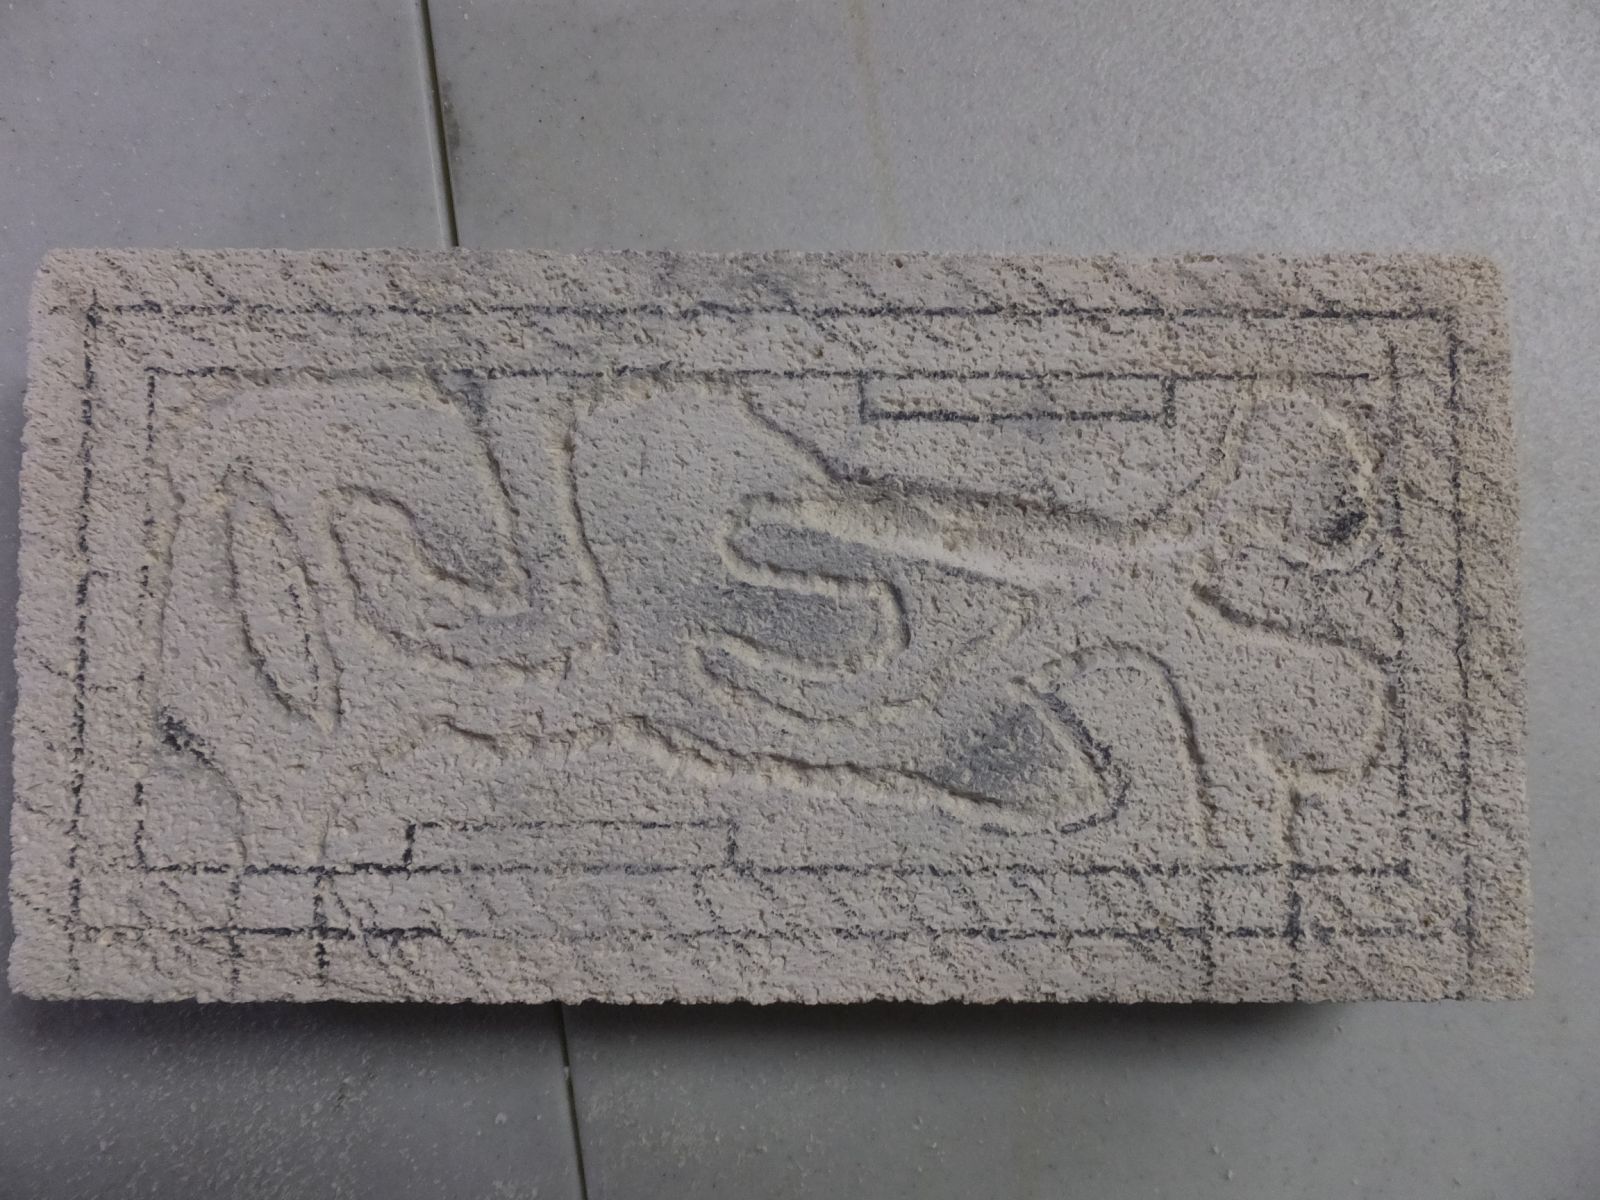
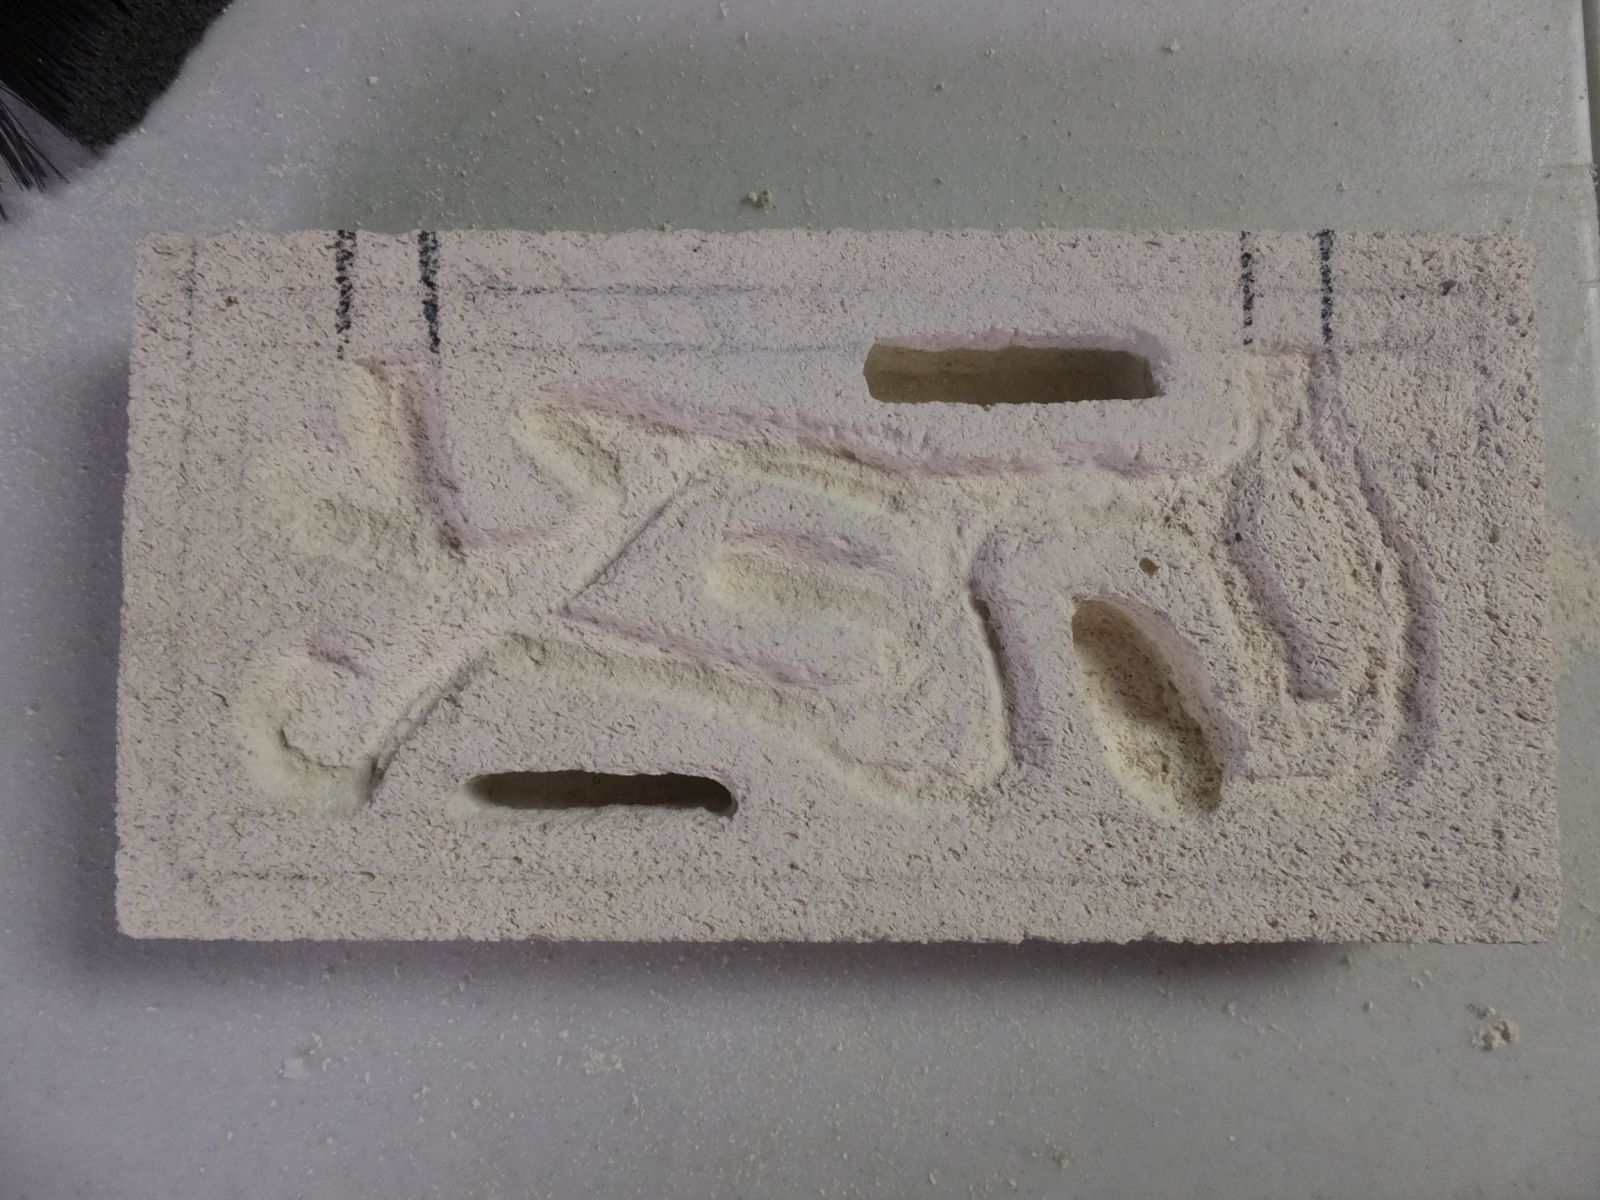
rough outline of the chambers and tunnels
water resevoirs and first chamber carved out


Once the outline was done, I used the cone-shaped and cylindrical orange grinding bits to carve everything to the right depth.  I would suggest using the cone first, to get rid of most of the material and to make the tunnels.  I found that the length of the cylinder tool is just the right right for chamber depth, so I just pushed it straight down until the bottom edge was even with the top of the brick, and followed the edges of the tunnels and chambers.
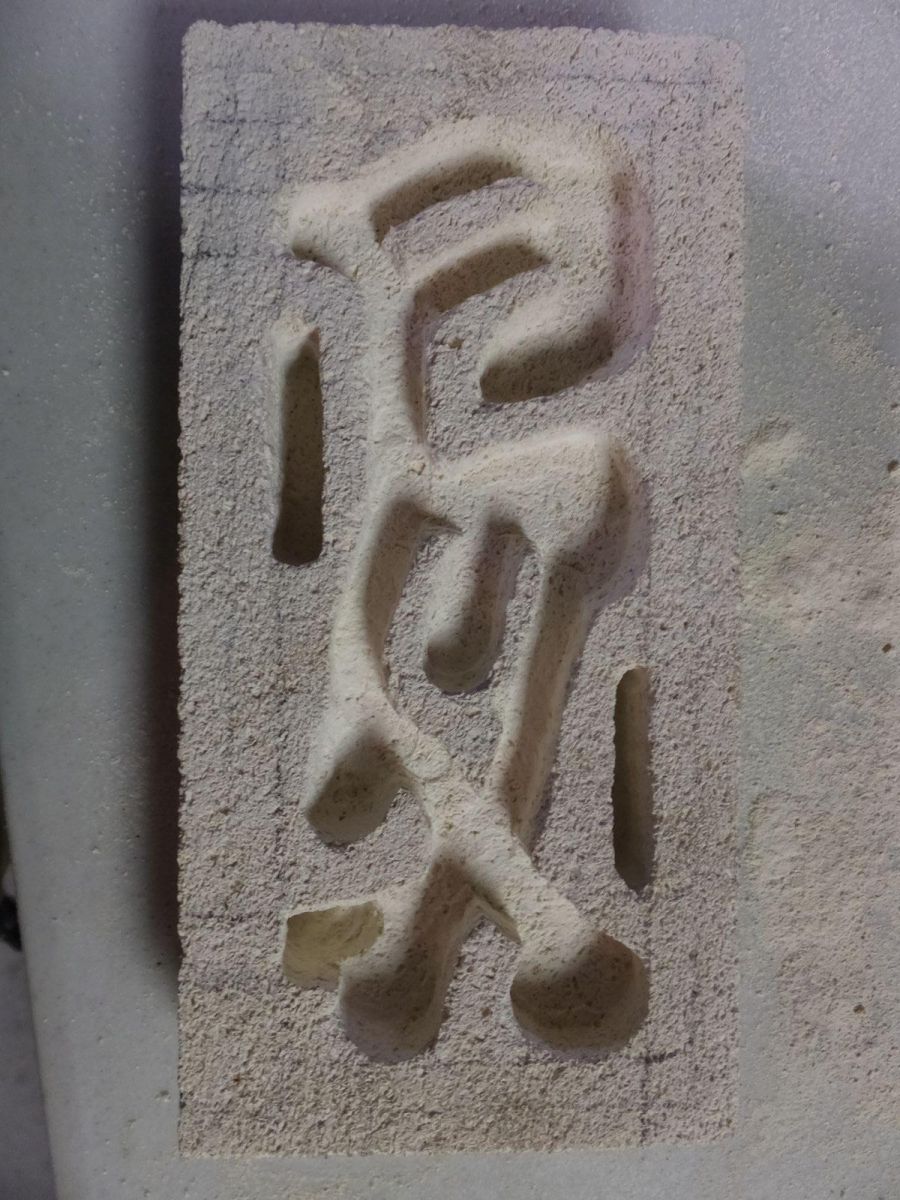
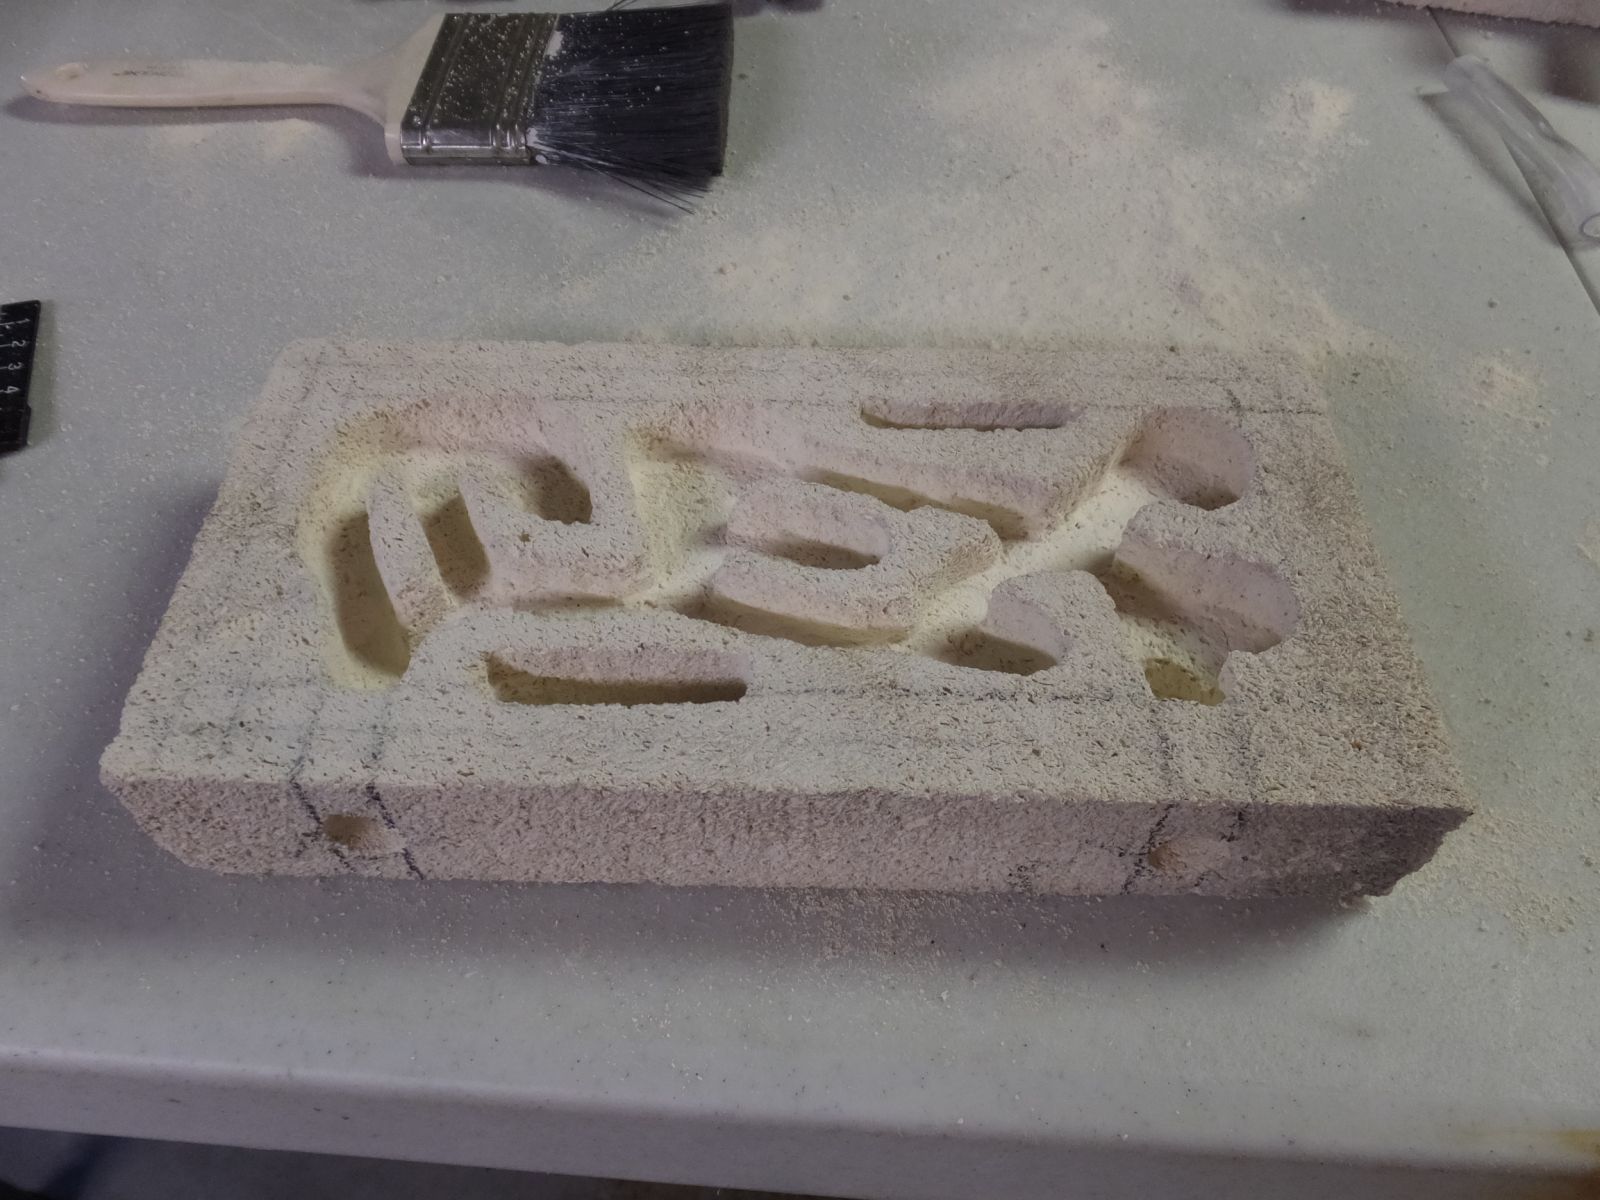
all chambers and tunnels done
 
I'm going to be using 1/2"OD vinyl tube for the connections, but this is an area where we want a tight fit so I drilled a 7/16" hole exactly halfway down the side of the brick in line with the marks I made earlier for the entrances.  I wiggled the drill just a little once the hole was made, and the tubes fit very nicely (sorry, forgot to take pictures again).  I went back inside the nest to make a bit of a ramp to the holes, since they were much lower than the rest of the nest.
holes drilled for connecting tubes
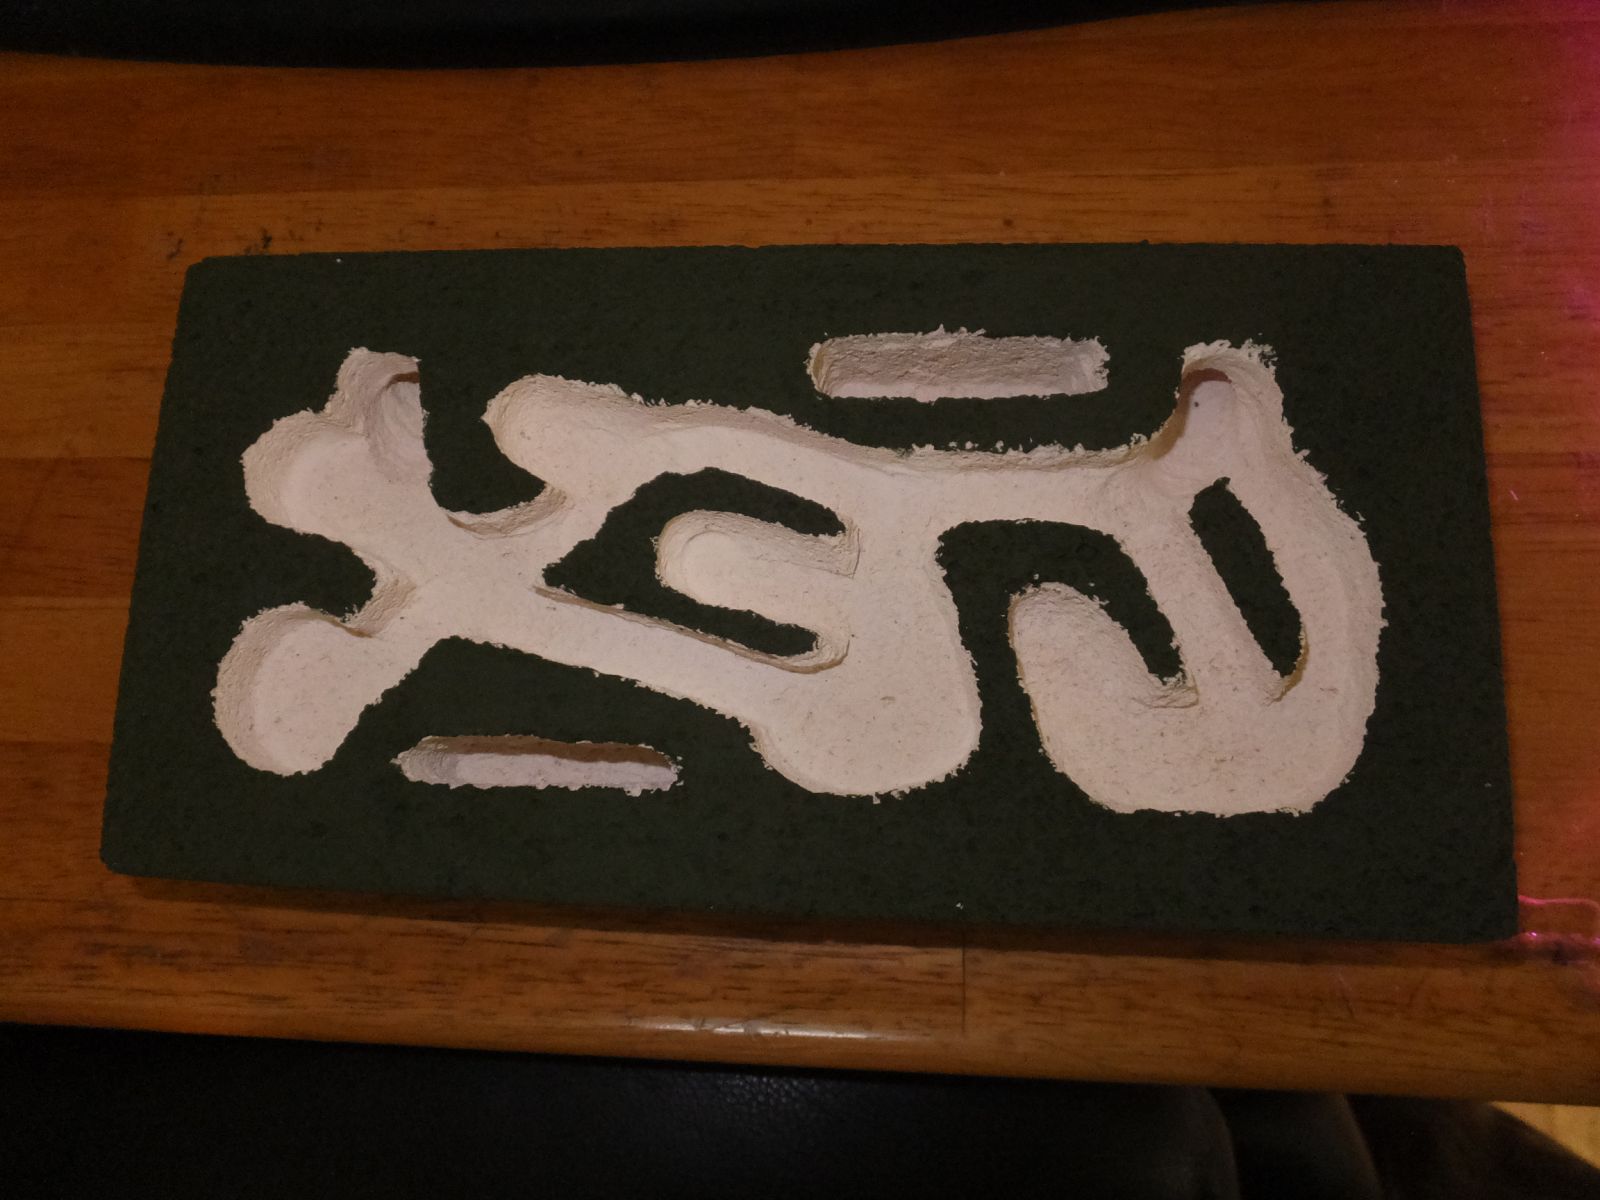
DSCF0333


Now all that's left is the finishing touches!  I took some sandpaper and smoothed out all of the faces of the brick, and rounded out the edges to make it just look a bit better.  I soaked the brick to try and keep the dust down, so it's sitting in the oven right now at 200oF to help it dry out faster.  You don't want to set the oven hotter than that, as it may crack the brick in two.  I'll be finishing it tomorrow, making the cover out of a picture frame and painting the nest.


  • dermy, rdurham02, Mettcollsuss and 2 others like this

My current colonies:

1x 4 queen Myrmica colony, roughly 30 workers

1x 3 queen Myrmica colony, roughly 20 workers

2x Tetramorium Immigrans colony, one with probably 500 workers and the second has around 200

1x Pogonomyrmex Occidentalis colony from THA, about 40 workers


My 1st firebrick formicarium: http://www.formicult...ck-formicarium/


#2 Offline rdurham02 - Posted October 5 2018 - 3:16 PM

rdurham02

    Advanced Member

  • Members
  • PipPipPip
  • 93 posts
  • LocationPortland, Maine

Looking good! Looking forward to seeing the finished product  :D


#3 Offline Trythis22 - Posted October 5 2018 - 4:02 PM

Trythis22

    Advanced Member

  • Members
  • PipPipPip
  • 96 posts
  • LocationPortland, Oregon

I like it. Can you include in your tutorial what # dremel bits you used and some pointers on the rotational speed (if you have a variable speed dremel tool) you found worked best? That'll help everyone replicate exactly what you have done here. 


  • Mettcollsuss likes this

#4 Offline Leo - Posted October 5 2018 - 6:12 PM

Leo

    Advanced Member

  • Members
  • PipPipPip
  • 1,530 posts
  • LocationHong Kong

My mother, will never let get my hands on a dremel, so is a screwdriver okay? I make all my nests with screwdrivers (hint: I only have 1 nest)


#5 Offline Major - Posted October 5 2018 - 10:05 PM

Major

    Advanced Member

  • Members
  • PipPipPip
  • 588 posts
  • LocationRochester, New York

My mother, will never let get my hands on a dremel, so is a screwdriver okay? I make all my nests with screwdrivers (hint: I only have 1 nest)


A screw driver and a hammer used as a chisel will work just fine. A dremel will just get sharp, smooth, clean looking edges. You can still sand it down to get that look.

#6 Offline ANTdrew - Posted October 6 2018 - 2:08 AM

ANTdrew

    Advanced Member

  • Moderators
  • PipPipPip
  • 9,945 posts
  • LocationAlexandria, VA
Leo,
Are you a student in a school that has a shop class? I ask because I teach English at a middle school, and I was able to borrow two sets of excellent dremel bits and a cordless dremel from the teacher. If you go ask the teacher, I’m sure he/she would be more than happy to help you out with this, even if you don’t take the class!
  • Mettcollsuss likes this
"The ants are a people not strong, yet they prepare their meat in the summer." Prov. 30:25
Keep ordinary ants in extraordinary ways.

#7 Offline ANTdrew - Posted October 6 2018 - 2:12 AM

ANTdrew

    Advanced Member

  • Moderators
  • PipPipPip
  • 9,945 posts
  • LocationAlexandria, VA
Excellent post and very timely. I’m also making a firebrick nest at the moment (I put a picture of it in the formicarium pictures thread). I carved my tunnels really tight because I’ll use it for tetramorium, and I’ve noticed they like tight quarters. Can you please share insights on hydration as well?
"The ants are a people not strong, yet they prepare their meat in the summer." Prov. 30:25
Keep ordinary ants in extraordinary ways.

#8 Offline Yosigi - Posted October 6 2018 - 7:19 AM

Yosigi

    Member

  • Members
  • PipPip
  • 23 posts
  • LocationSaranac, NY

I like it. Can you include in your tutorial what # dremel bits you used and some pointers on the rotational speed (if you have a variable speed dremel tool) you found worked best? That'll help everyone replicate exactly what you have done here. 

Not sure what number the bits were, just the standard orange cylinder and cone?  I kept the speed around 8k, figured I didn't really need it going too fast.  Just carve away slowly, that's what makes the edges so smooth and it helps prevent mistakes as well.


My mother, will never let get my hands on a dremel, so is a screwdriver okay? I make all my nests with screwdrivers (hint: I only have 1 nest)

A screwdriver works just fine, this stuff is really easy to carve.  I just used the dremel because I like really smooth lines, and it is a bit quicker than using a screwdriver.


Excellent post and very timely. I’m also making a firebrick nest at the moment (I put a picture of it in the formicarium pictures thread). I carved my tunnels really tight because I’ll use it for tetramorium, and I’ve noticed they like tight quarters. Can you please share insights on hydration as well?

Hydration wise, this stuff absorbs water like a sponge, it's amazing how quick it soaks into the brick.  I'm hoping the paint on the outside will help retain that moisture and keep the nest from drying out too quickly.  I'm planning on this nest being for my Formica Subsericea when they get big enough, so I left the tunnels and chambers a bit bigger.   I'm also thinking about making a small wooden frame for it, as I'm a bit clumsy and don't want to accidentally break it.


Edited by Yosigi, October 6 2018 - 7:21 AM.

My current colonies:

1x 4 queen Myrmica colony, roughly 30 workers

1x 3 queen Myrmica colony, roughly 20 workers

2x Tetramorium Immigrans colony, one with probably 500 workers and the second has around 200

1x Pogonomyrmex Occidentalis colony from THA, about 40 workers


My 1st firebrick formicarium: http://www.formicult...ck-formicarium/


#9 Offline ANTdrew - Posted October 6 2018 - 11:23 AM

ANTdrew

    Advanced Member

  • Moderators
  • PipPipPip
  • 9,945 posts
  • LocationAlexandria, VA
Cool! What kind of paint are you using? I’m putting mine in a mini fish-tank as an all-in-one, so I’m weighing options to water seal the back. I think I’ll follow Chrystals advice and spray it with a rubber sealer. I’d like to glue some dried moss or something on it for a more natural look, too.
I’m really eager to figure this out because my tetramoriums are bursting at the seams in their mini-hearth.
"The ants are a people not strong, yet they prepare their meat in the summer." Prov. 30:25
Keep ordinary ants in extraordinary ways.

#10 Offline Yosigi - Posted October 6 2018 - 5:03 PM

Yosigi

    Member

  • Members
  • PipPip
  • 23 posts
  • LocationSaranac, NY

Gonna be using Apple Barrel brand matte acrylic paint, I like to stick with simple and cheap lol.  Make sure you check the labels closely, the glossy acrylic from Apple Barrel isn't safe for ants.  Make sure the label states "non-toxic".  The rubber sealant is a nice idea, the cans are a little expensive for my liking compared to paint, and you can't make the nest as aesthetically pleasing either.  I don't plan on painting the chambers or tunnels, I like the idea of having a light background to see the ants on.  I didn't get a chance to paint or make the cover today, so that'll be done tomorrow if I don't get stuck doing other things.


Edited by Yosigi, October 6 2018 - 5:04 PM.

My current colonies:

1x 4 queen Myrmica colony, roughly 30 workers

1x 3 queen Myrmica colony, roughly 20 workers

2x Tetramorium Immigrans colony, one with probably 500 workers and the second has around 200

1x Pogonomyrmex Occidentalis colony from THA, about 40 workers


My 1st firebrick formicarium: http://www.formicult...ck-formicarium/


#11 Offline ANTdrew - Posted October 7 2018 - 3:27 PM

ANTdrew

    Advanced Member

  • Moderators
  • PipPipPip
  • 9,945 posts
  • LocationAlexandria, VA
Waiting on updates, bro! I still haven’t decided on how to water seal my nest. I may do nothing at all. All this trouble makes me want to just fill my tank up with dirt and put a flat rock on top. My tetramoriums would love it, but I’d never see them again.
"The ants are a people not strong, yet they prepare their meat in the summer." Prov. 30:25
Keep ordinary ants in extraordinary ways.

#12 Offline Yosigi - Posted October 8 2018 - 8:01 AM

Yosigi

    Member

  • Members
  • PipPip
  • 23 posts
  • LocationSaranac, NY

I was able to paint the top side of the nest last night, and just finished the bottom a few minutes ago, I'll have pictures up tomorrow when it's all dry.  I'd do the pics tonight, but I'm gonna be in Rochester adopting some Camponotus pennsylvanicus. and Nylanderia Flavipes from Major this afternoon.


My current colonies:

1x 4 queen Myrmica colony, roughly 30 workers

1x 3 queen Myrmica colony, roughly 20 workers

2x Tetramorium Immigrans colony, one with probably 500 workers and the second has around 200

1x Pogonomyrmex Occidentalis colony from THA, about 40 workers


My 1st firebrick formicarium: http://www.formicult...ck-formicarium/


#13 Offline Kalidas - Posted October 8 2018 - 8:31 AM

Kalidas

    Advanced Member

  • Members
  • PipPipPip
  • 351 posts
  • LocationSanta Ana
This all look awesome! Thanks for the insight. One day I will make a naturalistic formicarium using this stuff... One day! Lol

#14 Offline ANTdrew - Posted October 8 2018 - 10:50 AM

ANTdrew

    Advanced Member

  • Moderators
  • PipPipPip
  • 9,945 posts
  • LocationAlexandria, VA

Here's what I got so far. I'd like to water seal the back of the nest somehow, but maybe I'll just forget that step.


  • T.C. and Mettcollsuss like this
"The ants are a people not strong, yet they prepare their meat in the summer." Prov. 30:25
Keep ordinary ants in extraordinary ways.

#15 Offline Yosigi - Posted October 9 2018 - 6:25 AM

Yosigi

    Member

  • Members
  • PipPip
  • 23 posts
  • LocationSaranac, NY
DSCF0339

Both coats of paint are on, I'm going to leave it be for a day or two more to make sure the paint dries completely.  I also WILL be making the cover today.  Thanks to Major, I even have a colony of Camponotus Pennsylvanicus ready to move in when it's all done!


  • Mettcollsuss and TennesseeAnts like this

My current colonies:

1x 4 queen Myrmica colony, roughly 30 workers

1x 3 queen Myrmica colony, roughly 20 workers

2x Tetramorium Immigrans colony, one with probably 500 workers and the second has around 200

1x Pogonomyrmex Occidentalis colony from THA, about 40 workers


My 1st firebrick formicarium: http://www.formicult...ck-formicarium/


#16 Offline Kalidas - Posted October 9 2018 - 8:30 AM

Kalidas

    Advanced Member

  • Members
  • PipPipPip
  • 351 posts
  • LocationSanta Ana
I had this idea I wanted to know what you all think about it. So I kinda got the idea from looking at the THA formicariums. The idea would be to have maybe like two bricks and cut out some nests in both also adding a plastic screen that you screw in and seal them together to make like a double formicarium. Maybe connect them with a hole and seal it up with cotton balls. Then seal an aquarium or another acrylic container on top for an out world. And as the colony grows you can remove the seal to the other foicarium thus doubling the size of the nest size.

What do you all think of that? It would mostly be used for ant colonies that tend to not like moving nests .

#17 Offline Yosigi - Posted October 9 2018 - 9:00 AM

Yosigi

    Member

  • Members
  • PipPip
  • 23 posts
  • LocationSaranac, NY

The only issue I can see with that is it would be very difficult to re-use or clean the formicarium in that setup.  Being able to give them more space in their current setup is a good thought.  I've not seen it talked about too often, but people move their colonies into new nests not only to give the colony more space, but to also give the keeper a chance to clean out and reuse the old formicarium.


My current colonies:

1x 4 queen Myrmica colony, roughly 30 workers

1x 3 queen Myrmica colony, roughly 20 workers

2x Tetramorium Immigrans colony, one with probably 500 workers and the second has around 200

1x Pogonomyrmex Occidentalis colony from THA, about 40 workers


My 1st firebrick formicarium: http://www.formicult...ck-formicarium/


#18 Offline Kalidas - Posted October 9 2018 - 9:32 AM

Kalidas

    Advanced Member

  • Members
  • PipPipPip
  • 351 posts
  • LocationSanta Ana
Well the idea would be to include removable plastic screens with screws and such so you can clean them.

Yeah some species just don't like moving. Like example I'm looking at collecting Myrmecocystus one day and they hate to move nests

#19 Offline Yosigi - Posted October 9 2018 - 1:46 PM

Yosigi

    Member

  • Members
  • PipPip
  • 23 posts
  • LocationSaranac, NY

Ok, so I'm a little bit special and forgot to actually buy the plastic for the cover :whistle:  I'll be stopping by the hardware store after class tomorrow to grab a small sheet, and will hopefully be done with this by Thursday evening.  After that, on to the next one!


My current colonies:

1x 4 queen Myrmica colony, roughly 30 workers

1x 3 queen Myrmica colony, roughly 20 workers

2x Tetramorium Immigrans colony, one with probably 500 workers and the second has around 200

1x Pogonomyrmex Occidentalis colony from THA, about 40 workers


My 1st firebrick formicarium: http://www.formicult...ck-formicarium/


#20 Offline Kalidas - Posted October 9 2018 - 1:47 PM

Kalidas

    Advanced Member

  • Members
  • PipPipPip
  • 351 posts
  • LocationSanta Ana
Yeah gonna need that :D don't want you ants turning your house into the outworld do you? Lol
  • Rstheant likes this


Also tagged with one or more of these keywords: firebrick, formicarium, diy, dremel

1 user(s) are reading this topic

0 members, 1 guests, 0 anonymous users