Jump to content

  • Chat
  •  
  •  

Welcome to Formiculture.com!

This is a website for anyone interested in Myrmecology and all aspects of finding, keeping, and studying ants. The site and forum are free to use. Register now to gain access to all of our features. Once registered and logged in, you will be able to create topics, post replies to existing threads, give reputation points to your fellow members, get your own private messenger, post status updates, manage your profile and so much more. If you already have an account, login here - otherwise create an account for free today!

Photo

Formicarium DIY Try #1

formicarium diy grout do it yourself

  • Please log in to reply
13 replies to this topic

#1 Offline DaveJay - Posted July 2 2018 - 8:10 AM

DaveJay

    Advanced Member

  • Members
  • PipPipPip
  • 497 posts
  • LocationSouth Australia

Hi, I unexpectedly became an ant keeper, I found a queen and brought it home thinking a friend interstate might like it, with tarantulas and scorpions people like to have specimens from different localities where it's legal to do so.


I put it in a 'blank' enclosure I had sitting around, I often make up extra enclosures while setting them up for new scorpions or tarantulas, just adding substrate and compressing it without adding decor.

The queen now has eggs or larvae so I need a better home, the little enclosure has ventilation holes that could be an escape route and the substrate dries very quickly sometimes.

I do have test tubes and I have seen and read how to set them up but I don't want to disturb her too much.


While some of the formicariums made from grout, firebrick, hebel etc look amazing, I am drawn to the more naturalistic formicariums where the formicarium and outworld are one.

My initial thought was to make panels but instead of chambers have one large cavity filled with sand, and by placing these panels in an enclosure ending up with something similar looking to the Casita by Tarheel Ants but that seemed more like a future project to me, I wanted something I would actually finish and not have too much chance of failure.


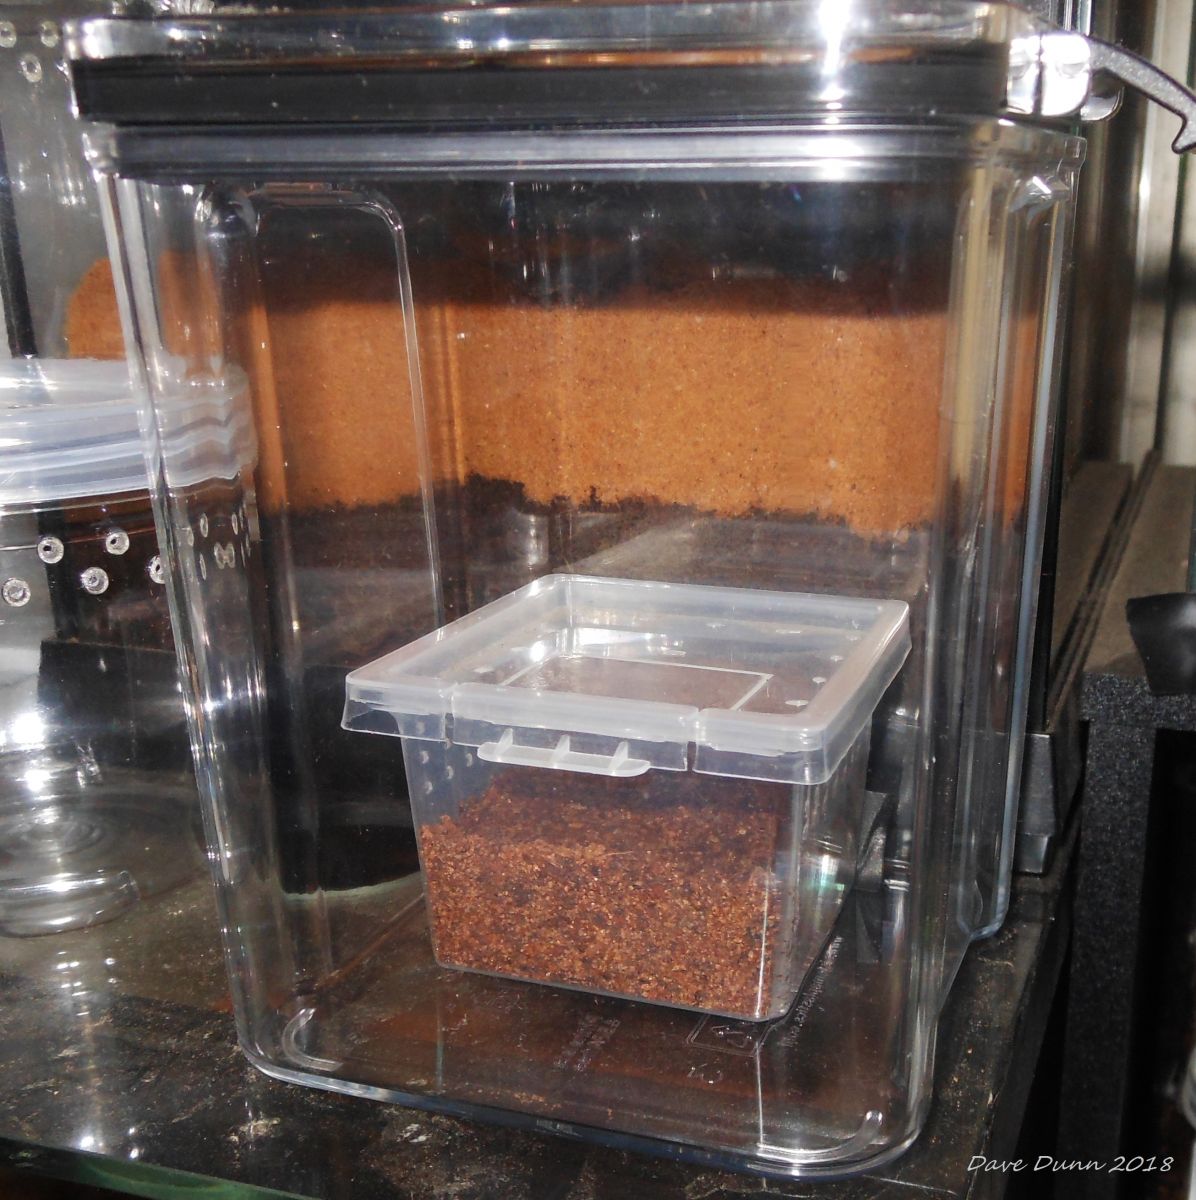
I think just sitting the small enclosure inside a larger more permanent one will be the best bet. It won't disturb her at all, the moisture won't evaporate so quickly and when it's time I'll let the smaller tub dry out so the queen and workers will move into the larger enclosure properly. 

I found some ultra-clear containers half price at the supermarket which left me with this.
041
It doesn't take much imagination to see that by having a smaller container in a larger one forces the ants to nest against the walls so you can see them, I just needed a bigger container. 
 
After looking at more photos, videos and threads regarding DIY formicariums I decided I would simply fill or coat the smaller container with one of the 'grout like' options (excluding normal plaster) then compress a coco peat/sand substrate around the edges. 
 
At the hardware store Hydrostone wasn't available and I was confused by the substitutes, not quite knowing if they had the same properties and if they would be safe. Also they were expensive (to my budget) as were most of the things people on this forum had said to use. I ended up at a salvage yard at the local dump where I came across old bags of coloured grout. The label is old and very simplistic but I assume it's unsanded grout as it says for swimming pools use sanded grout. Until this forum I wasn't aware there were more than one kind of grout!
 
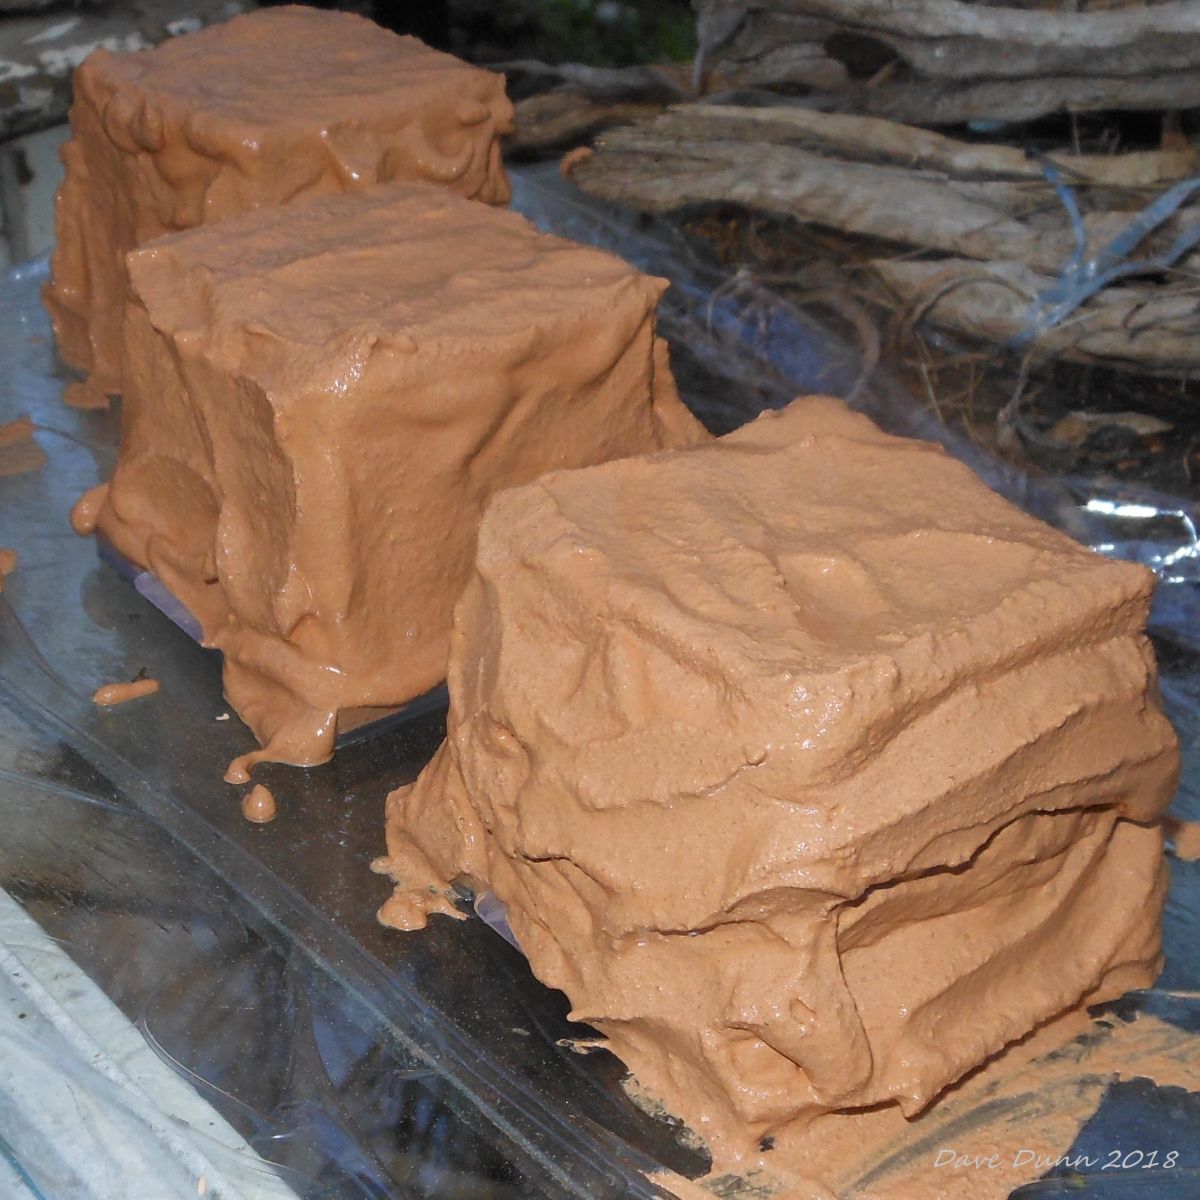
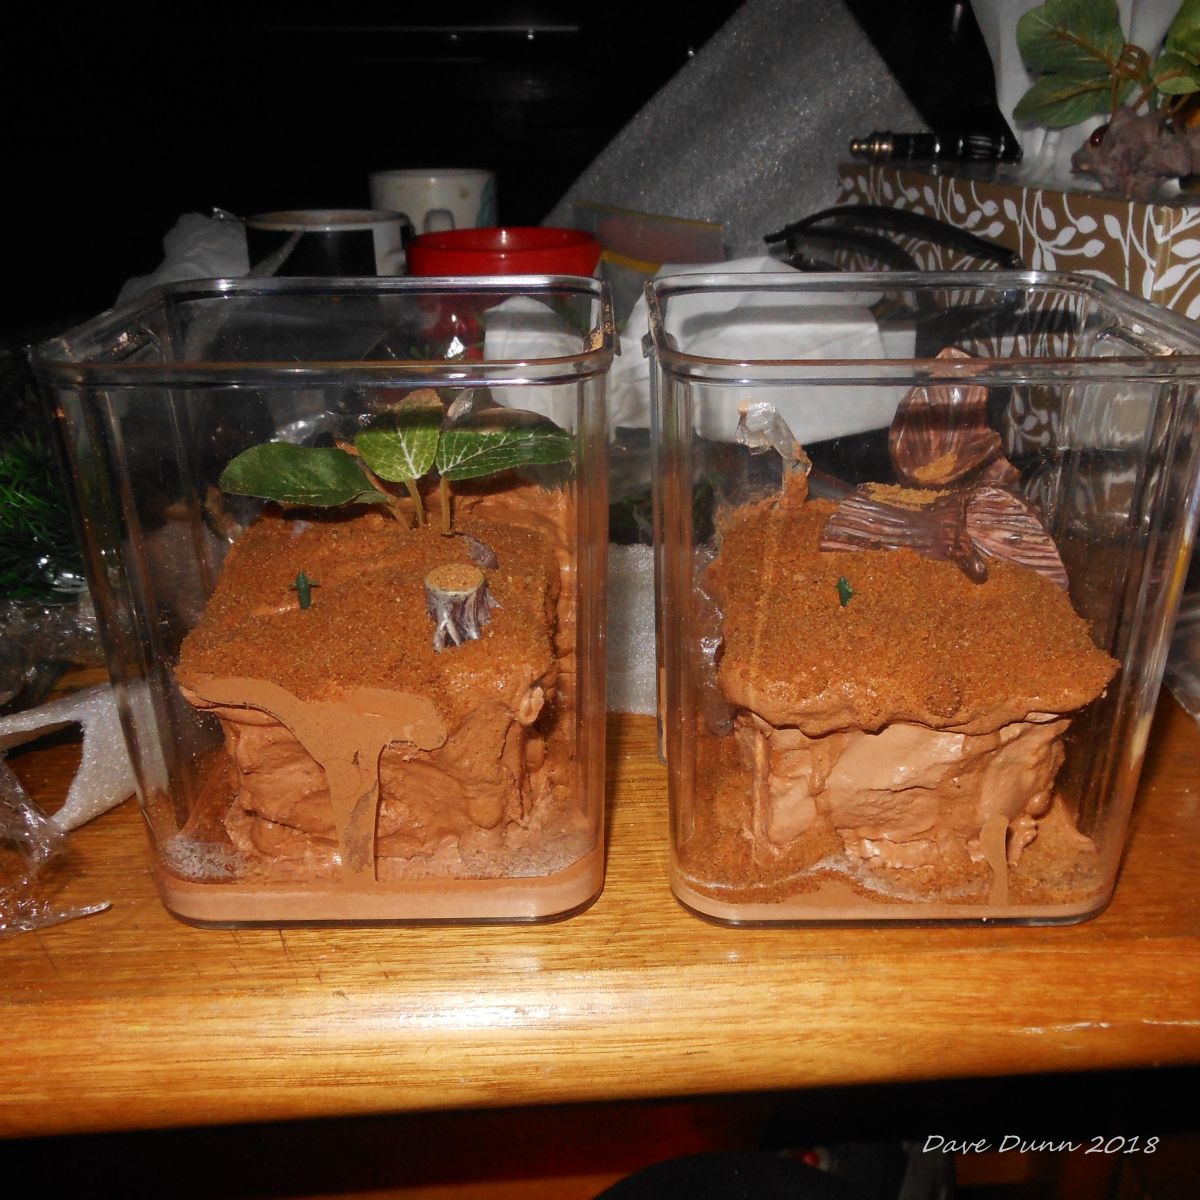
I mixed it with a small amount of red sand and coated the containers, upside-down at first because of the tapered sides. I had planned to stick red sand to it before it dried but I like the look of the grout like that I think, what little you'll see of it should look like rock and make a good backdrop to the chambers the ants dig. 
039

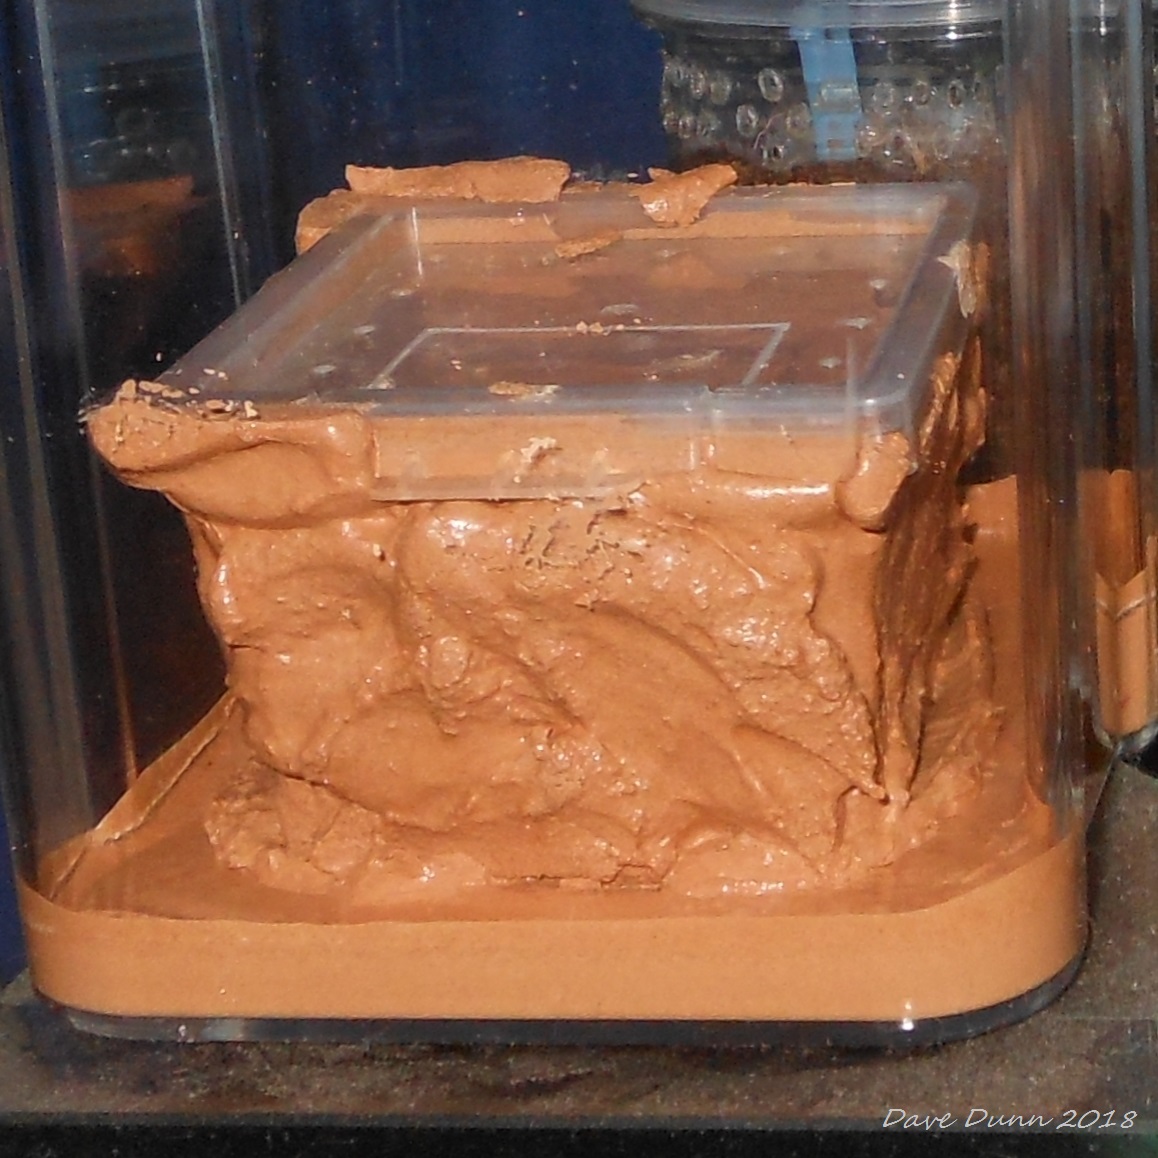
I had also read dspdrews' various formicarium development threads by now (I had searched formicarium and read all the threads on diy) and I liked the look of a layer of hydrostone on the base of the enclosure, it brings the look of my original vision to it.
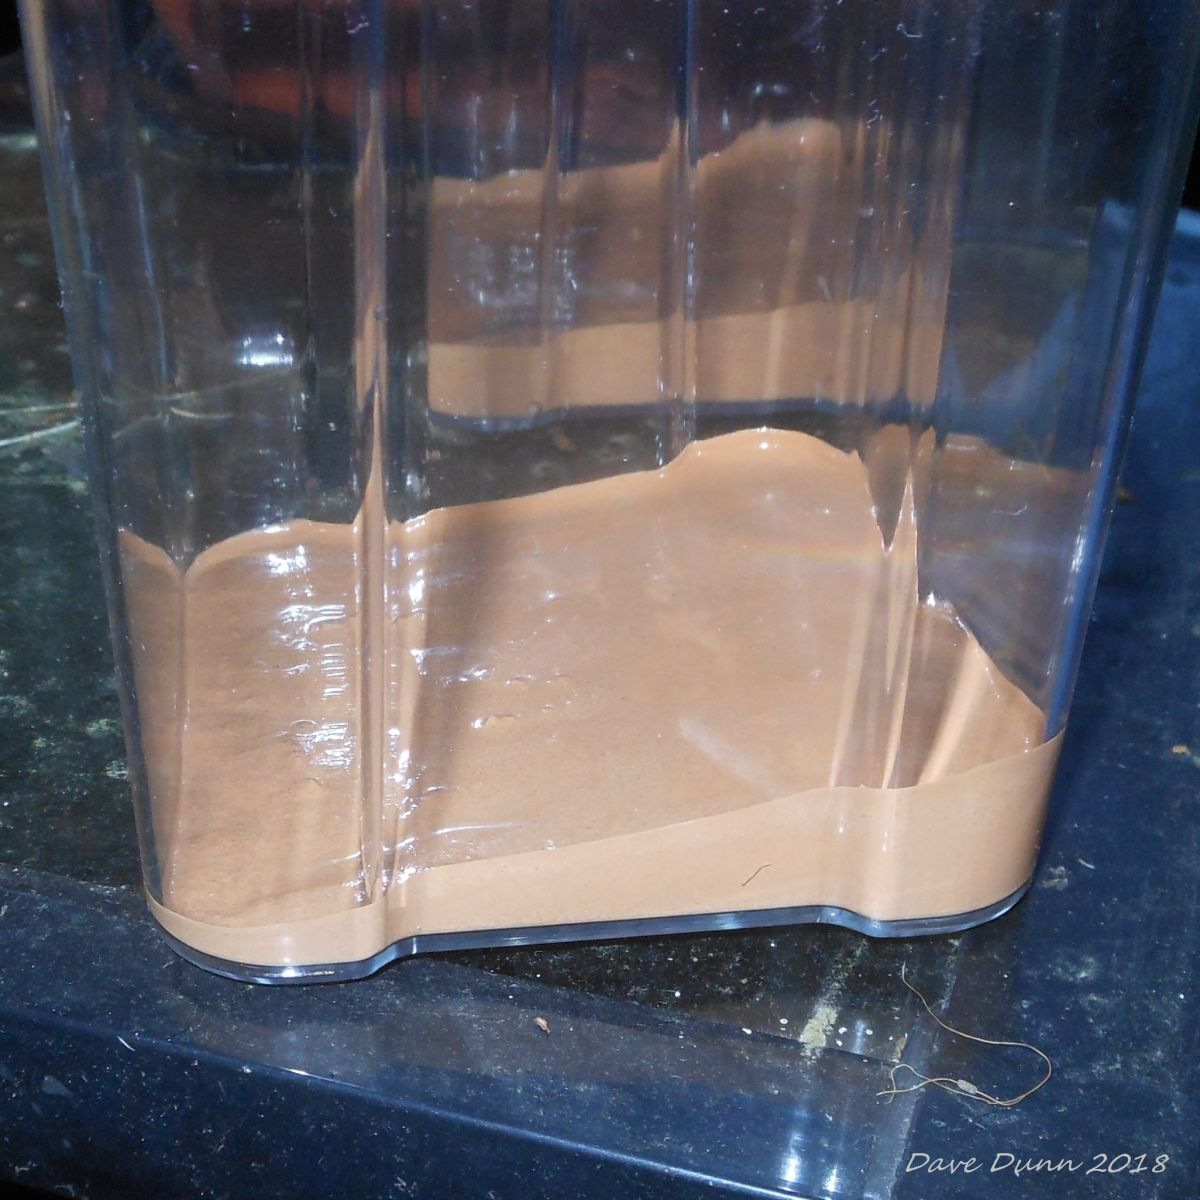
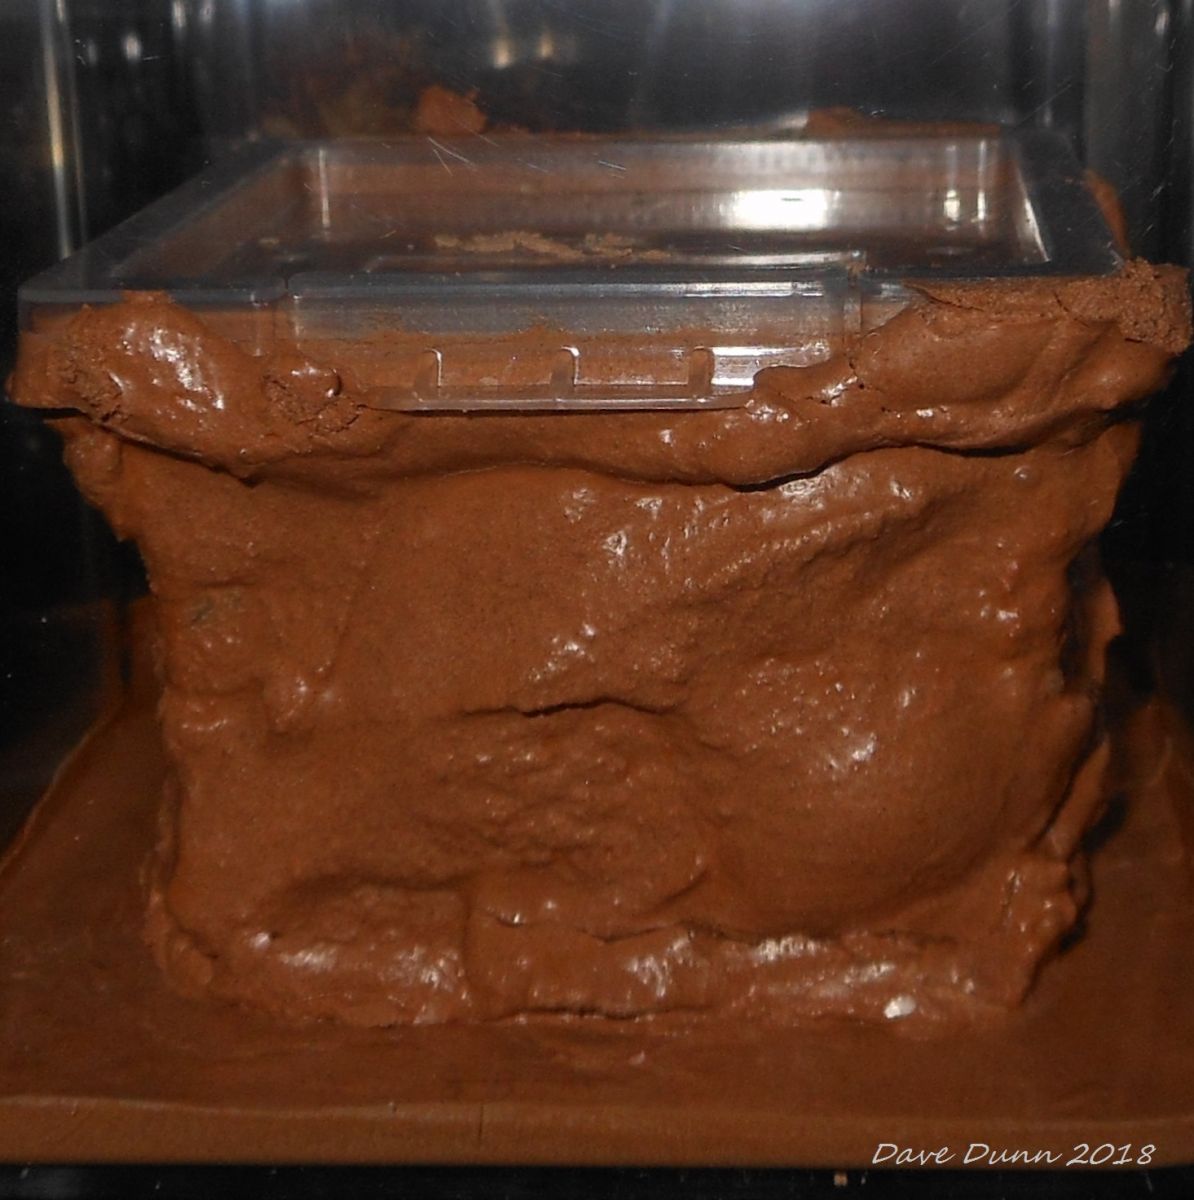
042
052
045

I also had seen how dspdrew had the idea to have the middle be a reservoir so I left it so I could take the lids off or add tubing if I decided to use it as a reservoir but I'm not sure it's necessary to be honest, I'm having a hard time deciding. I have 6 containers so I might try both ways. I bought taller containers of the same type today, it only adds vertical space but that might be good for larger species.
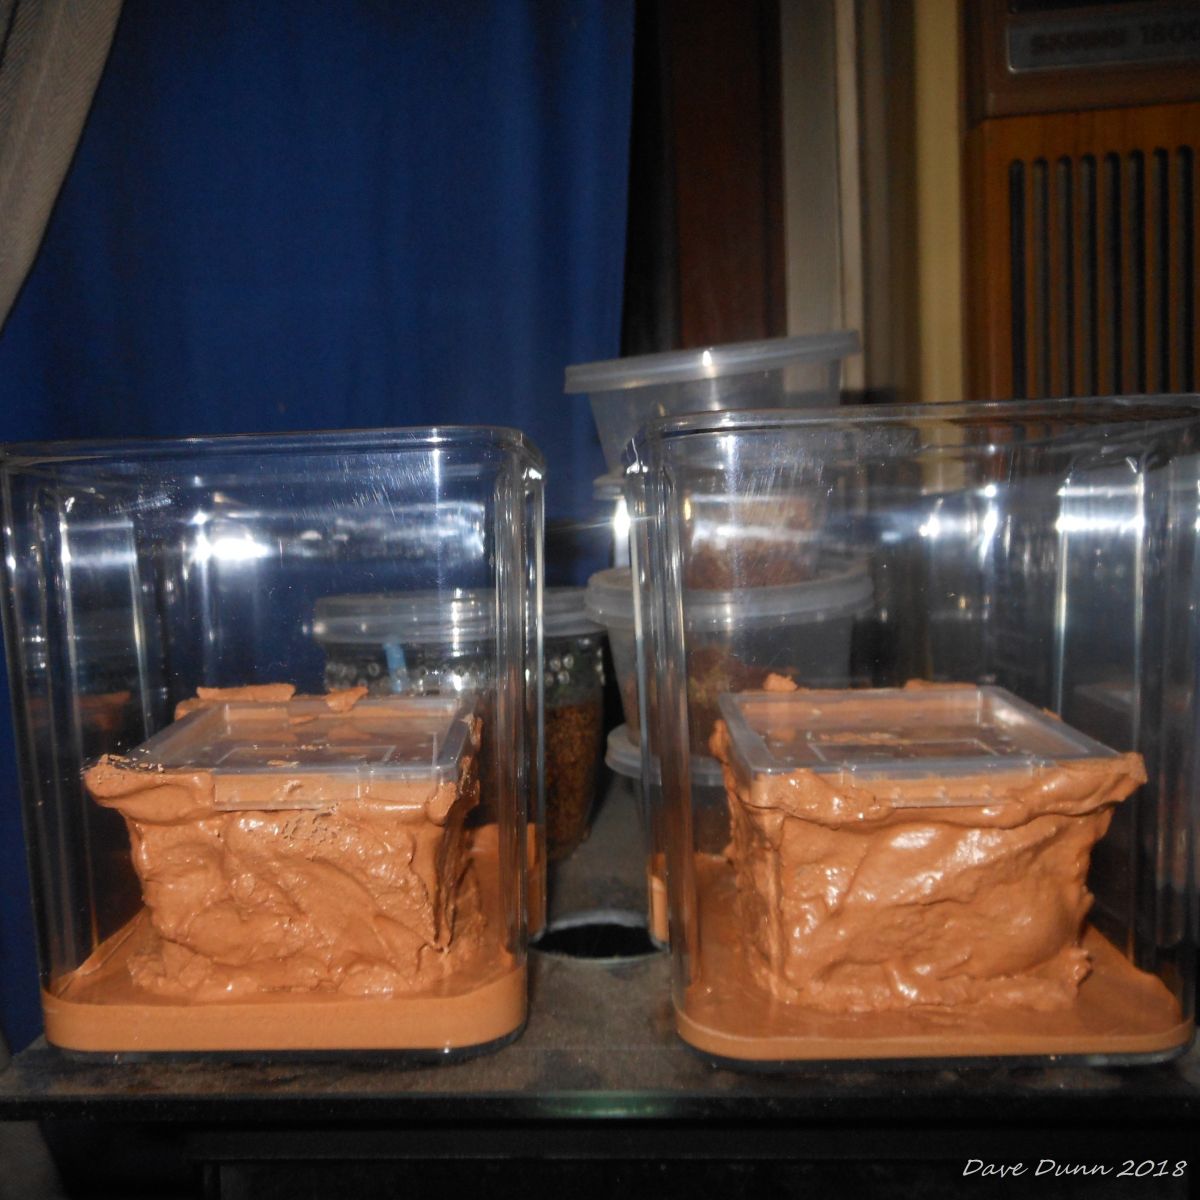
046

I had thought I might just bury the container basically, having it look like the enclosure was just half filled with substrate with the container just below the surface out of sight but now I'm thinking maybe not.


I am going to fill behind the small container with grout just leaving the front 3 sides free for tunnelling, if I don't use the container as a reservoir I may add a narrow straw to the back so I can syringe water to one or both bottom back corners. I worry that perhaps the ants will be in the straw when I want to add water though, but they shouldn't be actually living in there I hope.


I might continue with my original vision and make a surface out of grout, just leaving small gaps for the ants to have access to the surface, the sides are indented so a square will leave gaps at each corner. With the layer on the bottom a surface will give me the framed effect I originally imagined. 

It will be hard to fill it with substrate unless I add it first or make attach the surface to the lid of the inner container so that it can be removed when needed.

If it's not removable I'm sure I can work around it and add substrate but I wonder if there would be any problem adding it first and putting wet grout on top? Provided the rest of the grout has cured properly so it doesn't take forever to cure the whole lot.


I have stainless steel mesh that I could use to reinforce the surface piece but I'm also toying with pieces of plastic, cutting up live food containers.
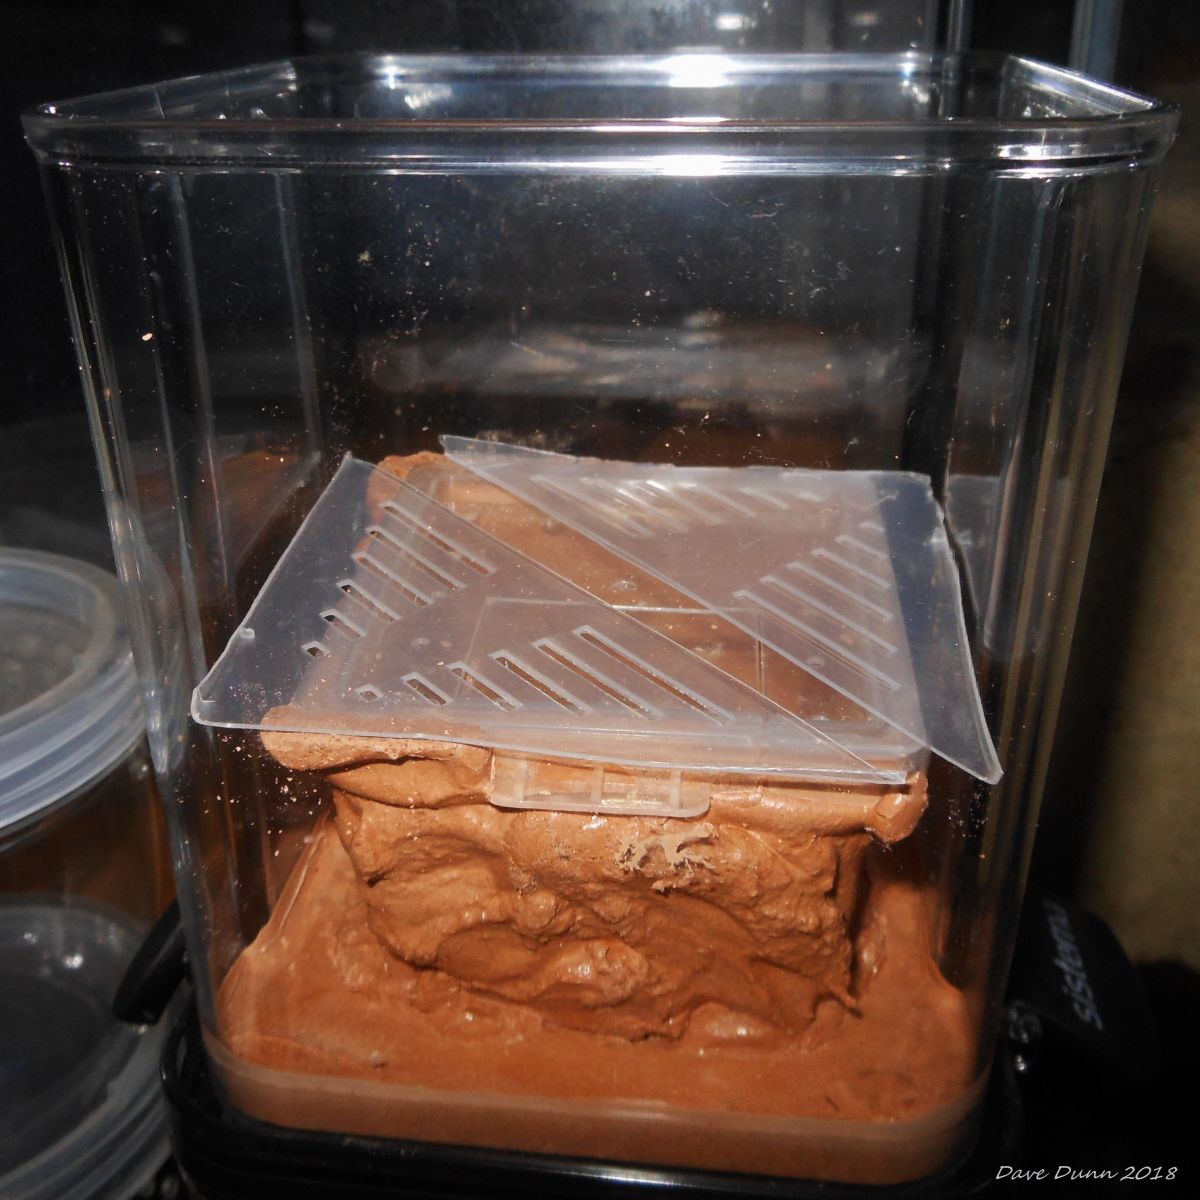
 

This is as far as I've got, I couldn't make up my mind so I procrastinated by posting on here and now it's past one am!

043

Hopefully I'll be updating this thread tomorrow night but I'd love some input good or bad, please feel free to reply with any suggestions, criticism or foreseeable problems, I'm just winging it here! :)


Edit - Also, in one of the threads 100 mesh was mentioned, on clicking the link I found there were finer meshes available from the same eBay seller. Is 100 mesh the optimum when keeping ants? I assume finer mesh would be thinner material and allow for less air flow, what it the general consensus on mesh size?


Edited by DaveJay, July 2 2018 - 8:39 AM.

  • Enderz, FeedTheAnts and rbarreto like this

#2 Offline Enderz - Posted July 2 2018 - 1:16 PM

Enderz

    Advanced Member

  • Members
  • PipPipPip
  • 393 posts
If you want a quick formicarium design, though it's not the most artistic, the 'Nurbs design' works quite well. It is essentially a test tube in a container with a grout/hydrostone bottom. Of course it doesn't work for all ant species (i.e. Myrmecocystus), but it should suit most people's needs.

The layer of grout/hydrostone on the bottom is a good look, I like to use it aswell as do many others. For Formica I myself wouldn't recommend a dirt box (take this with a grain of salt, I could be wrong :) ), as my founding Formica queens are doing fine in a simple test tube setup, they have pupae and are laying new eggs. Maybe making a different style of formicarium would be better for this genus. Anyway, good luck with this project and it is great to see this queen has brood! :D
  • DaveJay likes this

:morning:  :hot:  :hot:  :hot:

Ex igne et in infernum. 


#3 Offline Scrixx - Posted July 2 2018 - 2:09 PM

Scrixx

    Advanced Member

  • Members
  • PipPipPip
  • 274 posts
  • LocationSan Bernardino County, CA.

Hey, that's great you're making your own formicariums. 


I think the gap between the outer wall and inner wall is too wide. I made a similar setup with my Myrmecocystus mexicanus and Myrmecocystus mimicus. They both dug the entire width of the dirt but I think it may be better to make the width smaller so they make a taller and longer chamber size rather than wider. It may give a better viewing result. 


If you want a quick formicarium design, though it's not the most artistic, the 'Nurbs design' works quite well. It is essentially a test tube in a container with a grout/hydrostone bottom. Of course it doesn't work for all ant species (i.e. Myrmecocystus), but it should suit most people's needs.

The layer of grout/hydrostone on the bottom is a good look, I like to use it aswell as do many others. For Formica I myself wouldn't recommend a dirt box (take this with a grain of salt, I could be wrong :) ), as my founding Formica queens are doing fine in a simple test tube setup, they have pupae and are laying new eggs. Maybe making a different style of formicarium would be better for this genus. Anyway, good luck with this project and it is great to see this queen has brood! :D


With what I've seen so far Formica francoeuri like to dig. The 5 queens I put in small dirt containers have completely dug to the bottom of the containers and even cleared the bottom out leaving just a 1 mm layer of dirt. I've had to move them because they cleared too much dirt out that it collapsed on them. They dug just as much as my Myrmecocystus colonies. The Camponotus sansabeanus doesn't seem to want to move dirt around despite being a ground nesting species. 


  • DaveJay likes this

ScrixxAnts Queen Adoption

YouTube: View my ants

Keeping: Camponotus sansabeanus - C. vicinus - Formica francoeuri - Liometopum occidentale -  Pogonomyrmex californicus - P. rugosus - P. subnitidus - Solenopsis molesta - S. xyloni - Tapinoma sessile - Temnothorax sp.

Journals: Camponotus sansabeanus & C. vicinus | Pogonomyrmex californicus & P. rugosus | Solenopsis molesta & S. xyloni

Discontinued: Pogonomyrmex subnitidus


#4 Offline DaveJay - Posted July 2 2018 - 11:19 PM

DaveJay

    Advanced Member

  • Members
  • PipPipPip
  • 497 posts
  • LocationSouth Australia
Thanks for the input, I can't "like" the comments on my phone it seems but thank you both. :)
I was thinking the gap was a bit wide myself, another coat of grout might be needed. Because of the ventilation holes I thought the grout should anchor OK but while it was wet adding more was making it slump so I stopped there, I think I will add another coat, your comment cemented (grouted?) the idea.
I know test tubes are probably the best way to go but the one queen I have is already in the square container pictured so I figured just sit that tub in the larger one and when they're ready the ants will move to the larger one themselves. Future queens will be housed in test tubes initially for sure though.
I have 6 containers to use but only one queen atm so these two are very much experimental, after enough input from others I might feel comfortable to start on the others. I did coat 4 of the square enclosures though, but I wanted feedback before proceeding so thank you both. :)
  • Enderz likes this

#5 Offline CoolColJ - Posted July 3 2018 - 1:56 PM

CoolColJ

    Advanced Member

  • Members
  • PipPipPip
  • 2,646 posts
  • LocationSydney, Australia
You can use warmth to coax the ants against the container walls.
  • DaveJay likes this

Current ant colonies -
1) Opisthopsis Rufithorax (strobe ant), Melophorus sp2. black and orange, Pheidole species, Pheidole antipodum
Journal = http://www.formicult...ra-iridomyrmex/

Heterotermes cf brevicatena termite pet/feeder journal = http://www.formicult...feeder-journal/


#6 Offline DaveJay - Posted July 4 2018 - 11:33 PM

DaveJay

    Advanced Member

  • Members
  • PipPipPip
  • 497 posts
  • LocationSouth Australia

I did a bit more last night. I had 2 containers with the inserts already added, and 2 inserts still upside down. I coated the upside down ones again so that the gap would be smaller, I carefully measured the tops, which were at the bottom, and cut the grout while it was still soft enough to do so making a perfect fit. This was a mistake!!! The fit was too tight and I had to try and drop them in perfectly straight which didn't work well at all. They got stuck and wouldn't come back out so I had to ram them in no doubt leaving horrible scratches in the acrylic containers. Once at the bottom I found that the grout I had added to the containers was still very wet and they sank too deep, plus with such a tight fit I couldn't move them up or down, I couldn't adjust the angle they sat on without pushing them even deeper. I think I really b*ggered it up! In hindsight I should have left a gap all the way around that was small enough to fill once they were in there, I think I'm going to have real trouble adding substrate unless I use straight sand. Live and learn I guess.

023
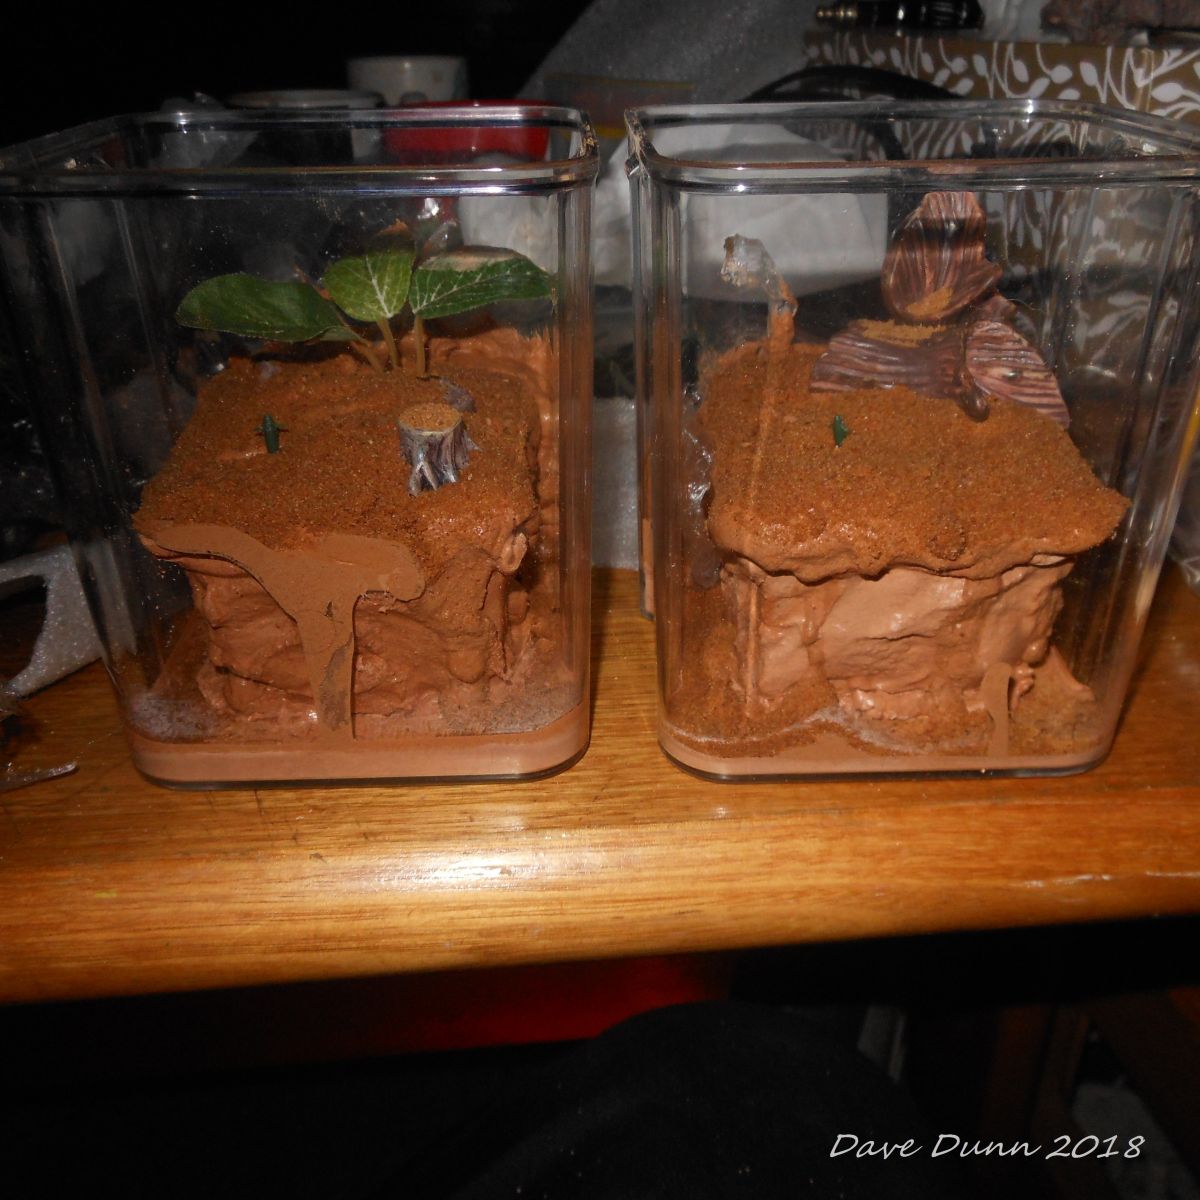
The others went better except that rather than the grout overflowing the top and running down the sides to close the gap somewhat as I envisioned it dropped blobs onto the base and some ran down the walls of the container. I should be able to clean up a bit with cotton tips I hope. I did get a bit of the frame effect on one though.
013
I decided I would leave the gaps for now, perhaps I will add grout on top of the substrate once it's in or perhaps I will just get some of the effect I want by topping the substrate mix with straight red sand, I'm not sure. Perhaps I will do one with sand, one with grout.
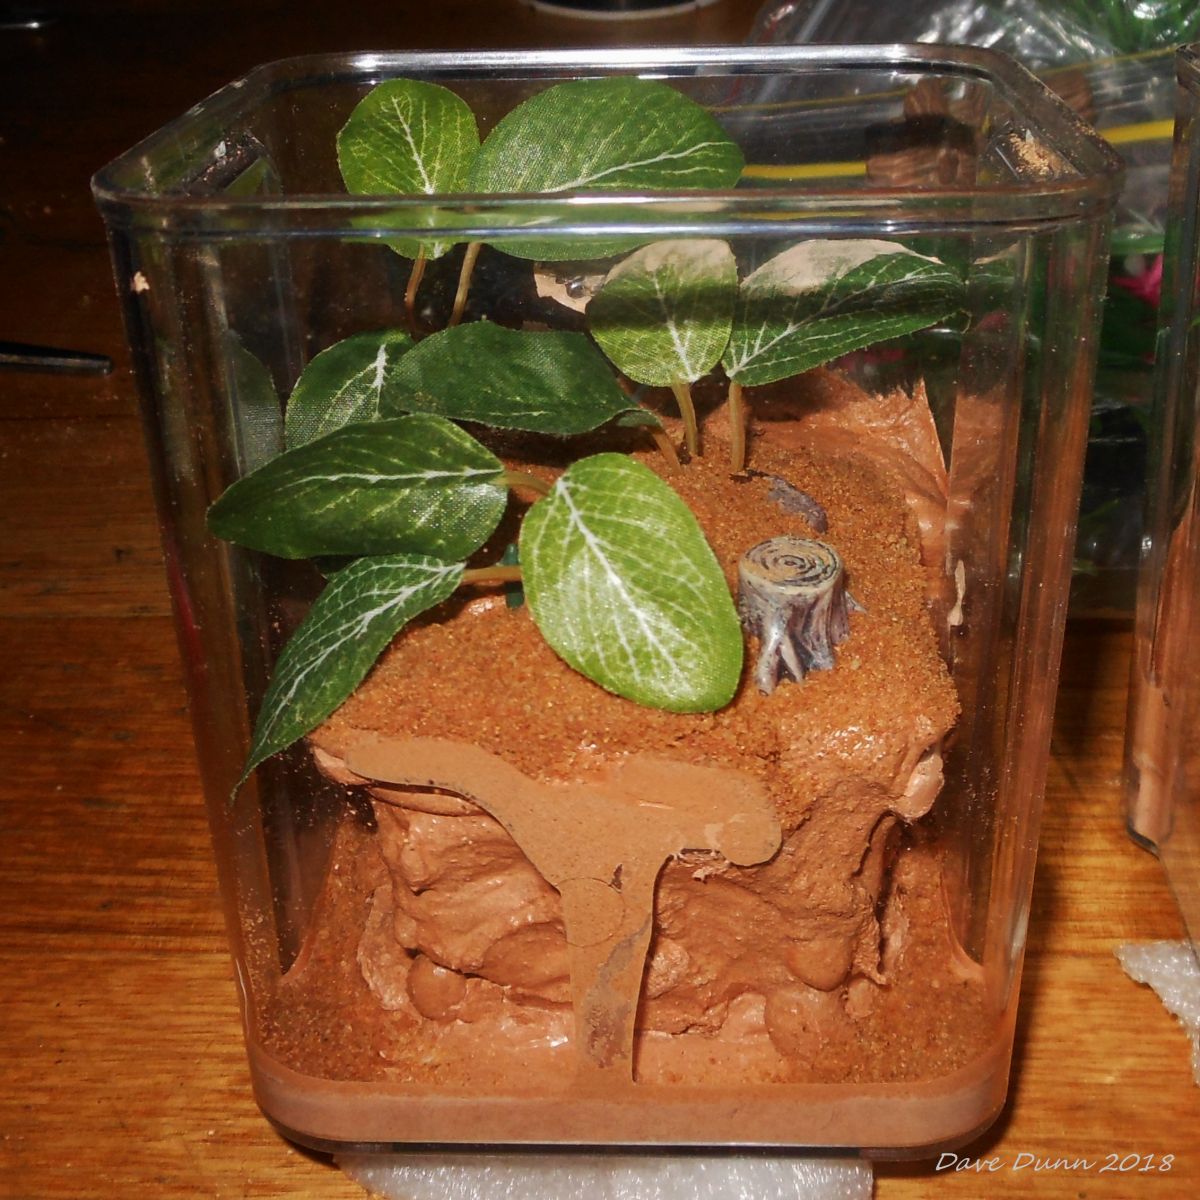
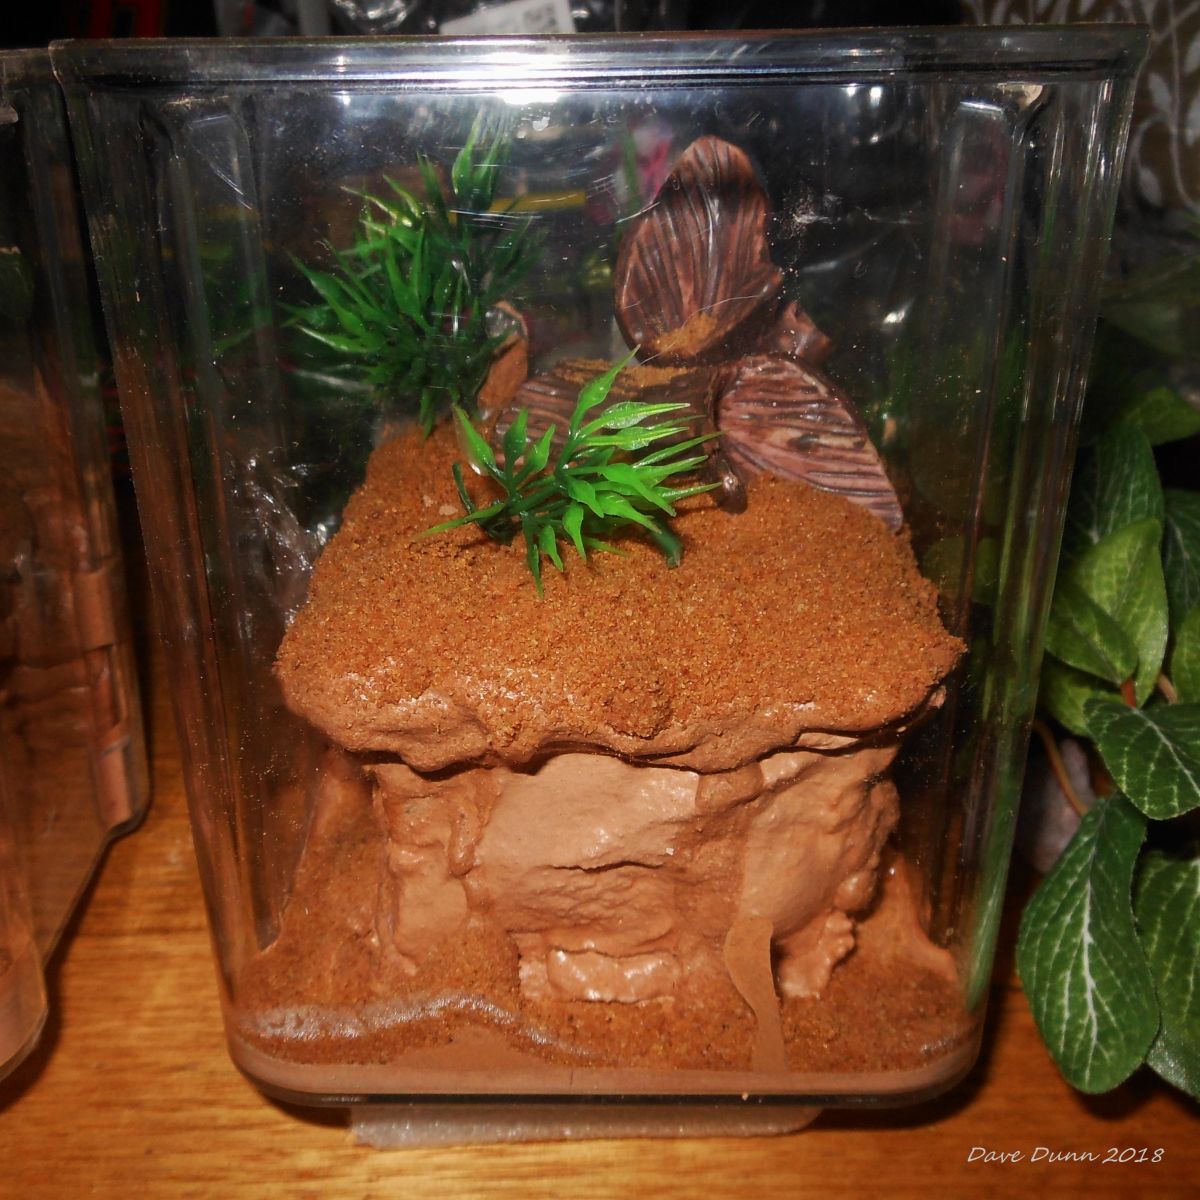
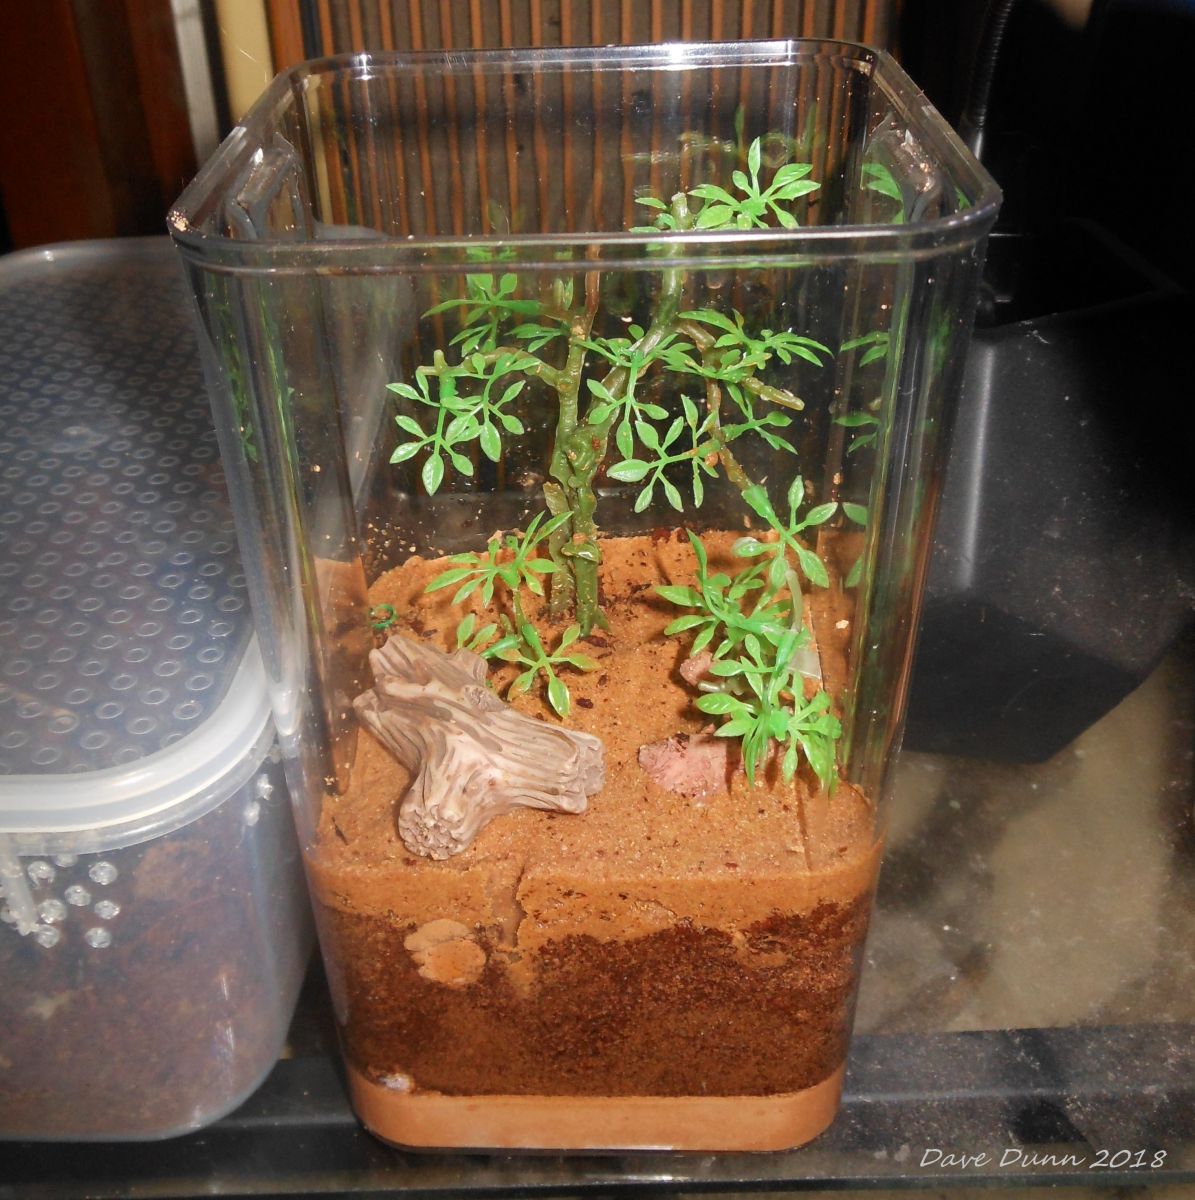
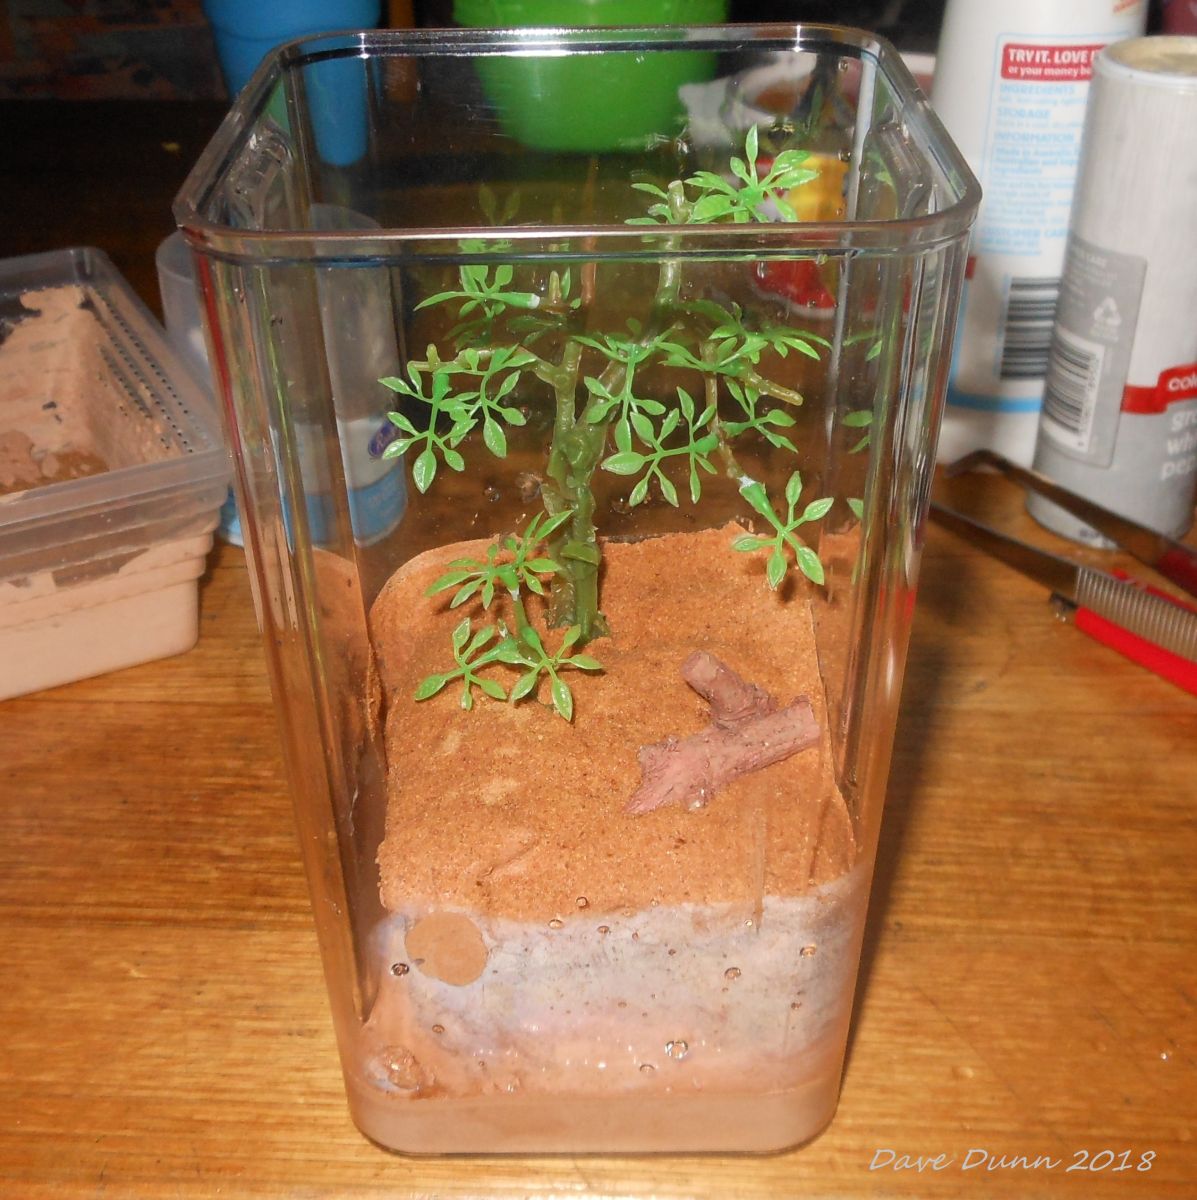
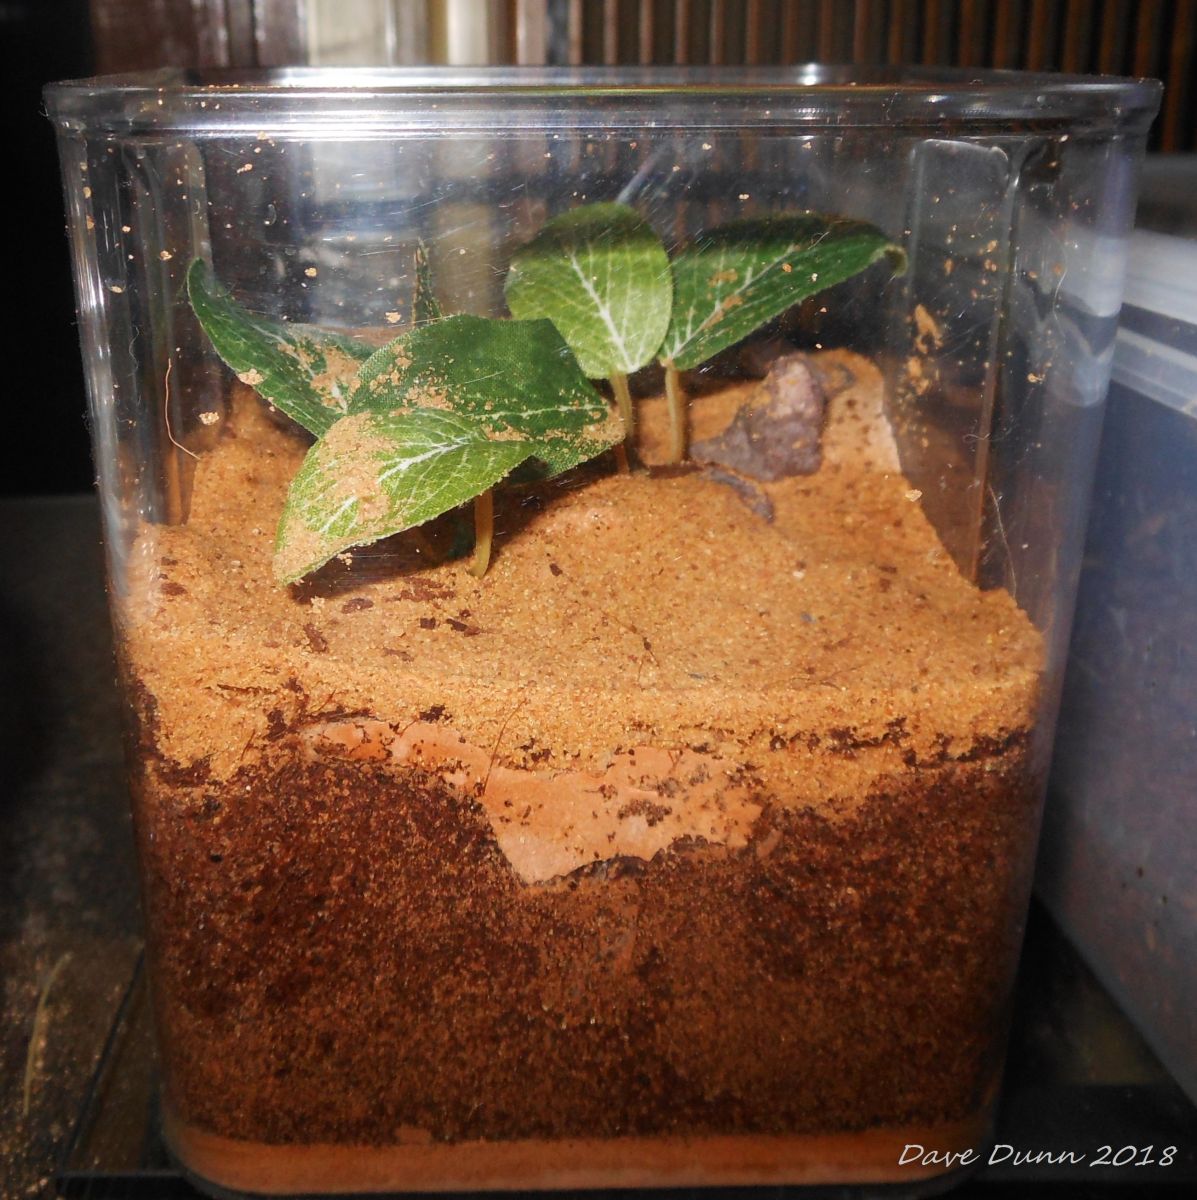
In any case I thought I'd add some decor while the grout was wet and top it with sand. I buried the bases of the plants leaving the attachment points exposed, that way the plants can be removed or changed as needed. I then topped with sand.
012
I decided not to use the inner containers as reservoirs for now, I can easily drill a hole later if I want to add tubes. Instead when I partially filled the gaps at the back I added small straws so I can "inject" water into the back bottom corners.
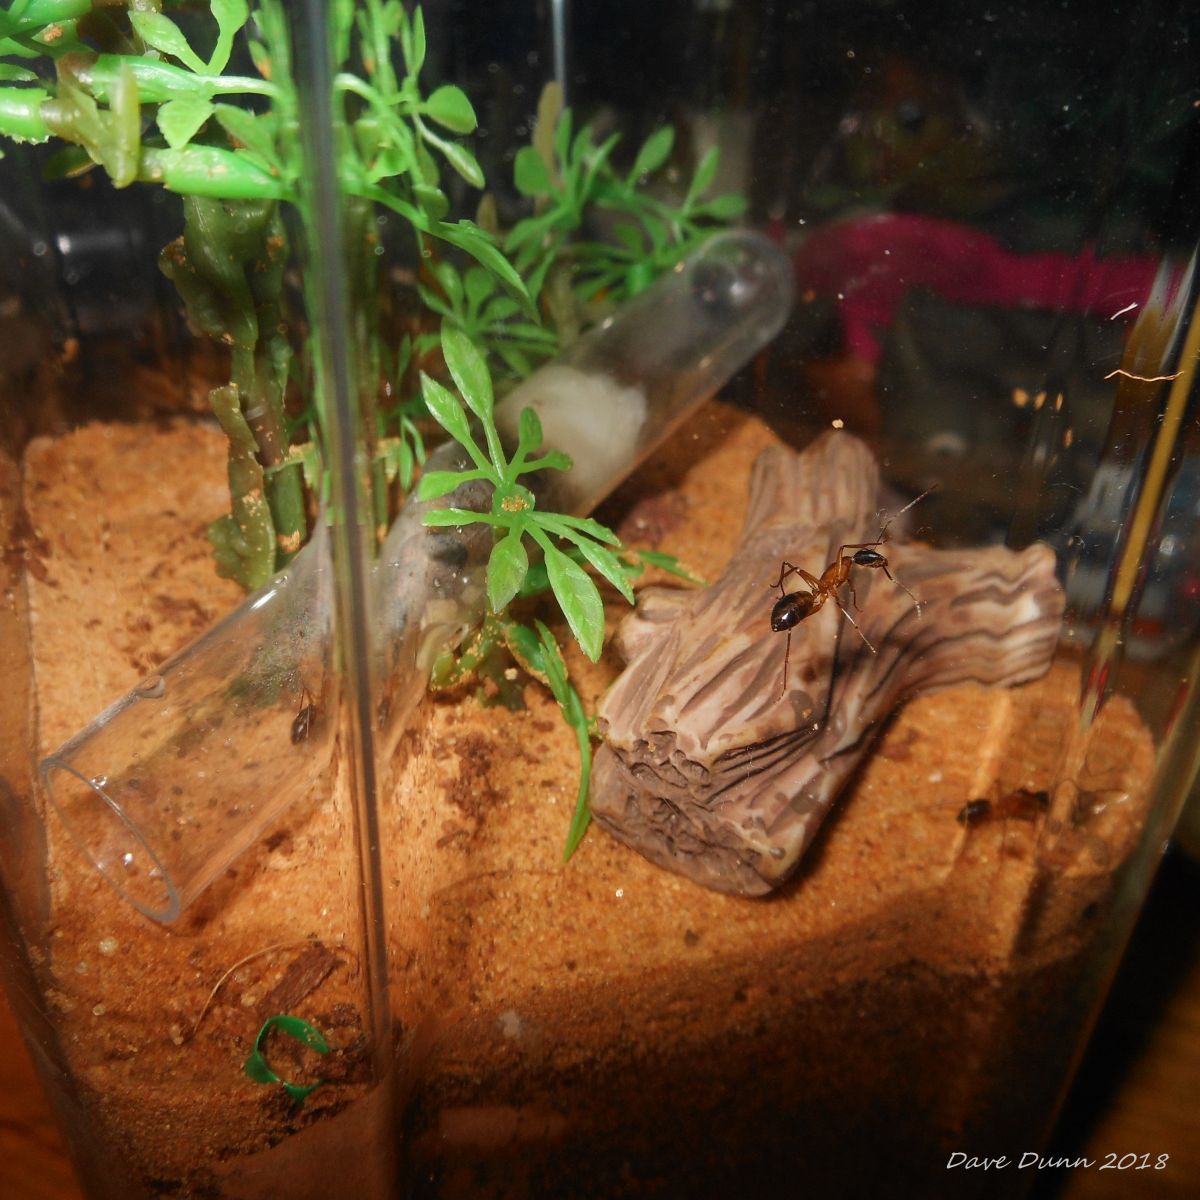
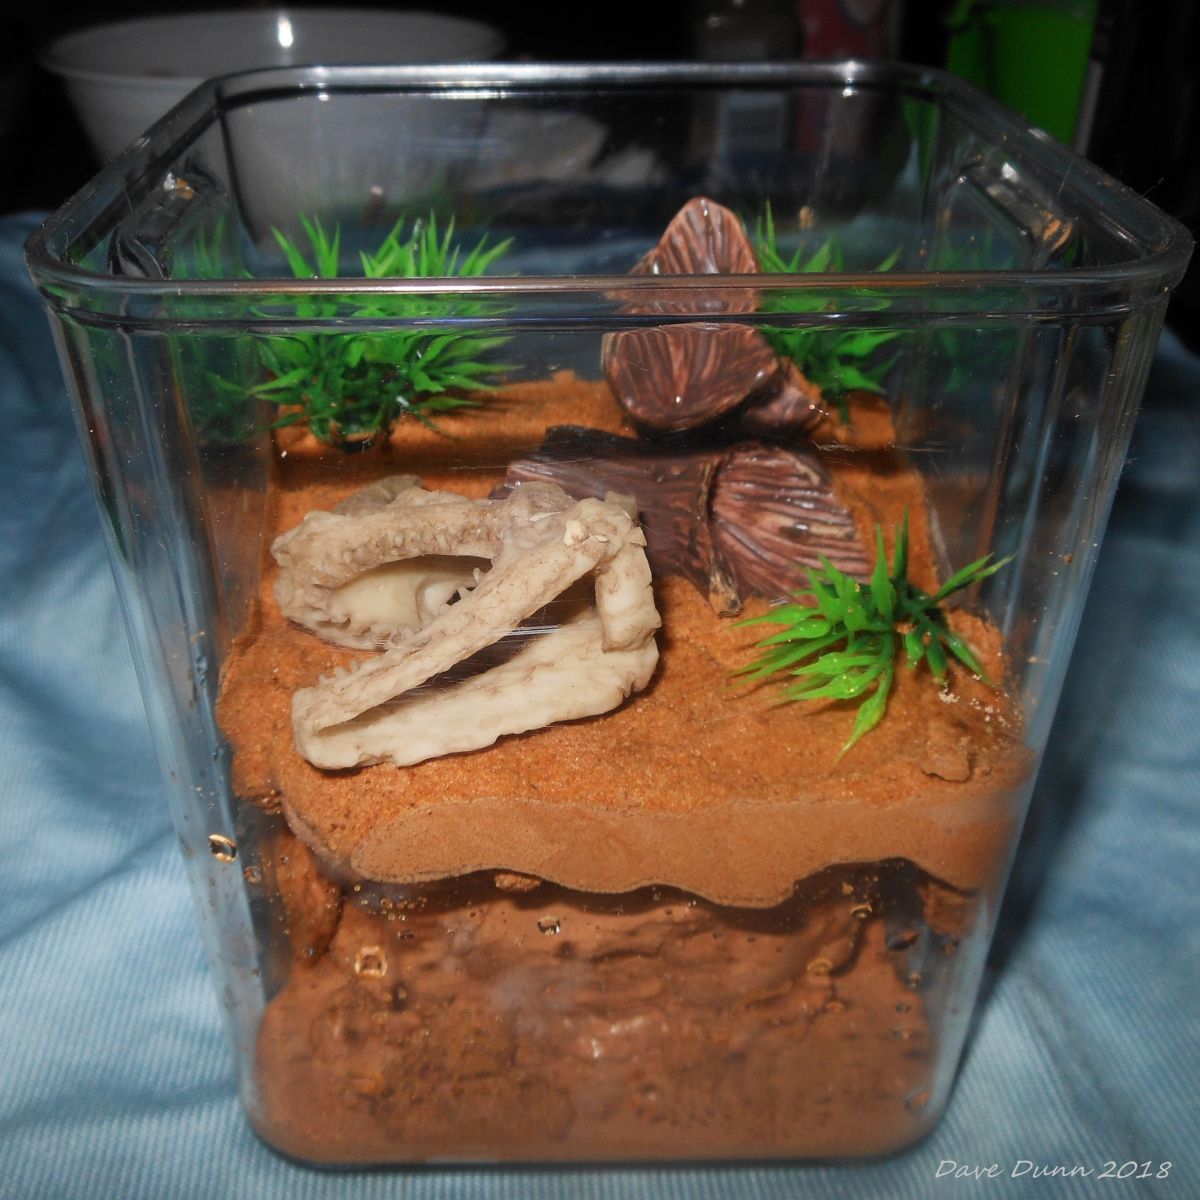
I played around with adding more plants and decor, when I top off the filling at the back I will add the plant bases and other decor, perhaps some fake wood upright will look good. Also the fake wood has hollows that can be used as dishes so I need to take that into account, a piece I did add for that reason leaned over a bit far but it might be usable.
The following pictures have the plants just sitting on top and the excess sand hasn't been tipped off but it gives me an idea of what they will eventually look like, I still need to play around a bit but I have plenty of miniature decor to experiment with so they should look pretty good imo. :)
021
019
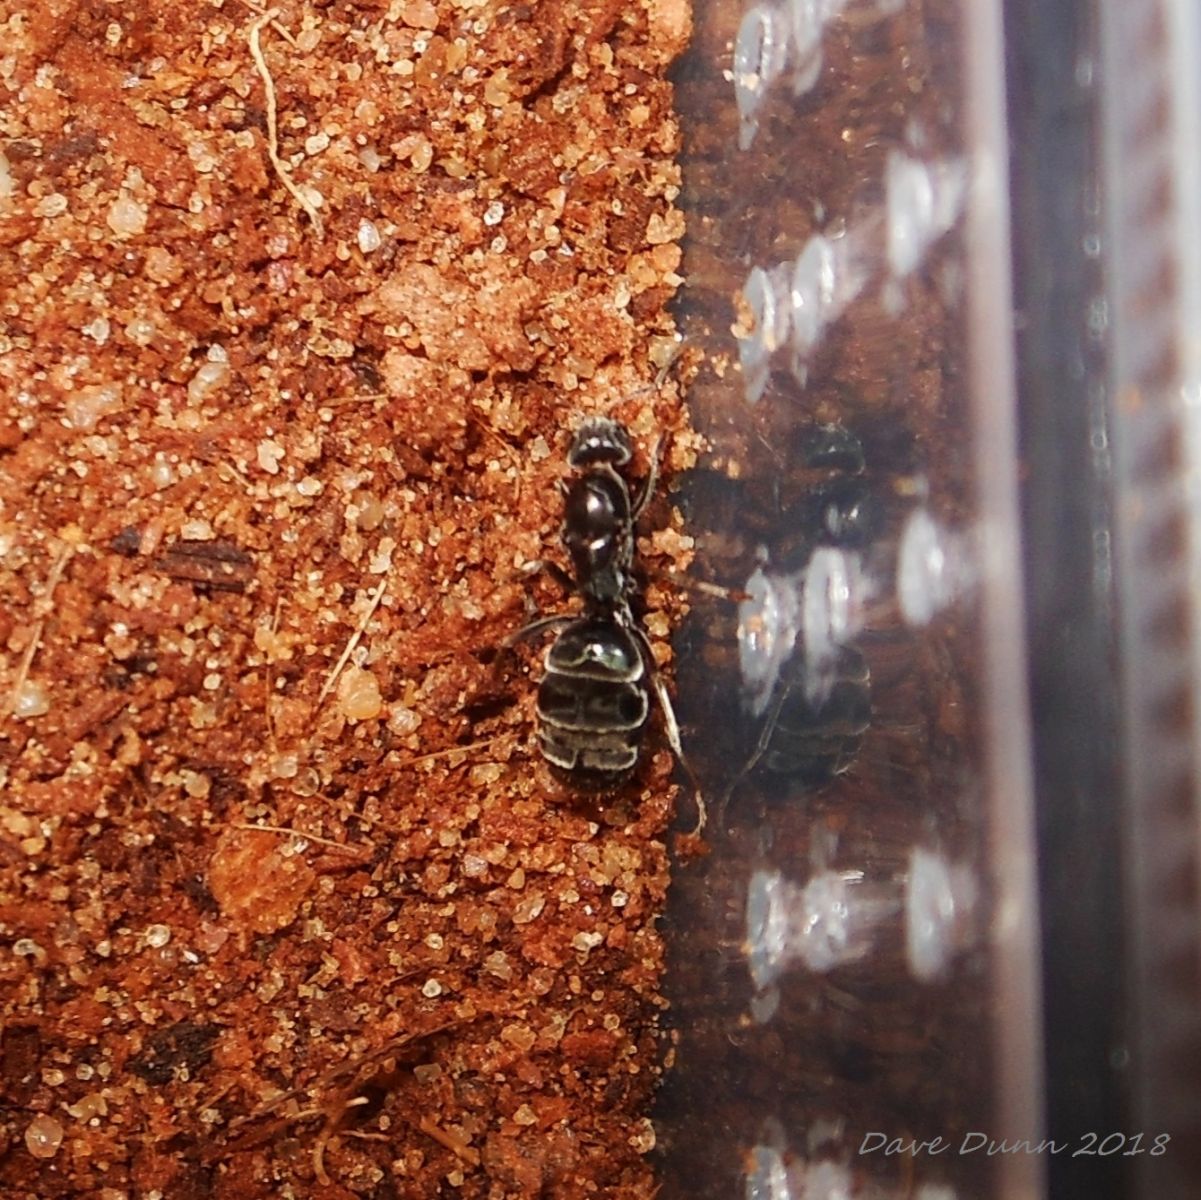
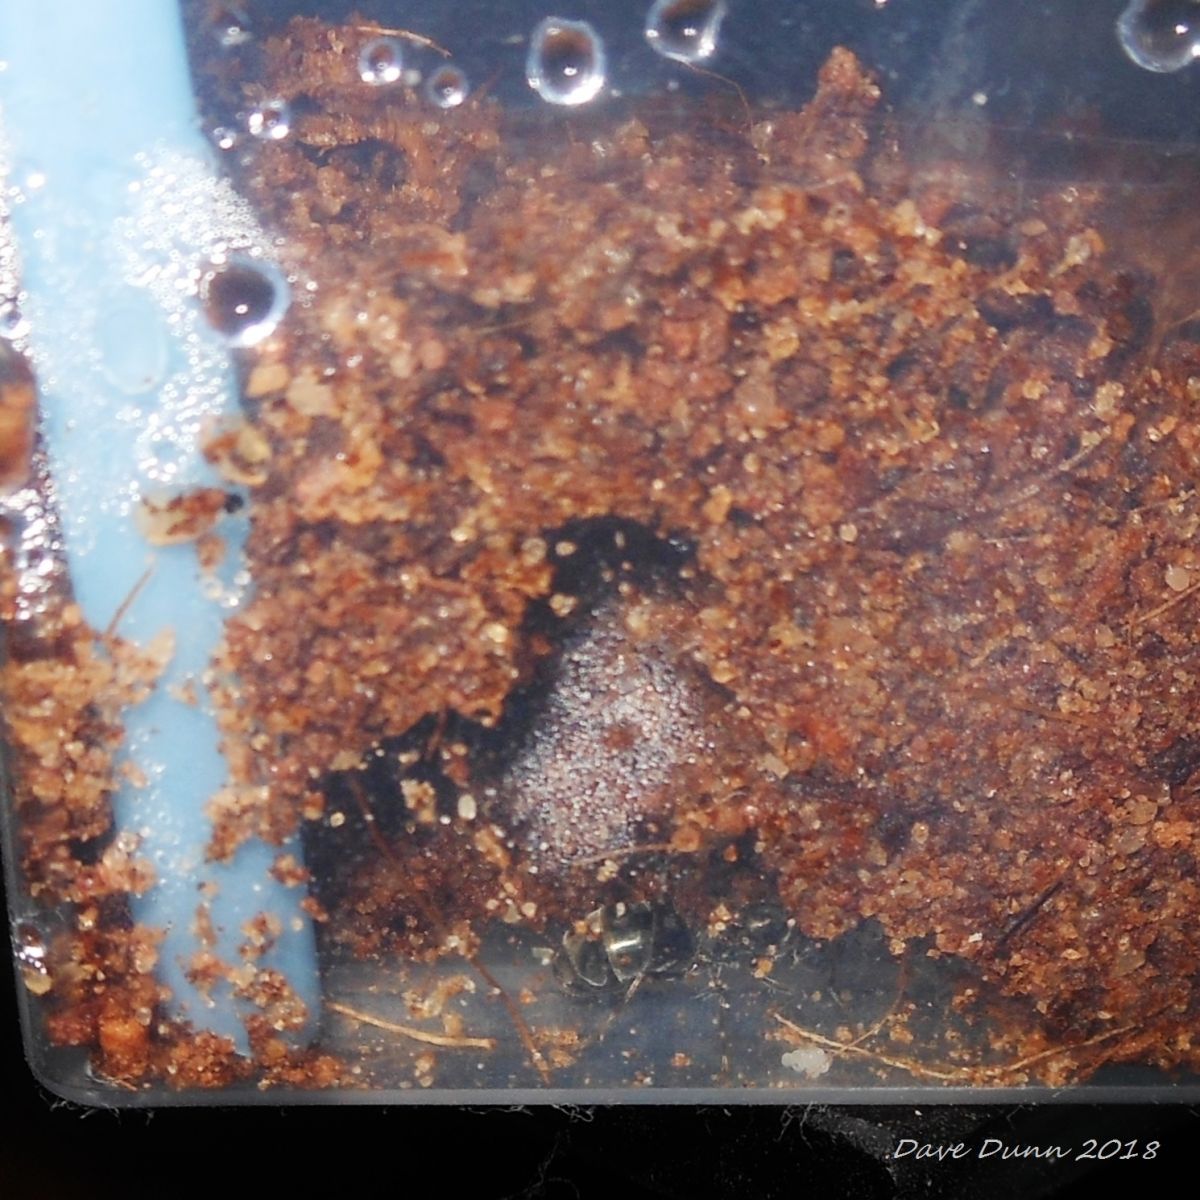
And here's the little Queen that started the whole thing, found at the start of june, tentatively identified as an Iridomyrmex species. 
Today I looked and where before she had a bundle of eggs on the floor of the chamber she now has the eggs or larvae halfway up the back wall of her chamber. I rarely look in on her as within seconds of removing the tape covering her chamber she panics and picks up the bundle of eggs.
A1
050
 

I'll let the grout cure before doing much more then I'll update this thread.


#7 Offline CoolColJ - Posted July 5 2018 - 1:00 AM

CoolColJ

    Advanced Member

  • Members
  • PipPipPip
  • 2,646 posts
  • LocationSydney, Australia
Definitely Iridomyrmex, are you in Australia?
  • StayLoki likes this

Current ant colonies -
1) Opisthopsis Rufithorax (strobe ant), Melophorus sp2. black and orange, Pheidole species, Pheidole antipodum
Journal = http://www.formicult...ra-iridomyrmex/

Heterotermes cf brevicatena termite pet/feeder journal = http://www.formicult...feeder-journal/


#8 Offline Enderz - Posted July 5 2018 - 2:04 AM

Enderz

    Advanced Member

  • Members
  • PipPipPip
  • 393 posts

Definitely Iridomyrmex, are you in Australia?

Yes he is ColJ.


  • StayLoki likes this

:morning:  :hot:  :hot:  :hot:

Ex igne et in infernum. 


#9 Offline StayLoki - Posted July 5 2018 - 9:49 AM

StayLoki

    Advanced Member

  • Members
  • PipPipPip
  • 275 posts
Amazing work davejay! Looks great!

#10 Offline DaveJay - Posted July 6 2018 - 12:01 AM

DaveJay

    Advanced Member

  • Members
  • PipPipPip
  • 497 posts
  • LocationSouth Australia

Definitely Iridomyrmex, are you in Australia?


Yes, South Australia. I found this ant in a city garden. Strange really, I had only just read a tiny bit about ants not really intending to keep them and the next day I saw a big ant crossing a path and thought it had the big thorax that denoted a queen so I caught it for a friend but he didn't want it , next thing I know it had eggs. I was planning to release it where I found it if he didn't want it but having eggs I decided to keep it, now I want quite a few species! My wife will spit if I spend $50 on an ant though! But if someone bought one of my scorpion kits and paid via PayPal and the ant seller took PayPal then I really don't think I'd have a choice lol! :)


Edited by DaveJay, July 18 2018 - 3:00 AM.


#11 Offline DaveJay - Posted July 18 2018 - 3:03 AM

DaveJay

    Advanced Member

  • Members
  • PipPipPip
  • 497 posts
  • LocationSouth Australia

Well it happened, I sold some scorpions and bought a Queen Camponotus consobrinus and 6 workers, there is also some brood.

My Journal is here http://www.formicult...es-ant-journal/


#12 Offline CoolColJ - Posted July 18 2018 - 3:17 AM

CoolColJ

    Advanced Member

  • Members
  • PipPipPip
  • 2,646 posts
  • LocationSydney, Australia

I find it odd that your queen is so panicky when looking at her under lights.


All my Iridomyrmex queens are exposed to light right from the start, and all calm as can be, laying down eggs within days of capture :)


Edited by CoolColJ, July 18 2018 - 3:18 AM.

  • DaveJay likes this

Current ant colonies -
1) Opisthopsis Rufithorax (strobe ant), Melophorus sp2. black and orange, Pheidole species, Pheidole antipodum
Journal = http://www.formicult...ra-iridomyrmex/

Heterotermes cf brevicatena termite pet/feeder journal = http://www.formicult...feeder-journal/


#13 Offline DaveJay - Posted July 18 2018 - 3:20 AM

DaveJay

    Advanced Member

  • Members
  • PipPipPip
  • 497 posts
  • LocationSouth Australia

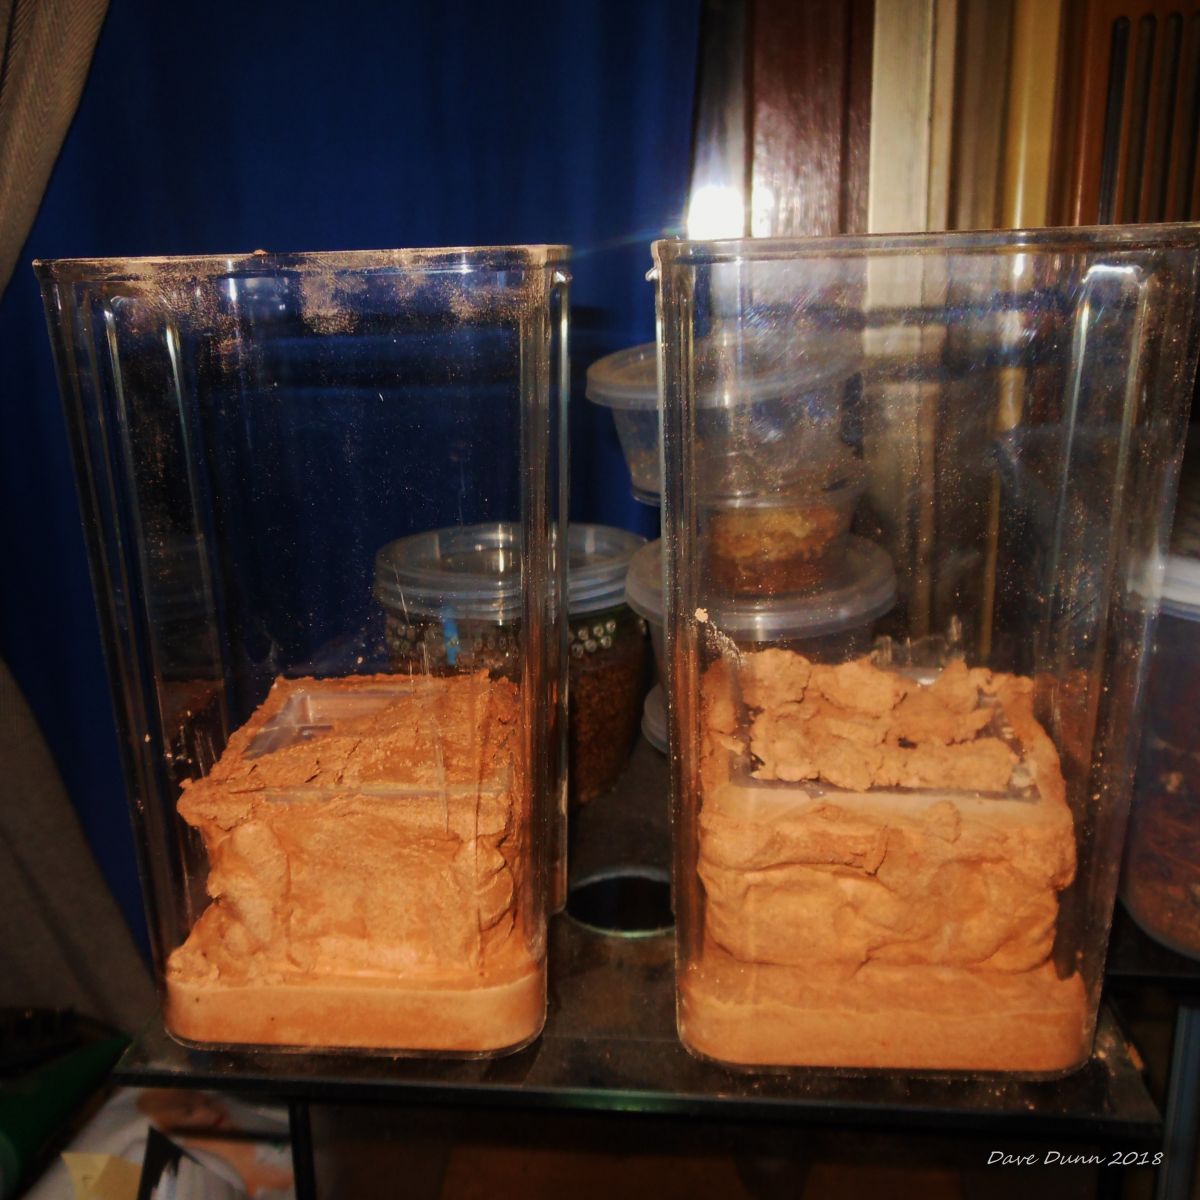
I have added substrate to two formicariums and have one left to fill, but still have four empty containers and one half finished.

I did have a bit of trouble adding substrate where the grout surface was close to or touching the walls but not too bad. I packed it as well as I could using what I think may be a metal chopstick. Because I've had the mix of sand and coir peat stored for a long time it is very dry, so even though some parts might not have been directly compressed once the peat swells with the moisture it should be packed hard.

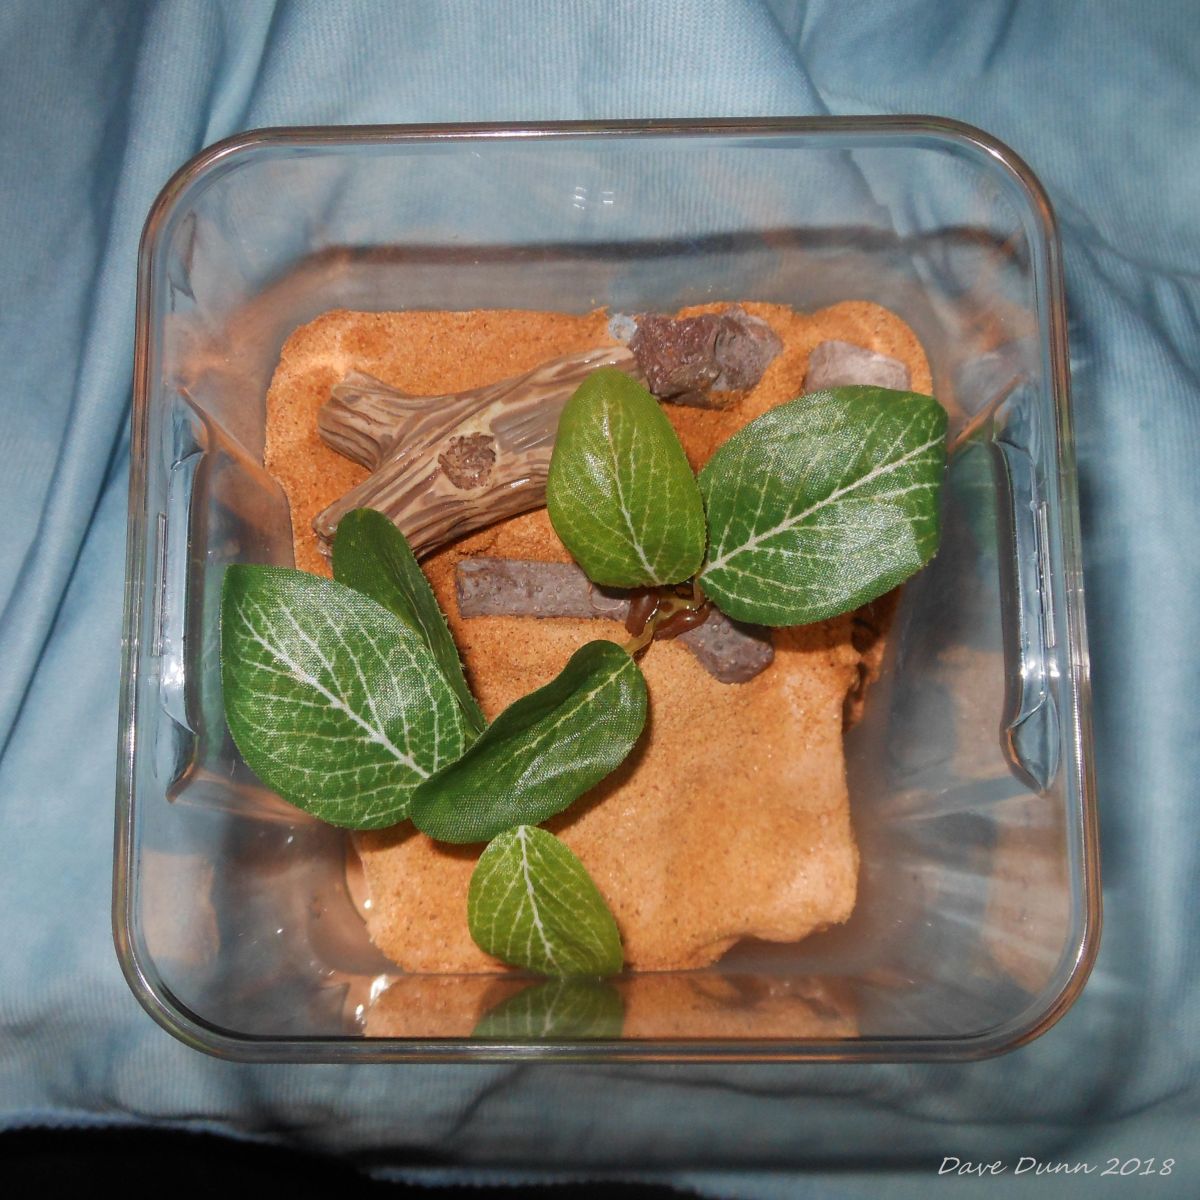
I tried having the substrate as the whole surface but I ended up going with sand, that gives me the framed effect I wanted and it will be easy to keep clean, I can just replace sections if needed.

042


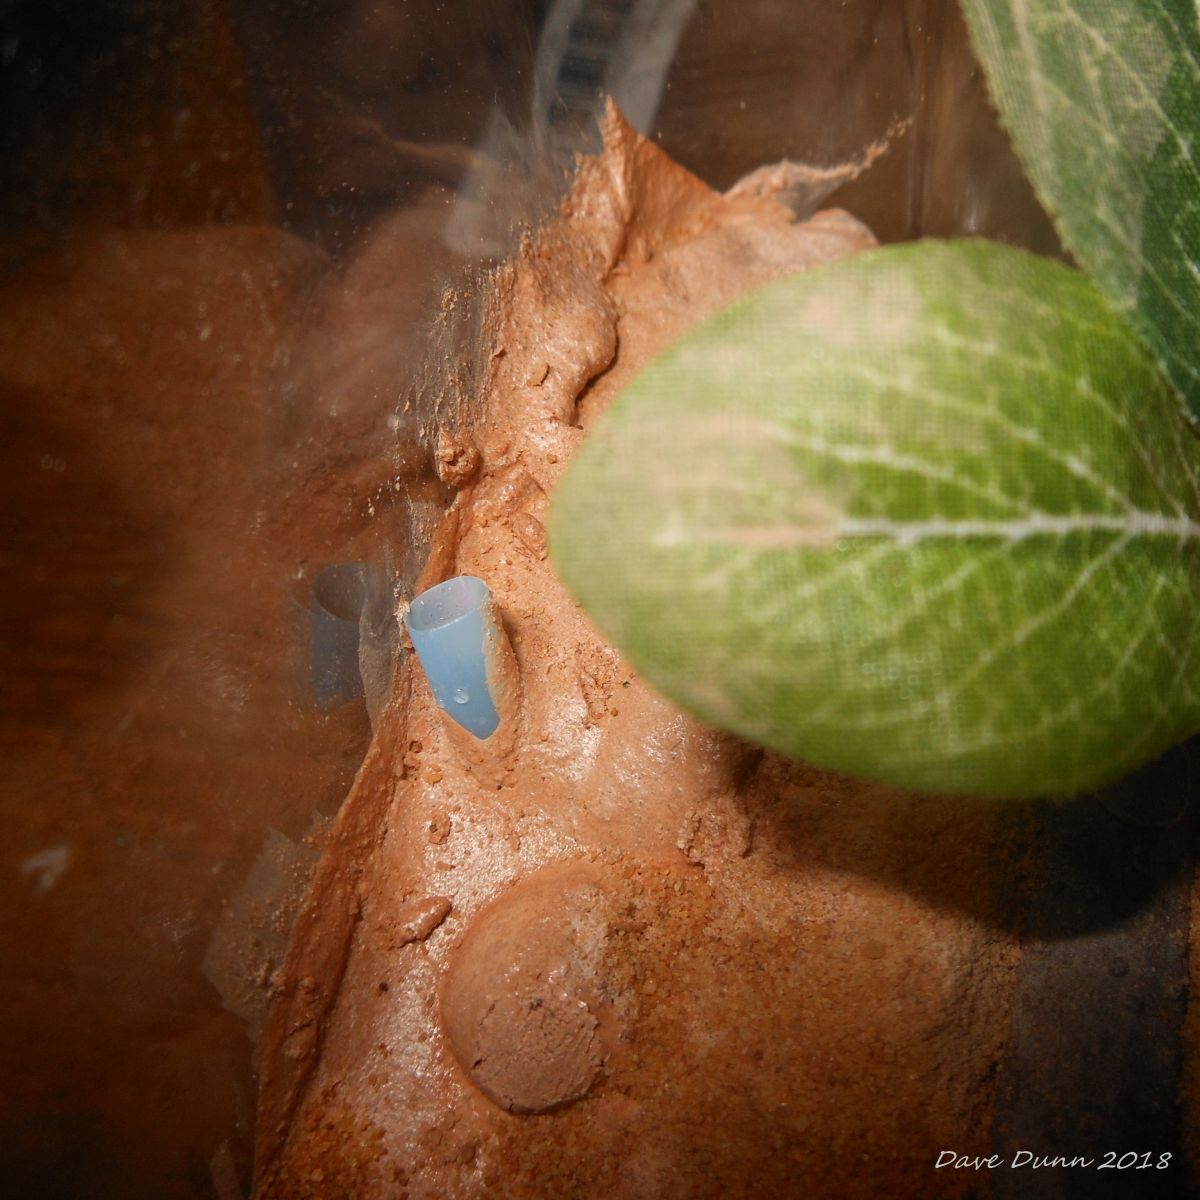
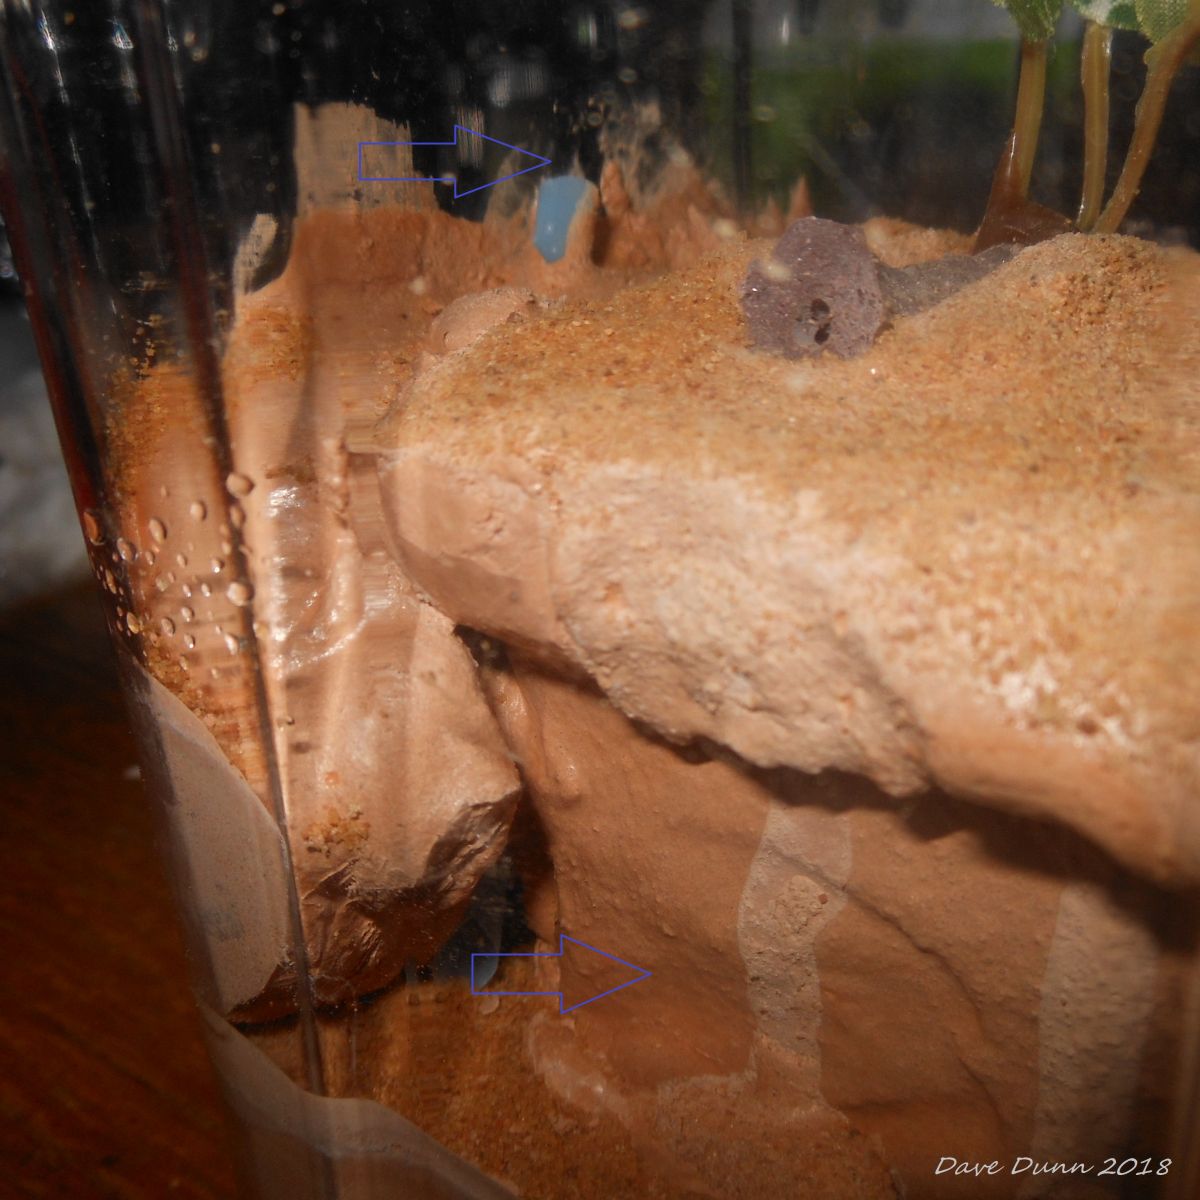
In each I have added a straw going from the surface to a bottom corner of substrate. I filled this with a course filter pad torn up and stuffed down the straw from both ends to stop ants entering. This will be where I can add water with a syringe so that water will enter the substrate from a bottom corner rather than from the surface, giving me a vertical moisture gradient as well as a horizontal one.

010
026
029


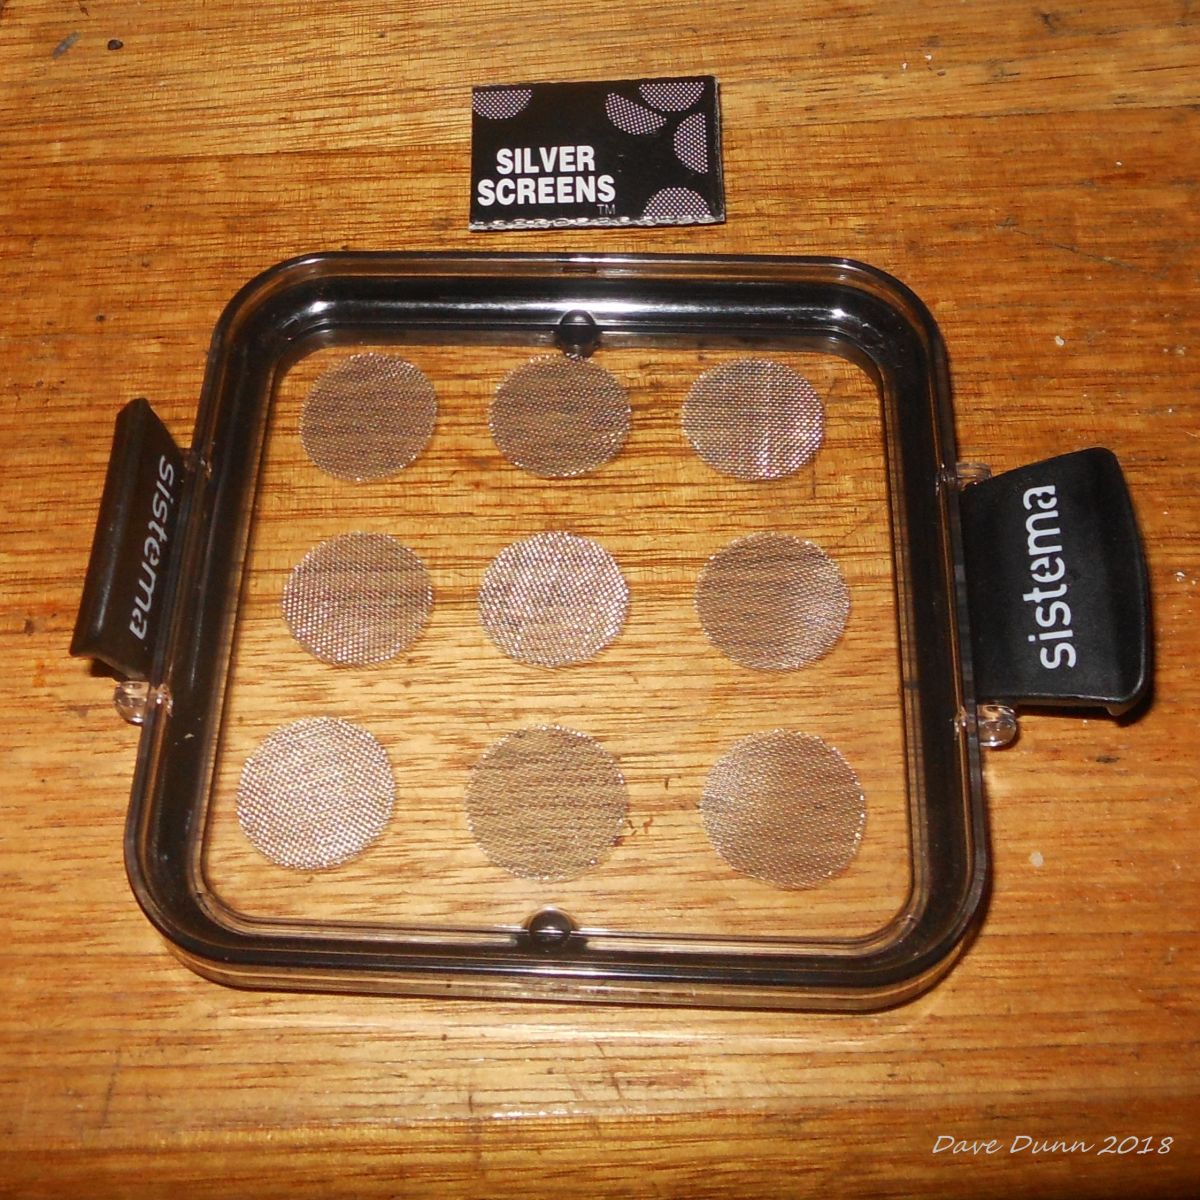
I bought some 100 mesh, but also these stainless steel mesh circles approx 2 cm across. They are advertised as fitting into pipes or hookahs but because they are pre-cut they will look neat once glued on. The mesh is not as fine as 100 mesh but still very fine, I imagine only the tiniest of tiny ants could get through it. 

016


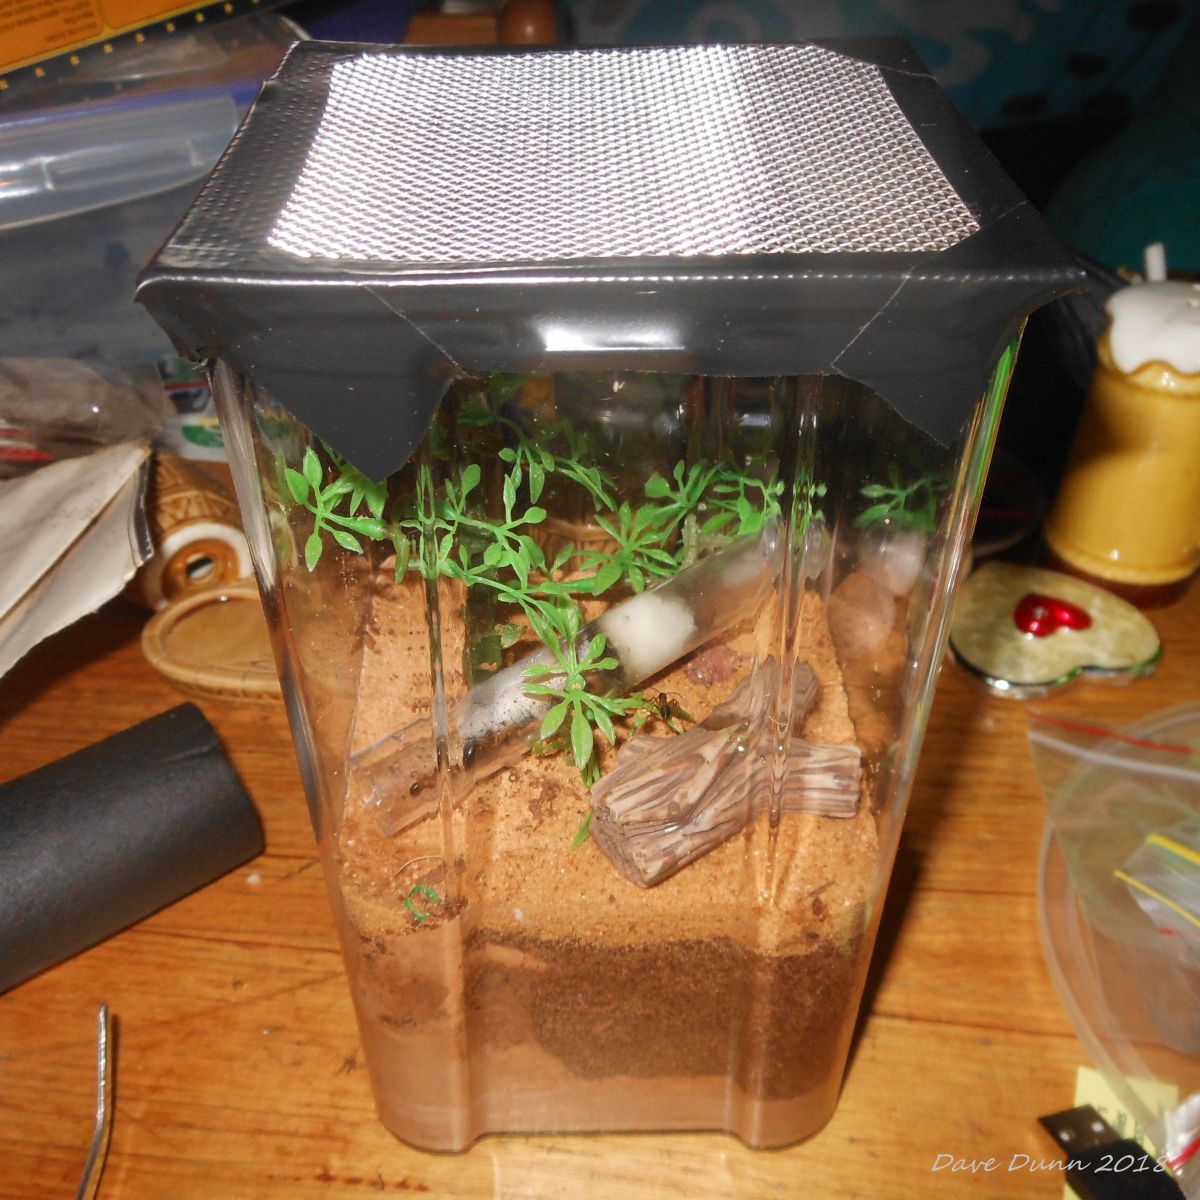
Because I didn't have the lids ready I taped a 10cm x 10cm stainless steel mesh piece on as a lid, the substrate is still wet from being sprayed to firm it so the extra ventilation will be good for now.

011
 
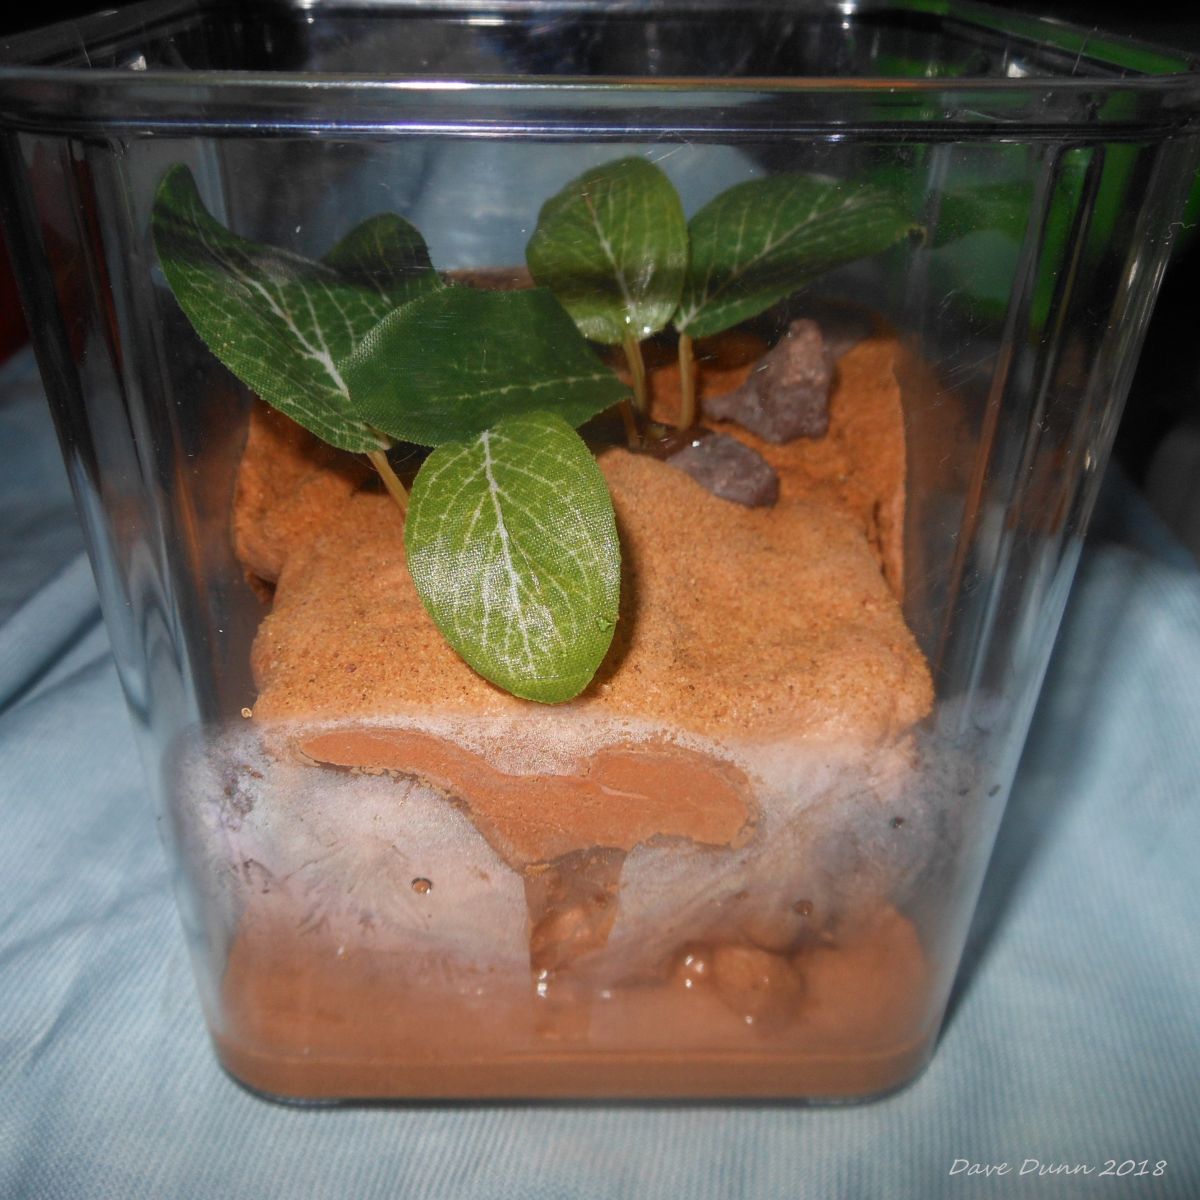
And just some odd pictures, some straight after washing in hot water hence the condensation.
031
042
014 (2)
011 (2)
002
027
021


Edited by DaveJay, July 18 2018 - 4:19 AM.

  • Mirandarachnid likes this

#14 Offline DaveJay - Posted July 18 2018 - 4:23 AM

DaveJay

    Advanced Member

  • Members
  • PipPipPip
  • 497 posts
  • LocationSouth Australia

I find it odd that your queen is so panicky when looking at her under lights.
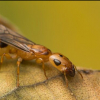
 

All my Iridomyrmex queens are exposed to light right from the start, and all calm as can be, laying down eggs within days of capture :)

Yeah, she just panics. Maybe because I taped over the chamber she made straight away so the sudden light startles her whereas yours pay no mind because the light is constant?


Also tagged with one or more of these keywords: formicarium, diy, grout, do it yourself

1 user(s) are reading this topic

0 members, 1 guests, 0 anonymous users